What are collections?
As you use Ontraport, it will become the central repository for all kinds of data about your prospects and customers as well as all the assets you create and use to communicate with them, such as your pages, emails and automation maps.
Collections are the storage centers for each of these types of data. These are the collections in Ontraport:
- Contacts
- Automations
- Forms
- Messages
- Tasks
- Sales
- Partners
- Pages
- Tracking
- Systems
- Custom objects
You can think of collections as the folders on your personal computer: You might have folders for your medical records, your tax returns, and your vehicle maintenance receipts. In Ontraport, you have folders, or collections, for your accounts’ contact records, emails, pages, automation maps and more.
Check out the video about collections to learn more.
Customizing your collection views
All the collections look and work the same way. Within each collection, just like within each folder on your computer, you’ll find a list of items that belong in it. You can click on an item to open it and see its details, and you can also set up your collection to view just the information you want to see to make it easier and faster to find what you need.
Similar to working with folders on your computer or a spreadsheet, you can choose which columns you’d like to see, such as the name of the item and the date it was added, and reorder the columns however you’d like. You can also sort the collection from top to bottom, adjust how many rows you want to see on each page, and more.
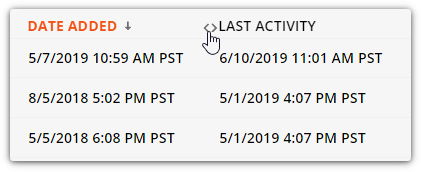
Resize columns
Hover just to the left of the column heading, then click and drag the < > symbol to resize the column.
Reorder columns
Click .png) and drag
and drag .png) to to arrange them wherever you’d like. Then click
to to arrange them wherever you’d like. Then click .png) .
.
Add new columns
Customize the fields that are displayed by clicking the column editor button in the upper right-hand corner.
Sort the data
Sort your data by clicking on the column headings. Your selected heading will be highlighted orange. Click the heading again to reverse the sort order.
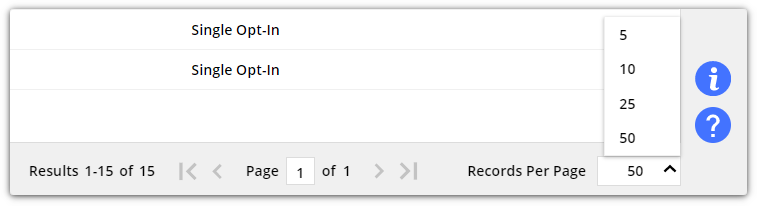
Set the number of items per page
Change the number of items that display on a page at the bottom of the page. This setting will remain in place until changed again. Also note the status bar indicates the page that you are currently viewing.
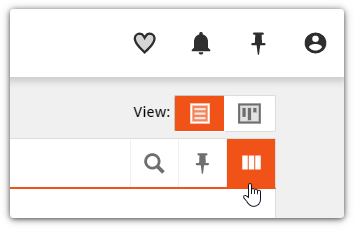
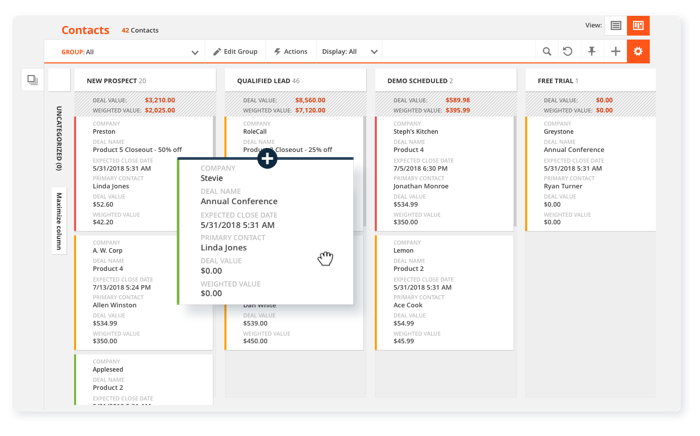
Using Card View instead of List View
The Contacts and Custom Objects collections have a special viewing option called Card View. This allows you to display your data like business cards rather than in a list – similar to how you might choose to view the items in your computer folder as square images rather than in a list. Card View is more than just a special view, however; it provides a visual home where you can interactively manage your contacts (or custom objects) more easily, including manually or automatically triggering follow-up right from the screen.
Learn more about using Card View for contacts in our Manage Contacts by Stage article; learn more about using Card View for our pre-built Deals and Companies custom objects in our Automate and Manage Your Sales Pipeline article.
Using collections
Now, here’s where Ontraport takes it a step further than the folders on your computer — and where the real power of Ontraport’s collections comes into play. Collections are actually living, ever-changing sets of data that you can use as your home base for accomplishing goals in your account. You can filter the data into groups, perform actions on the data, and view the data in different ways.
You can also search the items, create groups of items, and take action on items (such as sending an email to a contact in the Contacts collection, pausing an automation in the Automations collection; copying or deleting assets in the Pages, Forms or Messages collections, or exporting reports in the Sales collection).
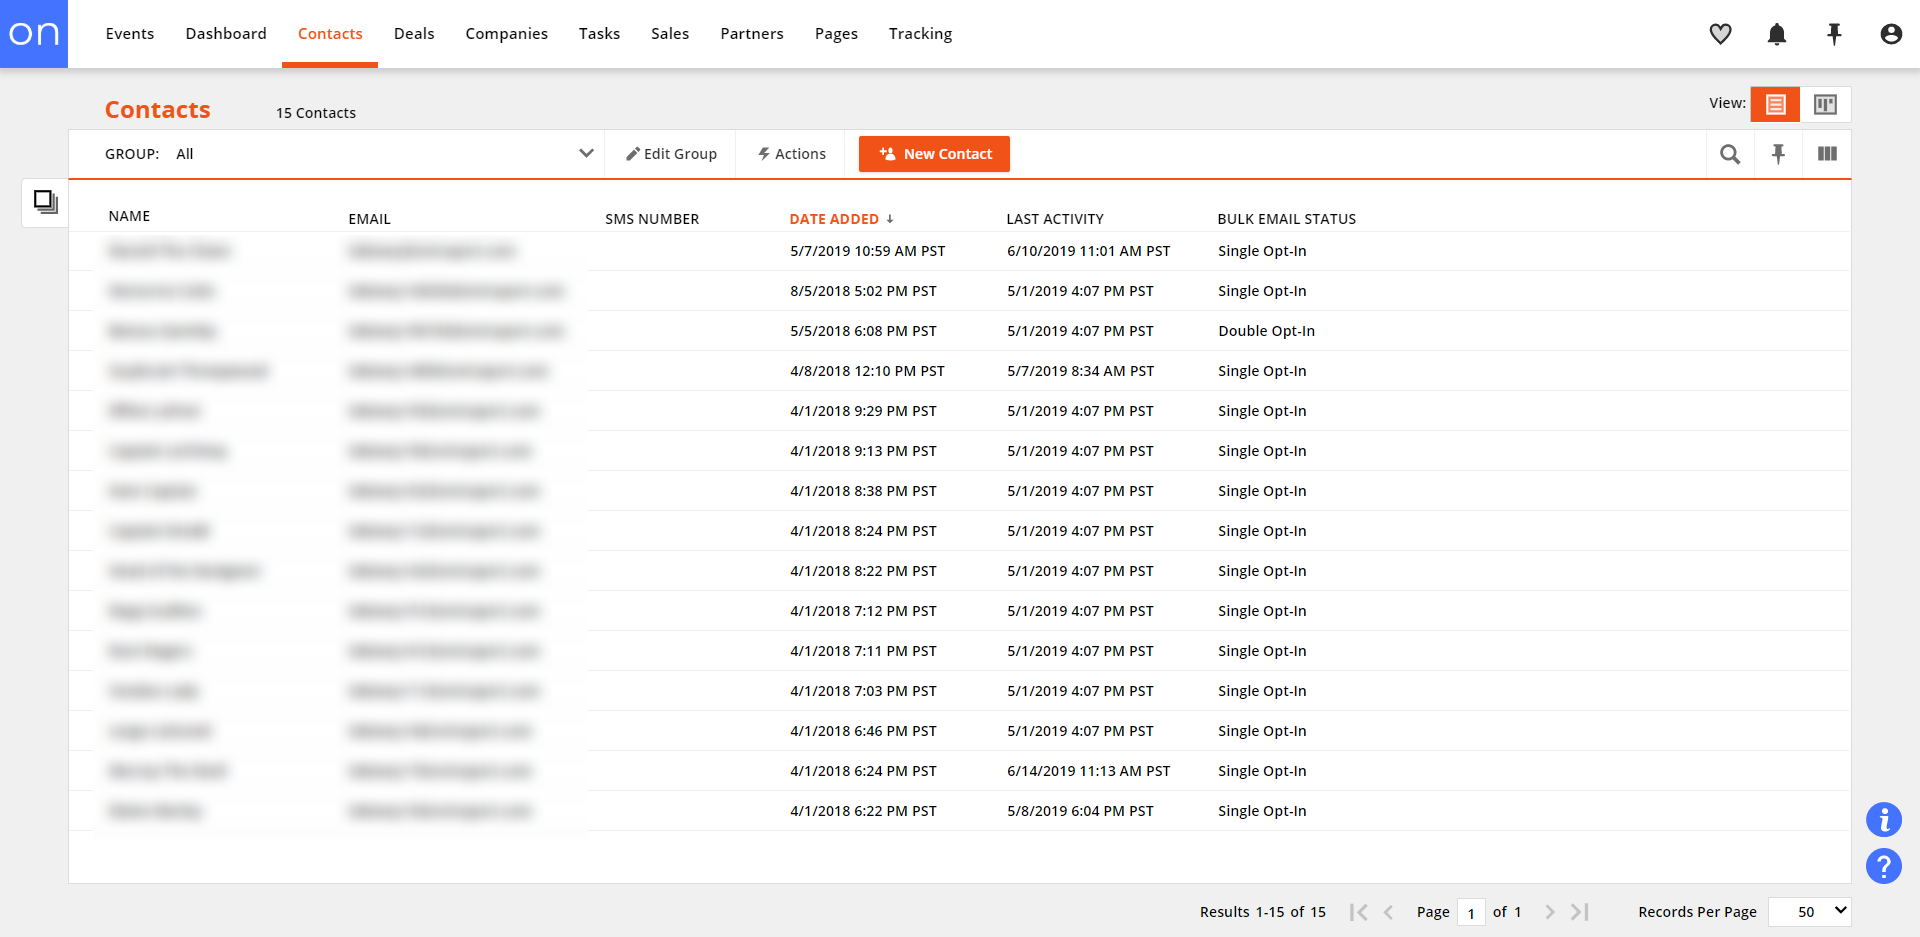
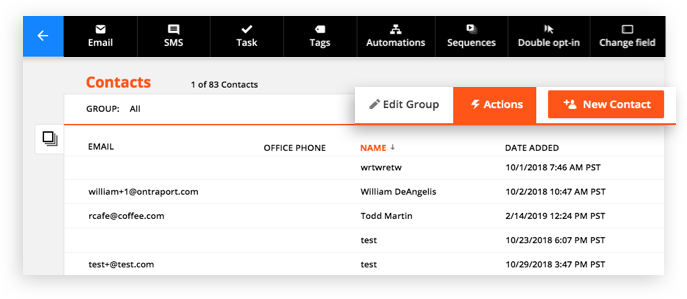
The Contacts collection
The Contacts collection is the first page you see every time you log in to your Ontraport account and it’s likely the one you’ll use the most. It’s also the most robust in terms of functionality, as you can interact with the collection to perform actions on contacts, segment your contacts and gain insights into your contacts overall.
With the majority of the other collections, when you click on a row, you’ll open up the item itself. So, if you click on the row for a particular page, you’ll open up that page. In Contacts, however, when you click on the row for a contact, you open a contact record to find more information about the contact. Similar to opening a folder to find a set of subfolders, in Ontraport when you open a contact record you find a set of tabs and sections.
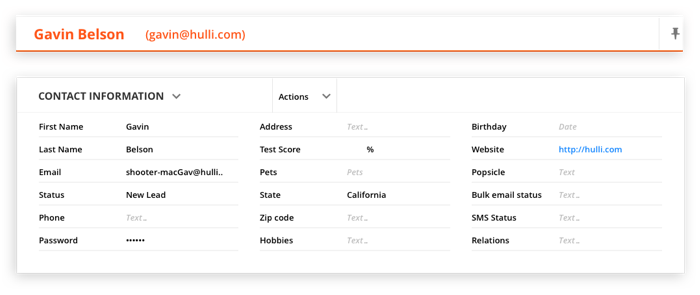
Here are some of the most important sections of contact records:
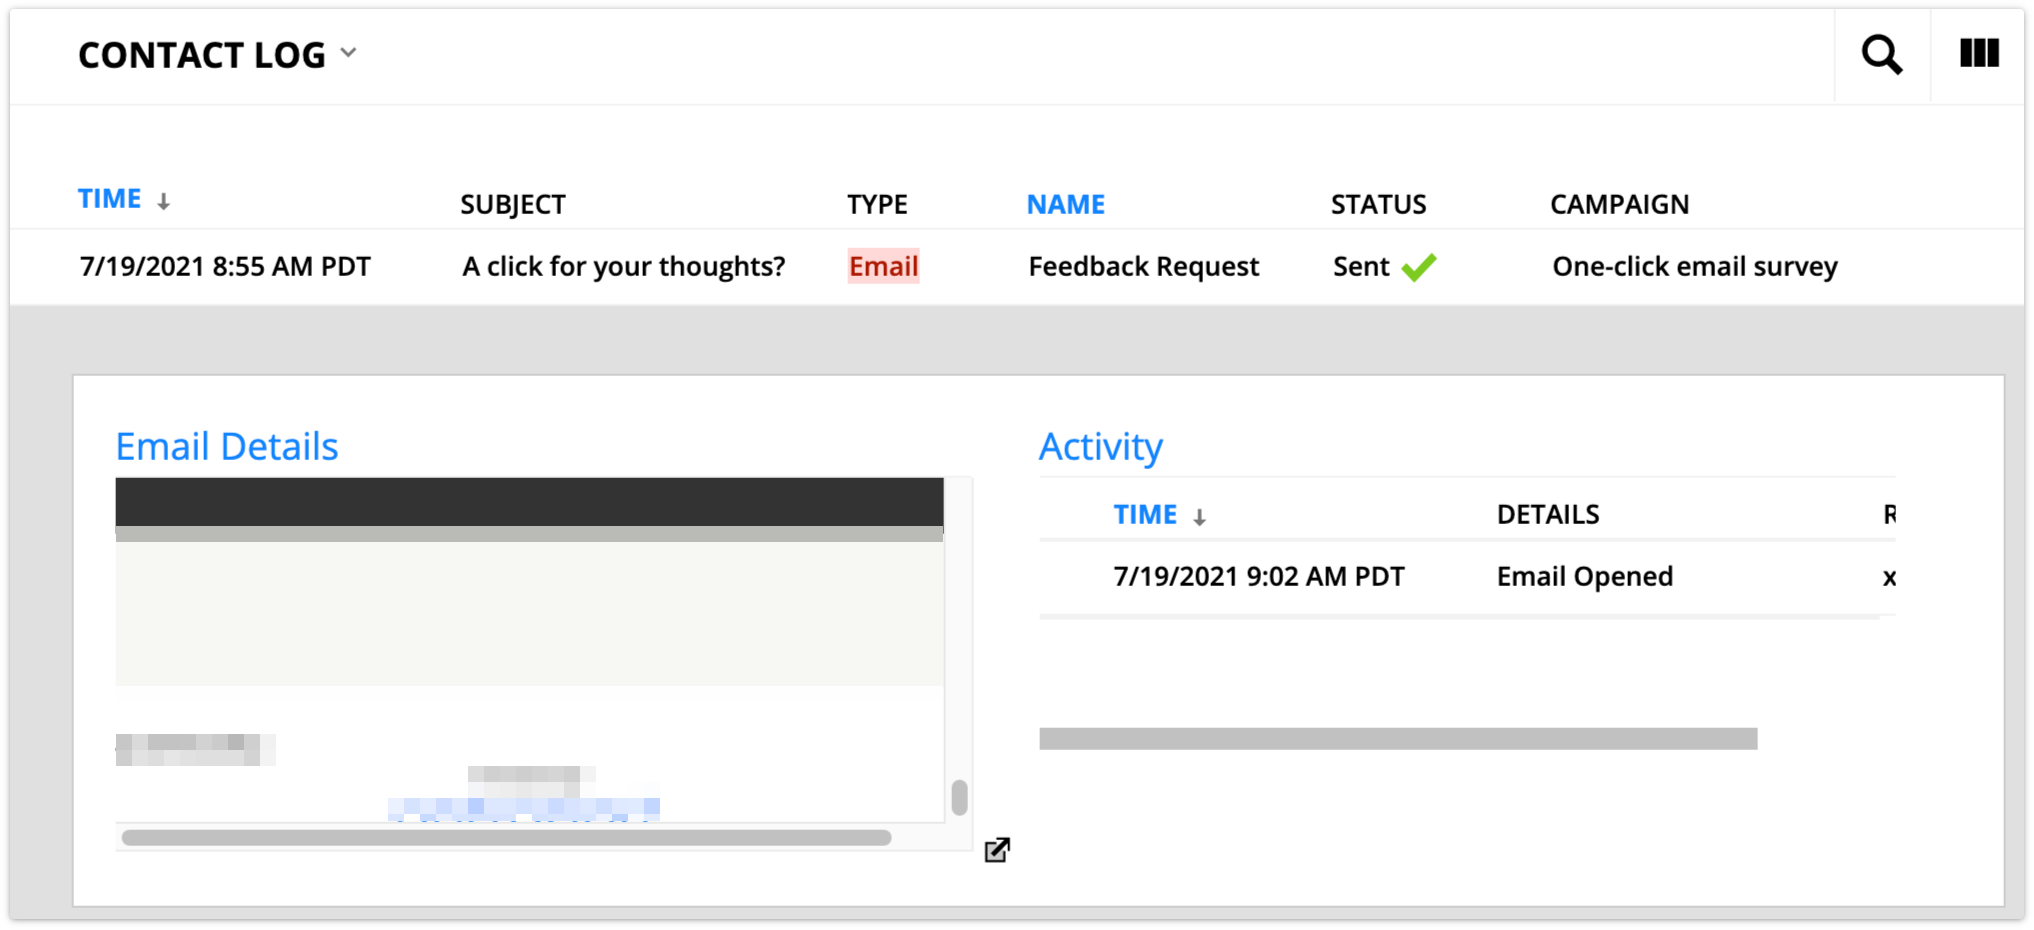
Contact Information tab > contact log
This has a record of each interaction with the contact, including visits to pages or tracked web pages on your website, forms they’ve filled out, postcards and emails you’ve sent to them, and emails you’ve received from them. You can click on the individual logged items to see more details on each one, including the date and time that a given email was opened and clicked. A green checkmark next to your email’s sent status means your contact opened that email. All interactions are expandable, and you can see details such as what a contact submitted on a form, if a task was completed, or when a contact visited your page.
Contact Information tab > automation log
While the contact log shows you the interactions your contact has had with you, such as form fill outs and email opens, the automation log shows you the actions taken in your Ontraport system as a result, such as a tag change or automation change. Checking the corresponding parts of the logs can help you discover and fix issues.
Notes and Tasks tab > notes
This is used for jotting down information on the fly that doesn’t fit in any given field. If you have a form on your website where people fill out the notes field, this is where that data will show up. Also, the notes you take from phone calls logged and from tasks will go here. One of the unique features of the notes field is that, unlike other fields, it is not overwritten with new data when your contacts submit forms; instead, a new note is created in the contact’s record so you never lose important information.
Notes and Tasks tab > task manager
This is where any tasks for a contact can be found. Once you’ve finished a task, you can click the check mark to designate it complete (and it will disappear if you have your “Show Tasks” dropdown set to “Open”). You can also email the contact, reassign the task to another user, or reschedule it to update the due date. You can manage tasks for all your contacts on the same screen in the Tasks collection.
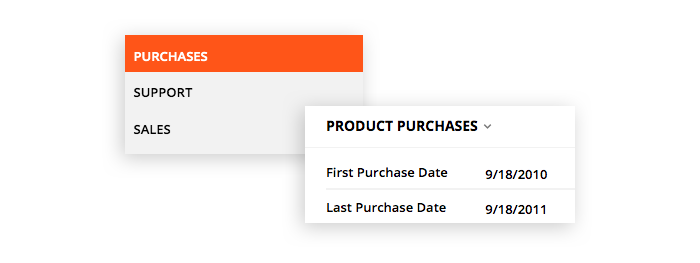
Purchases tab > purchase history
This is where all transaction history and purchases you log for a contact will show up.
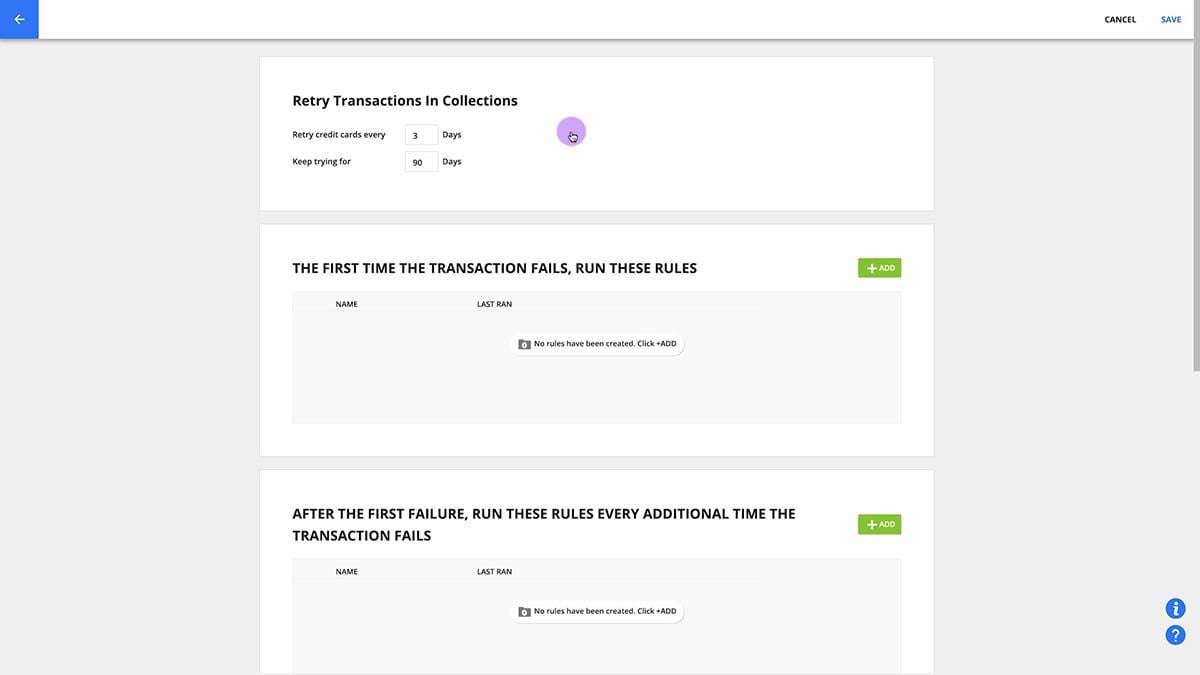
Purchases tab > transactions
This is where you can manually run or log transactions, and it shows you all attempted, successful and refunded transactions. You can also perform actions on those items, such as rerunning a failed transaction and a refunding transaction.
Purchases tab > subscriptions and payment plans
This area shows you the upcoming charges created through either subscriptions or payment plans. You can cancel these open orders or edit them to change how they will be processed for future payments.
Purchases tab > credit cards on file
You can easily manage your contacts’ credit cards through this area by adding new credit cards, setting a default card (if the contact has multiple cards) and updating expiration dates.
Referral Info tab > partner data
This section displays your contacts’ partner information including which partner program they’re a member of, who referred them, and the sales they’ve accrued. You can also view or edit the PayPal address that is used to pay your partners.
Memberships tab > website subscribers
This is where you can add/view the WordPress membership status of your contacts and edit their credentials.
Memberships tab > membership sites
This is where you can add/view the Ontraport membership status of your contact.
Calendar tab > calendar
This is where you can view your contact’s schedule. You can also add, edit and remove your contact from upcoming events.
Collections features
The Contacts collection is one of the main places Ontraport’s data-based functionality comes into play. Your contacts’ records hold all your saved data about each contact. You can use this saved data to create groups of contacts and follow up with them from within your Contacts collection.Below are the building blocks that work together to make this happen.
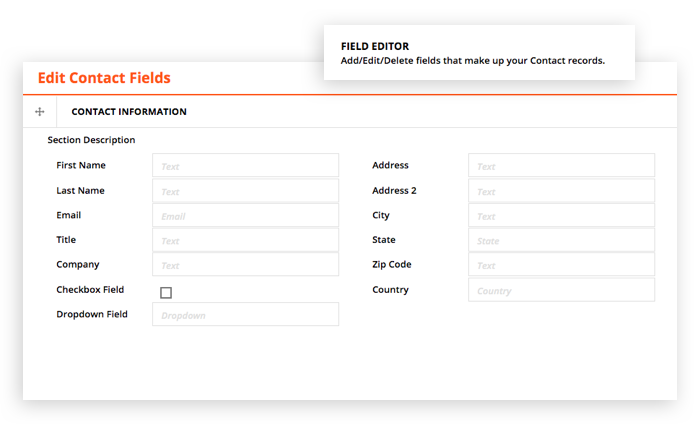
Fields
The fields in your contacts’ records are much more influential than simply their ability to store data: They’re often the power behind your manual and automated follow-up in Ontraport. The values within fields, such as purchase dates, products purchased, or even the contact’s job title, can be used to create groups of contacts to manually interact with (which you’ll do in the Contacts collection) or within your automation maps to trigger the appropriate next step for that contact (which you’ll do in Automations).
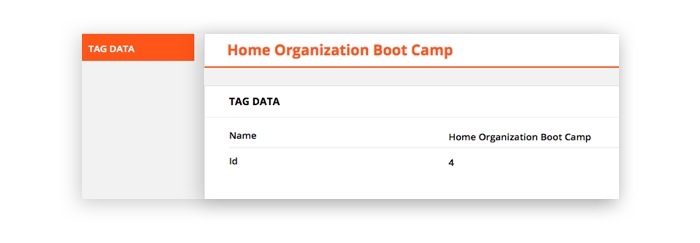
Tags
Tags are like post-it notes you can stick on your contacts to label, sort and also trigger automation. You can use both fields and tags to segment your contacts. However tags are simply labels, and you can’t store any data in them. Tags are great for short term segmentation when you just want to stick a label on your contact and not worry about creating a custom field. Let’s say you have a process where you need to track who has replied to a specific email and who hasn’t. A tag is great for this situation because you can label your contacts and not waste your space in your contact’s record with a field to track that information. It’s much easier and cleaner to slap an “awaiting reply” tag on your contact and use that for segmentation. Keep in mind that you have many fields in your Ontraport account that are already collecting data and tracking information you can use to segment your contacts, so using them is a more convenient way to manage your data. For example, there’s no need to give contacts who purchase Product A a tag called “Product A” because that information is already automatically stored in a field in their contact record. Likewise, you don’t need to tag contacts who open a particular email or visit a certain page; this information is all stored already in their record.
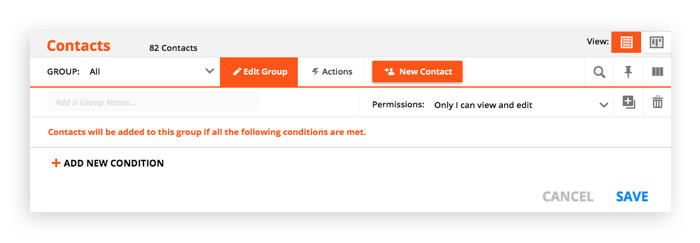
Groups
Your tags and fields become the building blocks of groups which allow you to segment your contacts for targeted interactions. Think of groups as saved searches on a search engine like Google; when you create a group, you’re simply searching your database for contacts who meet certain criteria and saving the results. Once you save your group, it will be continually and automatically updated to include or exclude contacts based on whether they meet the criteria of the group — keeping you from having to manually manage your lists.
Segment Your Data Using Groups
Actions
You may want to perform actions, such as sending an email, assigning/removing a tag, or adding contacts to an automation map, on entire groups or specific contacts. You can do this manually using actions when inside your Contacts collection or via your automation.
Collections activities
Here’s how to move your existing contacts into your Ontraport account, where they’ll be stored in your Contacts collection.