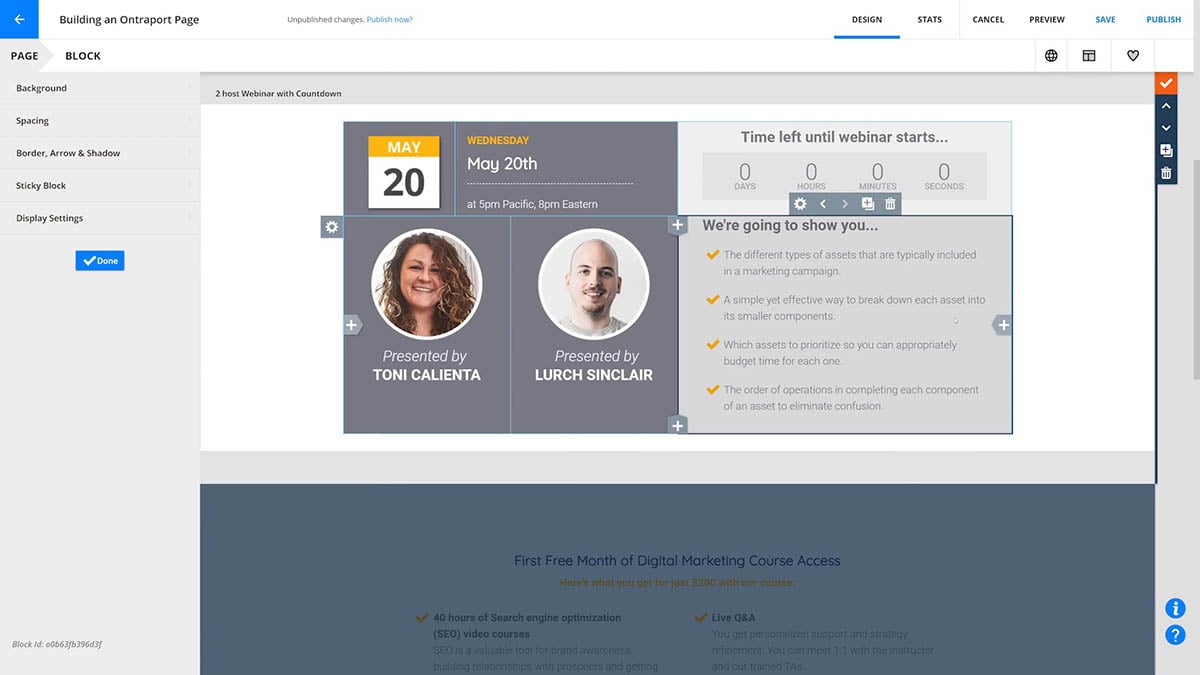
Settings for the entire page are accessed by clicking the Settings tab on your page editor.
Table of contents
Page Background
SEO & Social Sharing Settings
Favicon
Custom Code
Display Settings
• Conditions on display settings
• Display use case – Logged in and logged out members
Ontraport form settings
Here is what you can do with each of the page settings:
Page Background
Select a color or upload an image for the background of the entire page. You can adjust the opacity and the gradient of the background.
/Page-settings-background.png)
SEO & Social Sharing Settings
These settings control how your page appears in search results and when links to your page are shared on Facebook, LinkedIn and Twitter.
/pages-SEO_and_social_settings.png)
This section allows you to add:
- Title – a page name that appears at the top of a browser’s window
- Description – a short summary of your content that appears under your page’s URL in search results
- Social image – an image that is displayed when you share links to your page
Add unique settings based on social media platform
You can add separate titles, descriptions and social images to different platforms by “unlocking” your settings to open additional options.
- Click
/ontraport_pages-seo_social_settings-toggle_with_lock.png) next to “Title,” “Description” or “Social Image.”
next to “Title,” “Description” or “Social Image.” - Add your default Facebook/Linkedin or Twitter social sharing information.
- Click Done.
/pages-SEO-unlocked_title.png)
/pages-SEO-description_unlocked.png)
/pages-SEO-unlocked_image.png)
Prevent your unfinished page from appearing in search results
- Select “Disable search engines from indexing this page?”
- Click Done .
/Pages-SEO_settings-disable_search_engines.png)
Advanced Settings
The advanced settings apply to Facebook only and allow you to select your:
- Type – select the Facebook graph type you’d like to use
- Site name – enter your site’s name
/pages-SEO_settings-advanced.png)
Favicon
The favicon is the small image seen next to the URL of your page title in the web browser address bar. Click the pencil and upload image.
/page-settings-favicon.png)
Custom Code
Insert tracking scripts, UTMs or other code. Select page header, body or footer and text entry cursor will flash on the page.
/page-settings-custom_code.png)
Display Settings
Restrict access to your page to specific visitors, such as your Ontraport membership site’s subscribers. When you restrict access, you can select a URL to redirect unauthorized visitors to if they attempt to visit your page.
From the “Display this page to whom?” dropdown, you can set your pages to show for:
- Everyone
- Anonymous visitors only – Visitors who aren’t cookied by Ontraport
- Identified visitors only – Visitors who have the Ontraport cookie
- Some identified visitors – Visitors who have the Ontraport cookie and fit your condition*
- All logged in members – Members who have logged in to your membership site
- Some logged in members – Members who have logged in to your membership site and fit your condition*
- Everyone except logged in members – Anyone who isn’t logged in to your membership site
/page-settings-dispay_this_page_to_whom.png)
Conditions on display settings
If you restrict access to your page to “Only some identified visitors” or “Some logged in members,” you can add conditions to control who can visit your page.
You can choose from the following conditions:
- Was subscribed to automation before or after a certain date
- Has been on an automation for a certain amount of time
- Contact is paused on active on automation
- Field is this value
- Contact has tag
- Contact doesn’t have tag
- If contact is subscribed to fulfillment list
- If contact is not subscribed to fulfillment list
- Relationship does or does not exist
- Has ordered a certain amount of product
- Is subscribed to product
- Access to Ontraport Membership Site is this status
Display use case – Logged in and logged out members
The “All logged in members” and “Everyone except logged in members” from the “Display this block to whom?” setting work hand in hand. They allow you to create pages or dynamic templates that only logged in members can see. You can also use this setting to display pages or templates only to visitors who aren’t logged in to your site.
These settings help you create targeted offers. For example, you can create a sales page that is only visible to people who are not current members of your site. Or you can offer your existing members a special offer to reward them for their loyalty.
Show page to all logged in members
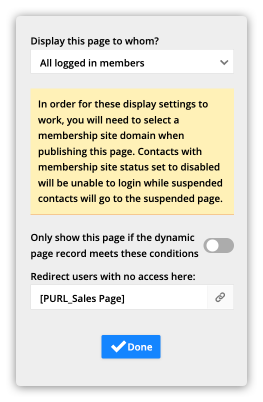
- Click Settings → Display Settings.
- Select “All logged in members” from the “Display this block to whom?” dropdown.
- Add a redirect link to the “Redirect users with no access here” field. (Optional)
- This allows you to choose a page to send visitors to if they land on your page but aren’t logged in. This is a great place to add your sales page so your visitors have the option to purchase your membership product and join your site.
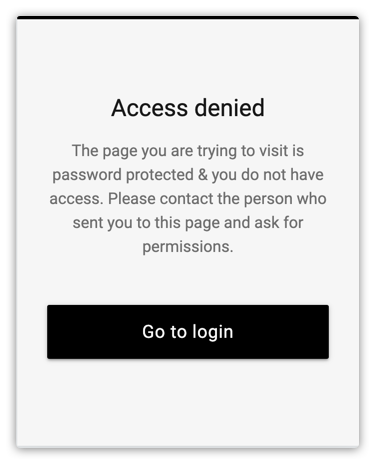
- If you don’t add a link here, visitors who don’t have access will see this message:
- Click Done.
Show page to everyone except logged in members
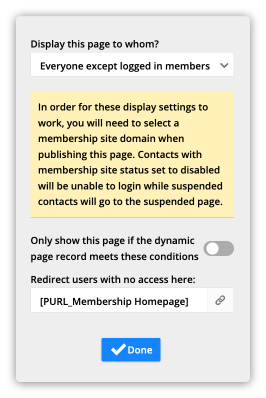
- Click Settings → Display Settings.
- Select “Everyone except logged in members” from the “Display this block to whom?” dropdown.
- Add a redirect link to the “Redirect users with no access here” field. (Optional)
- This allows you to send your members to a specific page if they happen to land on the page meant for non-members.
- If you don’t add a link here, visitors who don’t have access will see this message:
- Click Done.
Ontraform settings
Choose to show a pop-up form on the page based on scroll percentage, time spent on page, and exit intent. Toggle “on” to expose the settings. Note you’ll need to use an Ontraform, rather than a form you create within Ontraport Pages, to accomplish this.
/page-settings-ontraform_settings.png)