When your design is done, it’s time to publish your page.
Once your page is published, you’ll use its URL to share your links online and start driving traffic to your page.
You have three different publishing options:
- Use an Ontraport domain
- Use your own domain
- Publish to WordPress
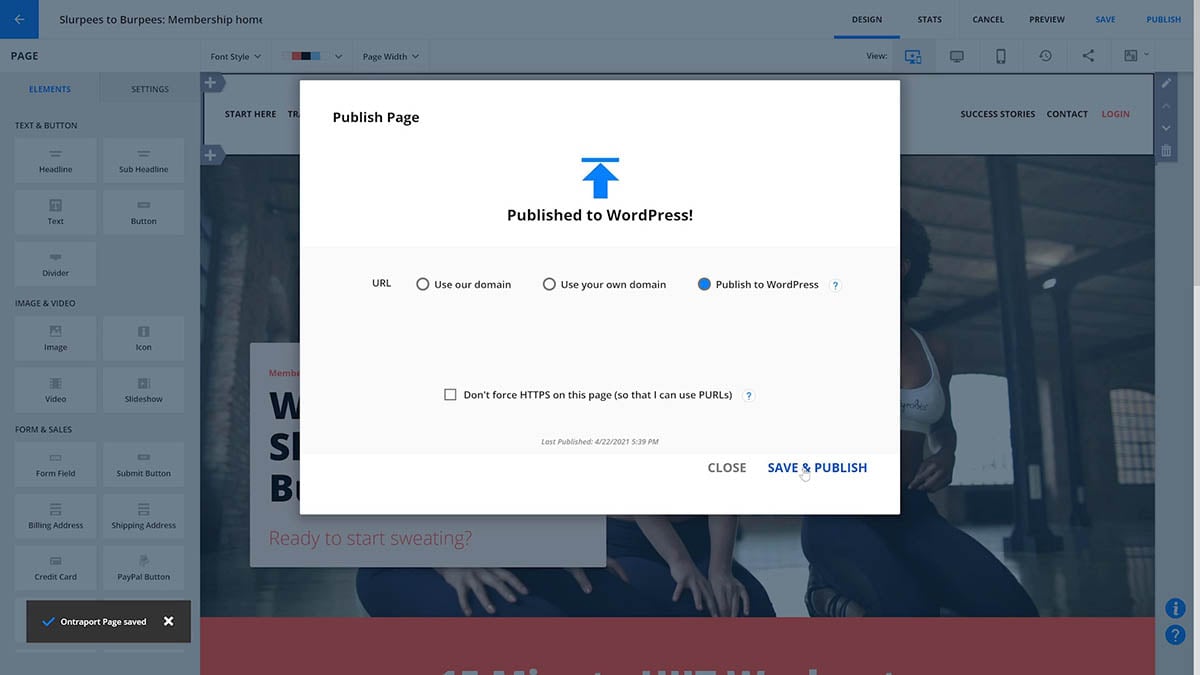
Regardless of the option you choose, the process always starts when you click Publish from your page builder.
/ontraport_pages-publish-dialogue.png)
Check out this Ontraport University lesson on publishing your pages:
Table of contents
Publish on an Ontraport domain
Publish on your own domain
• Publish your page
• Host pages to your main domain
Optional settings
• Make “www” work on your custom domain
• Make subdomains work on your custom domain
Publish on your WordPress site
SSL certificates
Don’t ‘force HTTPS’ — so you can use PURLs
Unhost your page
Publish on an Ontraport domain
If you don’t have a domain of your own, you can use one of Ontraport’s domains to publish your pages for free.
You can customize your URLs by adding a branded subdomain. Then you can continue to publish pages with similar URLs by using the same subdomain and adding file names to distinguish different pages, such as mysite.mytemporarydomain.com/pricing and mysite.mytemporarydomain.com/blog.
Ontraport offers the following free secure domains:
/ontraport+pages+-+hosting+-+our+domains+(dropdown+-+entire+list).png)
- Select “Use our domain.”
- Enter your subdomain.
- Select the Ontraport domain you’d like to use.
- (Optional) Add your file name.
- Click Save & Publish.
Publish on your own domain
In order to publish your pages on your own domain, you’ll first need to connect your domain to your Ontraport account. If you haven’t done that yet, check out “Host pages to your main domain” section below before you publish your page.
Publish your page
If you’ve already set up your domain, follow these steps to publish your Ontraport page:
- Select “Use your own domain.”
- Add the URL you’d like to publish your page on, such as mydomain.com for your homepage and mydomain.com/blog for your blog page.
- Click Save & Publish.
/pages-publish_page-use_your_own_custom_domain_example.png)
You should not include “www” before your custom domain in the “Use your own domain” field. If you do, all your links must include “www” to send visitors to your page.
If, however, you want to include “www” in your page URLs, follow the steps discussed in the “Make ‘www’ work” section below.
Host pages to your main domain
If you own a domain, you can publish your Ontraport pages to it. You need to update your settings to host pages on a custom domain. Check out this article to learn how.
Optional settings
Once you’ve got your main custom domain set up, there are a few optional settings you may be interested in:
Make “www” work on your custom domain
When you purchase a new domain, www may not automatically be part of your URL. If you want visitors to be able to reach your site by typing in www.[Page//your domain].com, follow the steps below:
- Log in to your registrar (the place you bought your domain name, such as GoDaddy) and navigate to DNS (domain name system) settings.
- Create this CNAME record:
- Type: CNAME
- Name/Host: www
- IP/Content/Points to: yourdomain.com
- Click Save.
At Godaddy, your CNAME will look like this.
/pages-hosting-CNAME_www.png)
Make subdomains work on your custom domain
If you want to publish pages on a subdomain to your main domain, such as pages.mydomain.com, you need to create an A record for your subdomain. This option is great if you already have separate content on your main domain that you want to leave as is.
Here’s how:
- Log in to your registrar (the place you bought your domain name, such as GoDaddy) and navigate to DNS (domain name system) settings.
- Create this A record:
- Type: A
- Name/Host: Add the subdomain you want, such as “pages.”
- IP/Content/Points to: 209.170.211.179
- Click Save.
At Godaddy, your A record will look like this.
/pages-hosting-a_record_pages_new.png)
Publish on your WordPress site
Back to top
If you’d like to publish your page to an existing WordPress site, you’ll need to make sure that you’ve installed and activated the Ontrapage Plugin. Follow these steps to set up your Ontrapages plugin.
- Select “Publish to WordPress.”
- Click Save & Publish.
- Log in to your WordPress site as the administrator.
- Click ONTRApages → Add New.
- Add a title for your page, and select the saved name from Ontraport in the “Choose which Ontrapage you would like to use” drop down.
- Click Publish.
SSL certificates
SSL (Secure Sockets Layer) is a protocol that provides secure communications over a computer network or link, which helps visitors know a website is safe for browsing.
An SSL certificate creates an encrypted connection between web servers and browsers. It ensures that any data passed between you and the website can’t be stolen by hackers or malicious software.
There are two ways to spot whether a page has an SSL certificate installed. Secure pages have both a lock icon and HTTPS in the front of the URL. HTTPS is standard for web browsing now, and many browsers warn you if you try to visit an unsecure HTTP page.
/pages-publishing-Secure_SSL_example.png)
Ontraport automatically applies an SSL certificate to your page URL (i.e, yourdomain.com) when you publish it. It can take anywhere from a few minutes to upwards of 48 hours before the change is reflected on your page.
Don’t ‘force HTTPS’ — so you can use PURLs
A PURL is a personalized URL, such as jane.yourcompanyname.com, that you can create to personalize your pages for your contacts. Check out this article for more info on PURLs.
PURLs don’t work on secure pages so, in order to use them, you’ll need to select the “Don’t force HTTPS on this page (so that I can use PURLs)” from your Publish Page dialogue before clicking Save & Publish.
/pages-publish-dont_force_HTTPS_context_image.png)
Unhost your page
If you would like to take down your page from your published URL, you can unhost it by clicking Publish → Un-Host Landing Page → Remove Current Page Hosting.
From there, you can either publish your page again to a different URL or store it unhosted in your pages collection.