You can lay the course for your leads’ and customers’ journey with your company using automation maps. These are like flowcharts that set up what you want to happen and let you track what your contacts are doing.
The automation you build can be for any aspect of your marketing strategy: new lead capture and follow-up, product fulfillment, re-engaging shopping cart abandons, generating referrals, getting customer feedback, webinar sign-up and follow-up, live event management, sales funnel automation, and much more.
In the Automation Builder, there are four primary types of elements that you’ll use to complete your maps: goals, triggers, actions and filters. These elements determine how contacts flow through the map. In this article, we’ve outlined the best approach to building your automation maps from scratch.
Prepare for a successful automation
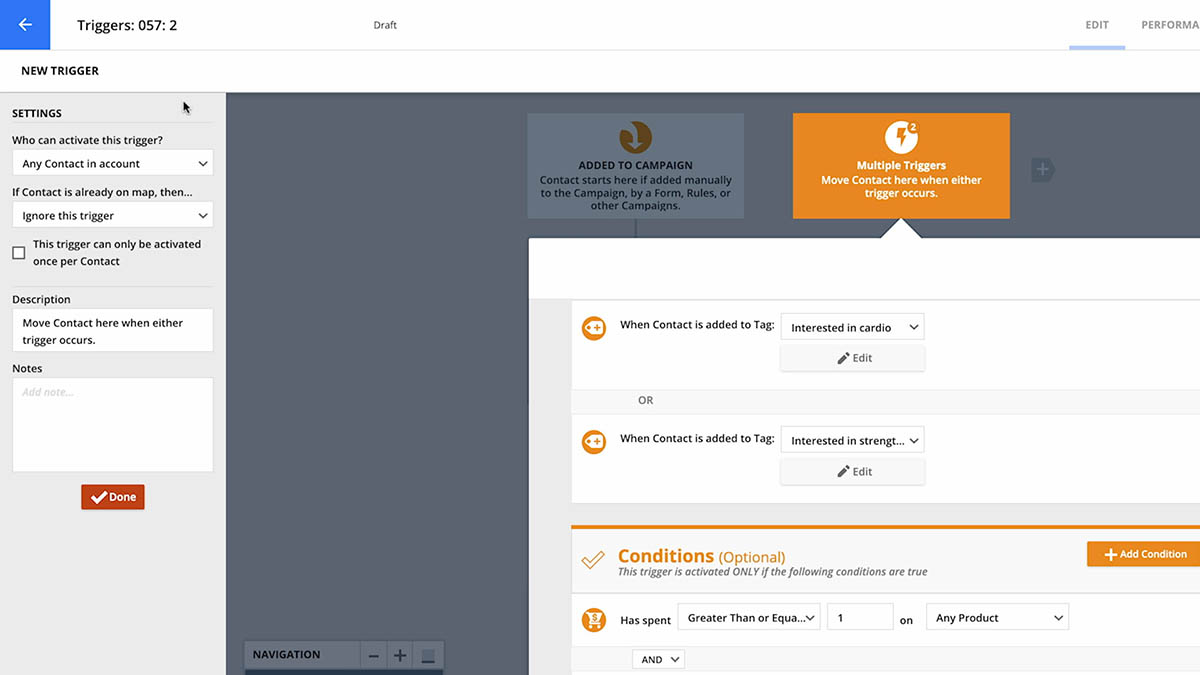
- List yourtriggers. Triggers are the “doorway” for your contacts to enter your automation map, and the first thing you should do is decide what action should add contacts to your map. This is completely dependent on your use case. Some examples of triggers are:
- Fill out a form
- Purchase a product
- Open an email
- Visit a page
- Become a partner
- Log in to a membership site
- Have a certain lead source or other tracking variable
- Has not completed any activity in the last X days
- Has ordered a certain quantity of product
- Determine your automationgoals. Start by identifying what action you want your contacts to take. Is it to purchase a product? Join your partner program? Your goals show you important stats and you can use them to evaluate whether your automation is meeting your expectations. Some examples of goals in Automation Builder are:
- Fill out a form
- Purchase a product
- Open an important email
- Visit a page
- Become a partner
- Log in to a membership site
Build an automation map from scratch
- If you have a plus, pro or enterprise account, hover over Contacts or any other object, then click New Automation.
- If you have a basic account, go to Automations → New Automation instead.
- To create user automations, go to
.png) → Administration → User Management → User Automations.
→ Administration → User Management → User Automations.
- Name your automation.
- Click
.png) → Add Trigger and select the event that will add contacts to your map.
→ Add Trigger and select the event that will add contacts to your map.- Edit your trigger settings to customize how you’d like them to work.
- Click Done.
- Click What Happens Next? and add what you’d like to happen as soon as your contact is added to your map.
- Add an action to “do something,” such as send an email or update a contact record.
- Add a filter to pause contacts or send them down another path.
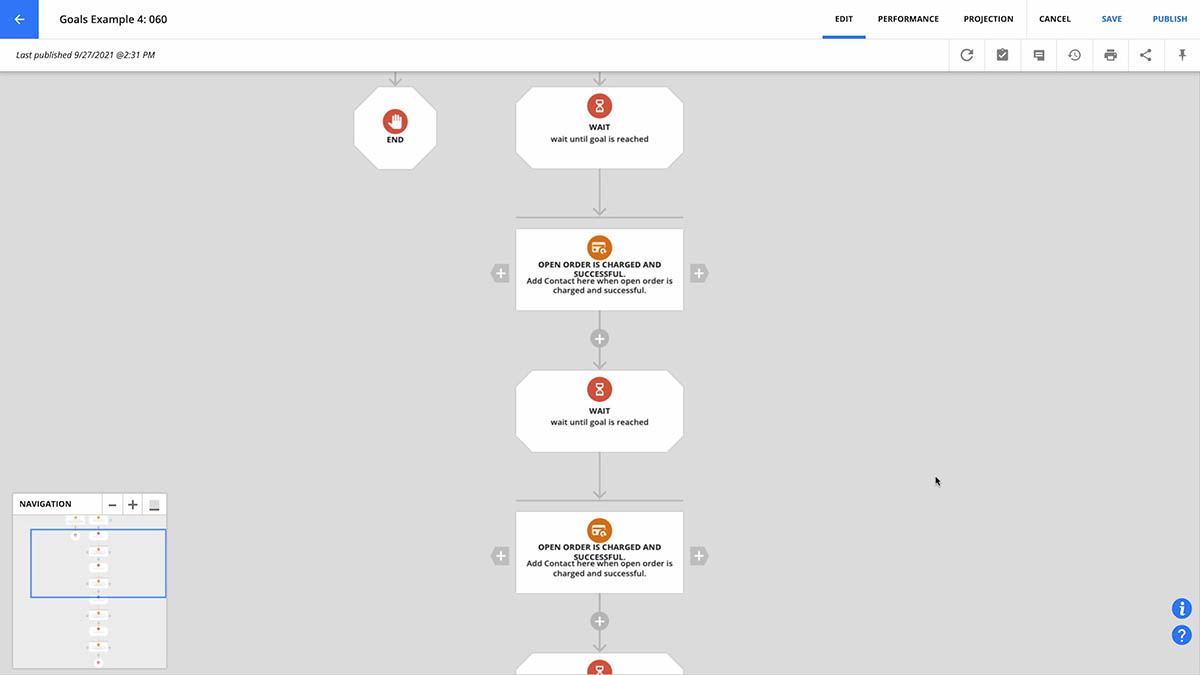
- Add a goal to move contacts once they achieve something you want your them to, such as signing up for a membership site, purchasing a product, or visiting your landing page.
- Goals are great for performance mode reporting once you publish your automation map, and you can also create a “path of least action” for contacts who haven’t activated your goal.
- Once you add an element to your map, click on it to configure its settings and click Done to save your work.
- Repeat steps 3 and 4 to continue building your automation flow.
- (Optional) Add a Go To under your “Added to automation” trigger to connect it to another path of automation.
- When your automation map is completed, add End an to any remaining What Happens Next? elements.
- Click
 to open your automotion checklist to make sure all important elements have been configured.
 - Click Publish → Save & Publishto go live.
- Click Save if you’re not ready to launch your automation.
Add your automation to the subscription management page
The subscription management page is where your contacts are sent when they click on the unsubscribe footer on your bulk emails. From there, your contacts can choose to unsubscribe from all your emails or, if you add automation maps to your page, your contacts can unsubscribe from a specific map and still receive other emails from you.
Here’s how:
- From your Automation Builder, click Publish.
- Click Subscription Settings.
- Select “Show this automation map on the subscription management page.”
- Add the public name and description of your automation.
- Click Save.
Copy, move, edit and delete automation elements
You can save time when you build your automation maps by copying and moving single elements or whole lines of automation to match your needs.
To copy and move automation elements and lines of automation
- Click Edit.
- Hover over the element you want to copy or move and click
.png) , then drag your element to either
, then drag your element to either  in between elements or What Happens Next? at the bottom of your automation map.
 - Then click the option you’d like:
- Move only this item
- Move this item, and all following items
- Copy only this item
- Copy this item, and all following items
To edit automation elements
- Click Edit.
- Click the element you’d like to edit.
- From there you can edit the settings for your:
To delete automation elements
- Click Edit.
- Hover over the element you want to delete and click
/ontraport_pages_builder_delete_block_(trash_icon).png) and select if you want to:
and select if you want to:- Delete only this item
- Delete this item and everything below it
- Click Delete Item.
Note: if you delete an element that has contacts “sitting” on it, those contacts will be removed from the automation map.
What can’t be moved
Each automation element is unique in the way that it functions. This means that some of the elements don’t have every option available when you try to move or copy them.
These include:
- Triggers: You can only move triggers from left to right, because they belong at the beginning of a line of automation.
- Elements that are connected to multiple lines of automation — or to other elements — don’t have the option to “Move only this item” because doing that would strand automation items without a connection to the rest of the map. These include:
- Forks
- Splits
- Conditions
- Waits connected to Goals
- Some elements can only be added to the end of your map by clicking What Happens Next?.
- Go Tos
- Ends