Automated emails are crucial for any business. When you automate repeatable processes, you can focus on the tasks that need more personalization.
You can create email funnels that nurture your leads. Or you can deliver your digital products automatically. And you can automatically respond when visitors submit your forms so you know you’ll never drop the ball. Plus, automation maps allow you to segment your contacts and create personalized replies.
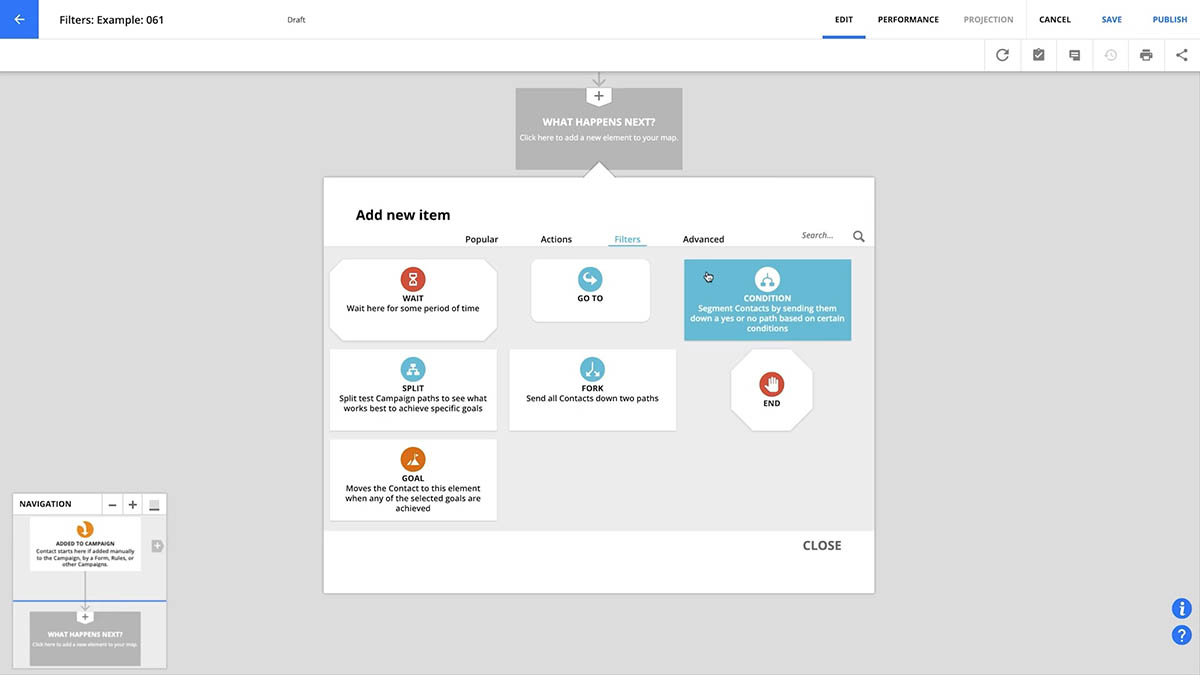
In this article, you’ll learn how to use the “Send an email” action on your automation maps.
Check out this Ontraport University lesson to learn more about automations
Table of contents
The send an email action
Use wait elements to schedule your emails
• Some time passes
• A specific date arrives
• Date relative to a contact’s date field arrives
• Day of the week is
Use date triggers to schedule your emails
• Today matches contact’s date field
• Today is relative to a contact’s date field
• Today is a specific date
Use goals to resend unopened emails
Split testing emails
The send an email action

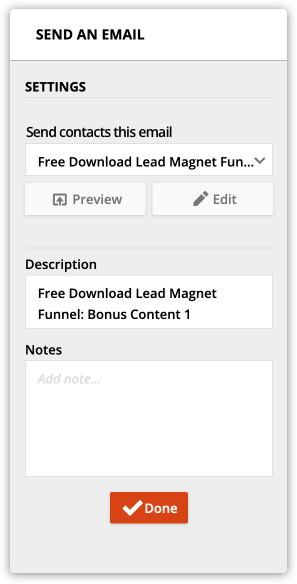
The send an email action allows you to add emails to your automation maps.
To set it up, just select the email you want to send from the action’s settings.
Use wait elements to schedule your emails
Wait elements allow you to designate when to send your emails. There are several helpful wait settings you can customize to accomplish any use case.
Check out this Ontraport University lesson to learn more about wait elements.
Here’s how to use each wait element setting to schedule your emails:
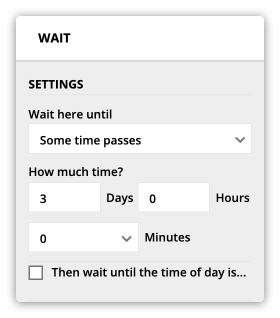
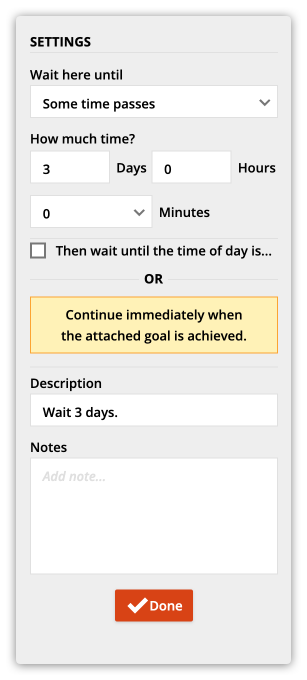
Wait here until some time passes
When you select “some time passes,” you can choose the number of days you’d like to wait between emails.
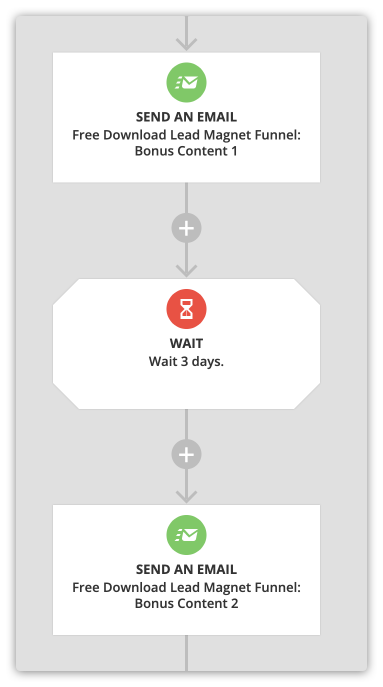
You can also choose the number of hours and minutes and optionally select a time of day to send.
A specific date arrives
If you want to send your email on a specific date, use the specific date wait.
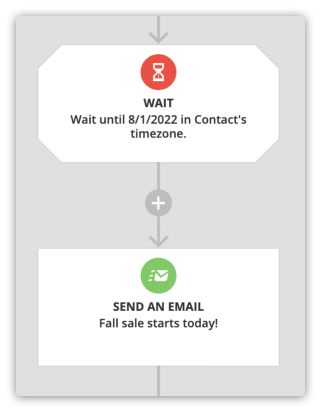
You can specify the date you want to send your email in the settings.
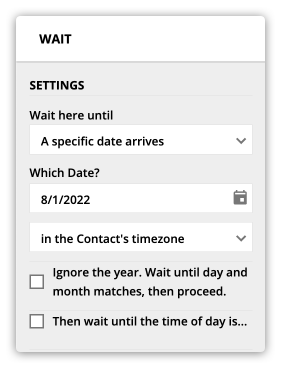
Note, if you don’t check the “Ignore the year” setting, the wait will hold contacts who reach it after your selected date indefinitely.
Use the “Today is a specific date” trigger instead if you’ll add contacts to your map over time.
Wait here until a date relative to a contact’s date field arrives
This wait setting lets you wait until specific days, such as your contact’s birthday or anniversary, to send a celebration email.
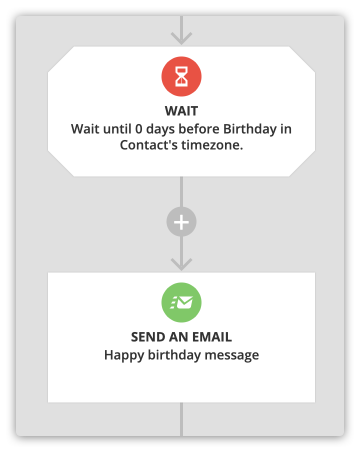
From the settings, you can select how many days before or after a saved date.
This setting also allows you to choose to ignore the saved year. This option is great for repeating events such as birthdays or anniversaries.
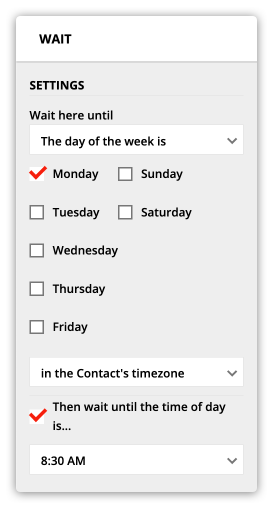
Wait until the day of week is
This wait setting allows you to choose a day of the week to send your email. For example, some businesses send a newsletter every Monday morning.
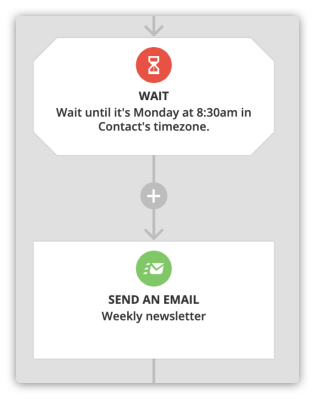
From the settings, you can choose the days of the week you want to send your emails on.
Use date triggers to schedule your emails
Triggers are great when your contacts join your automation at different times. Unlike waits, triggers move your contacts when something happens, and you can use date triggers to send everyone on your map the same email on the same date.
It’s best to use date trigger and wait elements together so you can choose the time of day to send your email.
Check out this Ontraport University lesson to learn more about triggers.
There are three date triggers you can use to schedule your emails:
- Today matches contact’s date field
- Today is relative to contact’s date field
- Today is a specific date
Here’s how to use each date trigger to schedule your emails:
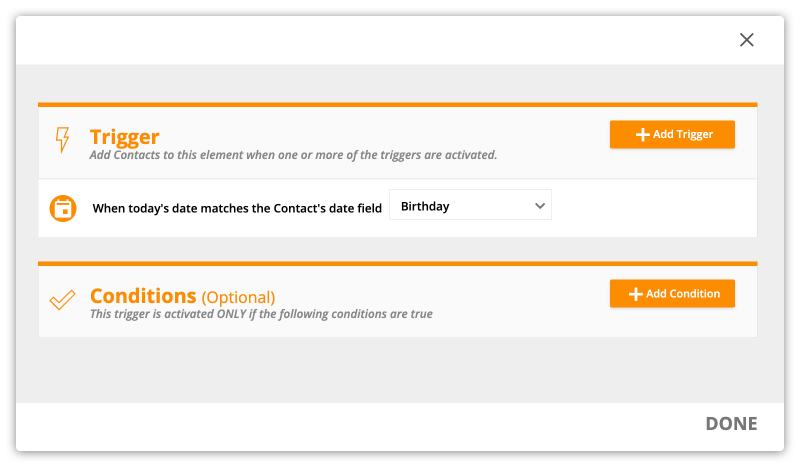
Today matches contact’s date field
This trigger adds or moves your contact when it’s a date that matches a date saved in the contact’s record.
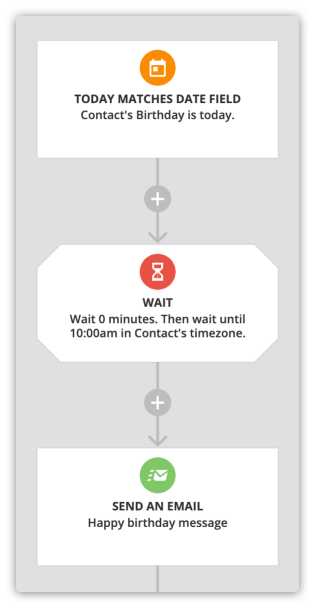
From the trigger’s settings, you choose the saved date you want to send your email.
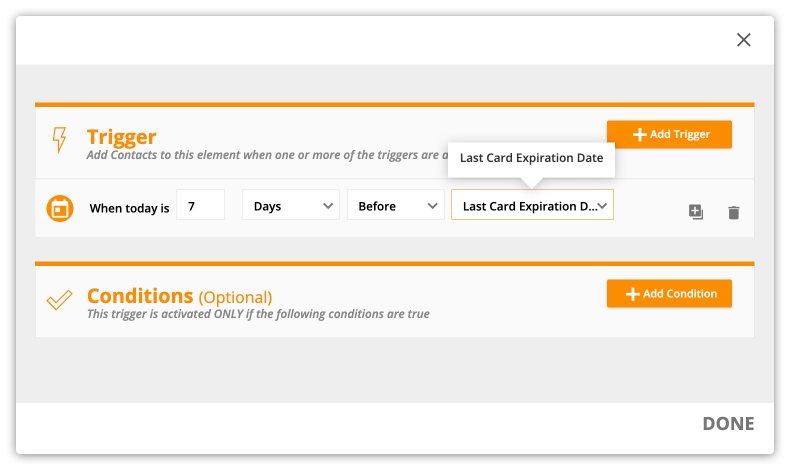
Today is relative to a contact’s date field
This trigger allows you to send emails on dates relative to a saved date in your contact’s record. For example, you can send a notification to your customer the week before their credit card expires.
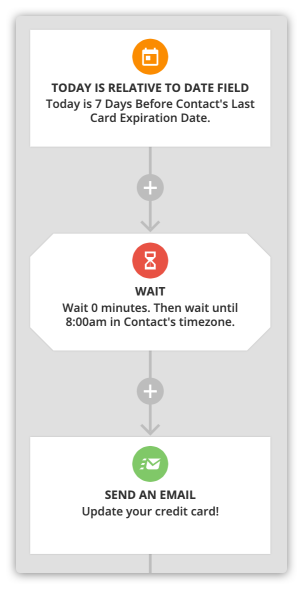
From the settings, choose the number of days before or after a specific date saved in your contact’s record.
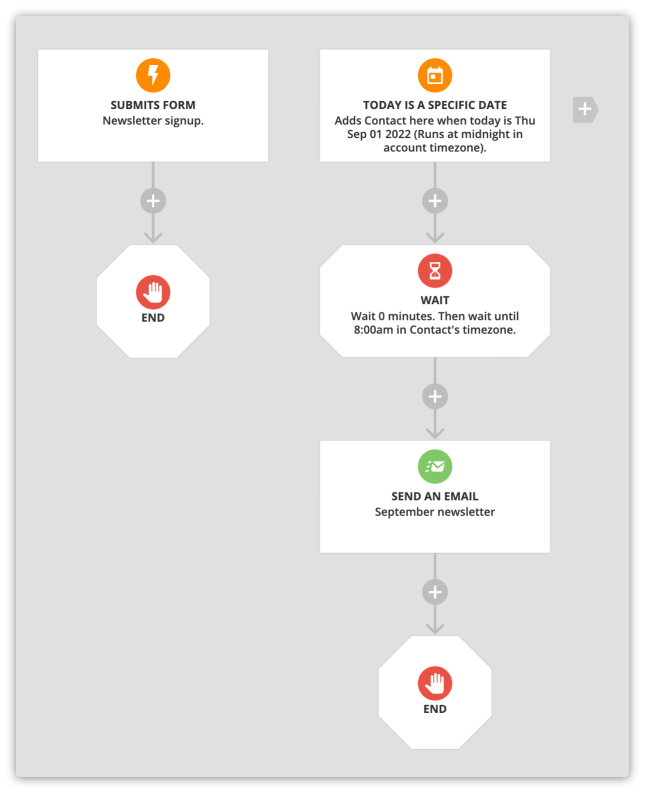
Today is a specific date
This trigger allows you to send an email on a specific date. It is similar to the “A specific date arrives” wait setting. If you want to send emails on specific dates and contacts will be added to the map over time, use this trigger instead of the wait.
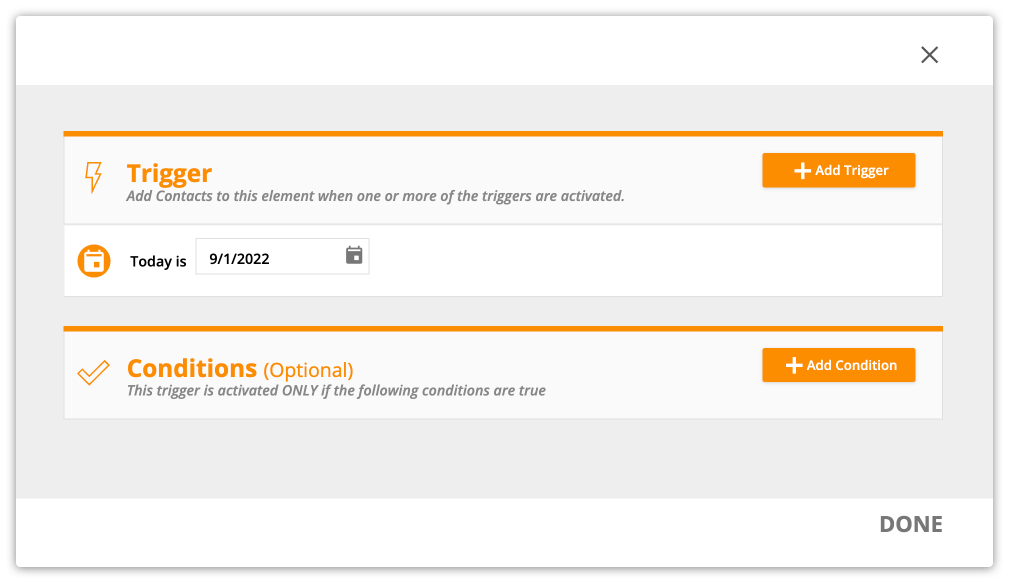
You can choose the date you want to send your email from the settings.
This trigger is unique because it will only move contacts already on your map.
It is excellent for newsletter automation because your contacts can enter your map through another trigger — commonly a contact filling out a form.
When you select this type of trigger for the first time, you’ll see this notification pop up:
Use goals to resend unopened emails
If you want to resend an email if your contact hasn’t opened it, you can use an “opens email” goal.
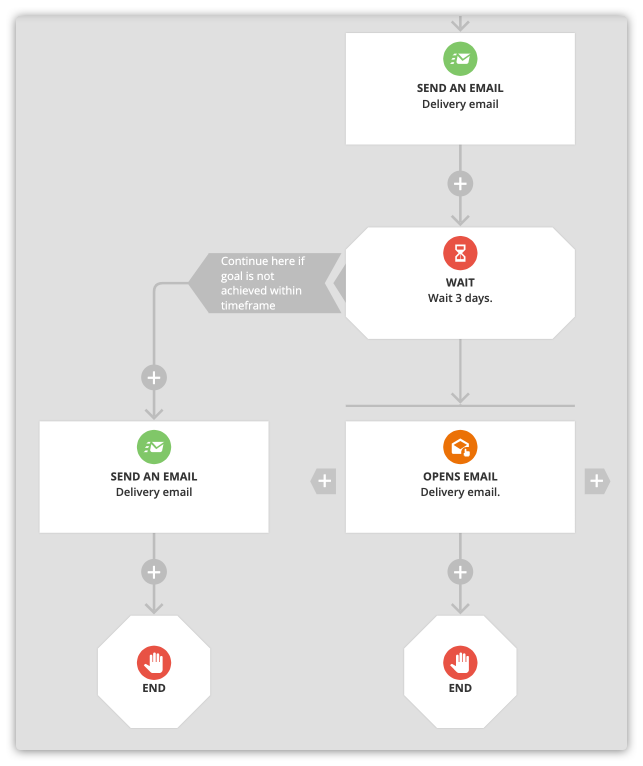
You can choose which email you want your contacts to open from your goal settings.

You can determine how long you’d like to wait for your contacts to open the email before resending it from your wait settings.
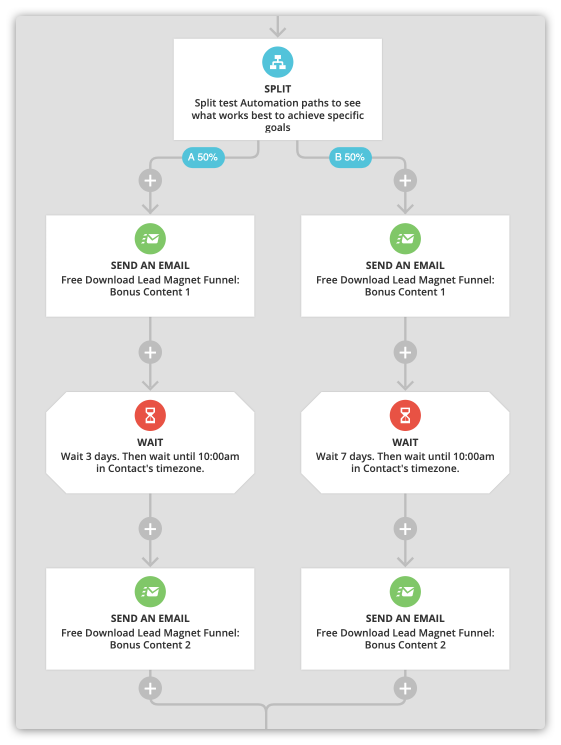
Split testing emails
It’s common to split test your emails. You can test different versions of the same email or send emails at different rates.
The split element helps you determine if one side of the split is getting more clicks, opens and conversions. For example, your contacts might like receiving a bonus email every three days. Or they can prefer to hear from you once a week.
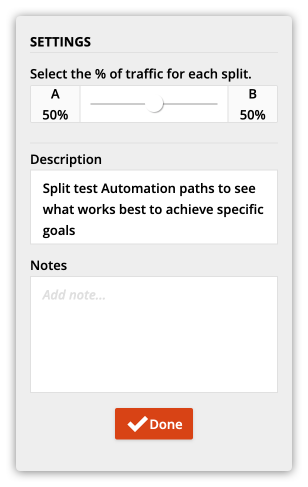
You can choose the percentage of contacts you’d like to send down each path from the split element’s settings.
For a detailed tutorial on split testing, watch our Ontraport University lesson.