If your business hosts multiple events throughout the year, using custom objects can be a great way to organize and automate the process for attendees to sign up and receive event details via email.
This use case involves creating a one-to-many relationship between the contacts and events objects, with events being the parent object.
Add a dynamic content package to your account to use this feature. Here’s how:
- Click here to go to your account details page.
- Click Add plan or Start trial next to “Add Dynamic CMS to your account” and choose the plan that fits your needs.
Steps to create the events object
- Go to
.png) → Administration → Data Tab → Custom Objects.
→ Administration → Data Tab → Custom Objects. - Click New Object
- In the “Name new object” field, type the new object name, such as Events, and add in the same word in the “Singular” field. Subsequent fields will populate. Ensure that the names are correct, then click Next.

- Next you will add and create fields in the object. You will be taken to the field editor for the new object.
- Click Add New Section.
- Click where it says Untitled and rename it to Event Details.
- Click Add Field to create fields for the object. You can always add more fields in the future. Add the following fields as text fields, then click Next.

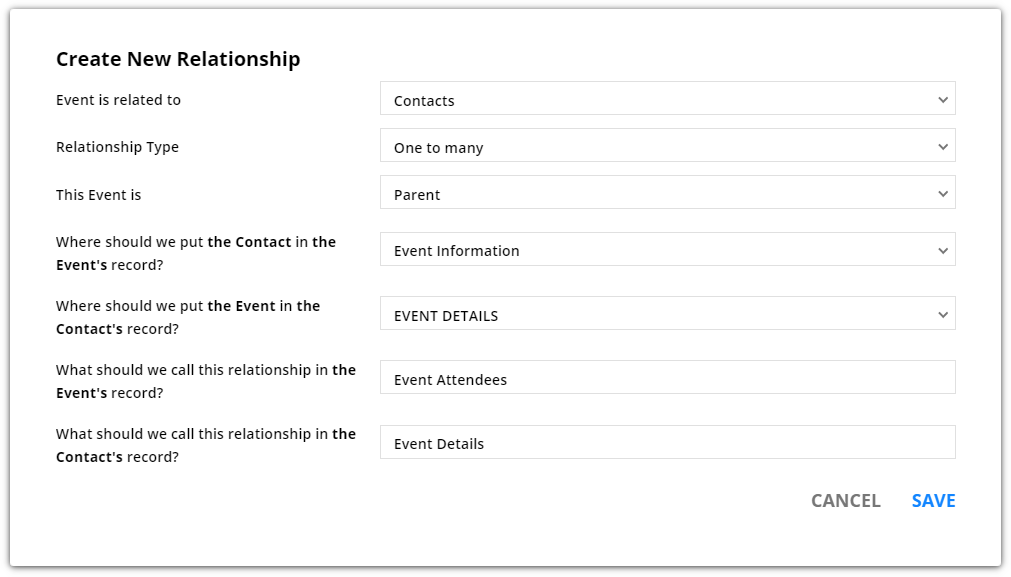
- Next you’ll create the relationship to relate the events objects back to the contacts object. This allows Ontraport to keep track of which contacts are attending which event. Click New Relationship, and set up the items like this:
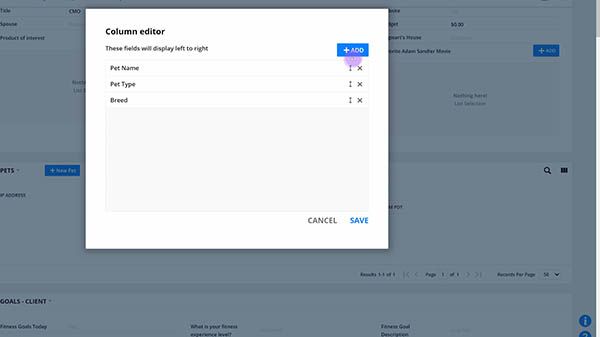
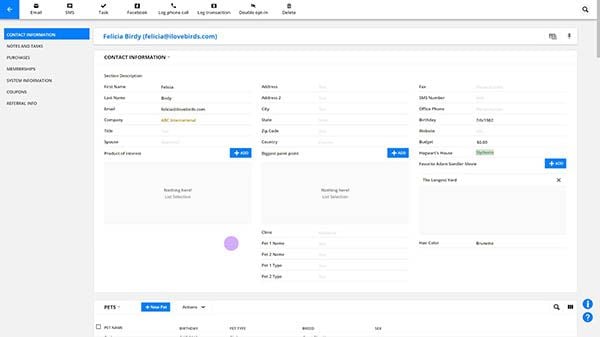
- Now you’ll configure the events object’s settings for how you would like it to display when you click on it. We suggest setting it up like this:

- If you used the above information, when clicking an event object record, the dropdown field settings created above would appear like this:

- In the navigation settings panel, add the events object to the navigation menu. Select the icon and color associated with the object. Use the up/down arrows to move the location of the object into the desired location.

Steps to create an event
To continue setting up this use case, we will need to create one event.
- In the navigation menu, click Events, then New Event, and fill in the event fields we created previously to suit your event.
Steps to enable contacts to sign up for an event
In order to allow contacts to sign up for an event, as well as to have the ability to email them any necessary details, we’ll need to do the following.
Create a form for each event
- Go to Contacts → Forms, then click New Form, and choose Ontraport Form.
- Name the form based on which event it’s going to be associated with.
- Add any fields you’ll need on the form to collect the desired information from the attendees.
- Click Save.
Create an automation map to change the contact’s related field
- Go to Automations, then click New Automation, and choose Start from Scratch.
- Directly below the Added to Automation trigger, add an end element. We won’t be using this trigger on this map.
- Next to the Added to Automation trigger, click
.png) , then Add Trigger and type in Contact Submits Form. From the dropdown, select the event form previously created. This is how contacts will be added to the automation.
, then Add Trigger and type in Contact Submits Form. From the dropdown, select the event form previously created. This is how contacts will be added to the automation.

- Directly below this trigger, click What Happens Next? and choose the Update Contact element.
- In the Update the Field dropdown, choose the event we created previously.
- Below the Update Contact element, add an End element.
- Name the automation map, then click Publish → Save & Publish. This automation will now relate the contact to the specific event. Repeat steps 4-8 for each event you have.
Create email messages with event details
- Go to Events → Messages, then click New Message, and choose Ontraport Email.
- Write and style your email message, then click Settings.
- Make sure the field “Send email to” is shown as Event information >> Email (or whatever you named the related section between events and contacts).

- Click Save. Repeat these steps for every message you want to send about each event.
Create an automation map to send the emails
- Go to Events → Automations, and click New Automation.
- Under the Added to Automation element, add a Wait element.
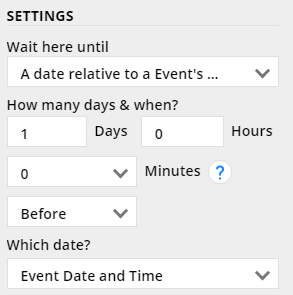
- Set your Wait element settings:
- Wait here until: A date relative to Event’s date field arrives.
- How many days and when?: Choose the specific day and time that you’d like the email to go out. For example, you might want to send a reminder email out a day before the event. You’d choose “one day before” and leave hours and minutes equal to 0.
- Which date?: Event Date and Time
- Click Done.
- Below the Wait element, Add a Send an Email element and choose the email you created about the event in the previous section.
- Repeat steps 3-9 for any other emails that you’ll want to send regarding the event.
- Click Publish → Save & Publish.
Once this automation is completed and you’re ready to send emails out about your event, you’ll simply go to the event records and subscribe them to this automation map. Since all of the contacts will be related to that specific event, the automation will make sure that they’ll all receive the same messages without you having to individually add each contact to the automation.
Completing all these steps will allow contacts to sign up for the event and then automatically receive the follow-up emails related to the event.