Integrating social login into an Ontraport site with membership enabled benefits members and site owners. Members can easily access the site using their existing social media credentials, simplifying the registration process, and your workload as a site owner would be reduced.
With open registration, your visitors can sign up for access directly from your login form – using their social credentials or their email – so they can access your free content right away. This is a great way to get new members on your site and promote paid content.
This built-in integration with Google, Facebook and Microsoft requires you to create login apps for each platform you want to offer as a social login option. If you need assistance setting up your third-party app, reach out to Google, Facebook or Microsoft to troubleshoot.
Alternatively, you can enable Single Sign-On OpenID Connect (OIDC) in your account, allowing your members to log into a connected OIDC-authenticated service (e.g., Google, Okta) and access your membership site without entering their credentials again. To get started, email support@ontraport.com.
Table of contents
Create a Google app
• Configure your Google social login app
Create a Facebook app
• Configure your Facebook social login app
Create a Microsoft app
• Configure your Microsoft social login app
Set up open registration
• Use the open registration trigger on automations
Create a Google app
You must create a Google app before enabling Google social login functionality on your Ontraport Membership Site. Creating a Google app allows you to obtain the credentials and configuration details required for seamless integration.
Learn more about integrating Google Sign-in to your site here. If you need assistance troubleshooting your Google app, contact Google Cloud’s customer care.
- Log in to the Google Cloud Console.
- Or create a new account by signing in and agreeing to Google’s terms of service.
- Click Select a project in the top left, then click New project.
- Fill out the new project fields:
- Project name: Add the name of your project.
- Your project name can’t be changed later.
- Organization: Select an organization to attach it to a project.
- Your organization setting can’t be changed later.
- Location: Select the parent organization or folder.
- Project name: Add the name of your project.
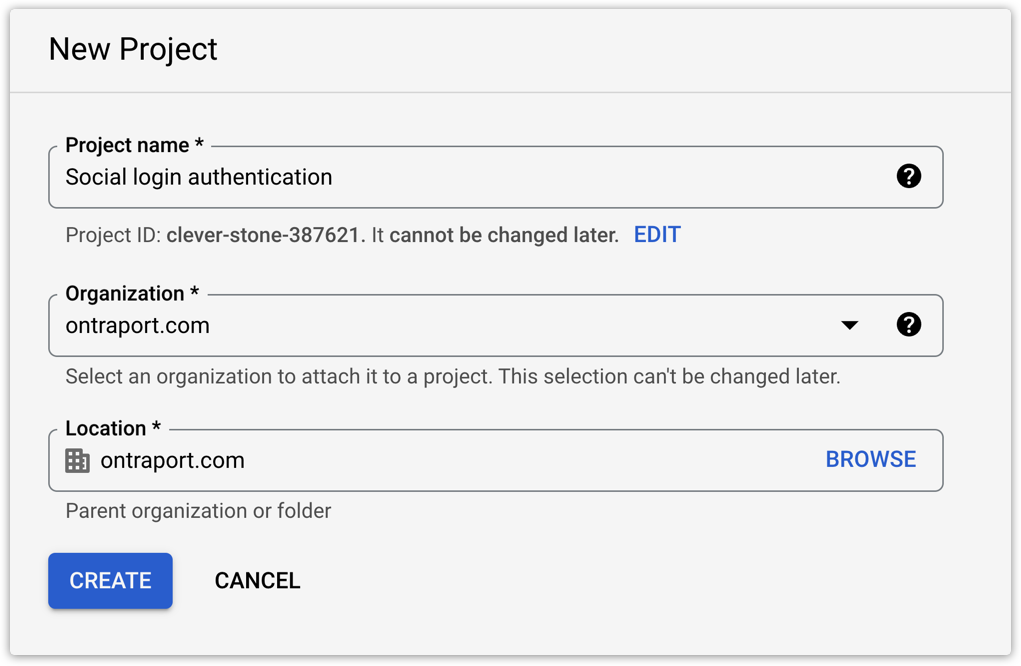
- Click Create.
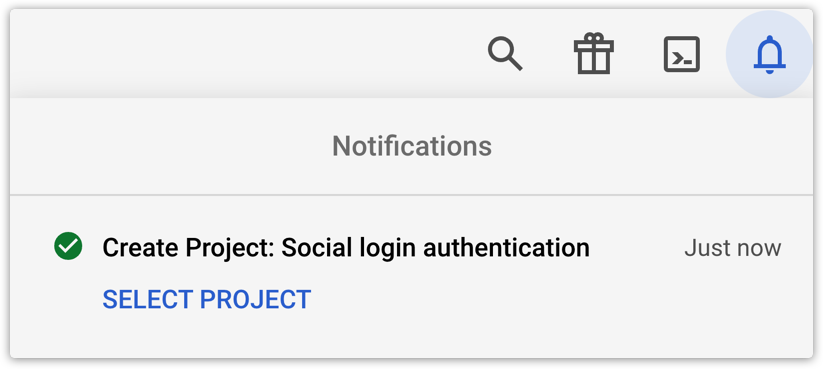
- Click the notifications icon and click Select project under your new project.
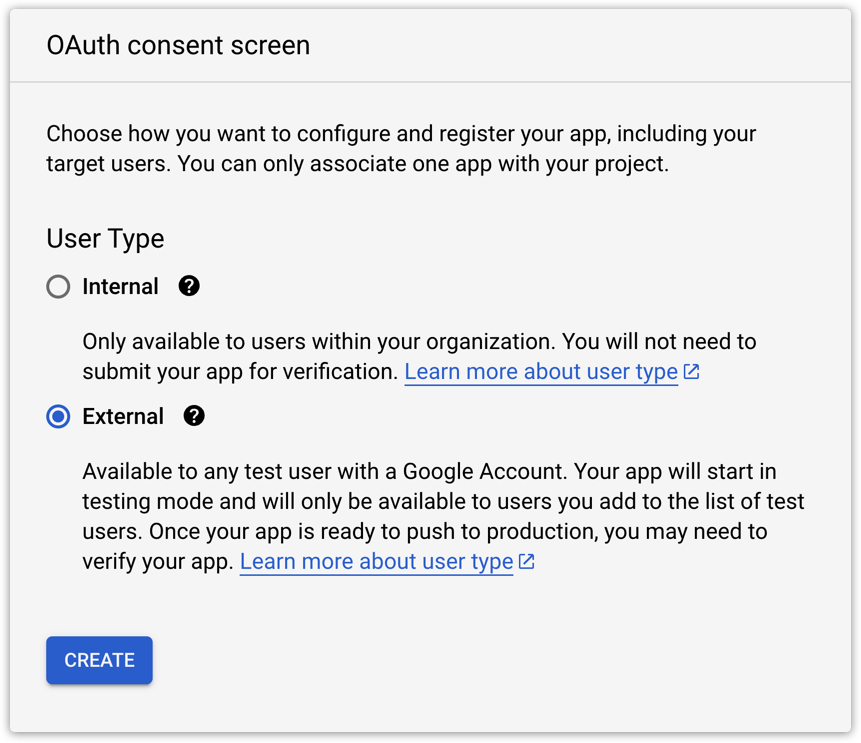
- Go to
 → APIs & Services → OAuth consent screen.
 - Select “External” on the User Type settings and click Create.
- Edit your app’s registration. And add your app information.
- App name: Add your business name.
- User support email: Enter the email address your customers can contact for help.
- Add your app logo
- Add your domain information:
- Application home page: Add your website’s homepage URL.
- Application privacy policy link: Add the URL of the page that contains your privacy policy.
- Application terms of service link: Add the URL of the page that contains your terms of service.
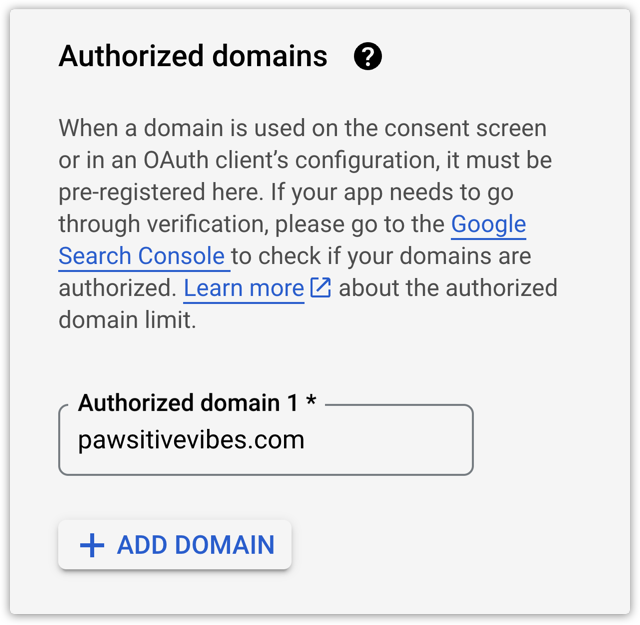
- Add your authorized domains.
- Click Add Domain and add your domain.
- Add your contact information.
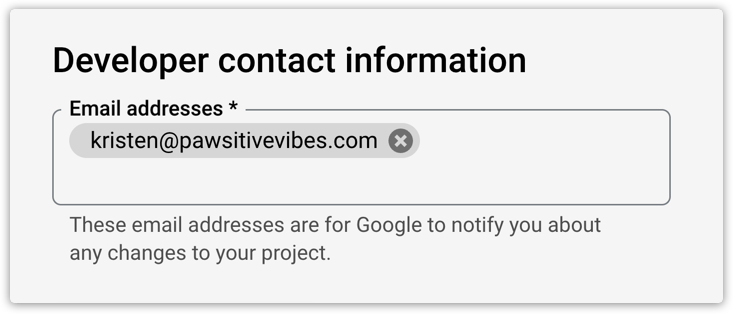
- Click Save and Continue.
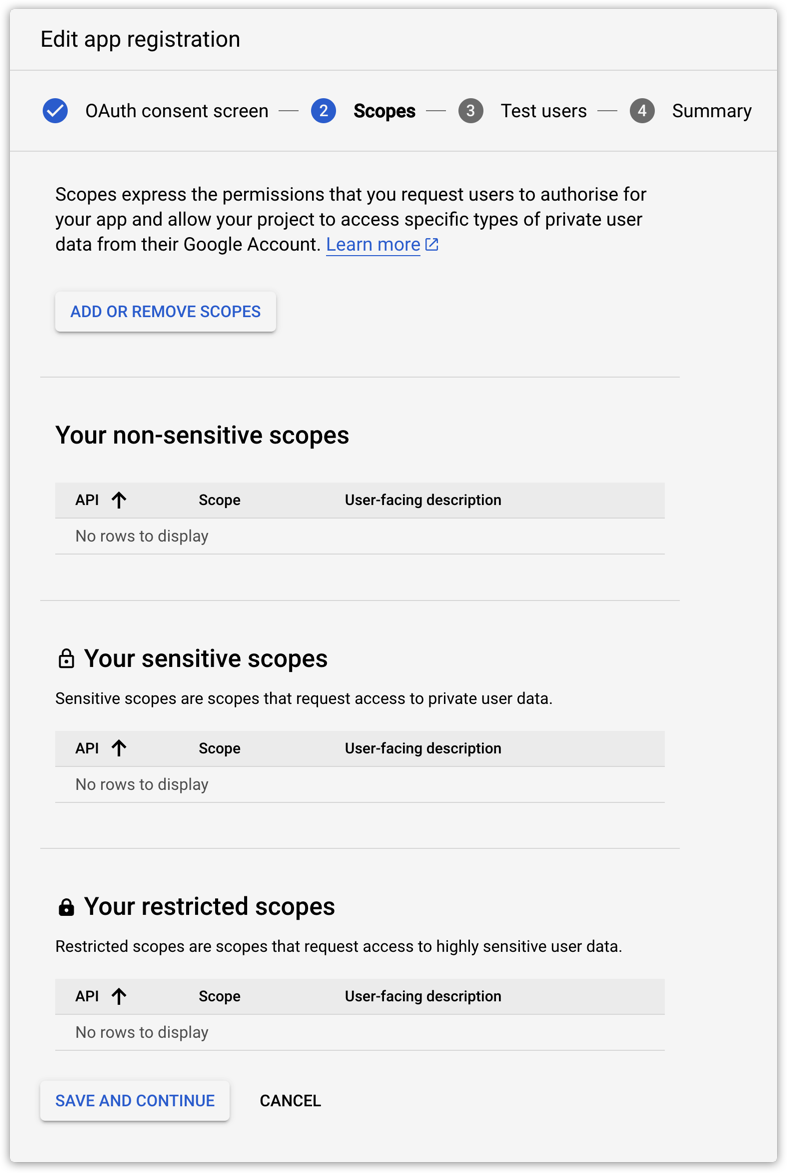
- On the next page, click Add or Remove Scopes.
- Check the first three scopes to:
- See your primary Google Account email address
- See your personal info, including any personal info you’ve made publicly available
- Associate you with your personal info on Google
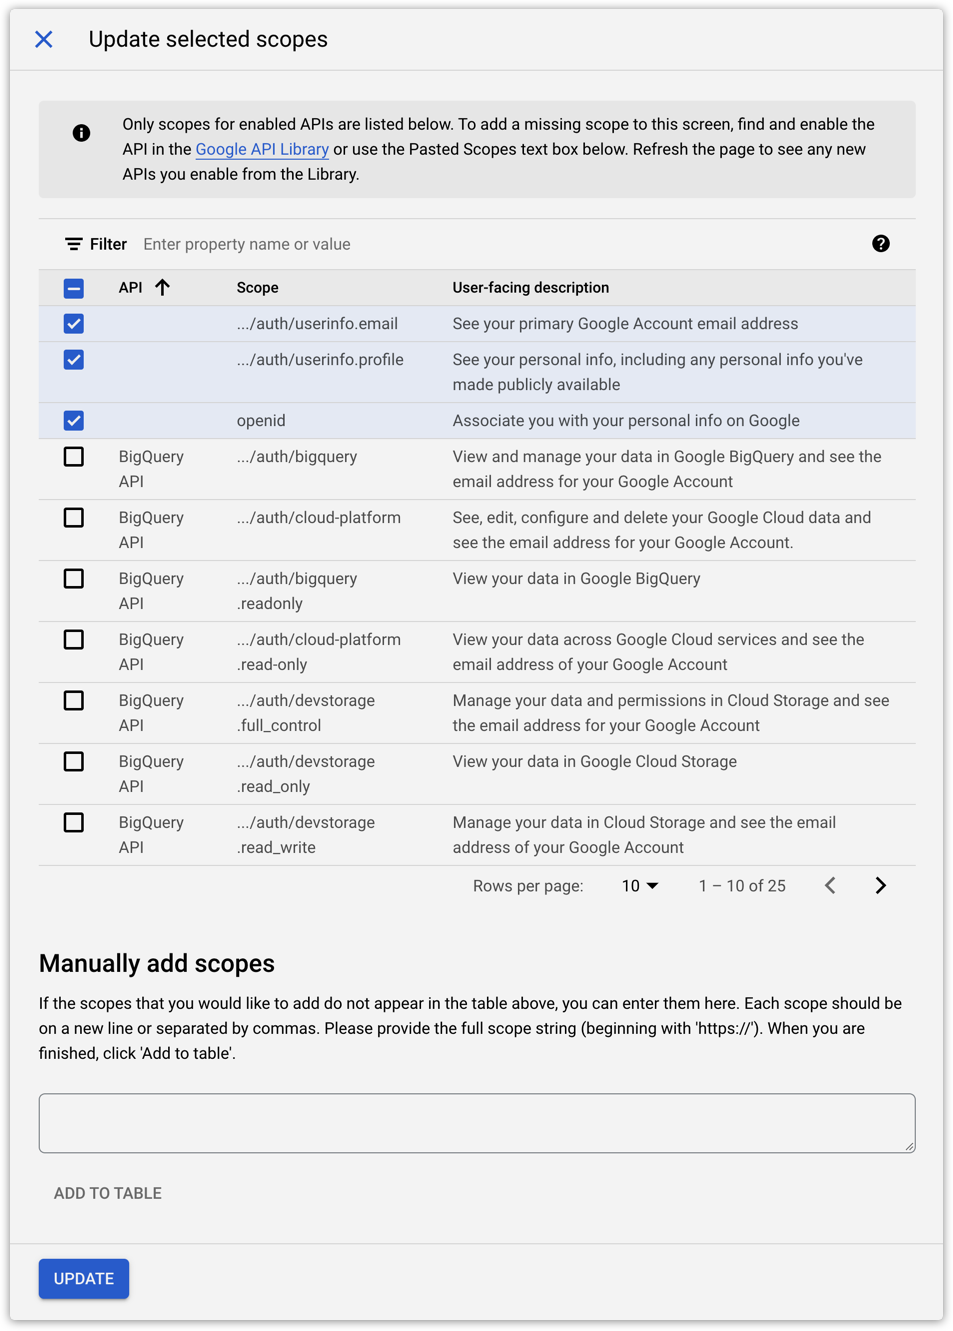
- Click Update.
- Click Save and Continue at the bottom of the page.
- (Optional) Add test users. This allows you to use your app when it is in the testing status.
- Click Add Users.
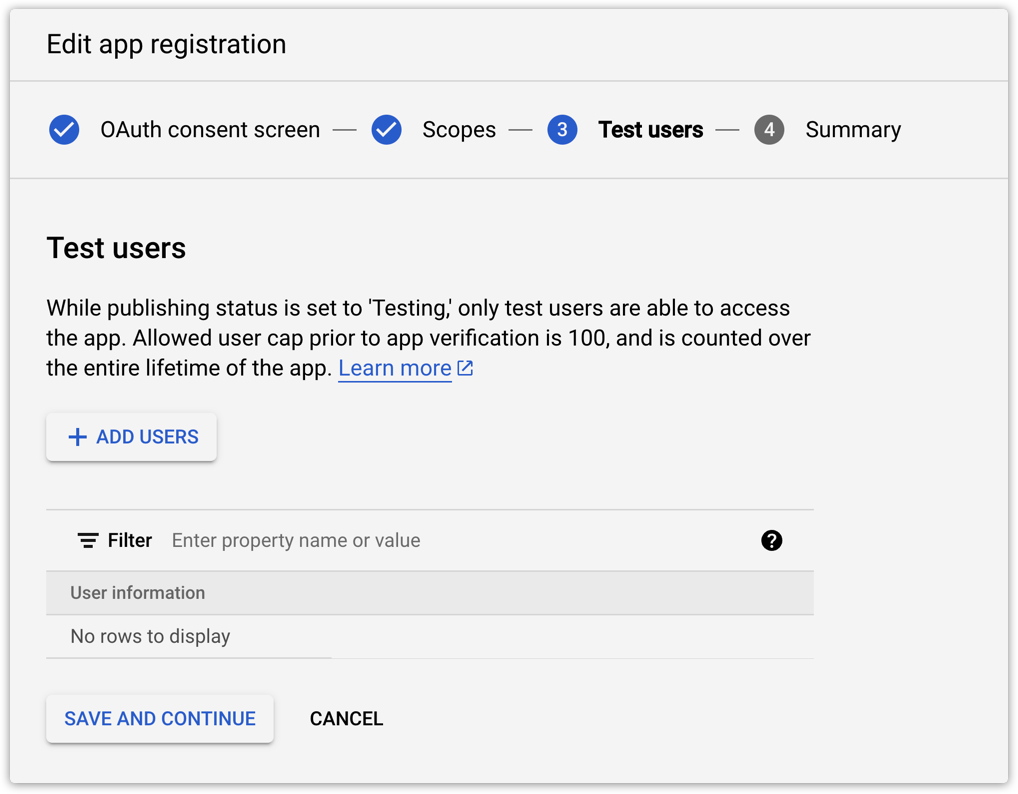
- Add the email addresses of your test users. This email address must be associated with an active Google Account, Google Workspace account or Cloud Identity account.
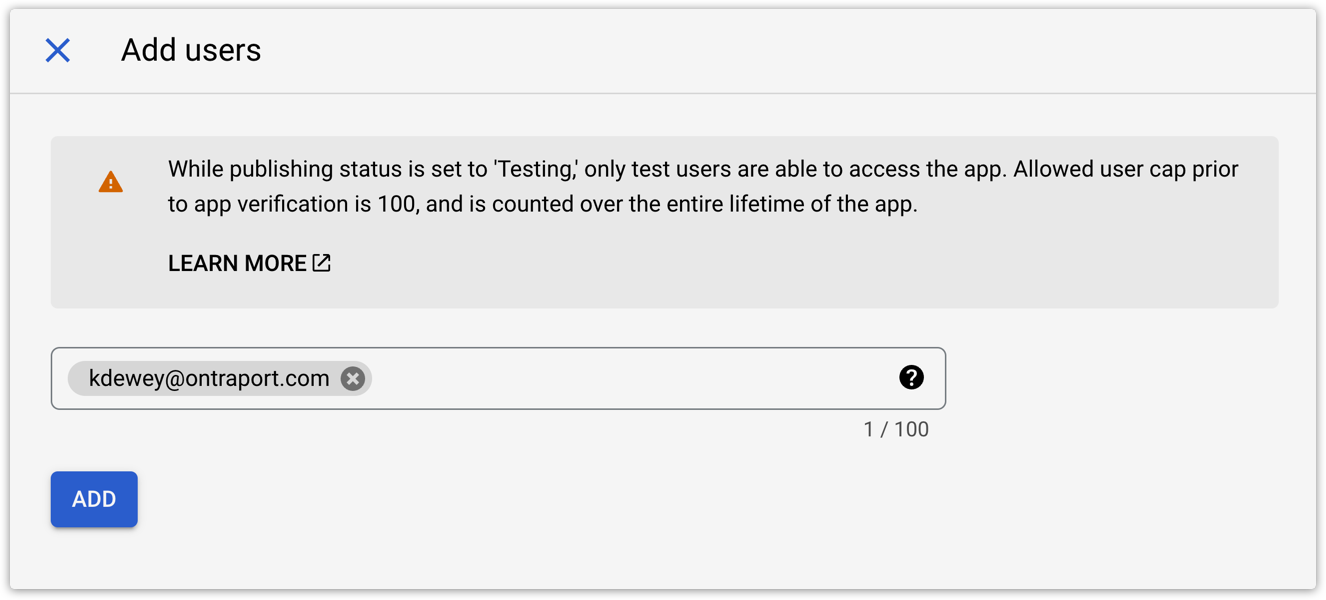
- Click Add.
- Click Save and Continue.
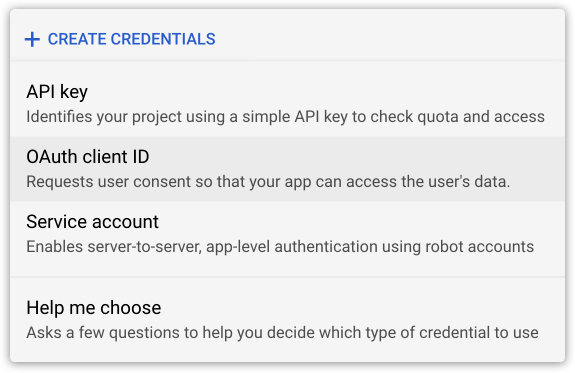
- Click Credentials on the left side of the page.
- Click Create Credentials at the top of the page.
- Select OAuth client ID.
- Customize your client ID’s settings:
- Application type: Select web application.
- Name: Add your web client name.
- In the “Authorized JavaScript origins” section click Add URI and add your membership site’s domain.
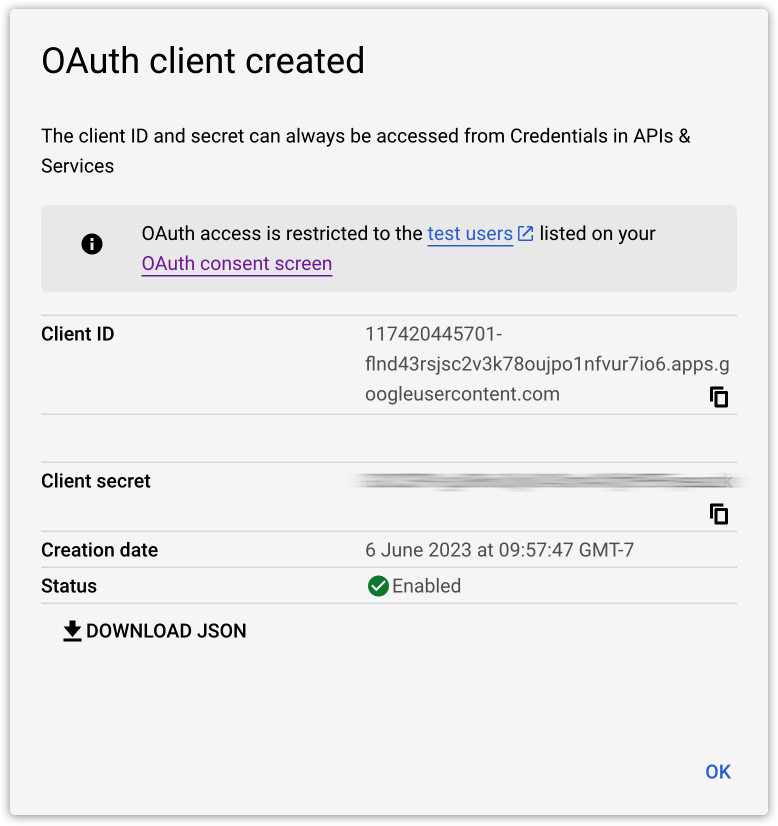
- Click Create at the bottom of the page.
- Copy your Client ID and Client secret to use in the next step.
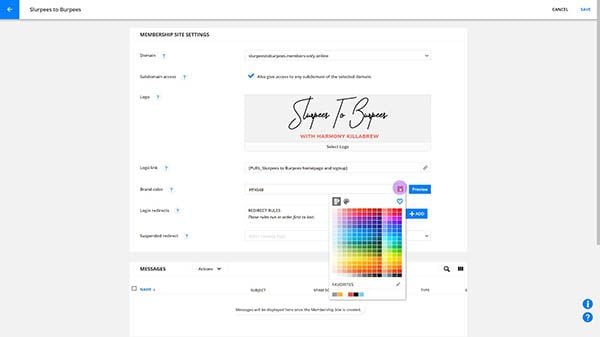
Configure your Google social login app
After you’ve created a Google app, you can configure your membership site.
- Log in to your Ontraport account.
- Go to your membership site collection, and click on your membership site.
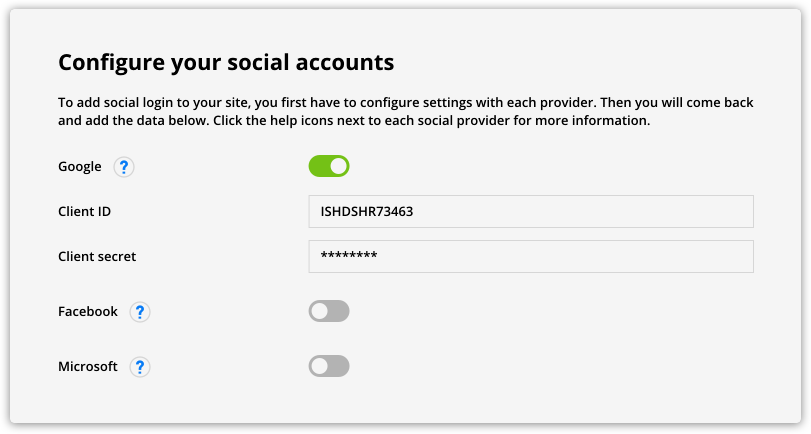
- In the Social accounts section, click Configure.
- Toggle the Google option on.
- Add your Client ID and Client Secret.
- Click Done to save your social accounts settings.
- Click Save to save your membership site’s settings.
Create a Facebook app
You must create a Facebook app before enabling Facebook social login functionality on your Ontraport Membership Site. Creating a Facebook Login app allows you to obtain the credentials and configuration details required for seamless integration.
Learn more about Facebook Login here. If you need assistance troubleshooting your Facebook Login app, contact Facebook’s developer support.
- Log in to your Meta for developers account.
- If you haven’t already, register as a developer.
- Click My Apps on the navigation bar.
- Click Create App.
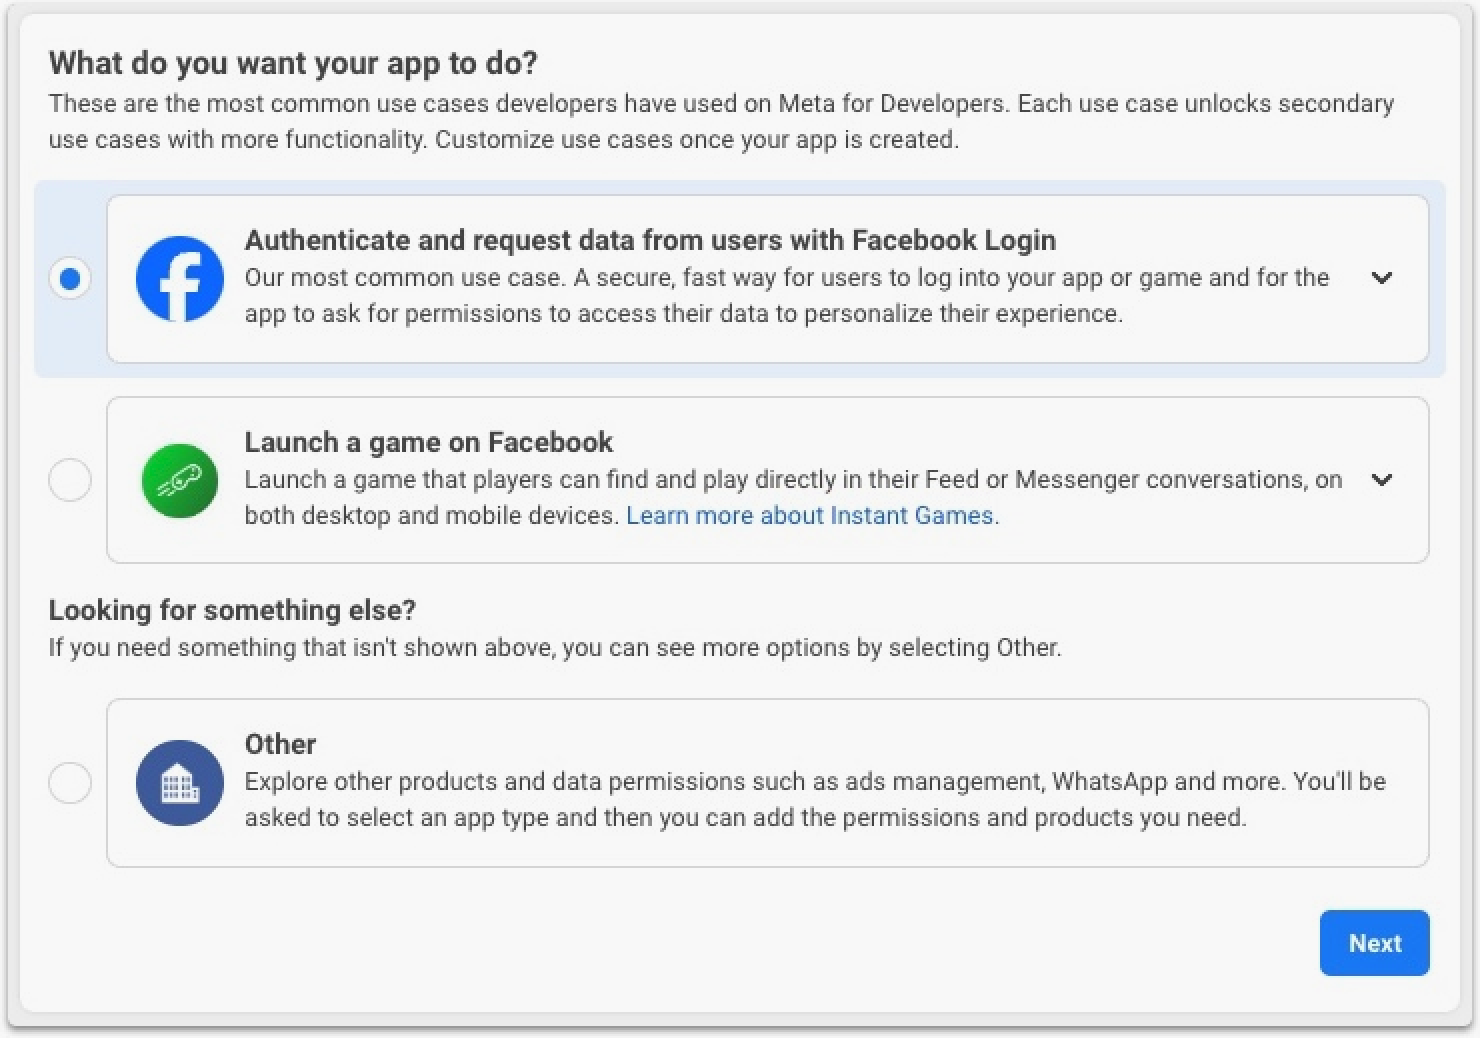
- Select “Authenticate and request data from users with Facebook Login,” and click Next.
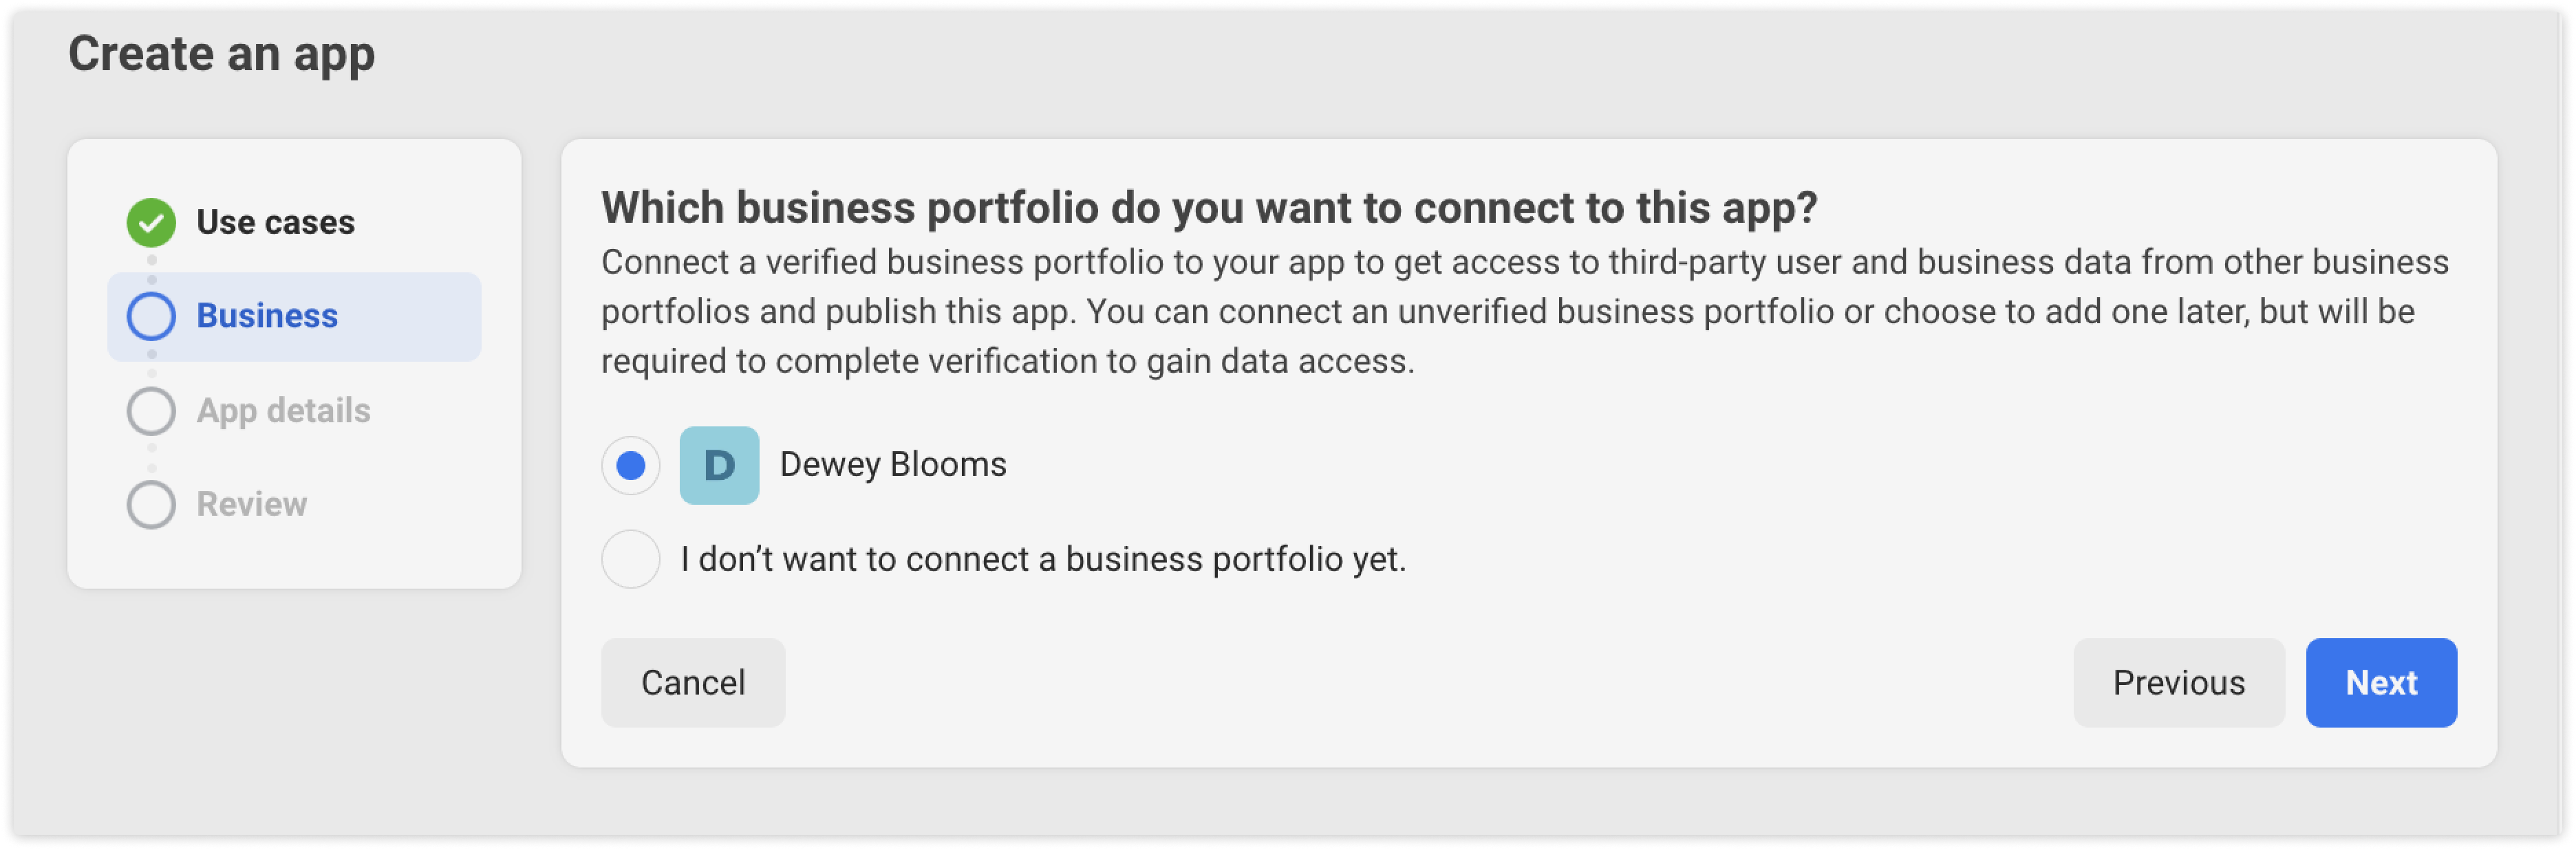
- Choose your business portfolio.
- Choose “I don’t want to connect a business portfolio yet” if you haven’t set one up.
- Add your app details:
- Add an app name: Add your app’s name.
- App contact email: Add an email address you check regularly to get updates about your app.
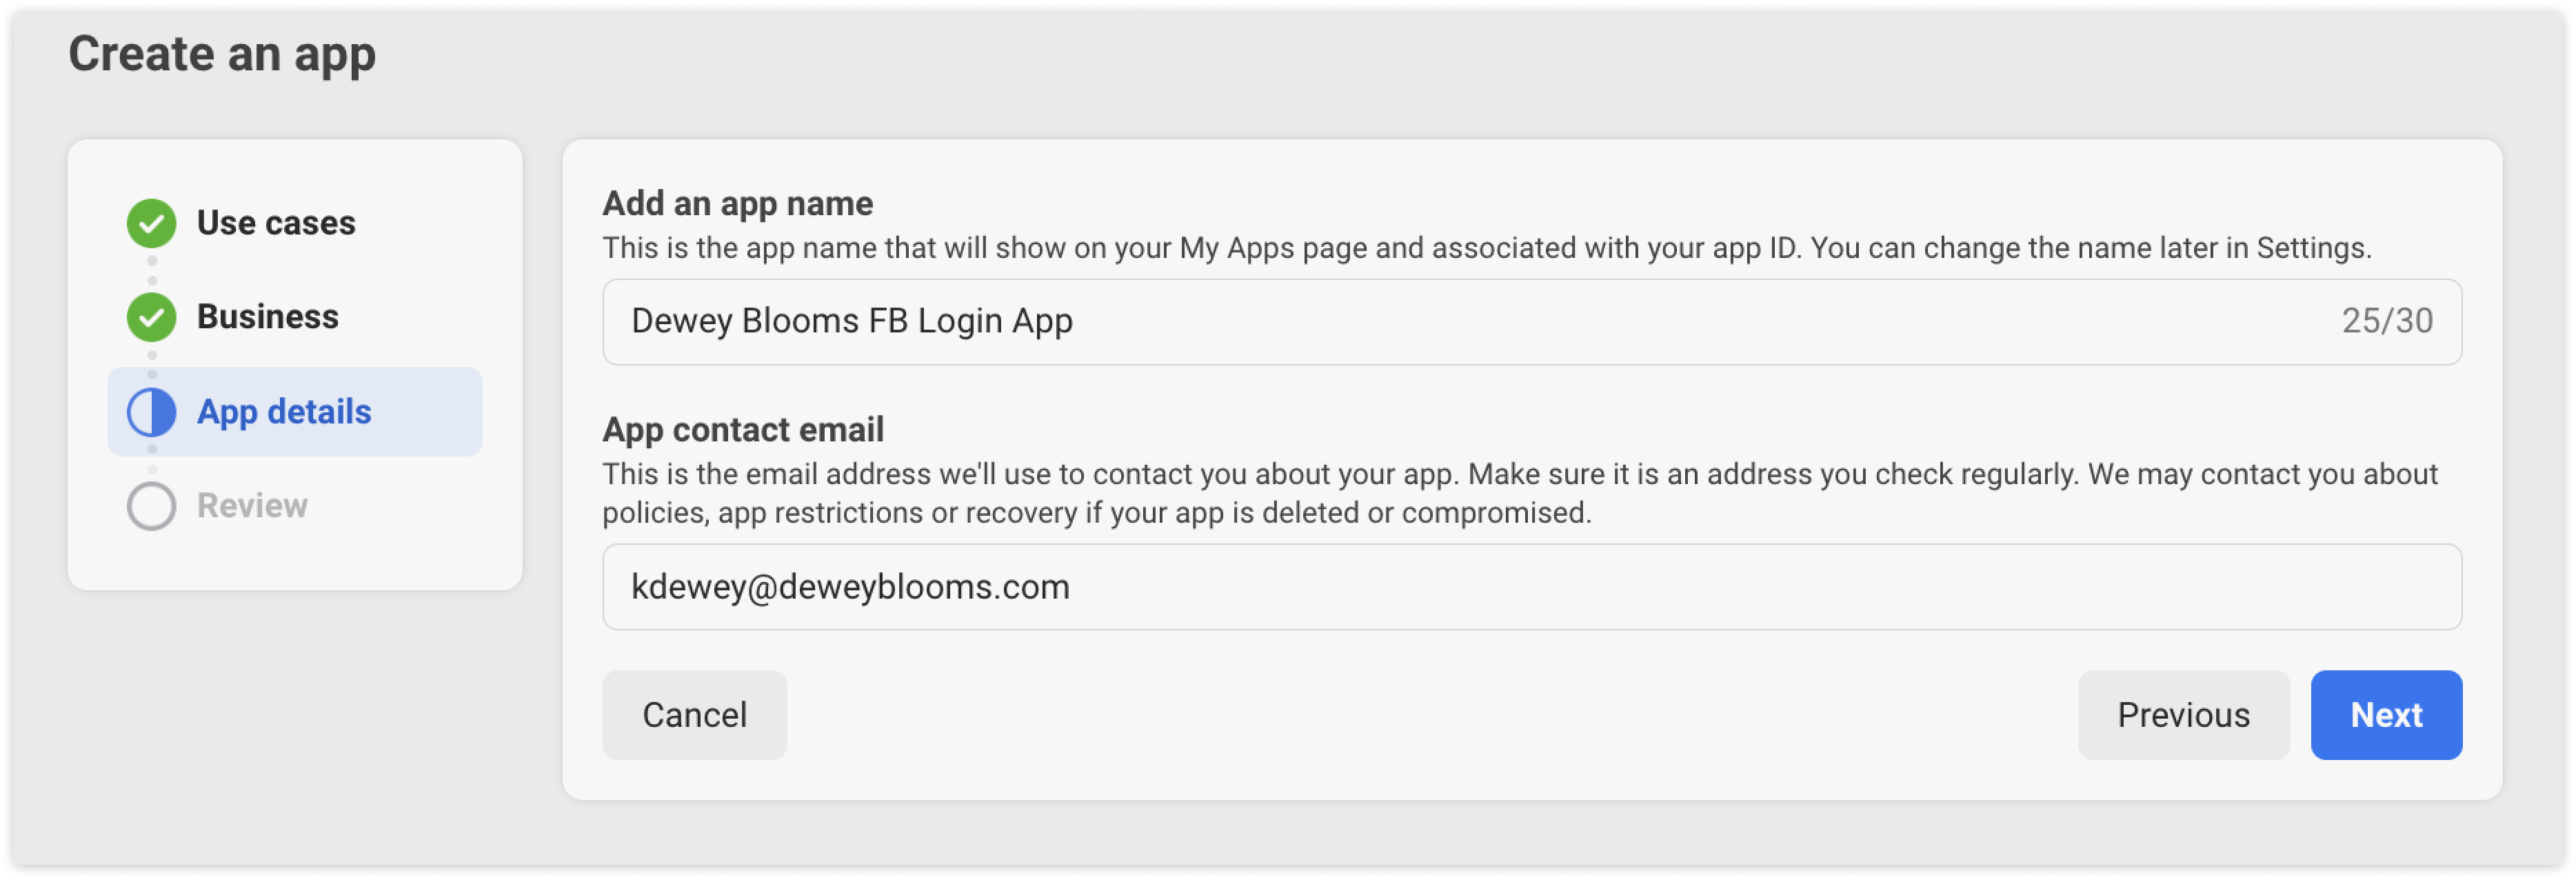
- Click Next.
- Review the requirements to publish your app and maintain data access and click Create app.
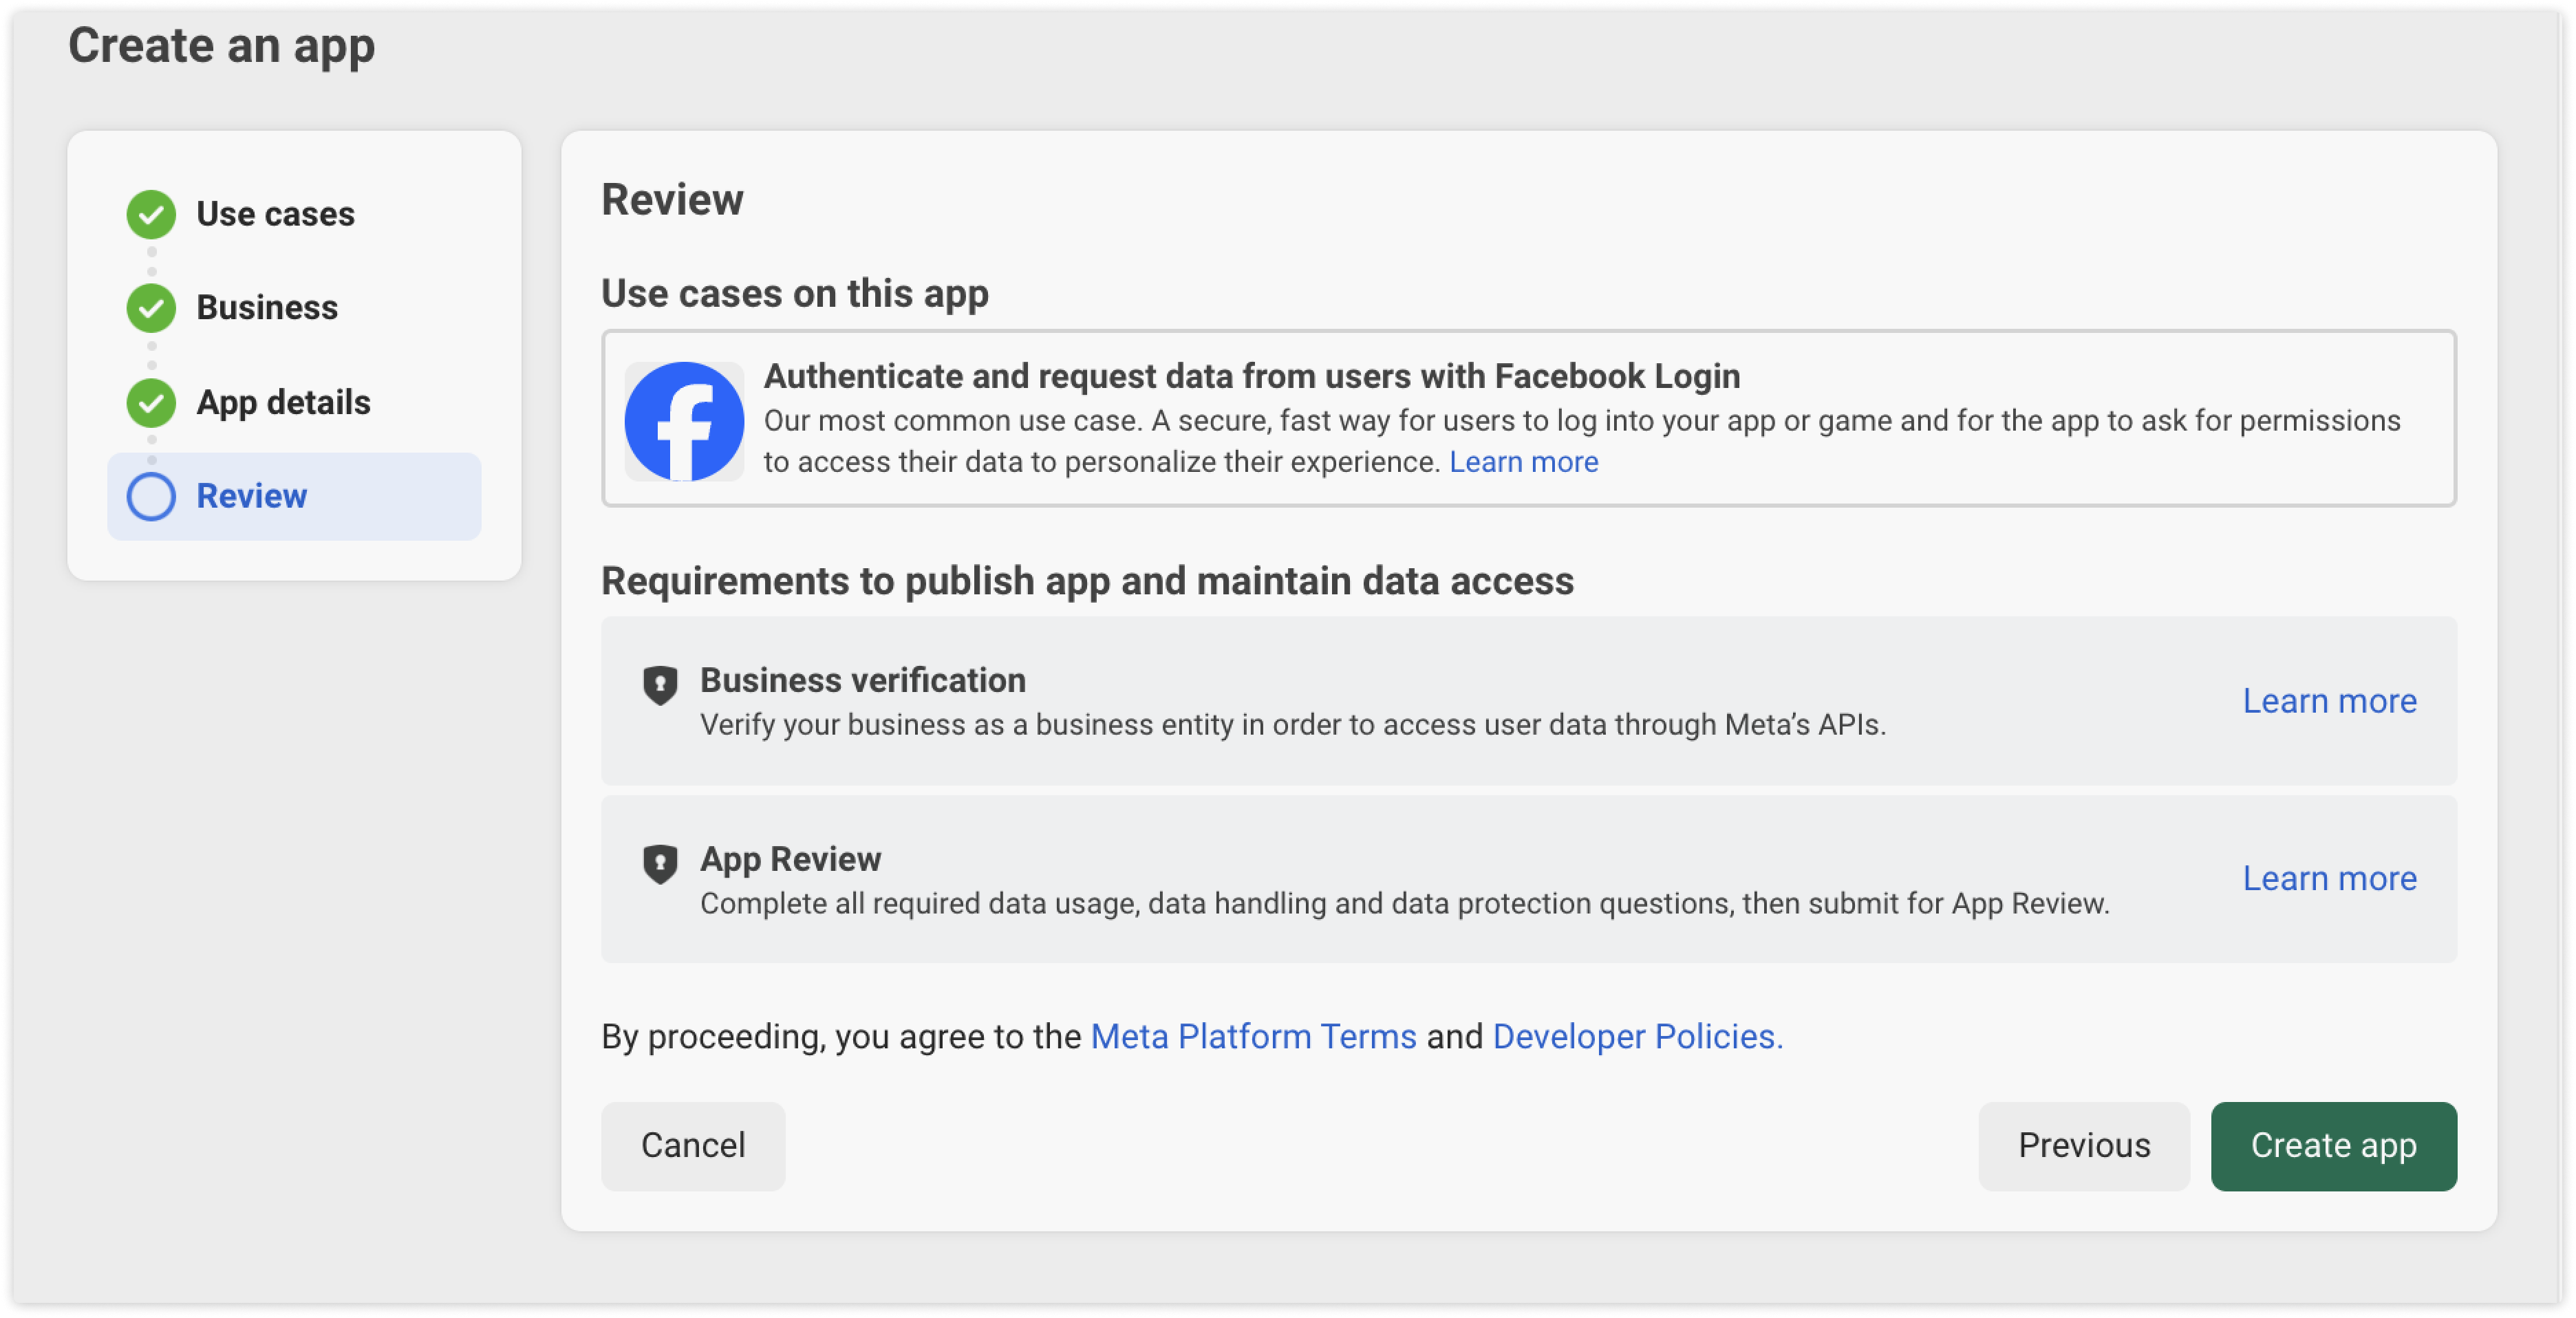
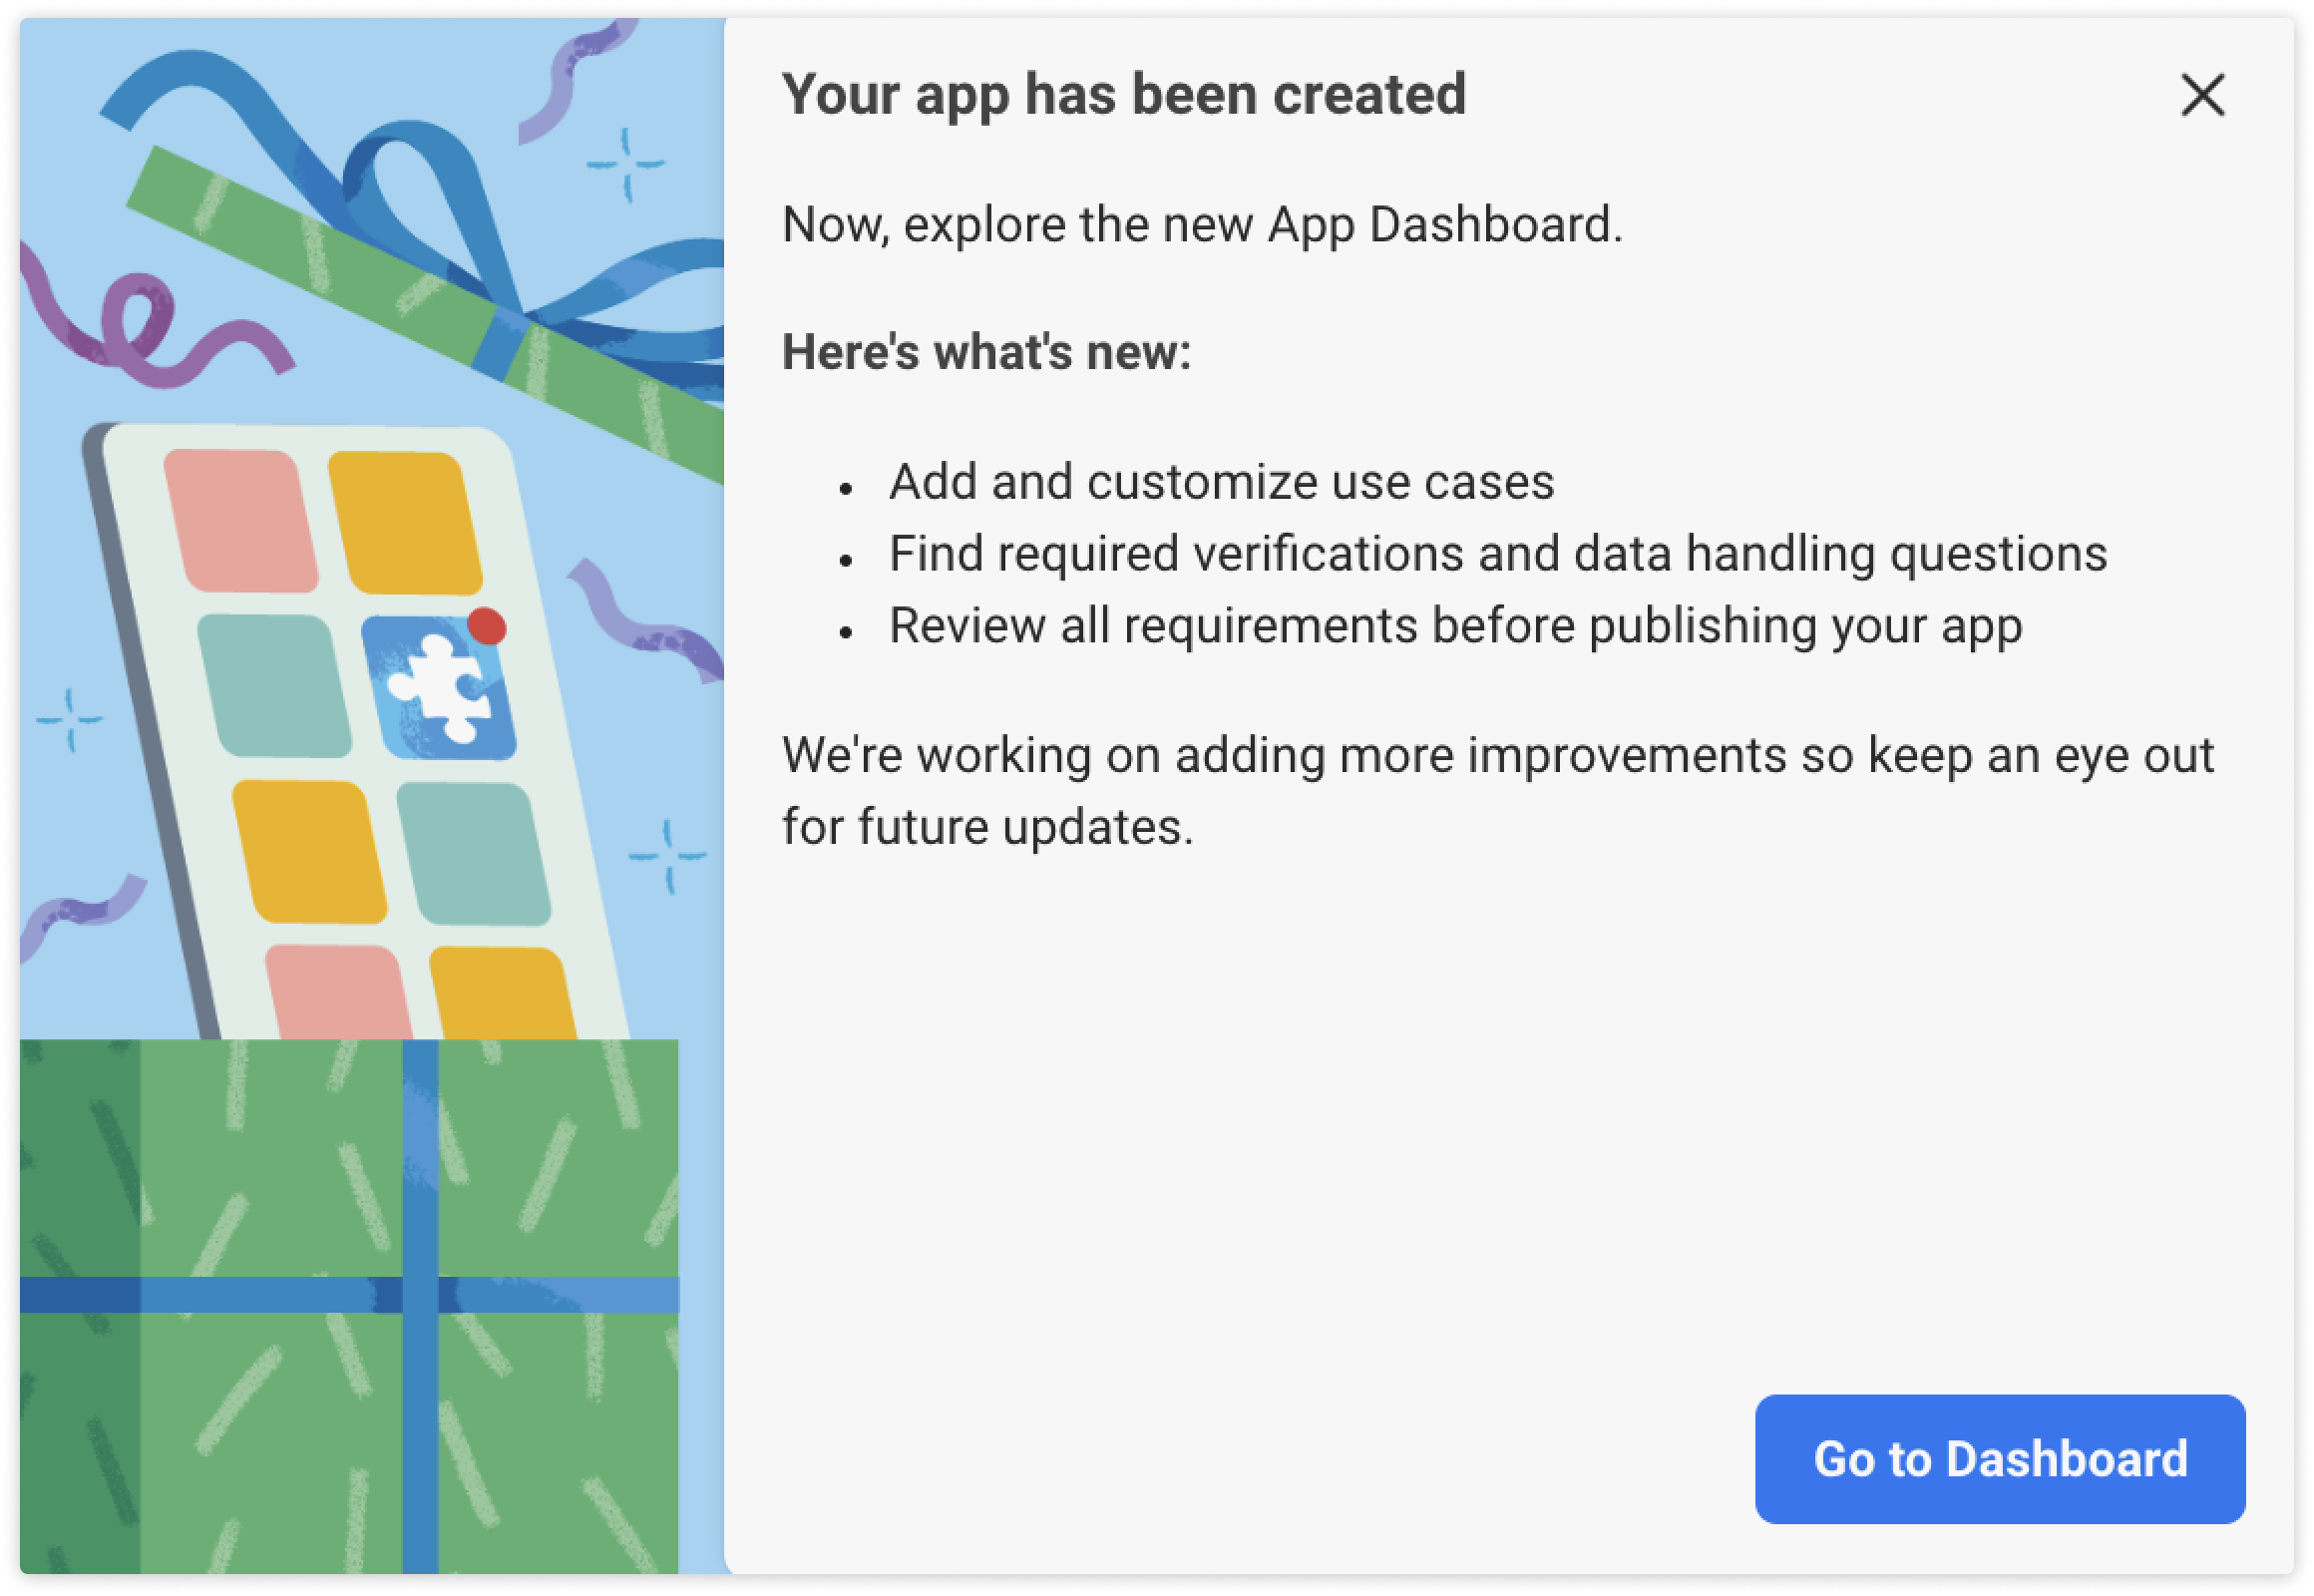
- Click Go to Dashboard on the pop-up.
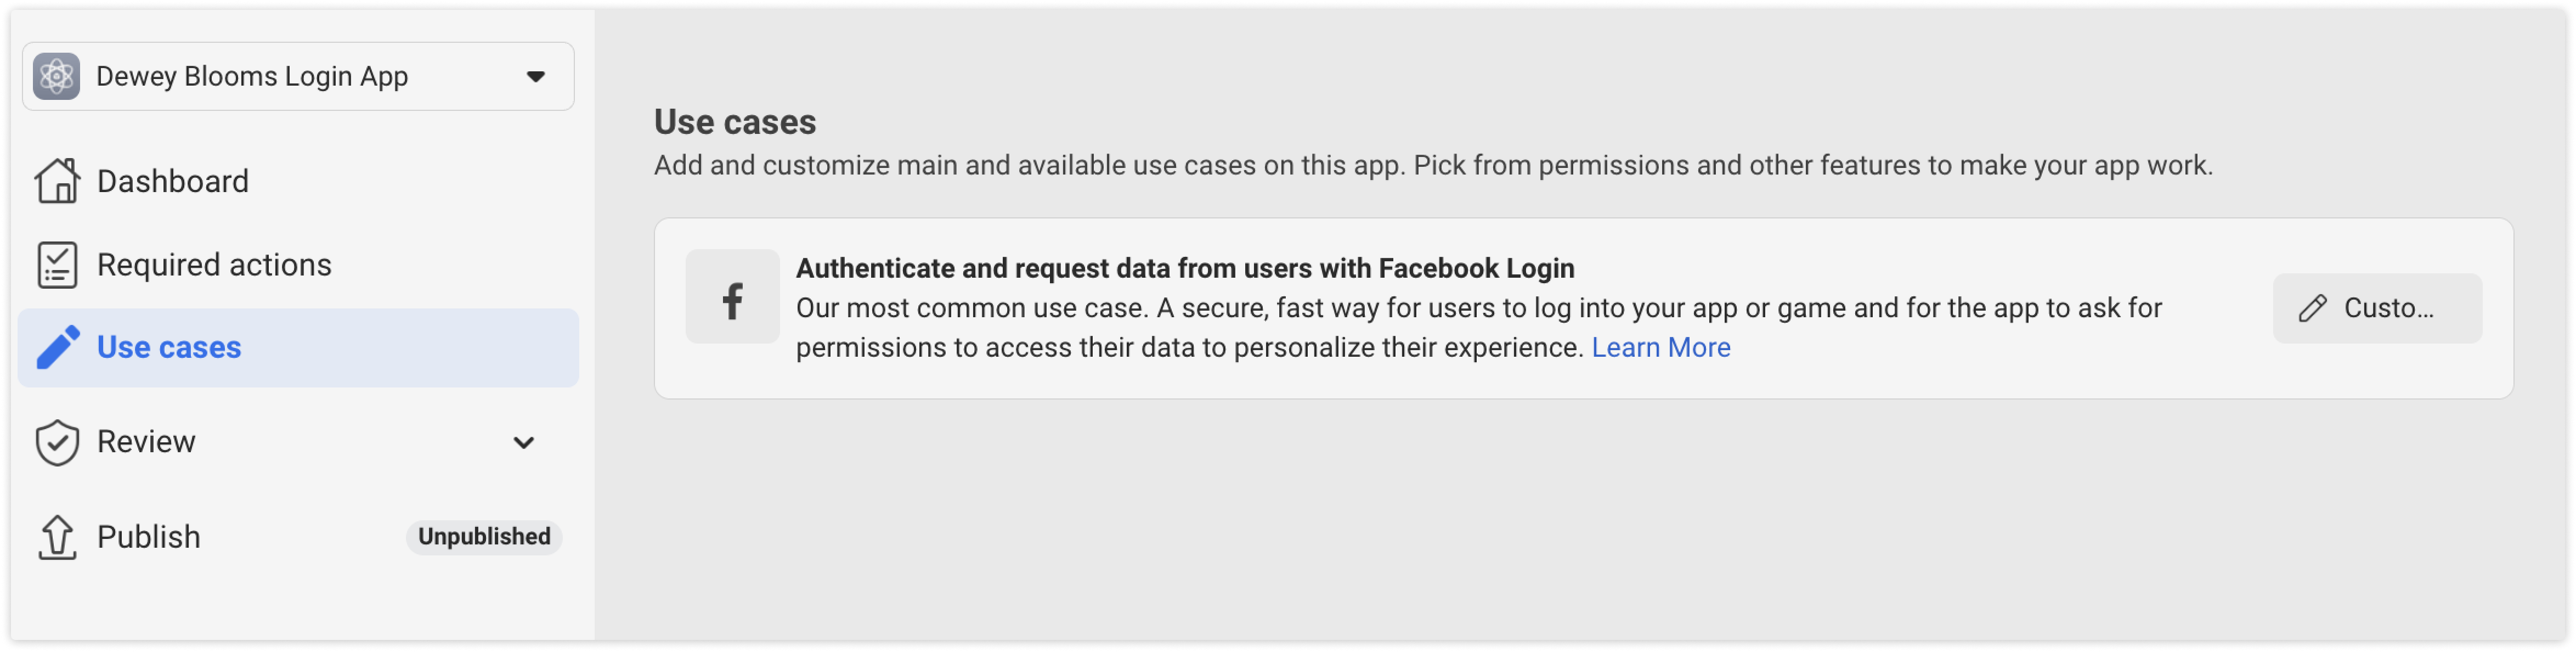
- Click Use cases on the left navigation.
- Click Customize on the “Authenticate and request data from users with Facebook Login” settings.
- Click Quickstart on the left navigation.
- Click WWW.
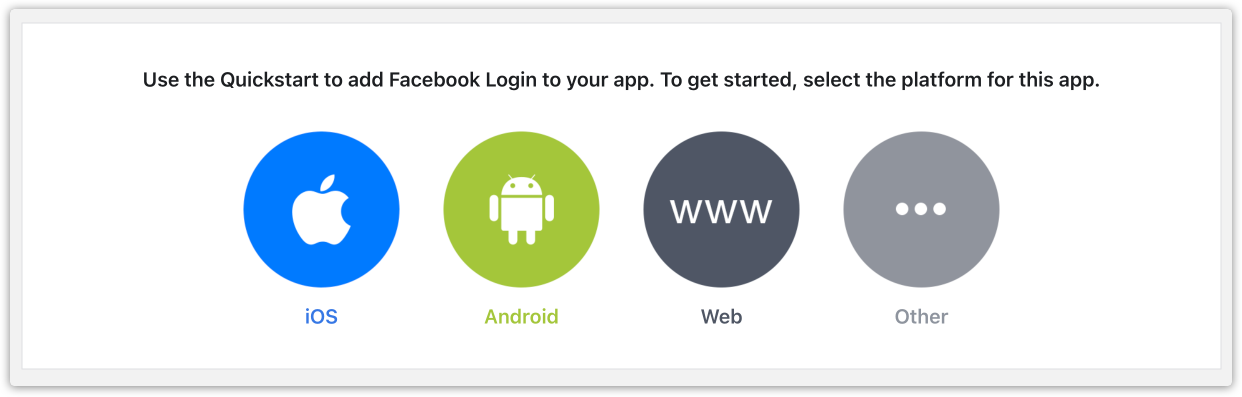
- Add your site’s URL.
- Click Save → Continue.
- You don’t need to do anything in step 2; click Next.
- You don’t need to do anything in step 3; click Next.
- You don’t need to do anything in step 4; click Next.
- Click App Settings → Basic on the menu on the left.
- Copy and save your App ID and App Secret to use in Ontraport later.
- Customize your app settings:
- Privacy Policy URL: Add the URL of the page that contains your privacy policy.
- Terms of Service URL: Add the URL of the page that contains your terms of service.
- User data deletion: Add the URL of the page that contains your user data deletion information.
- App Icon: Add your business logo.
- Category: Select the category that fits your app.
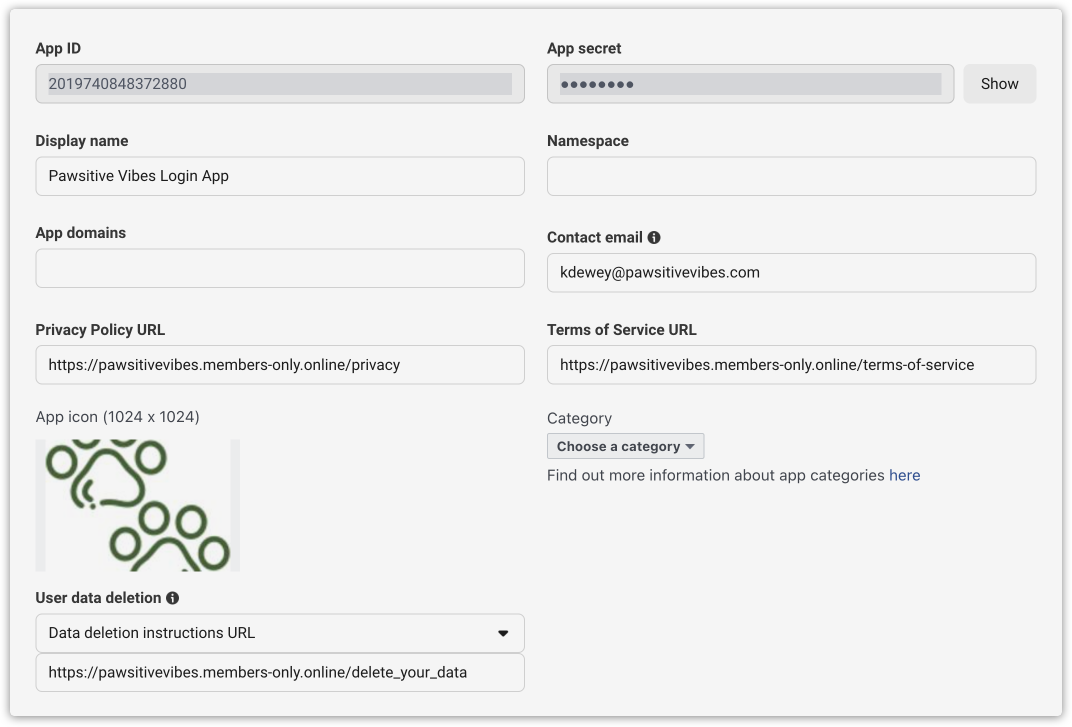
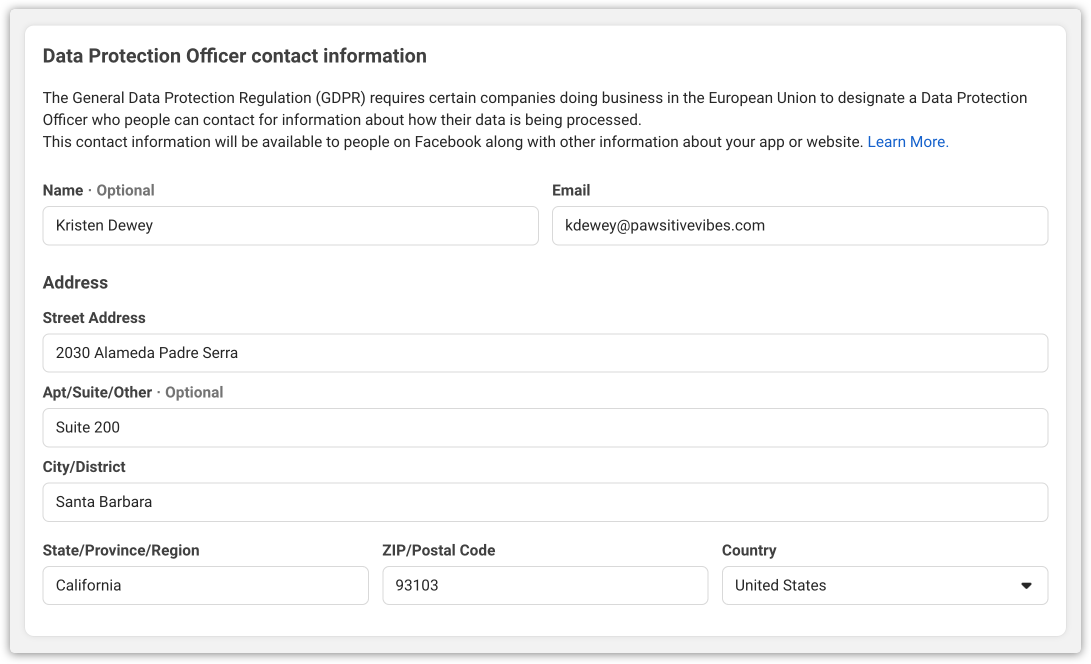
- (Optional) Enter your data protection officer contact information.
- Click Save changes.
- Click Publish on the left navigation.
- Locate your “Authenticate and request data from users with Facebook Login” use case on the app, and click on it to edit its settings.
- Click Settings on the sidebar.
- Customize your Client OAuth settings:
- Valid OAuth Redirect URI: Add your membership site’s domain.
- JavaScript SDK: Toggle to “Yes.”
- Allowed domains for the JavaScript SDK: Enter your membership site’s domain.
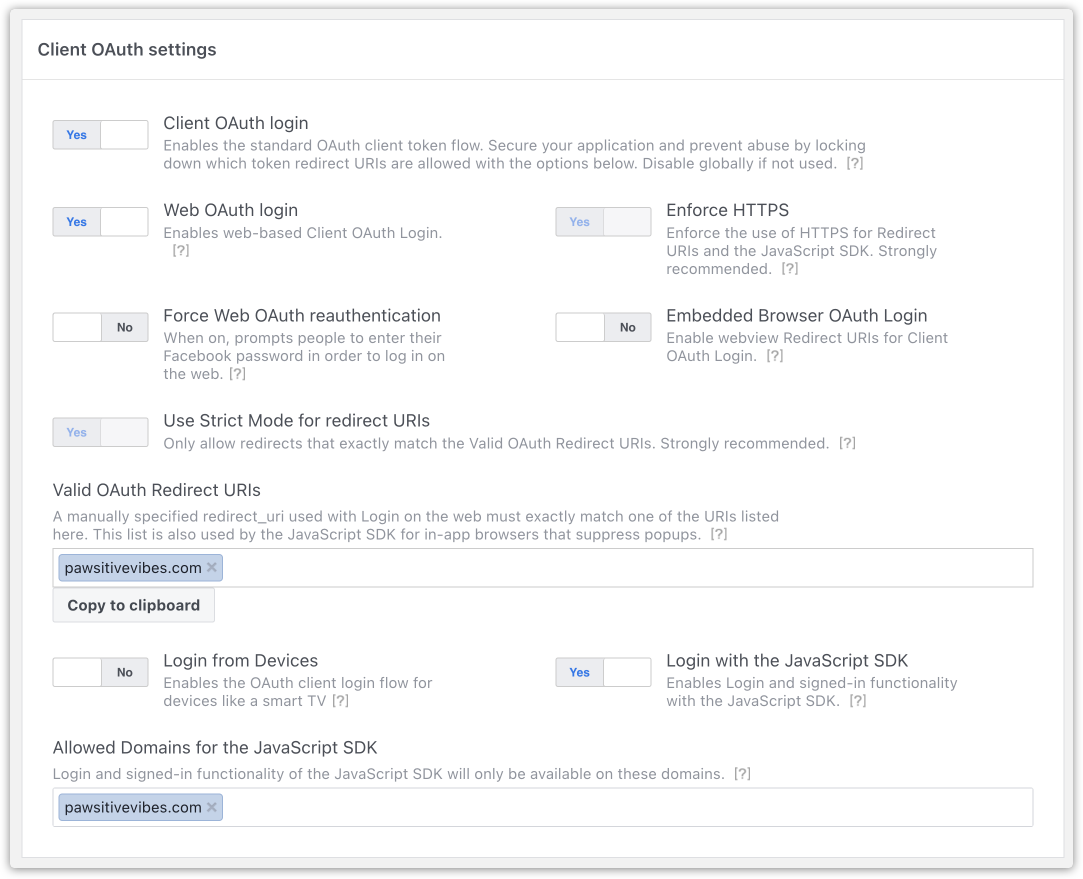
- Click Save changes.
- Click Permissions on the sidebar.
- Click Add next to the email option.

- Once you see the “Ready for testing” status, click Publish on the left navigation.
- Click Go live on the left menu.
- Complete your business verification.
- Business verification may take up to 10 days.
- Click Publish.
Note that if you signed on with a new Facebook account, your Facebook app credentials — App ID and App secret — may take up to 60 minutes to authorize before you can use them in Ontraport.
Configure your Facebook social login app
After you’ve created a Facebook Login app, you can configure your membership site.
- Log in to your Ontraport account.
- Go to your membership site collection, and click on your membership site.
- In the “Social login accounts” section, click Configure.
- Toggle the Facebook option on.
- Add your App ID and App Secret.
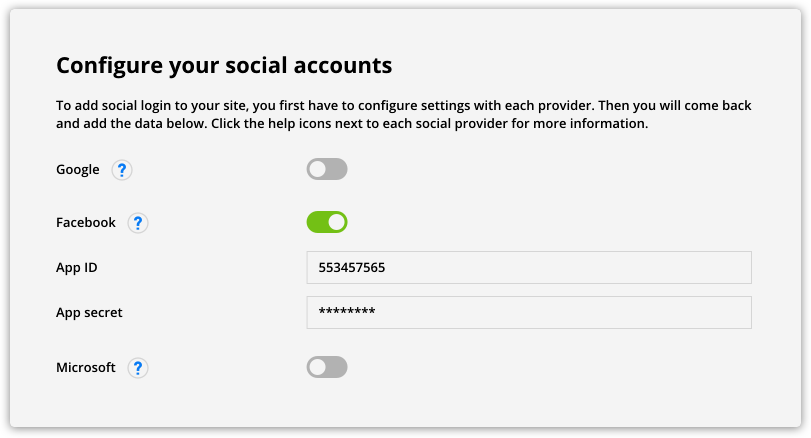
- Click Done to save your social accounts settings.
- Click Save to save changes to your membership site.
Create a Microsoft app
You must create a Microsoft Azure Active Directory app before enabling Microsoft Social Login functionality on your Ontraport Membership Site. Creating an Azure Active Directory app allows you to obtain the credentials and configuration details required for seamless integration.
Learn more about adding sign-in with Microsoft to your site here. If you need assistance troubleshooting your Azure Active Directory app, contact Azure support.
- Log in to your Microsoft Azure portal.
- Or sign up for a new account.
- Click Create a resource on the Azure services section.

- Click Identity on the Categories sidebar.
- Click Create under the Azure Active Directory option.
- Select the Azure Active Directory option and click Next: Configuration.
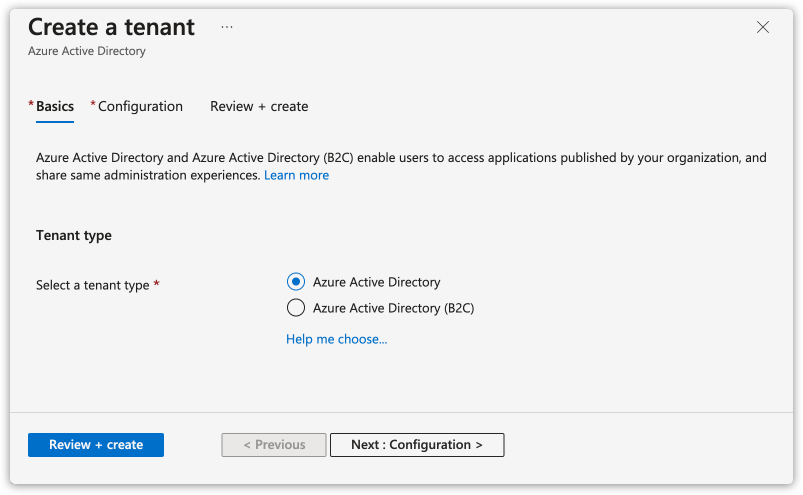
- Configure your new directory:
- Organization name: Add your business name.
- Initial domain name: Add your membership site’s domain name.
- Location: Select your location.
- Click Next: Review + create.
- Review your information and click Create.
- Complete Microsoft’s reCAPTCHA, and click Submit.
- It will take a few moments to create your new tenant. When it is complete, you’ll see a notification with a link to your new tenant. Click the link to continue setup.

- Click App registrations on the left navigation menu.
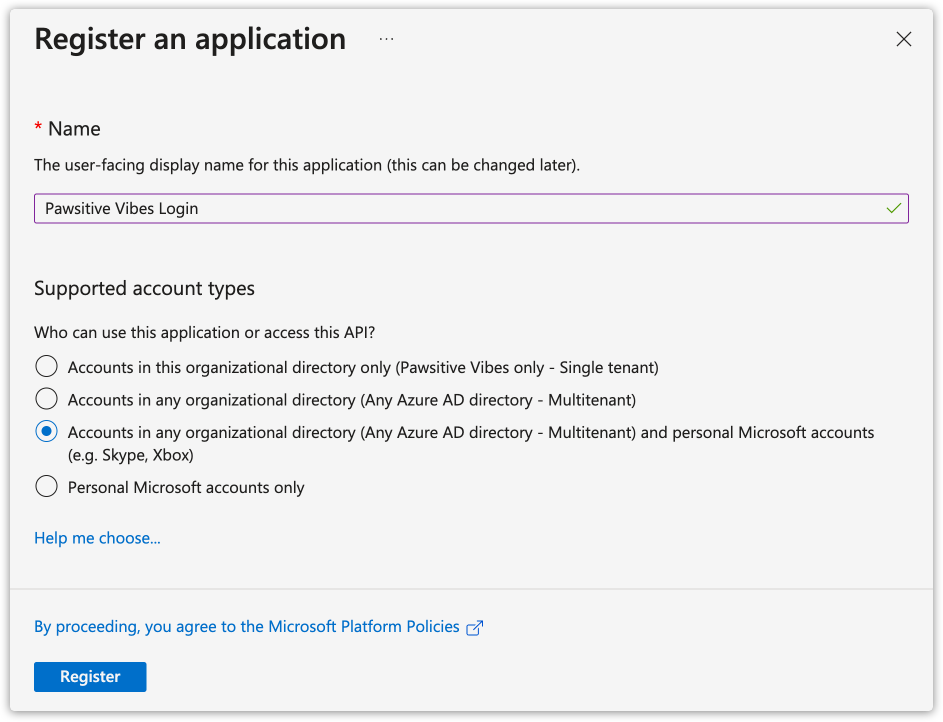
- Click New registration.
- Add your app name in the Name field.
- We recommend you include your business name.
- Select “Accounts in any organizational directory.”
- Click Register .
- Click Authentication on the left navigation menu.
- Under the Platform configurations section click Add a platform.
- Click Single-page application.
- In the Redirect URIs section, add your membership domain.
- In the Front-channel logout URL, add your site’s logout URL.
- Check the “ID tokens” option.
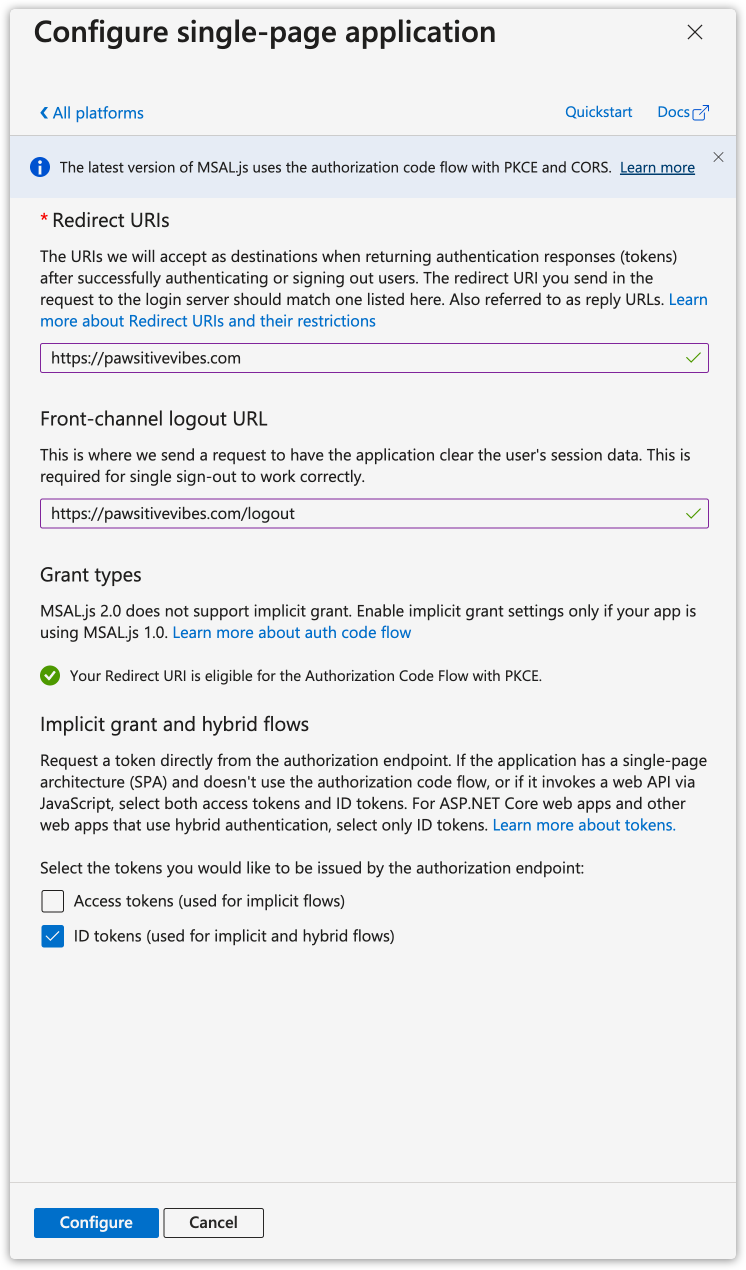
- Click Configure.
- Click Overview and copy your Application (client ID), Object ID, and Directory (tenant) ID to use in the next step in Ontraport.

- Click Branding & properties on the left menu.
- Add your site’s information:
- Upload new logo: Upload your logo.
- Home page URL: Add your membership site’s homepage URL.
- Terms of service URL: Add your site’s terms of service URL.
- Privacy statements URL: Add your site’s privacy policy URL.
- Click Save.
Configure your Microsoft social login app
After you’ve created a Microsoft app, you can configure your membership site.
- Log in to your Ontraport account.
- Go to your membership site collection, and click on your membership site.
- In the Social accounts section, click .
- Toggle the Microsoft option on.
- Add your application ID, Object ID and Tenant ID.
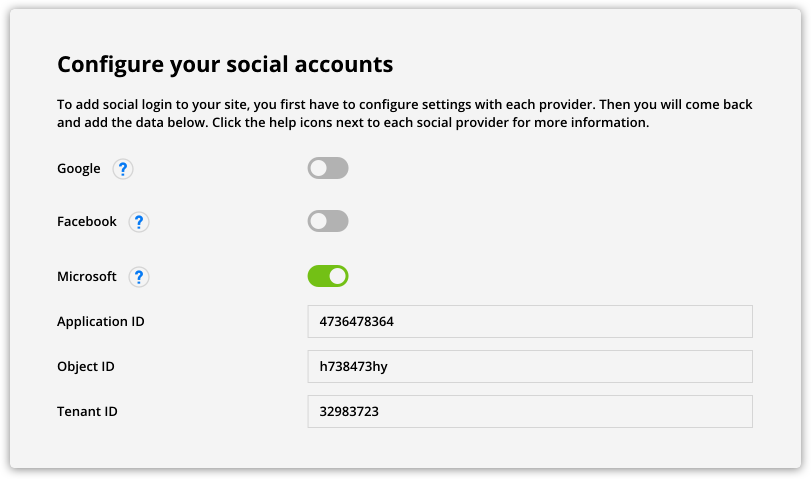
- Click Done to save your social accounts settings.
- Click Save to save changes to your membership site.
Set up open registration
You can allow your visitors to sign up on your login page so they can access your content right away. This is a great way to get more members on your site and upsell your paid content later.
- Log in to your Ontraport account.
- Go to your sites collection, and click on a site with membership enabled.
- Toggle the Open registration option on.
- Select the default status for members who sign up though open registration.
- For security purposes, we recommend using the status “suspended.” You can then create automation that updates the status of your new members.
- Click Save to save changes to your membership site.
Use the open registration trigger on automations
You can trigger automation when a new member signs up to access your site through open registration. This trigger is helpful if you want to welcome or email those new members about your other content.
- Create a new automation map or edit an existing one.
- Add a new trigger and search for “Membership is created by open registration.”
- Select your membership site from the dropdown.
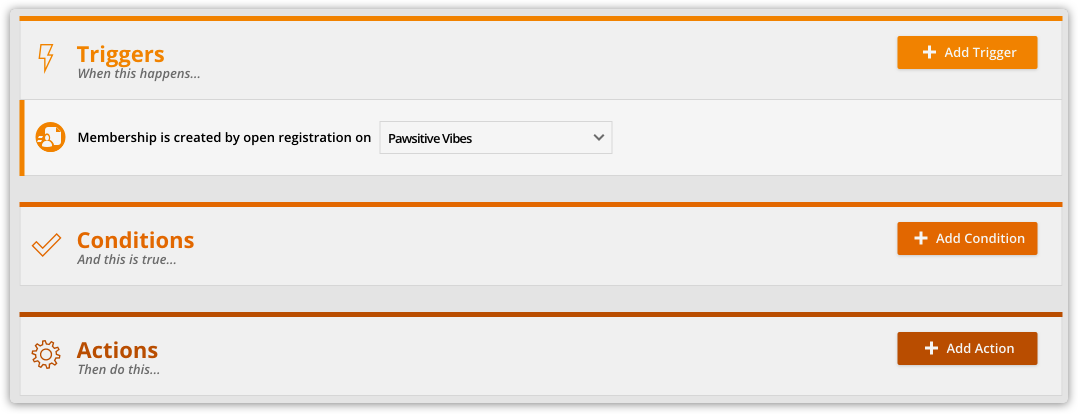
- Save your settings, complete your automation and publish your map.