Dynamic blocks are a lot like dynamic pages — they let you personalize your pages with dynamic content. The difference between the two is how your data will show up on your page. Dynamic blocks allow you to list data from several records on one page.
For example, you may want to show your clients all the notes about their pet on their “Pet info” page, and a user-friendly design would be to list all those notes on a single page. You can build it like that using dynamic blocks!
Before we jump into the details, here are some examples of lists you can create with dynamic blocks:
- Related blog posts
- Author page with all their posts
- Course overview pages to preview lessons
- Available courses
- Upcoming events
- And much more!
Increase engagement on your site by adding reaction buttons to dynamic blocks, allowing members to interact with your dynamic content.
Add a dynamic content package to your account to use this feature. Here’s how:
- Click here to go to your Account Details page.
- Click Add plan or Start trial next to “Add Dynamic CMS to your account” and choose the plan that fits your needs.
Table of contents
Convert to dynamic blocks
Make your content dynamic
• Add dynamic links
Preview settings
Customize dynamic block settings
Record settings
Customize display settings
Edit your pagination block
Design tips
Use cases
Convert blocks to dynamic blocks
You can convert any block on Ontraport Pages or dynamic templates to a dynamic block. When you convert your block, you’ll get access to new settings and a related pagination block. These features allow you to customize the way your dynamic block will display information.
Here’s how to determine where a dynamic block would be most appropriate — on your Ontraport Page or dynamic template:
- If you only need one of this type of page, add your block to an Ontraport Page. An example of this would be an “available courses” page, where your visitors will always reference back to that same page.
- It’s faster and easier to build one Ontraport Page. It makes more sense to add your content directly onto your page and skip the extra steps of customizing your template.
- If you are going to repeat this type of page, such as a blog article, add your block to a dynamic template.
- When you need more than one page, the extra time it takes to set up your templates pays off right away. Once you’ve set up one template, publishing new pages that use that template is a snap.
When you convert your blocks to dynamic blocks, you’ll choose which records you want to pull the data from. For example, if you select your “Blog” object as a data source, you can display the titles of any posts that you’ve added to that Blog. A visitor to your page will then see a list of related blog articles in that block. If you select “Courses,” you can create a list with the names of available courses.
Your data sources are based on the objects that are enabled in your account and the relationships you’ve set up.
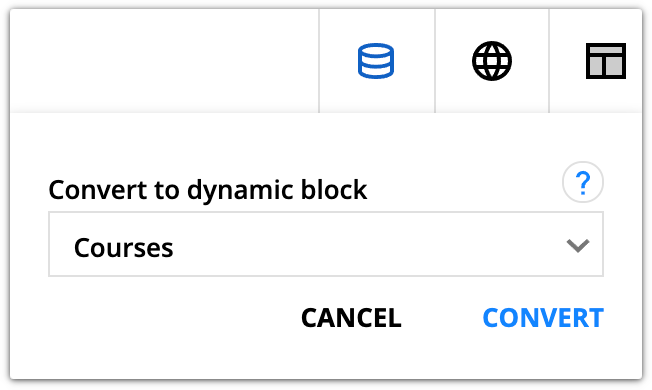
- Select the block you want to convert and click
/ontraport_pages-element_setting_wheel.png) to edit it.
to edit it. - Click
 to convert your block.
 - Select your data source.
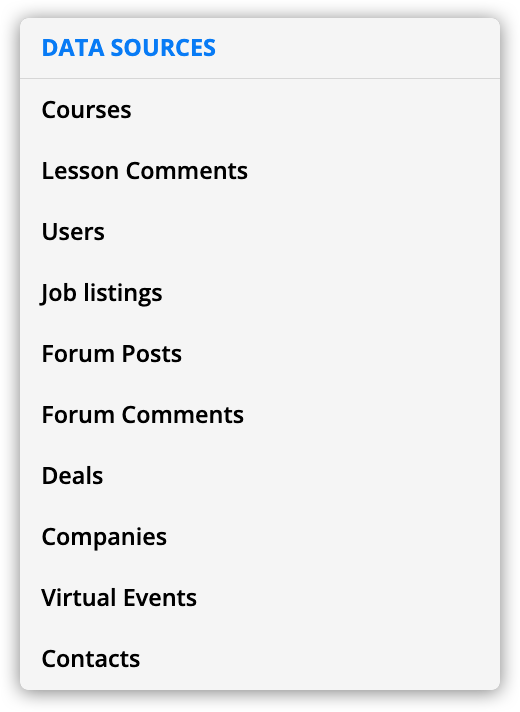
- Data sources – You can select from the objects, users and products in your account.
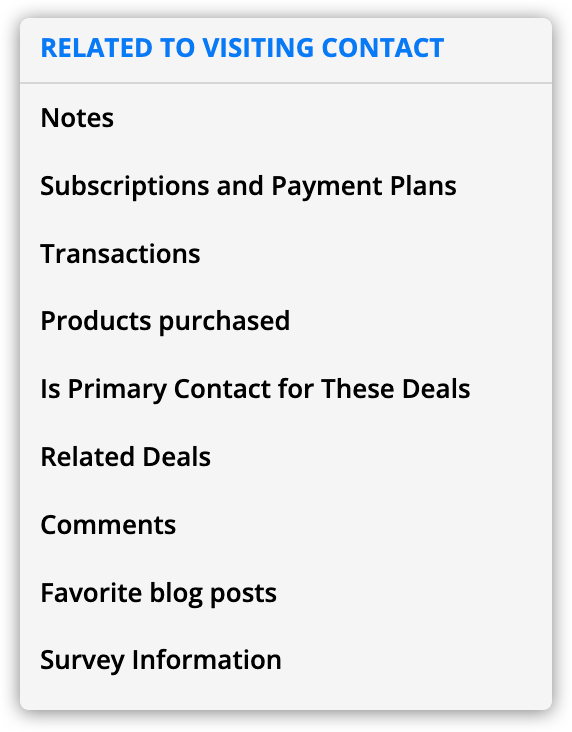
- Related to visiting contact – This allows you to add data about the person visiting your page. You can select from the objects that are children of your Contacts object. This includes files, open orders, transactions and any other related custom object.
- Related to contact record this dynamic page is based on – This option is only available when you convert a dynamic block on a dynamic template that uses your “Contacts” object as a data source. It allows you to display lists of information related to a specific contact. For example, if your contact is the primary contact for several deals, you can show all their deals on one page.

- Click Convert.
Make your content dynamic
When you make the elements in your block dynamic, you choose which fields you want to add. The options that you see depend on two things:
- Which object did you select as your block’s data source?
- If your data source is Contacts, you can add Contact fields; if it’s Deals, you can add Deal fields.
- Is your dynamic block on a dynamic template or is it on an Ontraport Page?
- If your block is on a dynamic template, you have the option to add dynamic page fields. This allows you to add fields to your block from the same object as your template.
- This is an easy way to mix and match the source of the content in your block.
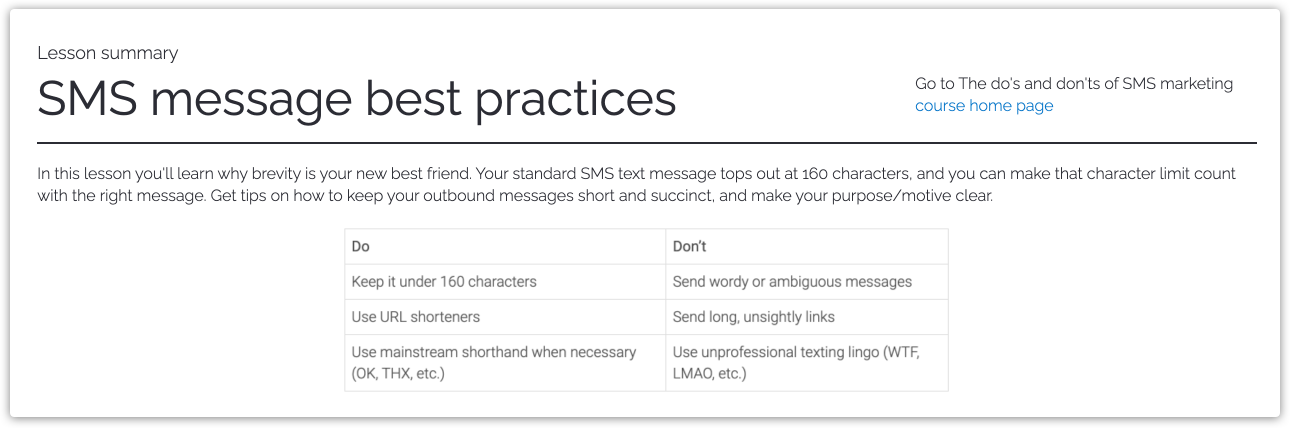
- For example, you can use dynamic blocks to display a summary of every lesson in your course. And you can give your visitors a link to your course’s home page at the top of each lesson’s summary.
- If your block is on a dynamic template, you have the option to add dynamic page fields. This allows you to add fields to your block from the same object as your template.
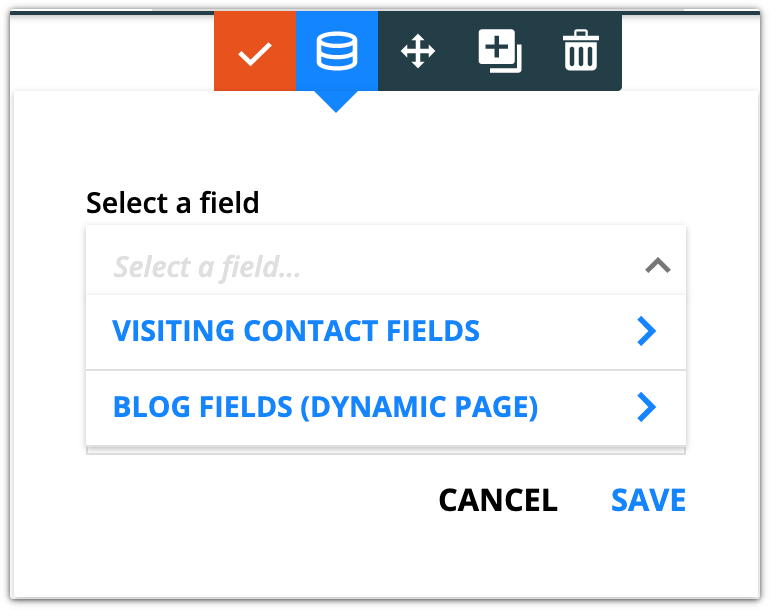
Here’s an example of the options available from a Contacts dynamic block on an Ontraport Page:
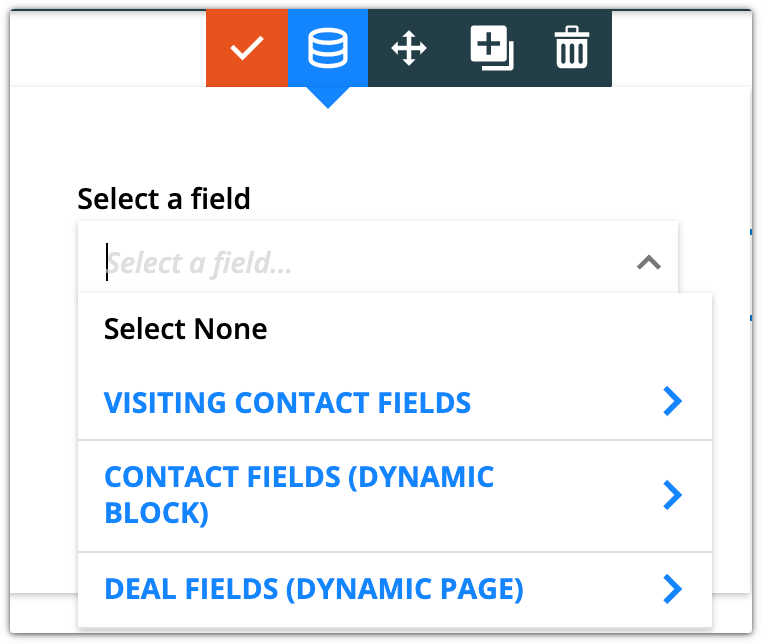
And here’s an example of a Contacts dynamic block on a Deals dynamic page template:
Here’s how to make your content dynamic:
- Set up your block’s layout.
- Add the text or image elements that you want to make dynamic.
- (Optional) Insert dynamic content into static content using merge fields.
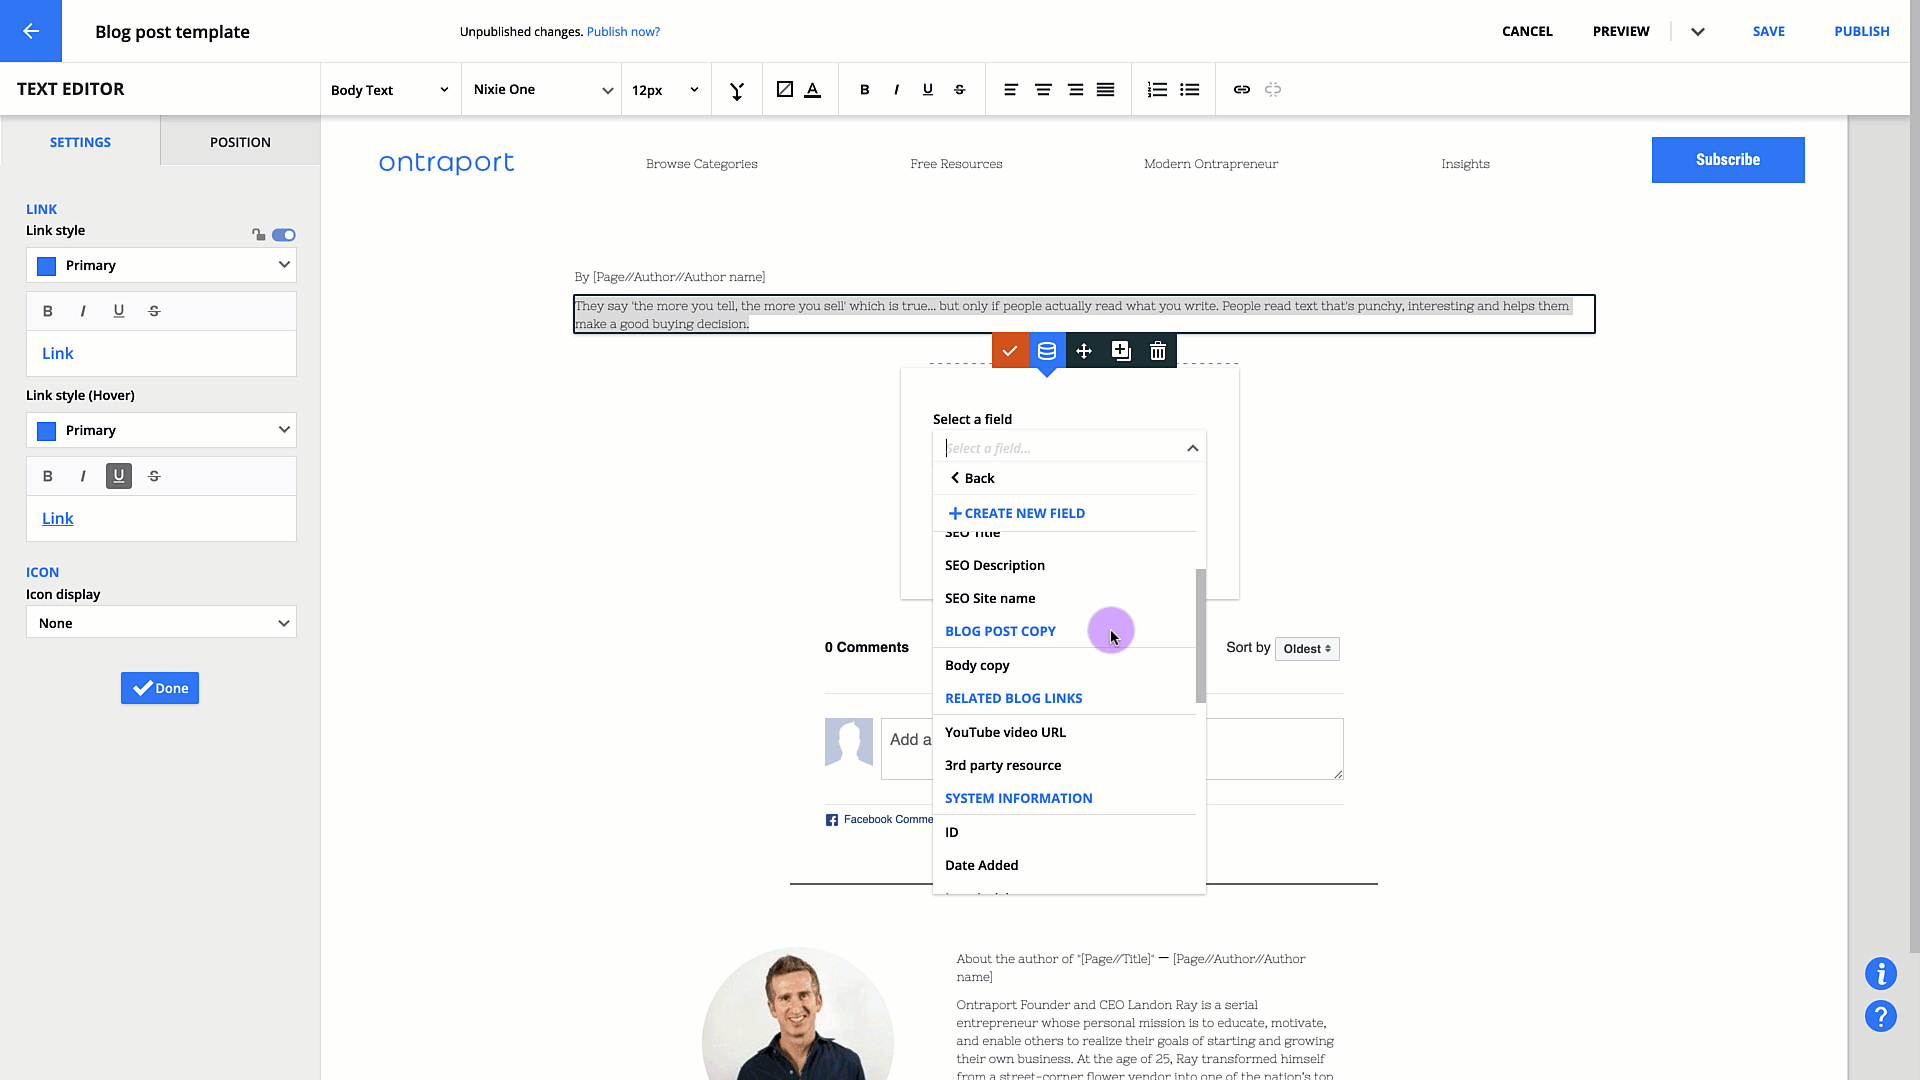
- This option allows you to fill in the blanks on your page with dynamic content. For example, adding “By [Page//Author//Author name]” automatically adds the name of the author to an article’s byline.
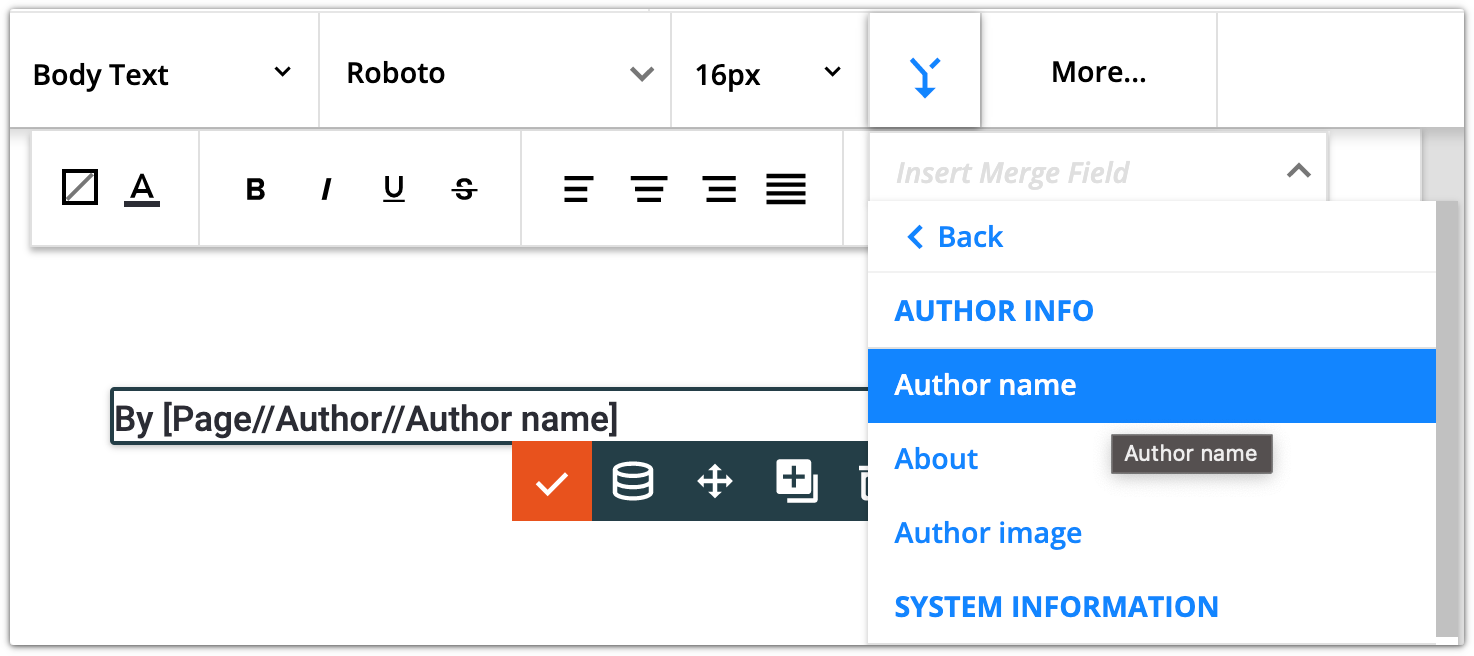
- Click
.png) and select the field you want to insert.
and select the field you want to insert. - Note that when you add dynamic content this way, your merge field won’t automatically transform into a preview. To preview this content, click the preview button.
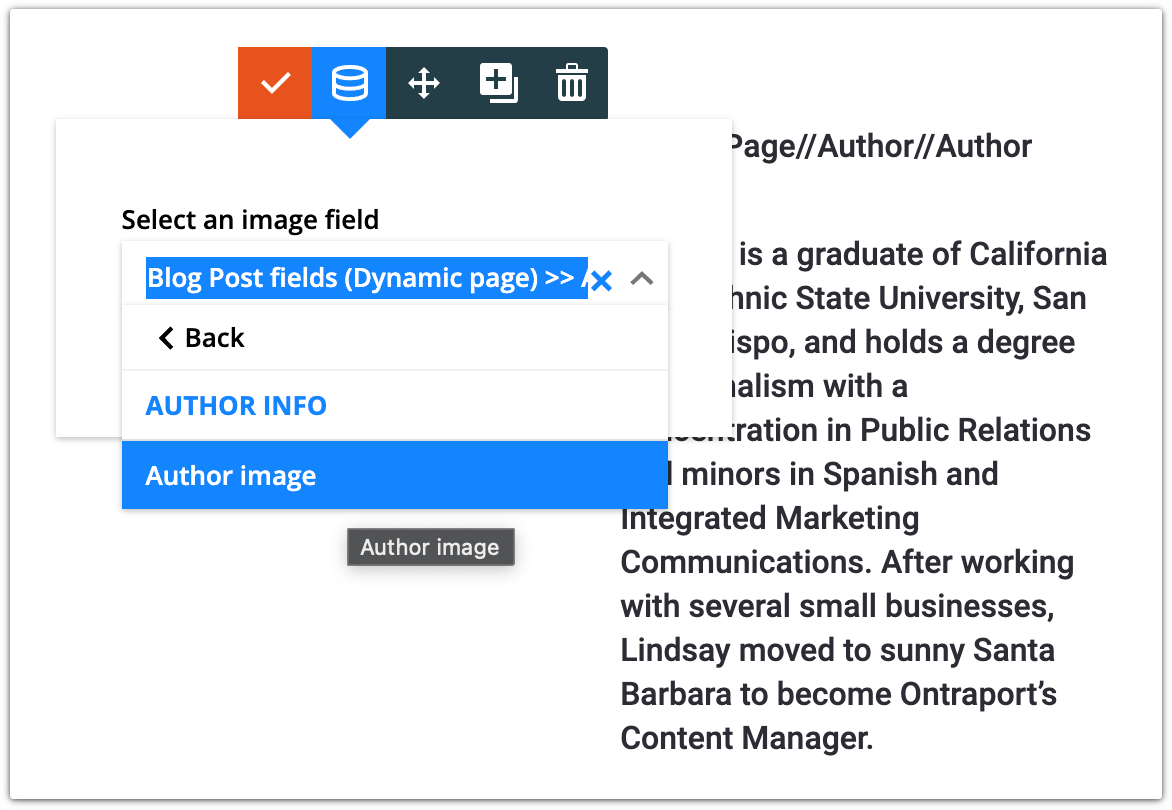
- Hover over the element you want to make dynamic and click
 .
. - Select the field you want to use.
- This will replace your whole element with the content you selected.
- Click Save.
- Your preview will display one record at a time, but you can click the Preview button to generate a preview of all displayed records.
Add dynamic links
You have a couple of special link options on your dynamic blocks. These options make it easy to link to related resources and related dynamic pages and link to your published dynamic pages.
Link to a URL field
Your first dynamic link option allows you to link to a URL field. This option lets you link to the URLs saved in your records. For example, if you have a YouTube playlist for each of your lessons, you can save that URL in each lesson’s record.
- Select the text you want to hyperlink, and click
 on your top toolbar.
- Or add a button element to your page and click its button link settings.
- Click Link to a URL field, and select the field you want to hyperlink.
- Choose if you want to add a link stored in your visiting contact’s record or a field related to your page’s record.
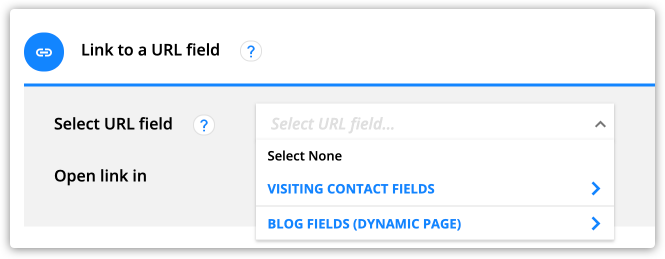
- Select the URL field you want to hyperlink.
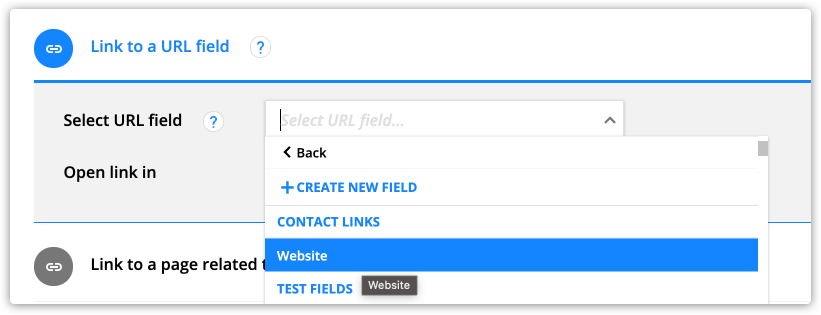
- Here’s an example of linking to URL fields from your “Visiting Contact Fields”:
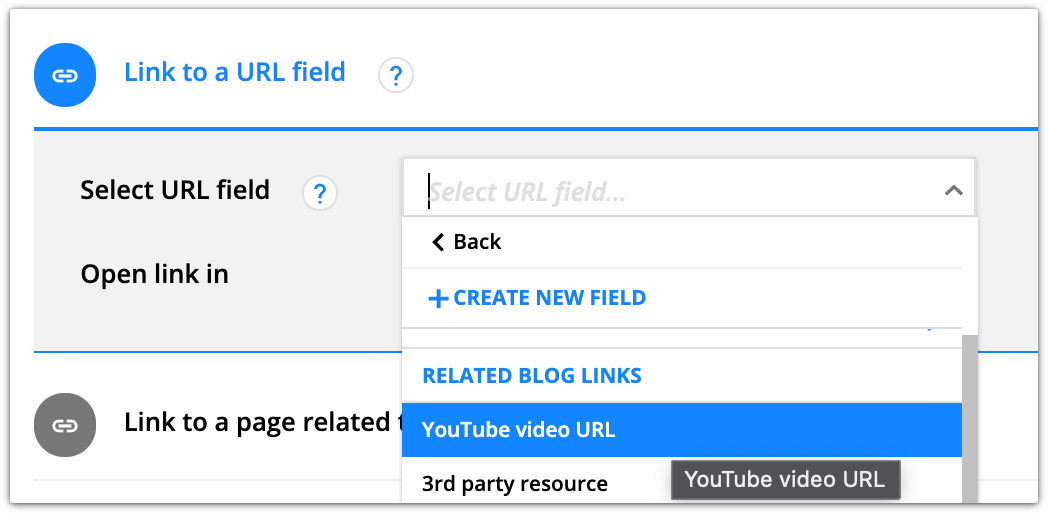
- And here’s an example of linking to URL fields saved in “Blog” records:
- Click Insert Link.
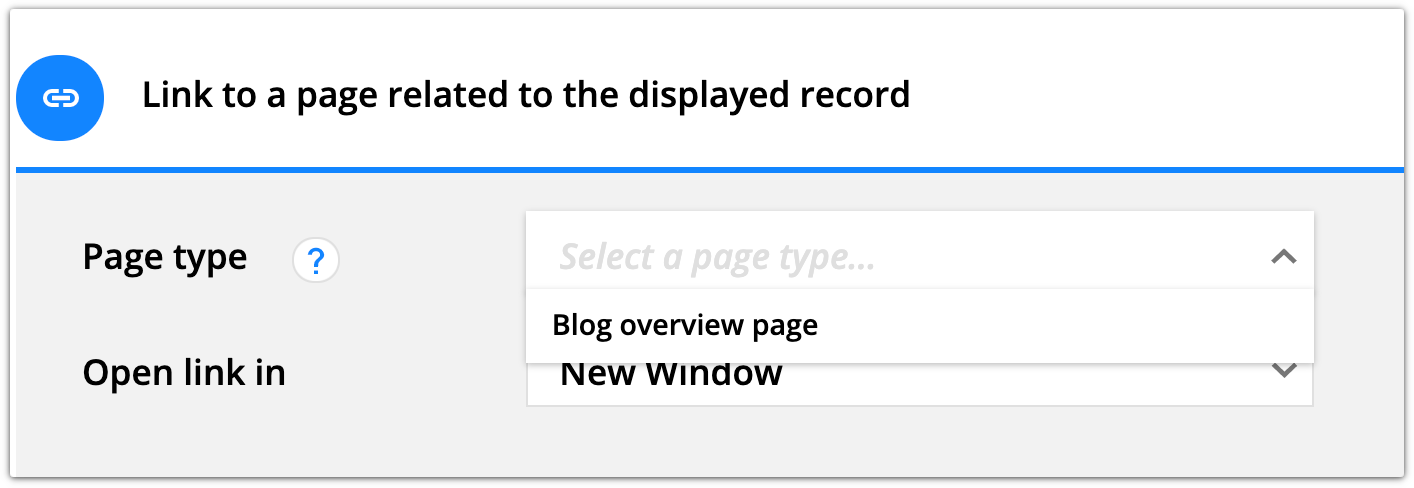
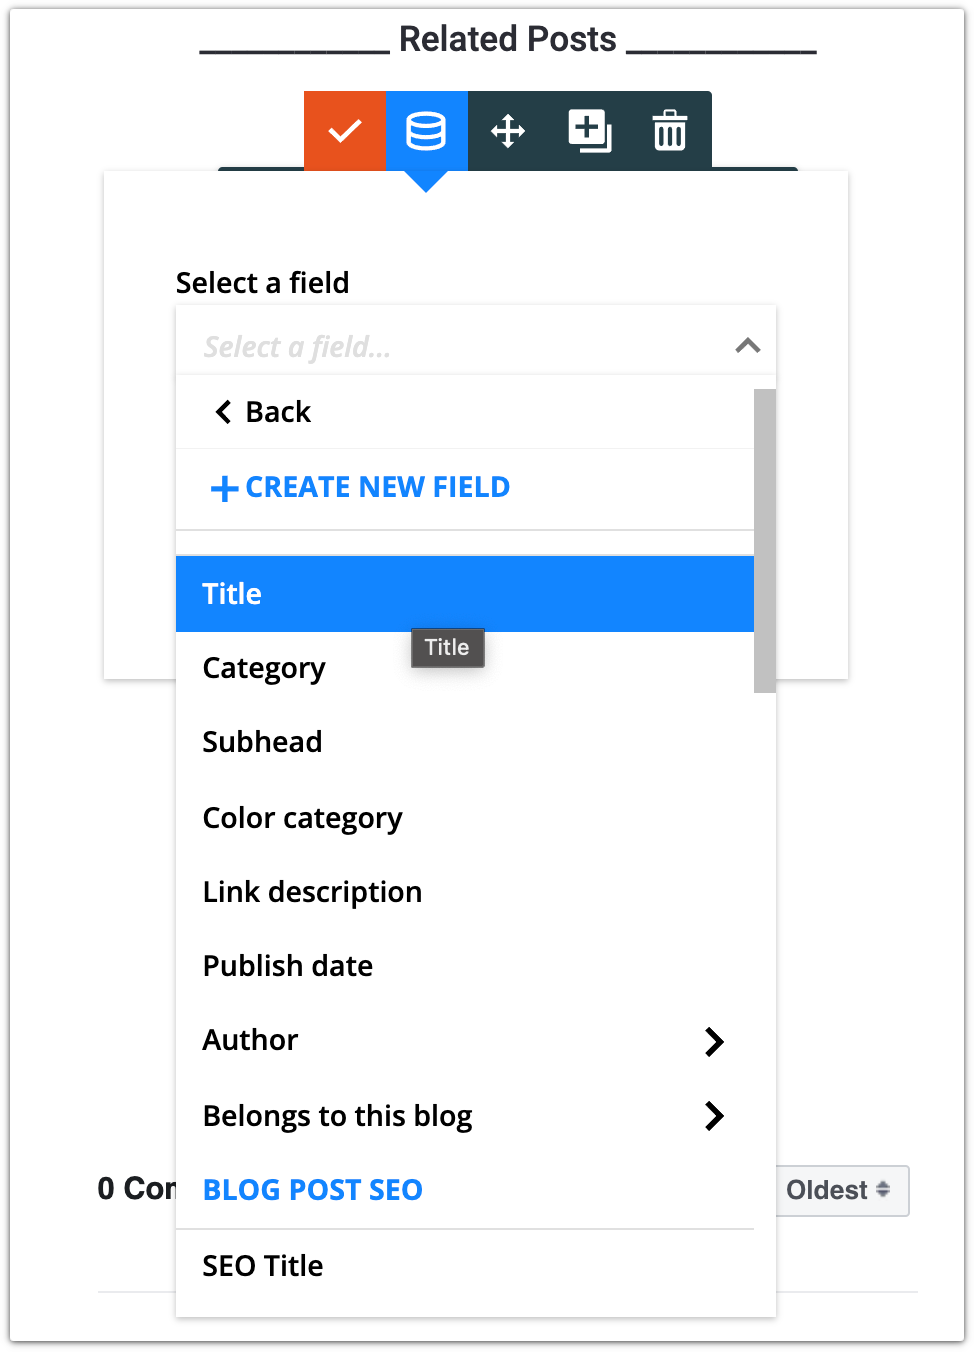
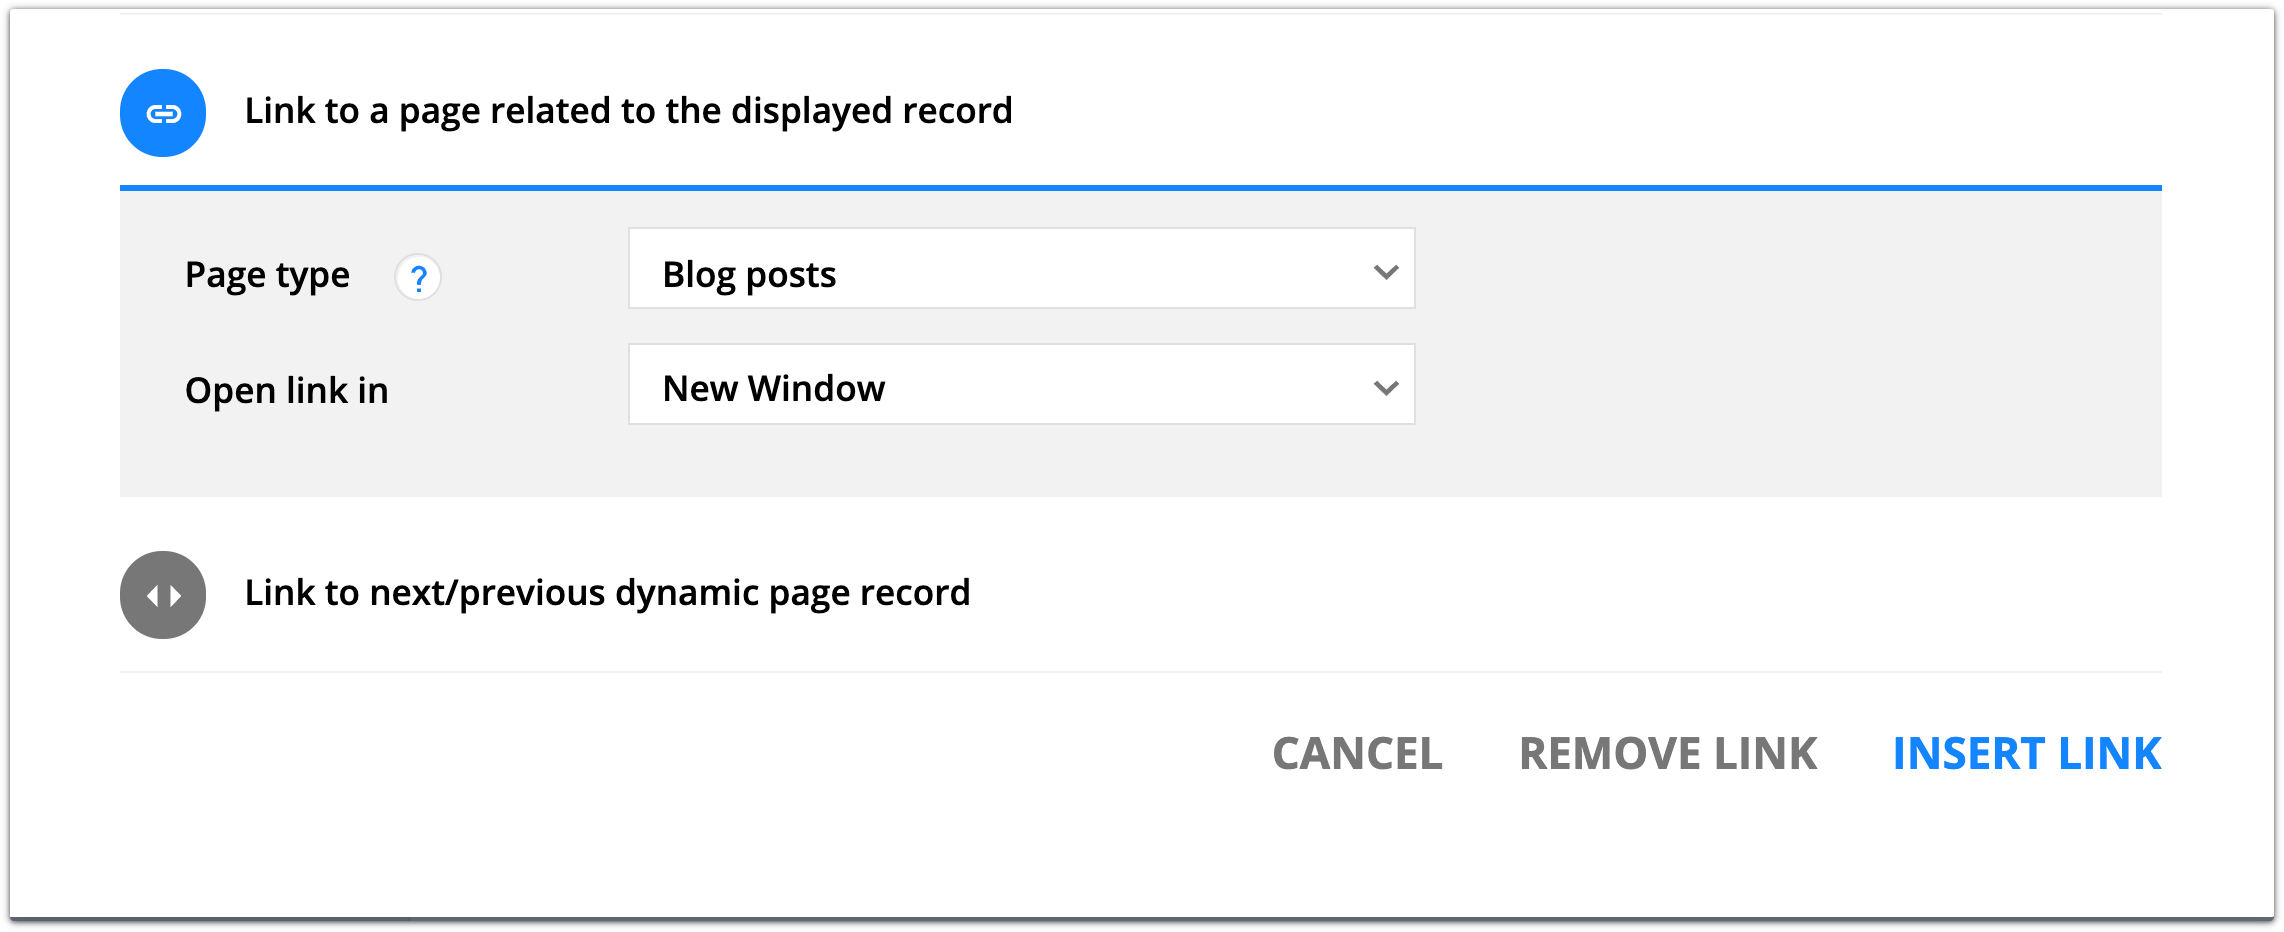
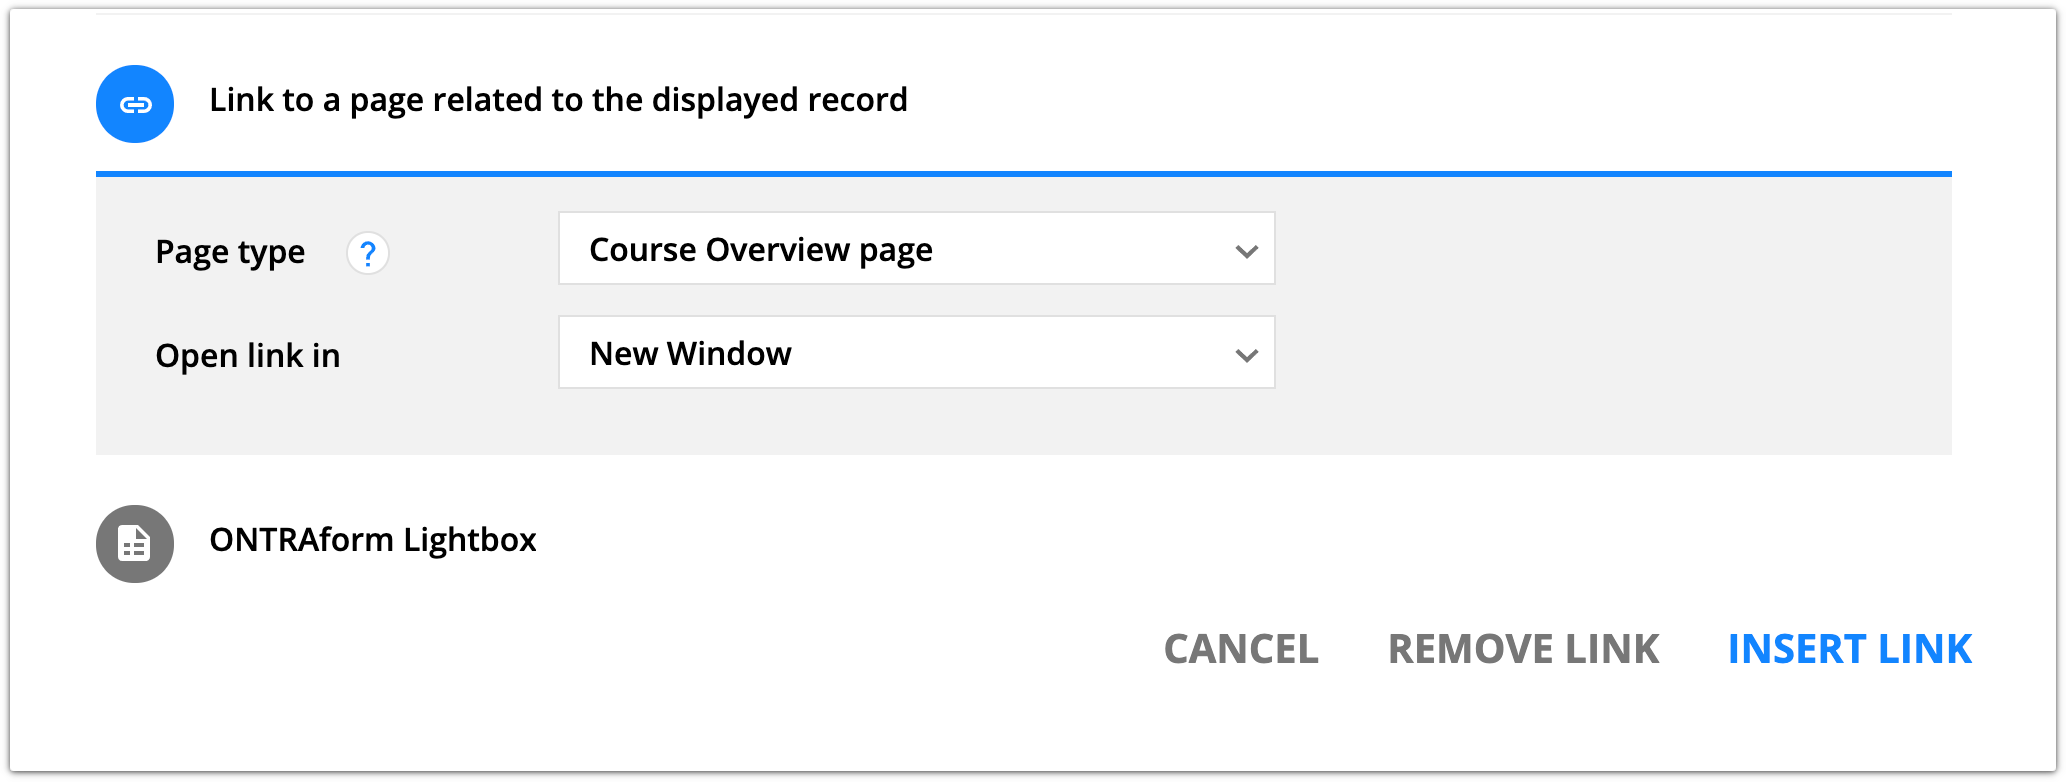
Link to a page related to the displayed record
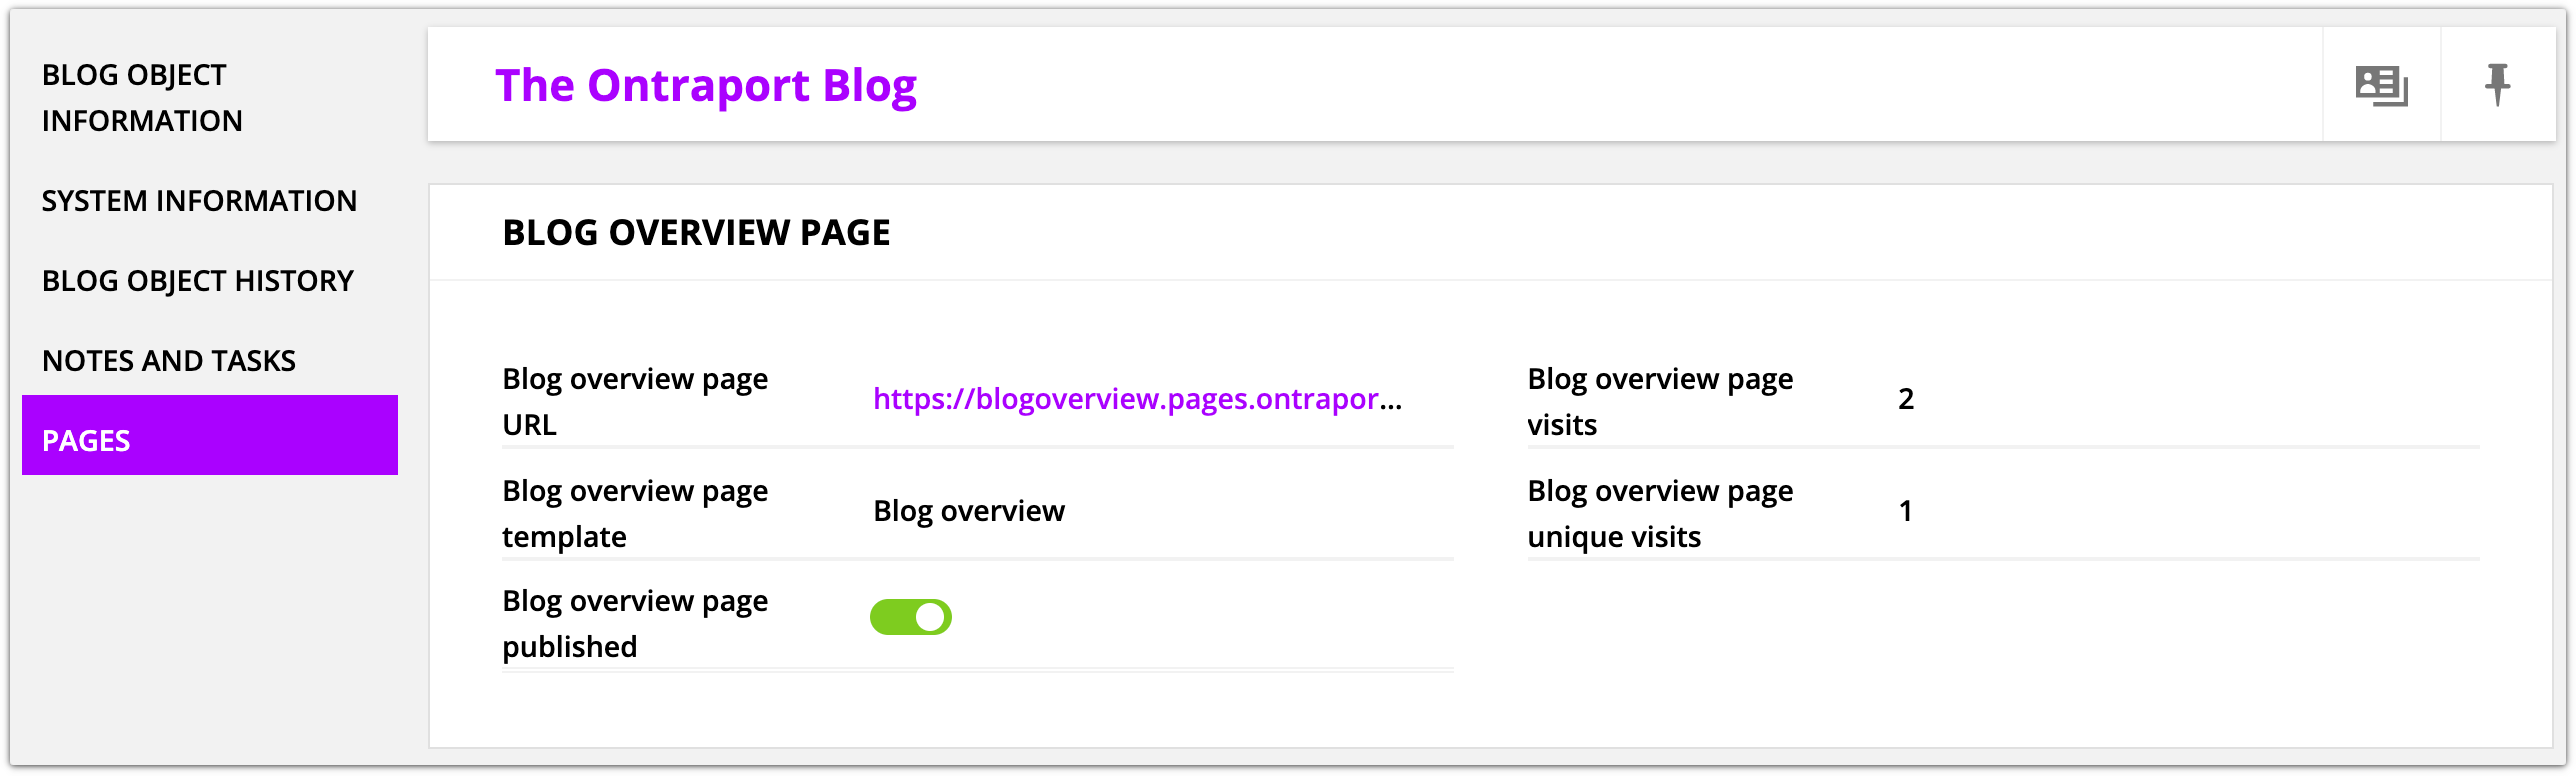
This option lets you link to a related dynamic page. The options you can choose from depend on the page types you’ve published for your object. For example, if you published a “Blog Overview page” page type, you can choose that “Blog overview page” from your link settings.
Here’s a “Blog overview page” page type in a Blog record:
And here’s that same page from the page type dropdown:
Preview settings
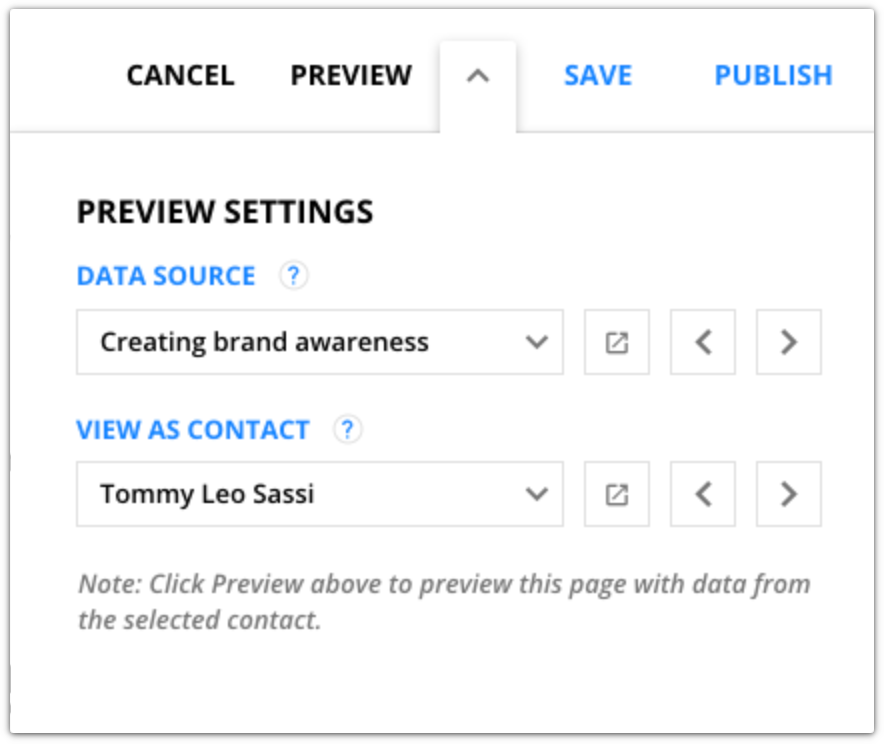
You can choose which record you want to use as a data source for your preview. To be clear, the preview will show you just one record at a time with the dynamic content pulled in. This makes it easy to ensure that you’ve added the right field for your dynamic content.
You can also choose a contact to preview the “visiting contact fields” you’ve added to your template.
Change your data source
- Click the expand arrow next to the preview button to expand your preview settings.
- Click “Data Source” and “View as Contact” dropdown fields and select the records you’d like to use to preview your content.
- Click
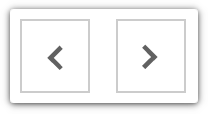 to scroll through your records.
- You’ll see your dynamic content change based on the saved data in your selected preview record.
- Click
 to open your record in another window.
Customize dynamic block settings
After you’ve made your content dynamic, it’s time to customize your dynamic block settings. Your dynamic block settings allow you to customize your list’s design. You can choose how many records you want to display and what order you want them in. This is also where you can choose if you want to include “Next” and “Previous” buttons to your other records.
Here’s how to edit your dynamic block’s settings:
- Hover over your dynamic block and click
 to edit it.
 - Click Dynamic Block Settings.
- Edit your display and record settings to fit your needs.
Display conditions
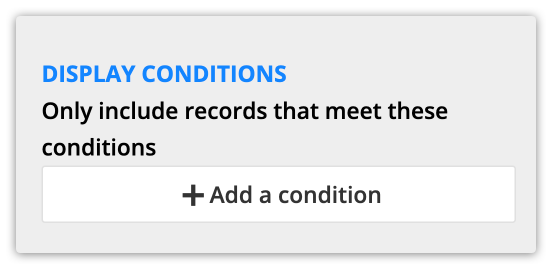
These conditions work a lot like your regular block display settings. The difference is these conditions determine what records you want to display rather than which visitors should see them.
- When you create conditions, the fields you can use depend on the object you chose as your data source.
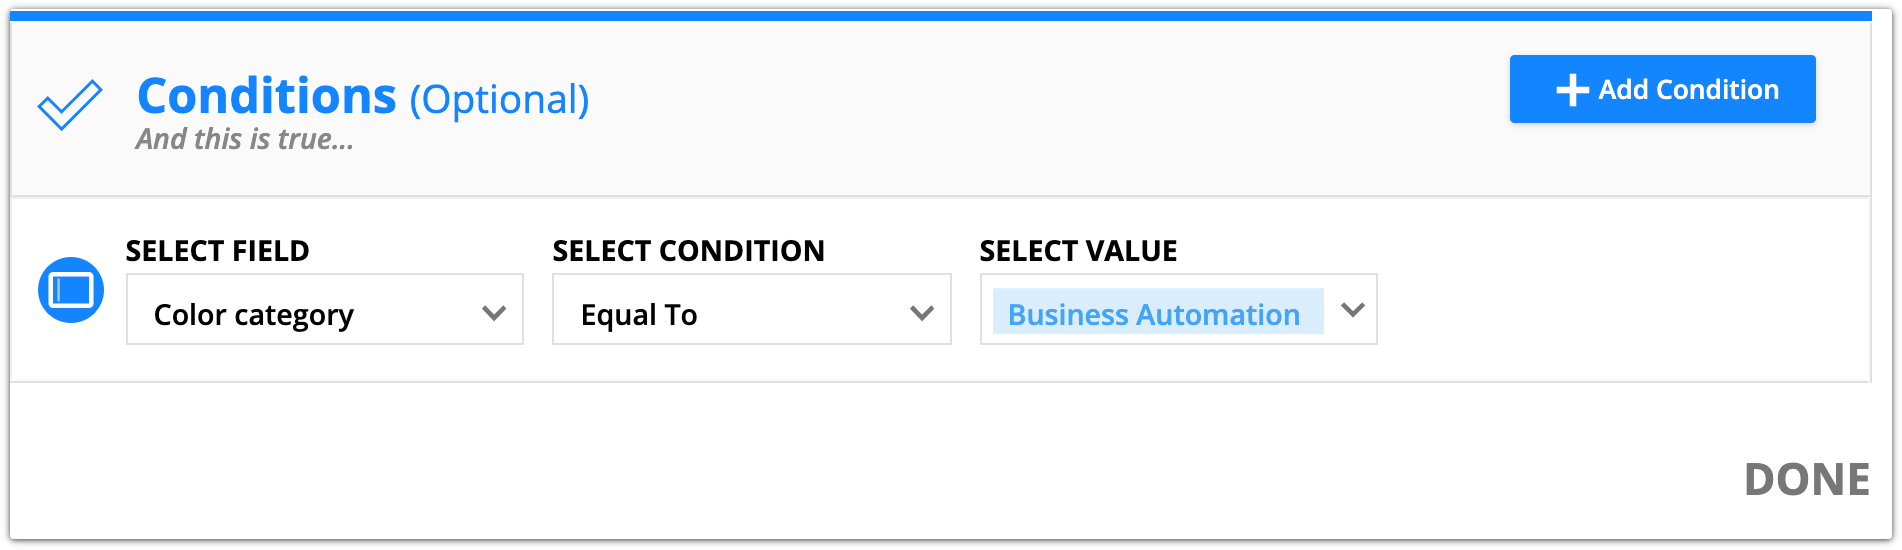
The example above shows a condition you could add to a “related articles” section of a blog. It ensures that the only blogs you show here belong to the “Business Automation” category.
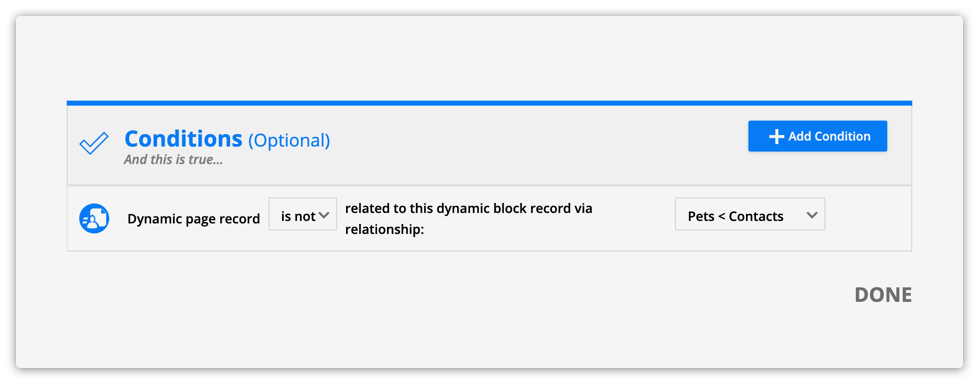
Record is not the same record as the Dynamic Page it appears on
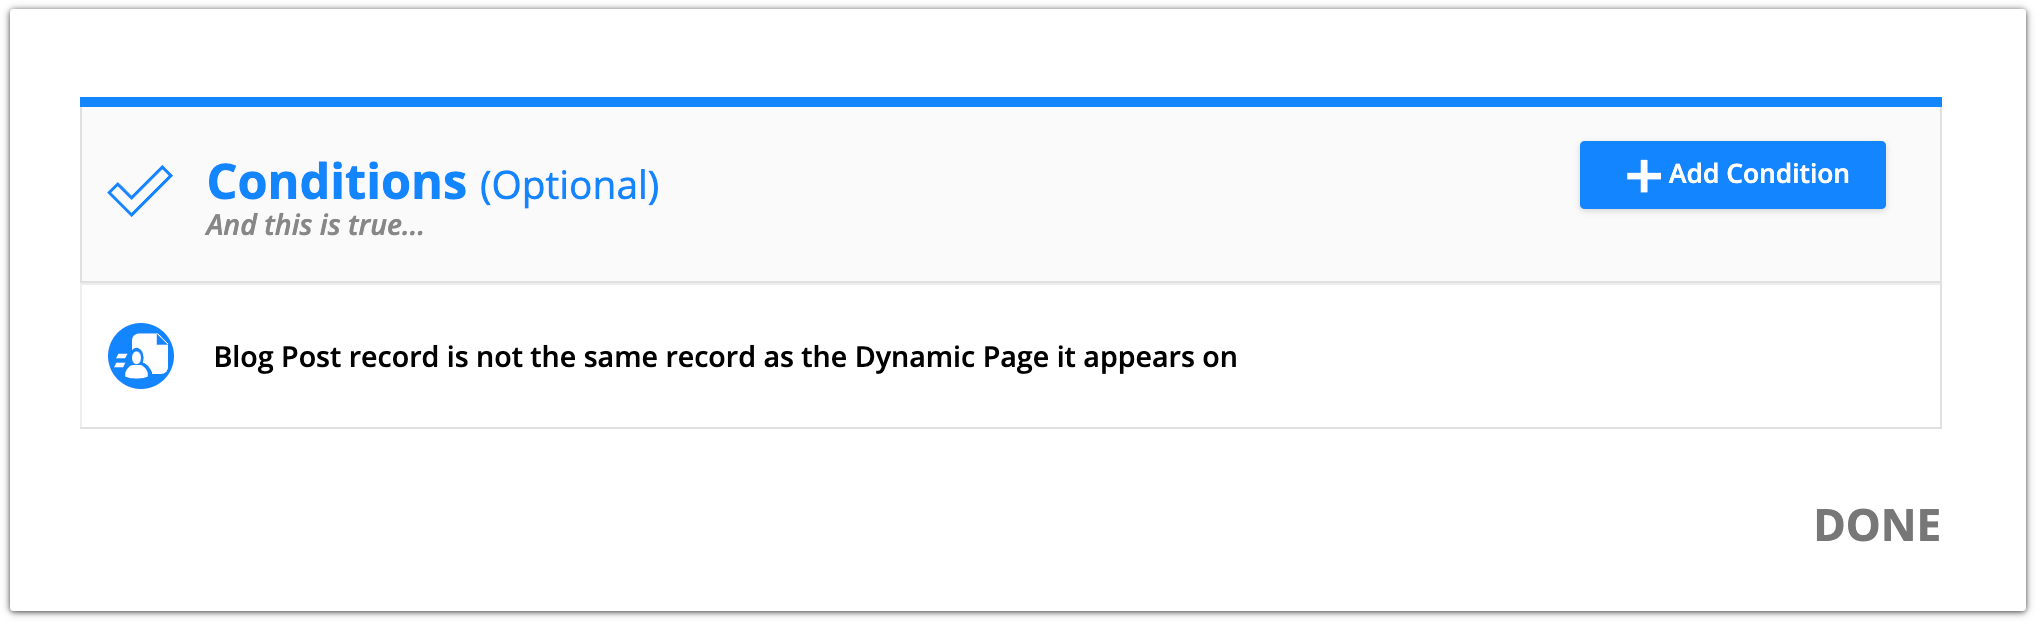
The example above shows a condition that’s unique to dynamic blocks. It ensures that your block doesn’t include the same record as the dynamic page it appears on. This condition is all about improving your site’s user experience. It’s an easy way to make sure your blocks don’t add information that doesn’t belong.
- For example, this condition can ensure you don’t add a link to the article your visitor is already reading.
- Or if your block shows the next lessons in your course, you won’t include the lessons your students are currently taking.
Visiting contact is/isn’t related to the dynamic block record
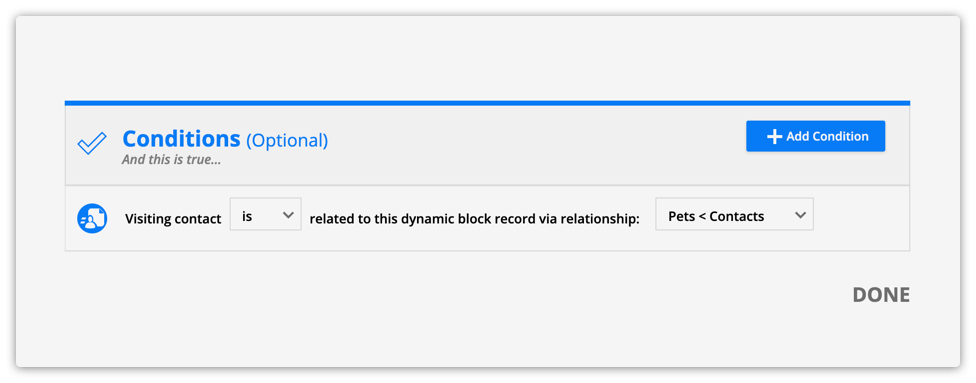
This condition ensures that your visiting contact either has or doesn’t have a relationship to your dynamic block’s source. This helps you ensure that your dynamic blocks only show your visitors relevant information.
- Click Edit Dynamic Block → Dynamic Block Settings.
- Click Add a condition in the “Display Conditions” section.
- In the conditions pop up, click Add Condition and select “Visiting contact is or isn’t related to this dynamic block record.”
- In the first dropdown select “is” to create a positive condition, or select “is not” to create a negative condition.
- In the second dropdown, select the relationship you want.
- For example, you can ensure that visitors only see information about their own pets with the condition “Visiting contact is related to this dynamic block record via relationship: Pets < Contacts.”
Dynamic block record is/is not related to the dynamic page record
This condition ensures that your block’s record is (or isn’t) related to your dynamic page’s record. This helps you get really specific about the records you want your dynamic block to show.
- Click Edit Dynamic Block → Dynamic Block Settings.
- Click Add a condition in the “Display Conditions” section.
- In the conditions pop up, click Add Condition and select “Dynamic page is or isn’t related to the dynamic block record.”
- In the first dropdown, select “is” to create a positive condition or “is not” to create a negative condition.
- In the second dropdown, select the relationship you want.
- For example, to display a list of adoptable pets, use the condition “Dynamic page record is not related to this dynamic block record via relationship: Pets < Contacts.”
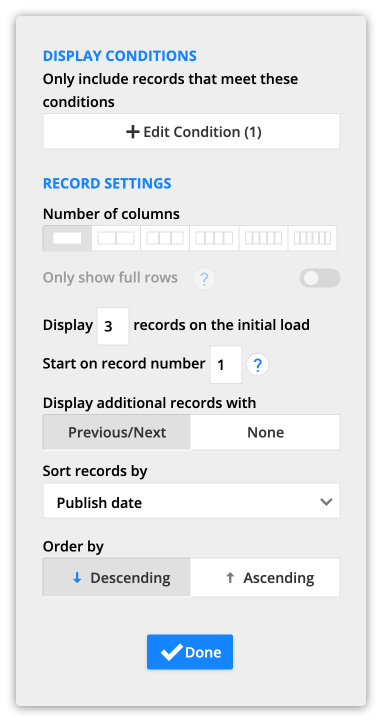
Record settings
These settings control how your records will display when your page loads.
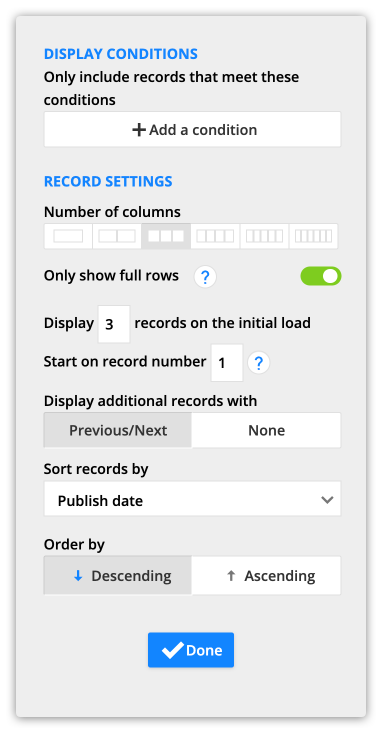
Number of columns
Choose how many columns you want to use to display your records.
- If you choose one column, you’ll create a vertical list.
- If you choose more than one column, the “Only show full rows” toggle becomes accessible.
- You can choose to show all rows or only show full rows. If this option is toggled on, your page will only display records in rows that are completely full. It will not display a row unless there are enough records to fill the row.
Display this number of records on the initial load
This setting lets you choose how many records in your list you want to display.
Start on record number
This setting lets you choose which record you want your list to start with. The record number depends on the settings you select in the “Sort records by” and “Order by” settings. This is beneficial if you want to break up your list using two designs and not repeat any records.
- You can use this setting if you have a blog homepage and want to display your latest article prominently while showing a list of previous published articles below it.
Display additional records with
This setting determines if your dynamic block includes a pagination block.
Previous/Next: This setting will add the “Previous” and “Next” buttons at the bottom of your list to see more records.
None: This setting will limit visitors to only seeing the number of records you selected in your “Display this number of records on the initial load” setting.
Sort records by
Choose the field you want to sort your record by. If you want to randomize your list, select “Random.”
Order by
Choose if you want to sort your list in descending or ascending order based on your “Sort records by” setting.
When you’re happy with your block settings, click Done.
Customize your block’s display settings
In addition to your dynamic block settings and normal block settings, you have a special display setting that’s only available on dynamic blocks placed on dynamic templates: “Only show this page if the dynamic page record meets these conditions.”
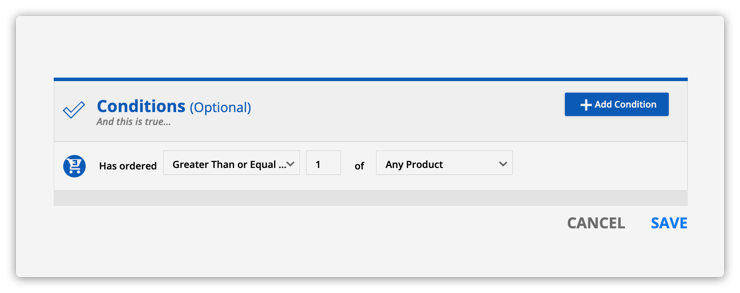
When you toggle this setting on, you can add conditions that the data source record must fit. This is a really useful condition to ensure your dynamic blocks only show the information you want to display. For example, if your lesson has a list of resources, you could display it. Or if your contacts are customers, you could show them a list of products they’ve purchased.
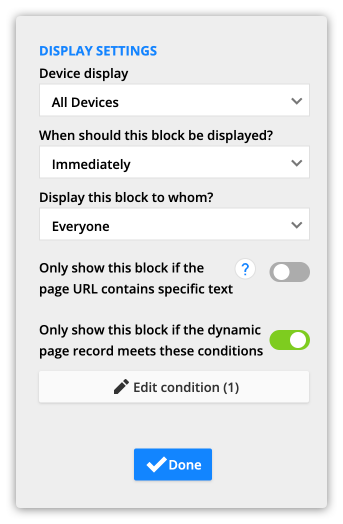
- Click Edit Dynamic Block on the right side of your block.
- Click Display Settings.
- Toggle Only show this block if the dynamic page record meets these conditions on.
- Click Add a condition.
- From your add a condition pop up, click Add Condition and select the condition you want to add.
- For example, you can add a condition to only show your dynamic block if your contact has purchased from you.
- Click Save.
Edit your pagination block
Once you’ve wrapped up your dynamic block’s settings, you can customize your pagination block. This block gets added when you convert a block to be dynamic. It contains the “next” and “previous” buttons that allow your visitors to view more records on your dynamic block. You can style your block’s alignment, size, border style and button colors.
Note, if you want to hide your previous and next buttons, you need to edit your dynamic block’s settings.
Here’s how to customize your pagination style:
- Hover over your pagination block and click to edit it.
- Click Pagination Style.
- Edit your style to fit your needs.
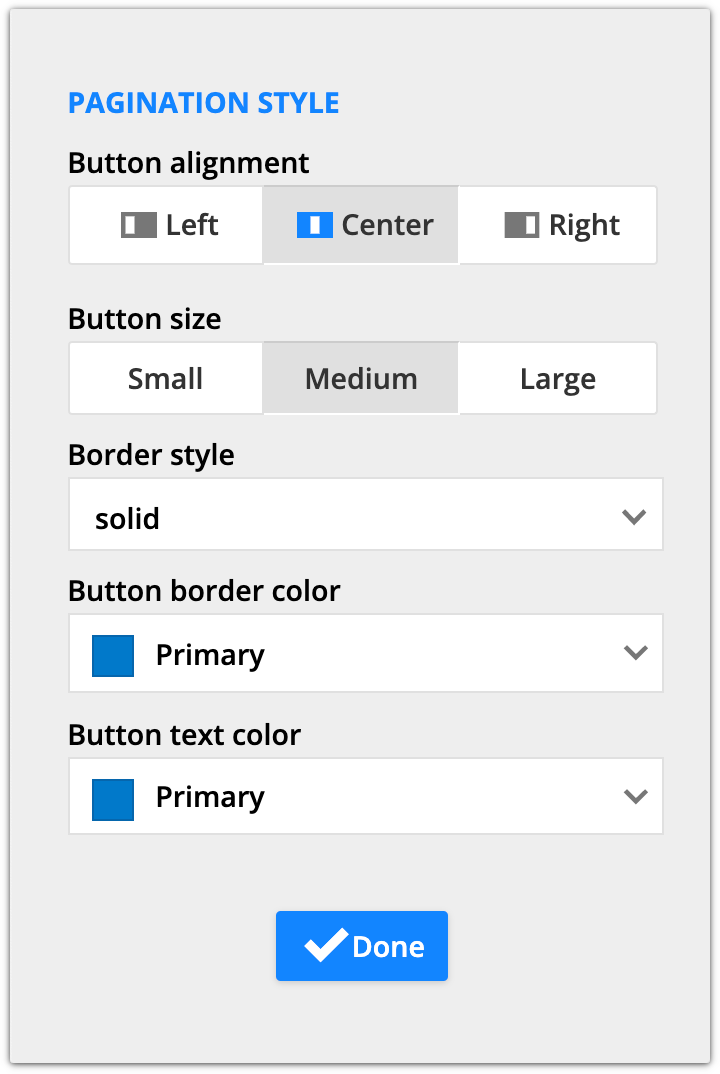
- Click Done.
Design tips
Designing dynamic blocks is a lot like designing Ontraport Page or dynamic templates. The main difference is that dynamic blocks repeat, which means their settings do too. Here are some tips to ensure your blocks look great:
Tip #1: Adjust your spacing
By default, every block you add to an Ontraport Page or dynamic template comes with 40px of padding to the top and bottom of your block.
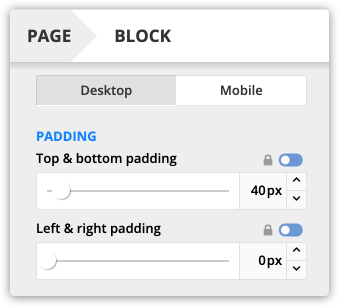
That means that when your block’s design is repeated to create your list, there will be 80px of space between each item, like this:

This may be what you’re looking for, but typically you’ll want to reduce the amount of space between each of your list items.
For example, if you reduce your top and bottom padding to 20px, your list will look like this:
Tip #2: Use columns and rows to create your layout
It’s an Ontraport best practice to create the block layout you want using columns and rows as opposed to relying on your elements’ position settings.
It is possible to place the elements you want exactly where you want them in your editor. But that’s not ideal because your page content will move around based on screen size. Creating a grid layout is important because your designs are more likely to look great on any screen.
For example, these two blocks look the same in the editor, but one uses columns and rows, and the other block doesn’t:
This example does not have a layout created with columns and rows.
This example holds elements in place using columns and rows.
Now let’s look at these blocks on a mobile device to see why those columns and rows are so important.
The example below is the block built without columns or rows. You can see this block is not mobile friendly:

And this example still looks good because this block had its layout set with rows and columns:

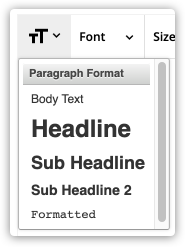
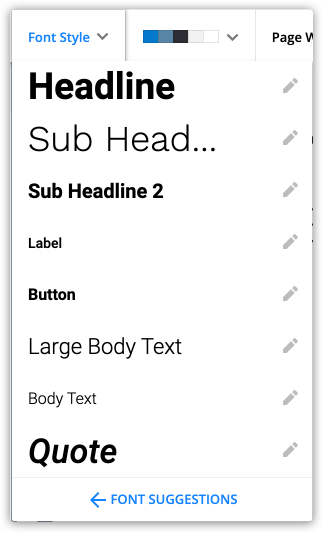
Tip #3: Use paragraph formatting in “Rich Text” fields
“Rich Text” fields allow you to customize how you want your text to look on your dynamic blocks and templates. You can set the specific fonts and font sizes you want to use to style the text saved in your fields. However, we recommend that you use paragraph formatting instead. Here’s why:
The paragraph formatting dropdown adds styling tags to your text. If you aren’t familiar with HTML tags, don’t worry, it’s really simple.
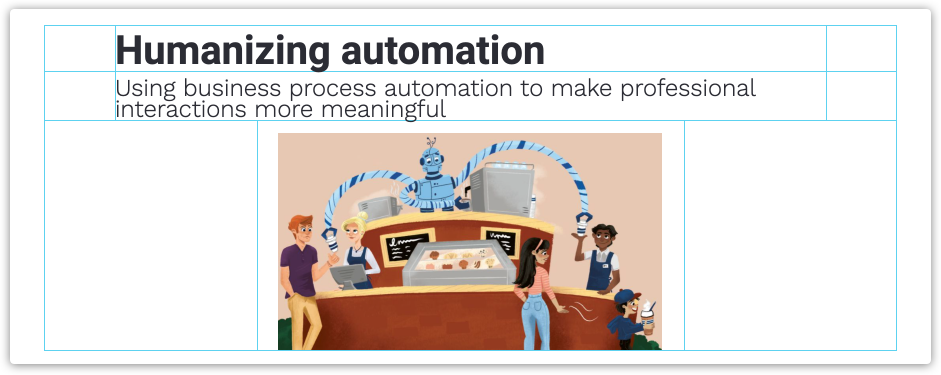
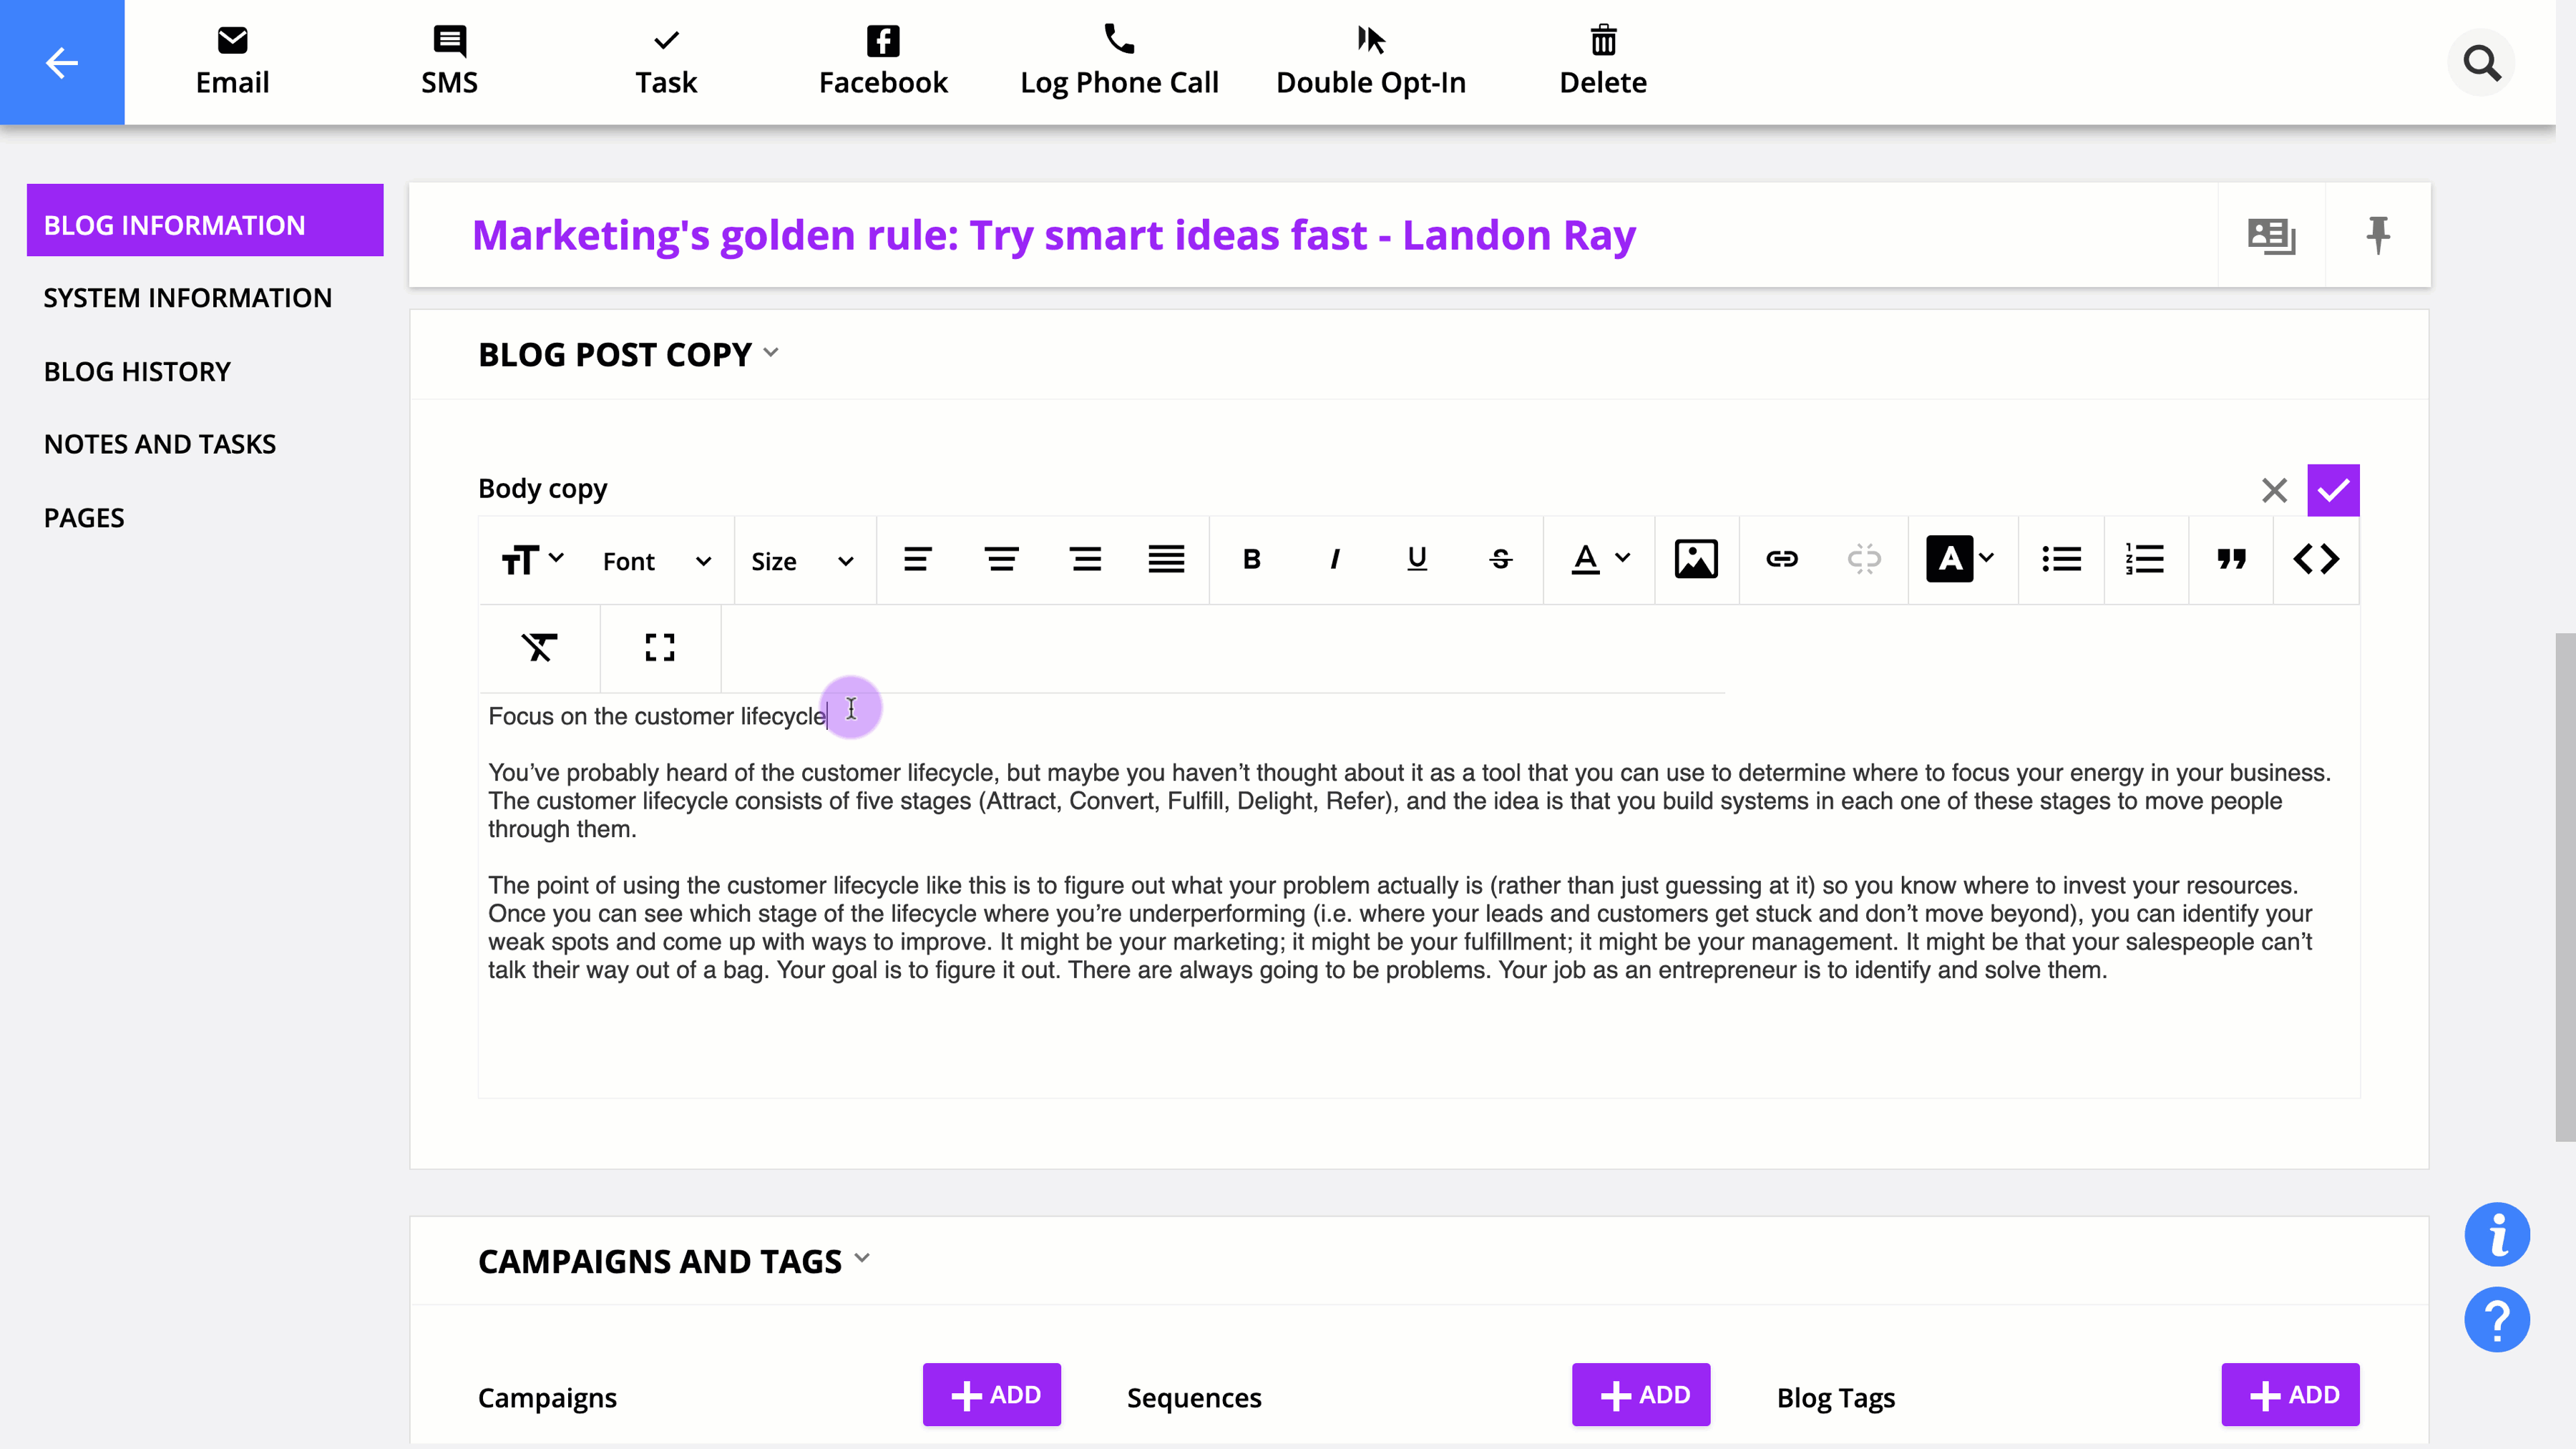
Here’s how it works. If you add the “Headline” paragraph format to a sentence in your rich text field, your sentence will be “wrapped” in a headline styling tag, like this: <h1>Focus on the customer lifecycle</h1>.
These tags work behind-the-scenes to make your life easier. And you never have to see this HTML unless you look at your rich text’s source code, like this:
Your paragraph format is related to your pages’ font style. And when you add your rich text to your page, your page “reads” your tags and applies the right font to your text.
Here’s how to use paragraph formatting:
- Highlight the text you want to style.
- Select the paragraph format you want to use.
- Click
 to save your text.
This means that you can set the font styles you want on your pages and templates and know that no matter where you add your “Rich Text” field, it will look good on your page.
Use cases
Now that you know how to set up and customize your dynamic blocks, let’s look at a couple of use cases.
1. Link to “related blogs” at the bottom of a blog template
Many blogs keep readers engaged by linking to other related articles in each post. It’s easy to add this functionality to the bottom of your blog post dynamic templates by adding a dynamic block. Here’s how it’s done:
On your blog post template, add a new block and convert it to be dynamic. You’ll want to select your “Blog posts” object as the source.
/dynamic_content-use_cases-related_articles_1.png)
Click Dynamic Block Settings and click on the button that represents three columns from the “Record Settings” section.

In the first column, add a text element to your block and click on the database icon. Select the blog title field so that your dynamic block shows a list of blog titles.
Next add a link to the blog title we just added. Highlight the blog title merge field, and add a link to it.
From your link options, choose “Link to page related to the displayed record.” Then select the “Blog posts” page type from the drop down, and click Insert Link.
Now the blog titles in the “related articles” section all link to their corresponding post.
You’re almost done, but there is one more setting you’ll definitely want to adjust.
Edit your block’s settings and go to your dynamic block settings. Add a condition so your blog post record is not the same record as the dynamic page it appears on. This makes sure that you don’t offer a link to the same article in your “related posts” section.
And that’s it!
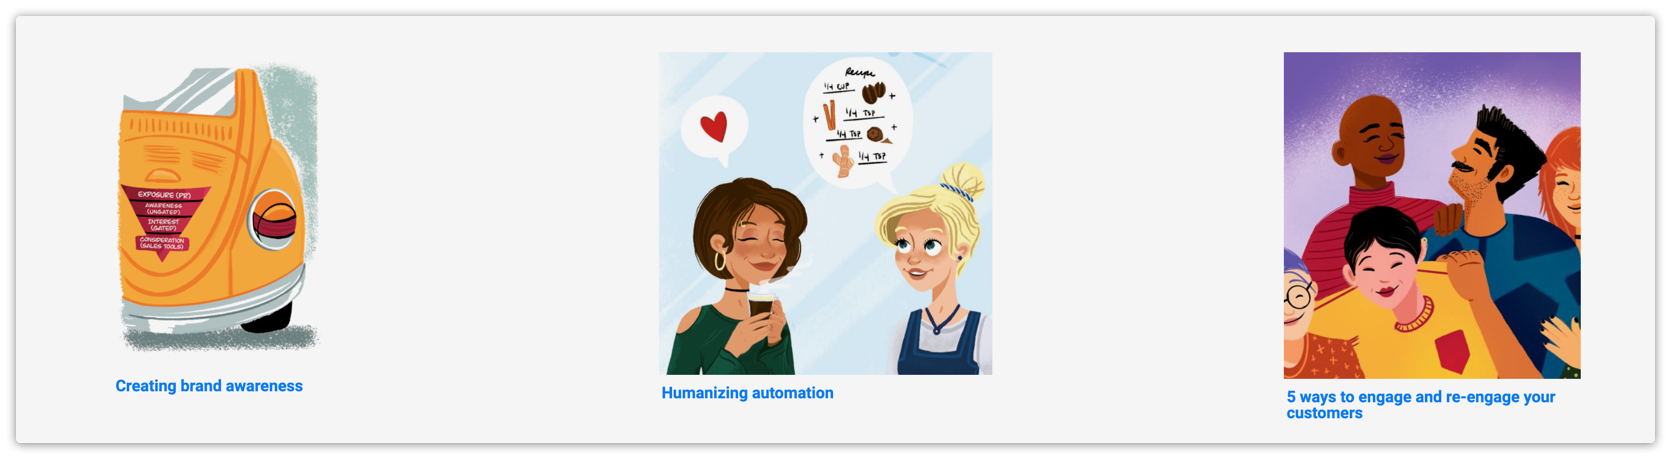
You might also consider adding an image element to your block if you want a picture to go along with the titles of your related articles. And you can choose to sort your records by publish date so your most recent articles get pushed to the top.
You have a ton of options to make your related posts dynamic block look the way you want.
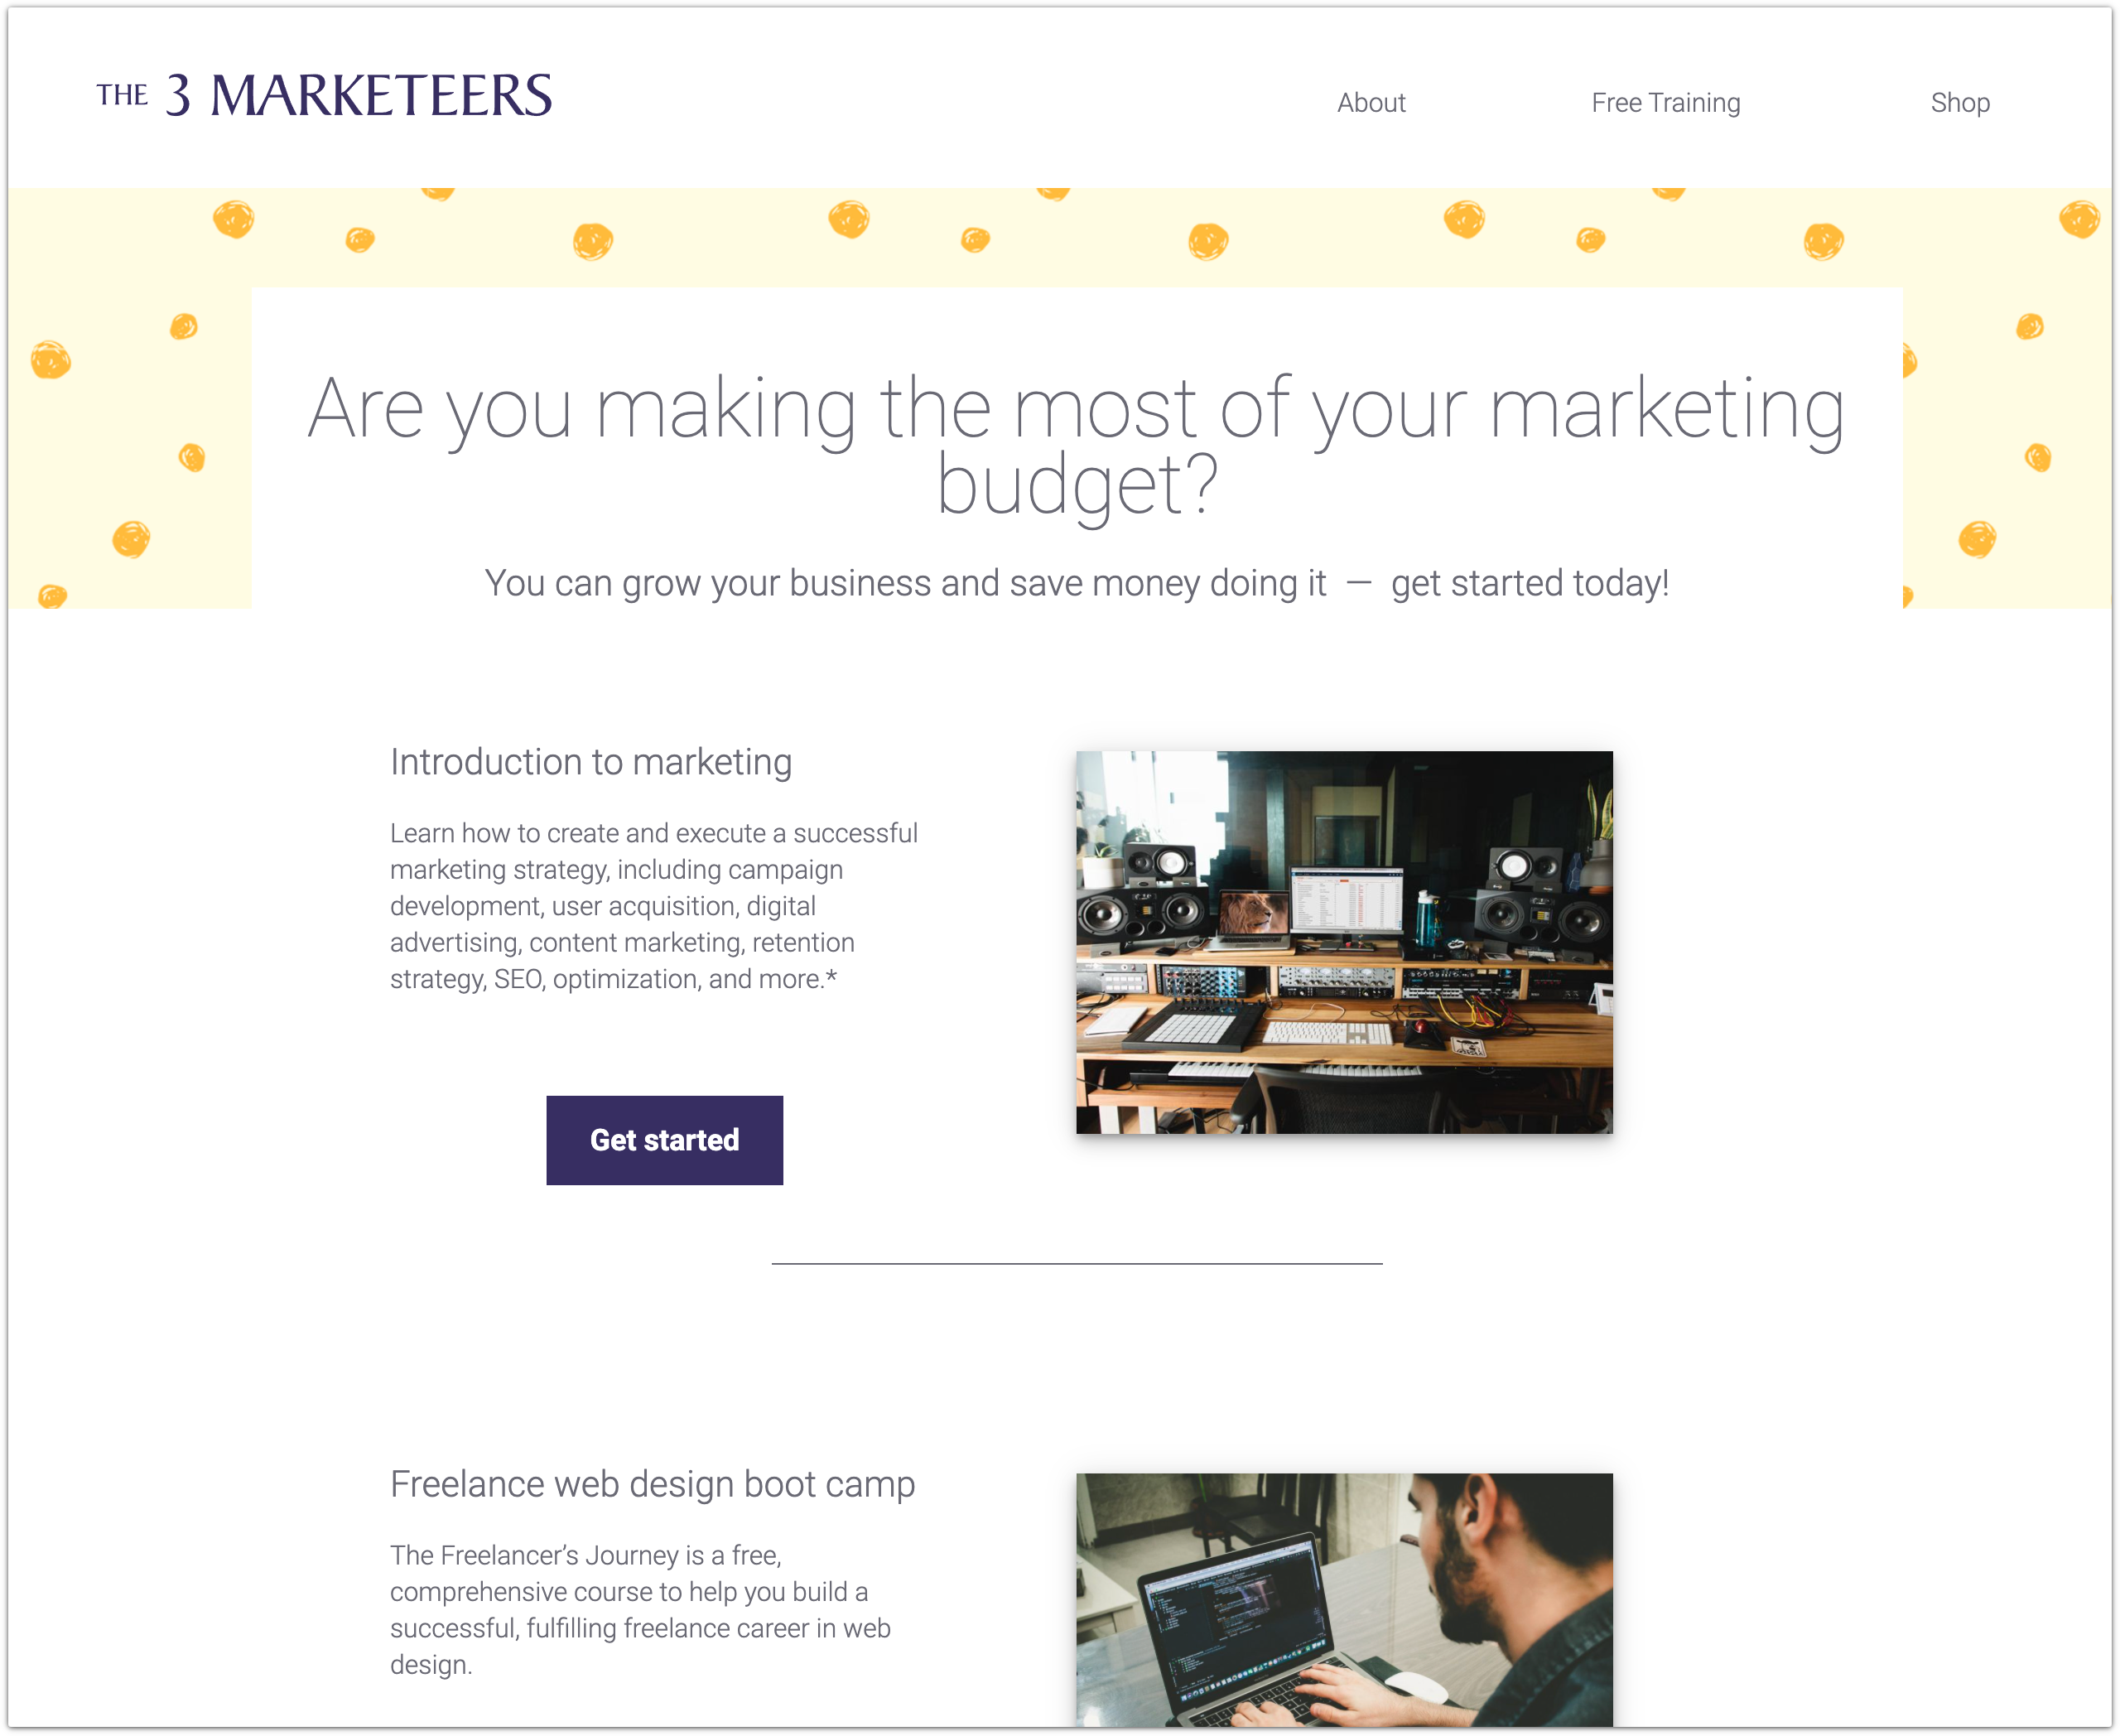
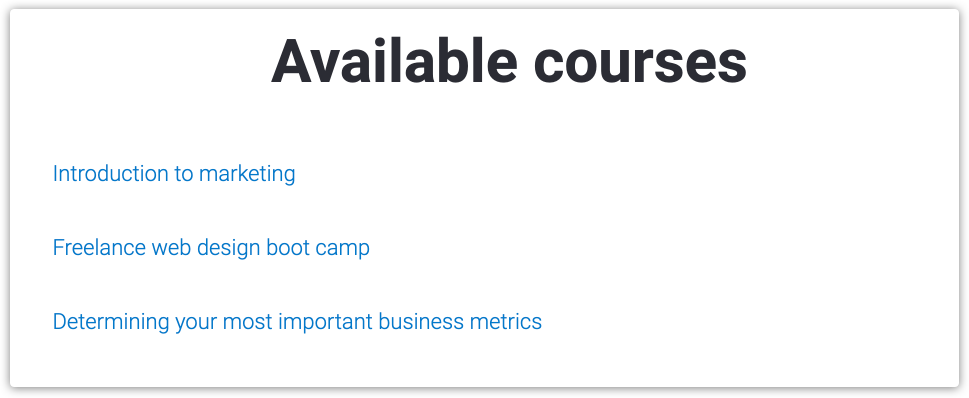
2. “Available courses” page
Let’s take a look at another use case for dynamic blocks — a course list page. If you sell access to courses, you’ll want a page where you can show visitors a list of courses you offer.
This use case is a little different because you’ll need to build an Ontraport Page, not a dynamic template. Let’s take a moment to consider why an Ontraport Page is the best approach for this use case.
Dynamic templates save you a ton of time if you are creating many pages that use that template. This is because you’re essentially “reusing” that template a number of times to avoid having to repeatedly redesign a page. So the initial investment in the extra steps needed to create the dynamic template makes sense.
Remember, if you only need one page, it makes more sense to go the simpler route and design an Ontraport Page. If what you need is one space where a bunch of related links are displayed, such as a “home” page, “contact us” page or “available courses” page, skip the extra steps and use an Ontraport Page. You can still add dynamic content to regular Ontraport Pages with dynamic blocks.
Start by designing your page to look the way you want. Add your header, footer, eye-catching headline and any other design elements.
Once you’re done, add a block where you want to add your list of available courses. Then convert your block and select your courses object as the source for this block.
Add any columns and rows you want on your block to create the right layout and add the elements you want to use.
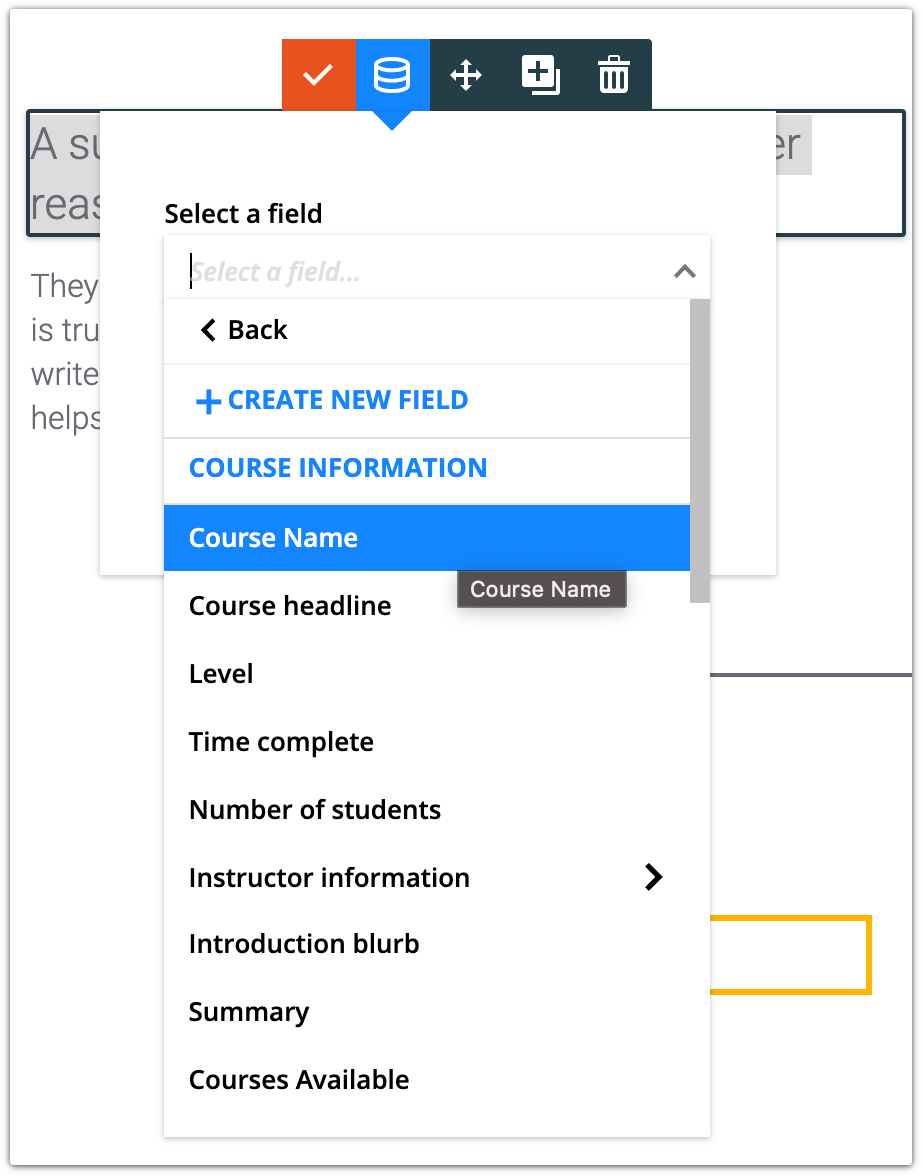
The next step is to add the title and some information about your course. For this example, we’ll add the course name, course summary, course image and link to the course page. Hover over each element, click ![]() and select the field you want to use.
and select the field you want to use.
For your “Get started” button, link to each course’s overview page. To do this, use the “Link to a page related to the displayed record” option and grab your course overview page.
The last step is to choose how many records you want to show when your page first loads. Edit your dynamic block and go to your dynamic block settings.
You can also choose the order you want your courses to appear. This example shows courses sorted by level of difficulty.
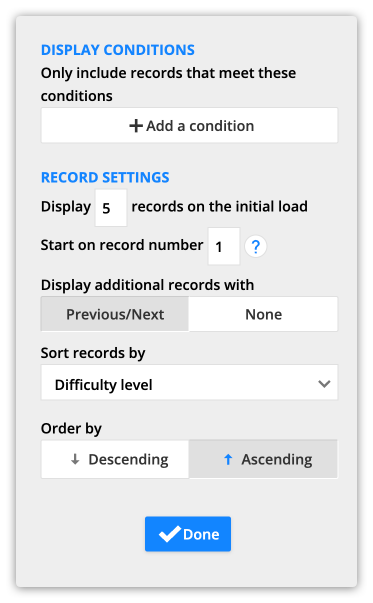
If you want to limit which courses to display, such as showing featured courses, add a condition.

That’s all there is to it! When you publish your page, you’ll create a dynamic list of your available courses and give your visitors links to get started.