Contact Detail View is best for when you want to see all of the information in a contact’s record. It is necessary if you want to log a transaction or send an invoice, and it allows you to view comprehensive contact and automation logs to track all of the steps in your contact’s journey. While this article focuses on contacts, the Detail View applies to all other custom object records too; they will have different tabs and sections, but they all follow the same format. You can also customize the tabs, sections, and fields within your own account.
Unlike your quick view, the Detail View is made up of Tabs and Sections. At the very top row of the record, you will also find the top action bar, which contains buttons for quickly sending emails, assigning tasks, and logging phone calls.
Here is a breakdown of how to access this view, where to look for information, and what you can do within each tab.
Table of contents
Use cases
How to access Detail View
Contact information
Calendar and tasks
Notes and files
Marketing Information
Invoices and payments
Membership
System information
Referral Info
Pages
Use cases
Here are common use cases that can be accomplished with Detail view:
“I want to see where a contact originally came from.”
To view a contact's source information, open their record in Detail View and click the Marketing Information tab. In the Marketing Tracking section, you'll find referring page data along with UTM parameters like campaign, medium, source, content, and term for both their first and most recent interaction. If the contact has sent you an inbound SMS, you can also find that under SMS Merge Fields.
“I want to request payment from a contact.”
To request payment from a contact, open their record in Detail View and click the Invoices & Payments tab. Click New Invoice to get started. From there, you can request a payment, log a manual transaction, or charge a credit card on file.
Note that if you want to set up a subscription or payment plan, you'll do that here too; create a new invoice and set the product type to subscription.
“I want to view a contact's active subscriptions.”
To see a contact's active subscriptions or payment plans, open their record in Detail View and click the Invoices & Payments tab. The Subscriptions and Payment Plans section shows each active open order, including its status, next charge date, most recent charge amount, total charged to date, and number of transactions.
“I want to upload a file to a contact's record.”
To upload a file to a contact's record, open their record in Detail View and click the Notes & Files tab. In the Filebox section, click Add File and select the file you want to upload. Once uploaded, the file will be stored directly on the contact's record and accessible any time you return to this tab.
“I want to see a log of all automation activity for a contact.”
To view a contact's automation history, open their record in Detail View and click the System Information tab. The Automation Log displays a running history of field changes, automation updates, invoices created or modified, and when the contact record was originally created. Click on any individual line item to expand it and see more details about that specific event.
How to access Detail View
Back to top
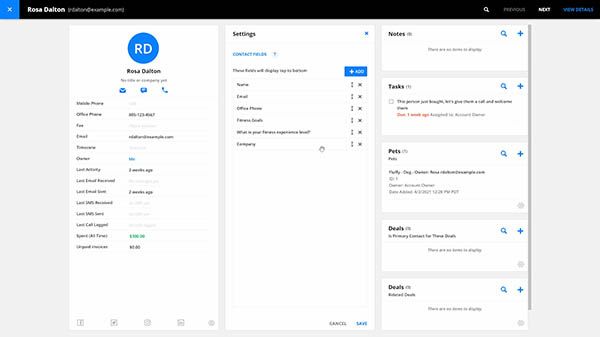
By default, when you click on a contact record in your Table View, you are taken to the Quick View. To access the Detail View instead, hover over the record and click the small icon that appears on the right side. You can also click "View Details" in the upper right-hand corner of the Quick View.
- Change your default view: If you prefer, you can flip this default behavior so that clicking a record automatically opens the Detail View.
- To do this, navigate to Administration → Personalize → Default contact view.
- Managing lists within Detail View: When looking at lists within your Detail View (such as your Contact log or Task manager), you can use the Records Per Page dropdown to choose how many records you see at once. You can also use the arrows next to the dropdown to flip through pages of records.
Contact information
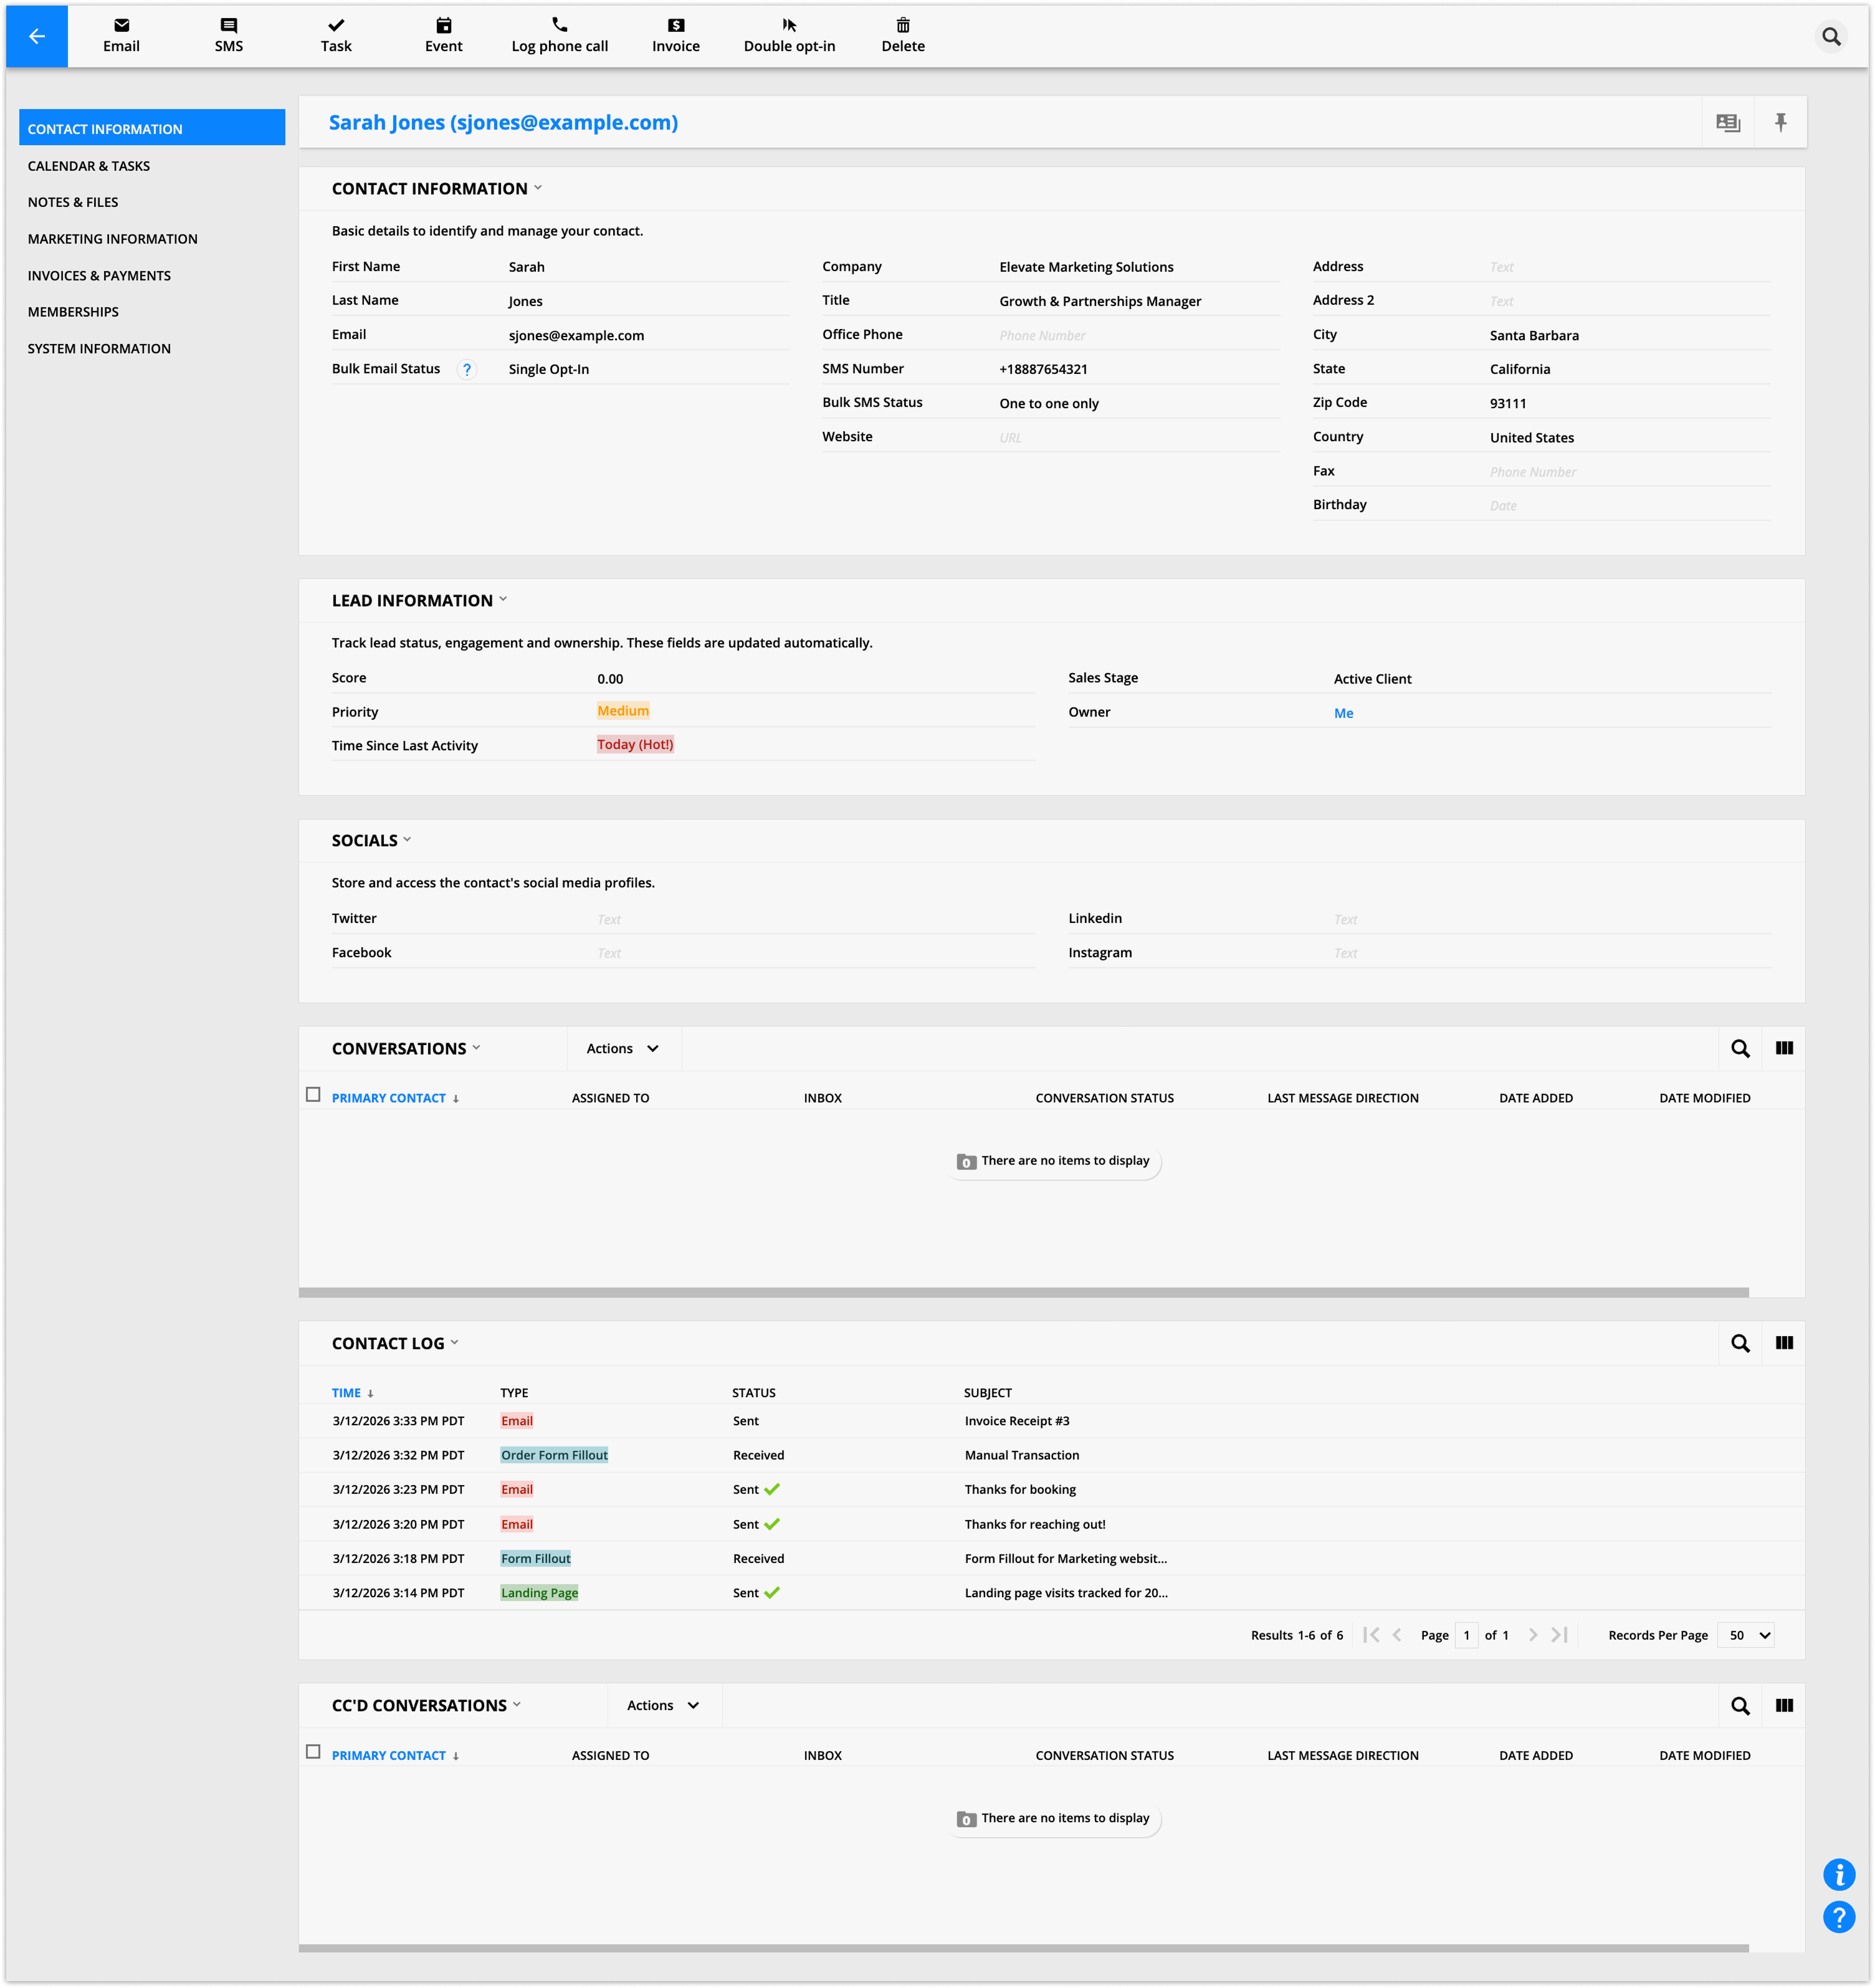
The core tab for viewing and managing a contact's personal details, lead data, social media profiles, and full communication history, including emails, form fillouts, page visits, and Inbox conversations.
Where to look for info
Contact information: View basic details such as the contact's name, address, phone number, and bulk email status.
Lead Information: Track lead status, engagement, and ownership. These fields update automatically and show you the lead score, priority, time since last activity, stage, and owner.
If the Partners feature is enabled, this section also shows the first and last referrer.
Contact log: View all correspondence with the contact, including every email sent, form fillouts, and page visits. If you set up email sync, you will also see each email received.
Conversations & CC’d Conversations: View all Inbox conversations this contact had or is CC'd on.
What you can do
Click on line items in the Contact log to expand them for more details.
Calendar and tasks
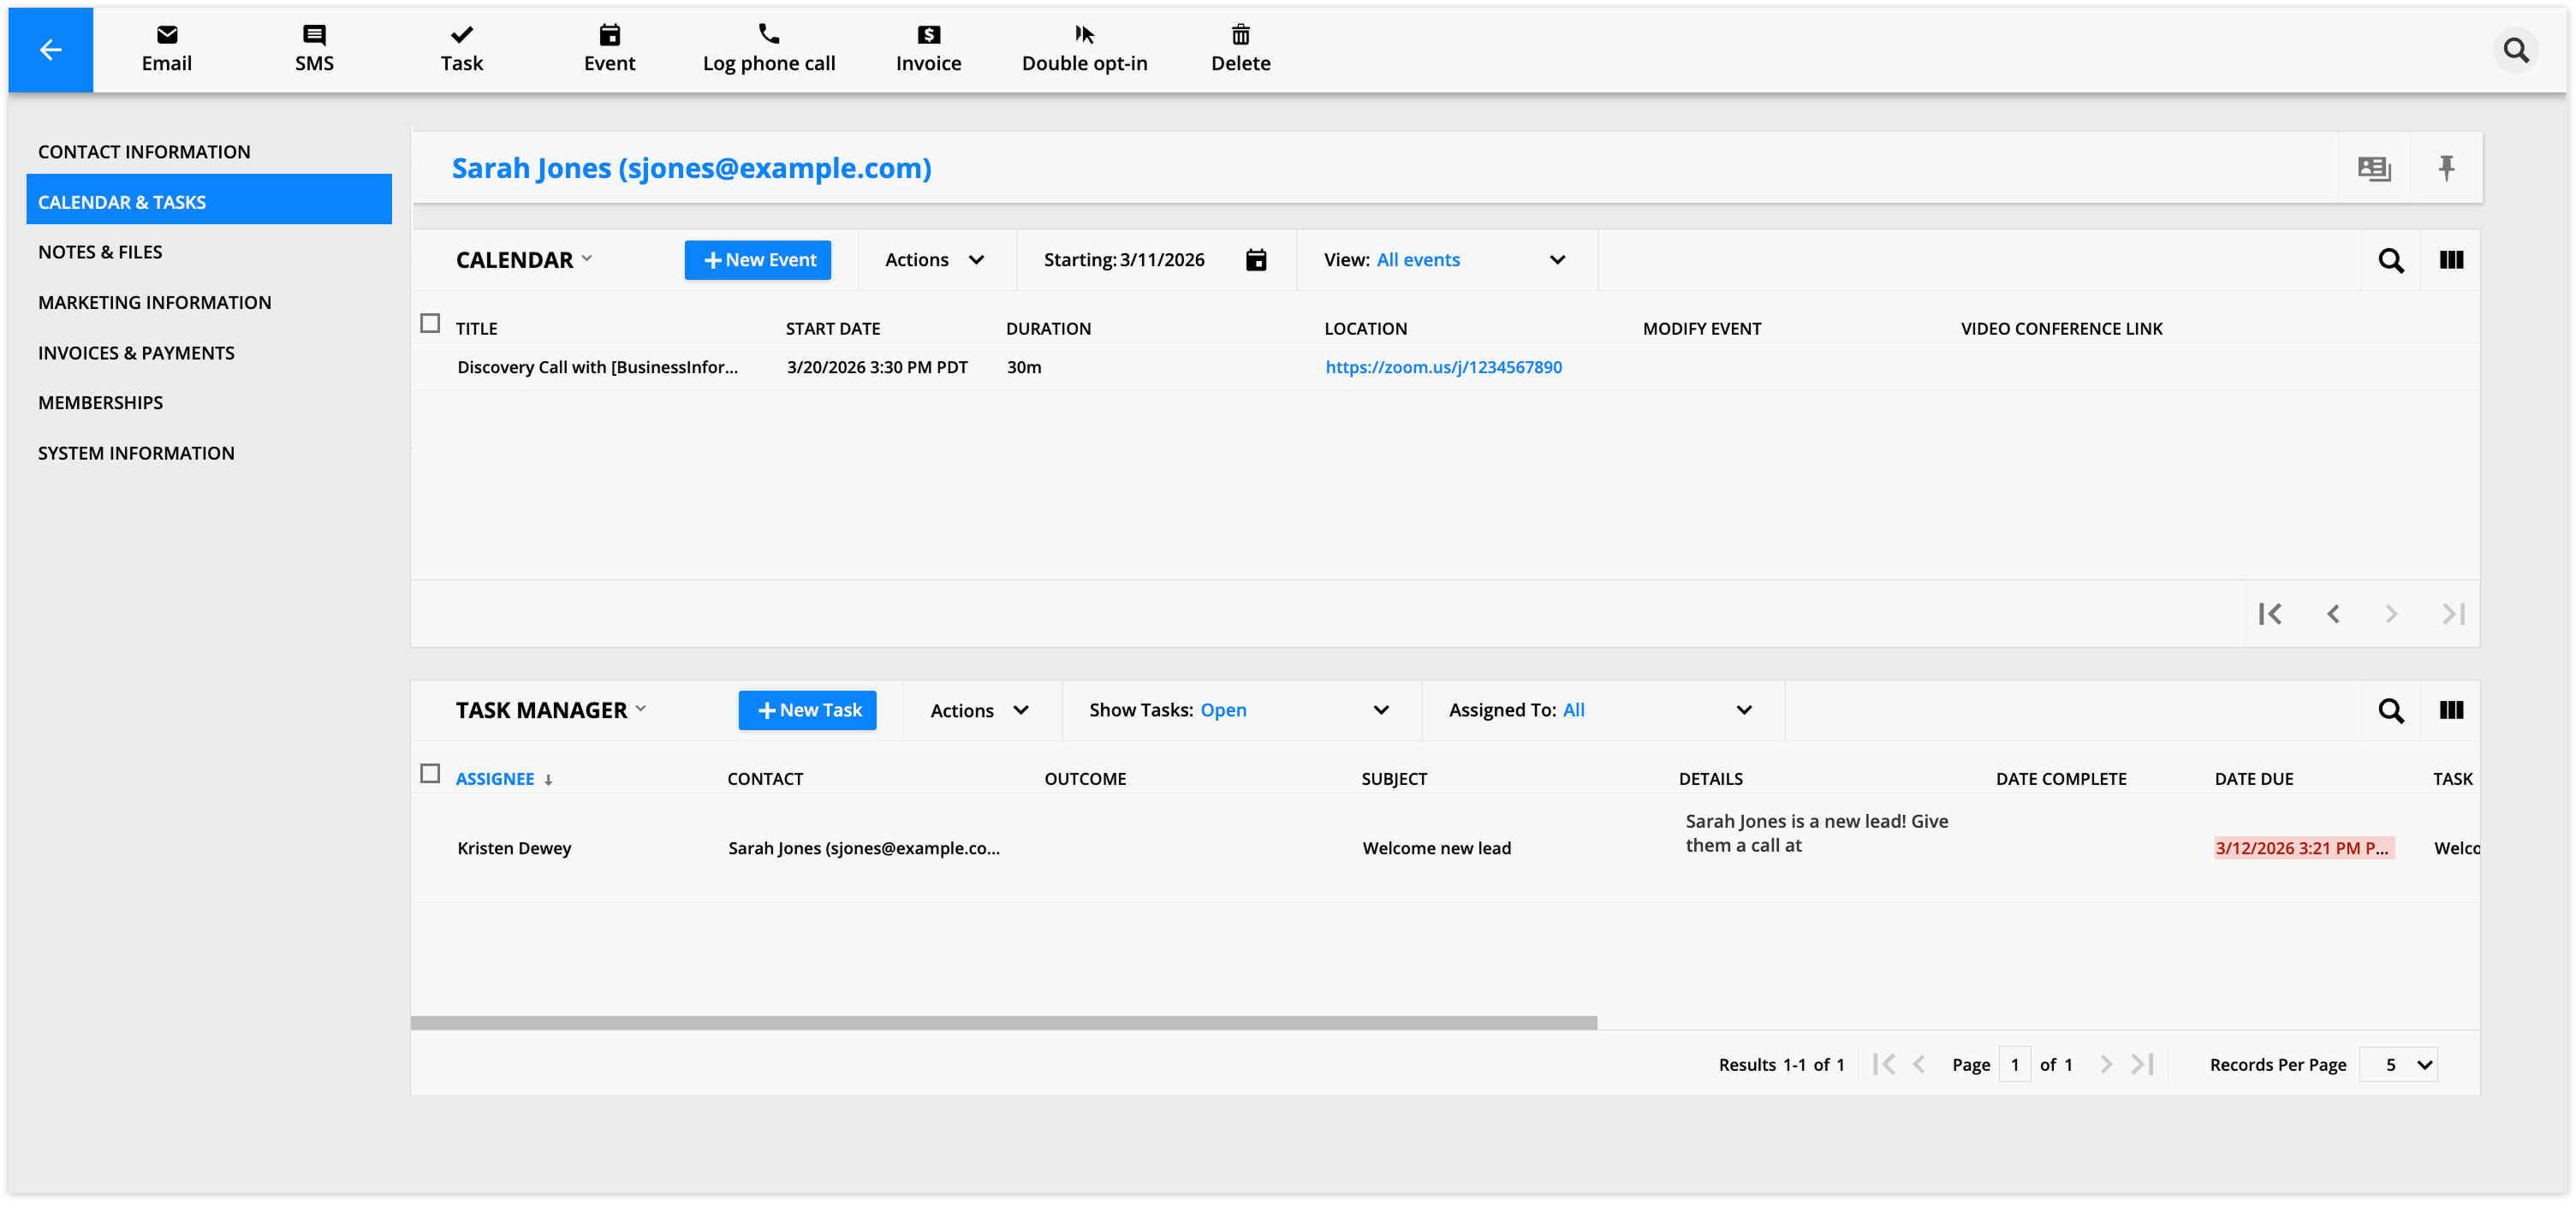
Shows all calendar events the contact has been a guest for, and all tasks assigned to users related to this contact. Both events and tasks can be managed directly from this tab.
Where to look for info
The calendar subcollection shows all Ontraport Calendar events the contact was a guest for.
Task manager shows all of the tasks assigned to users for this contact.
What you can do
Add contacts to events directly from the calendar subcollection.
In the task manager, you can create new tasks or take action on existing ones, like marking them complete.
Notes and files
Back to top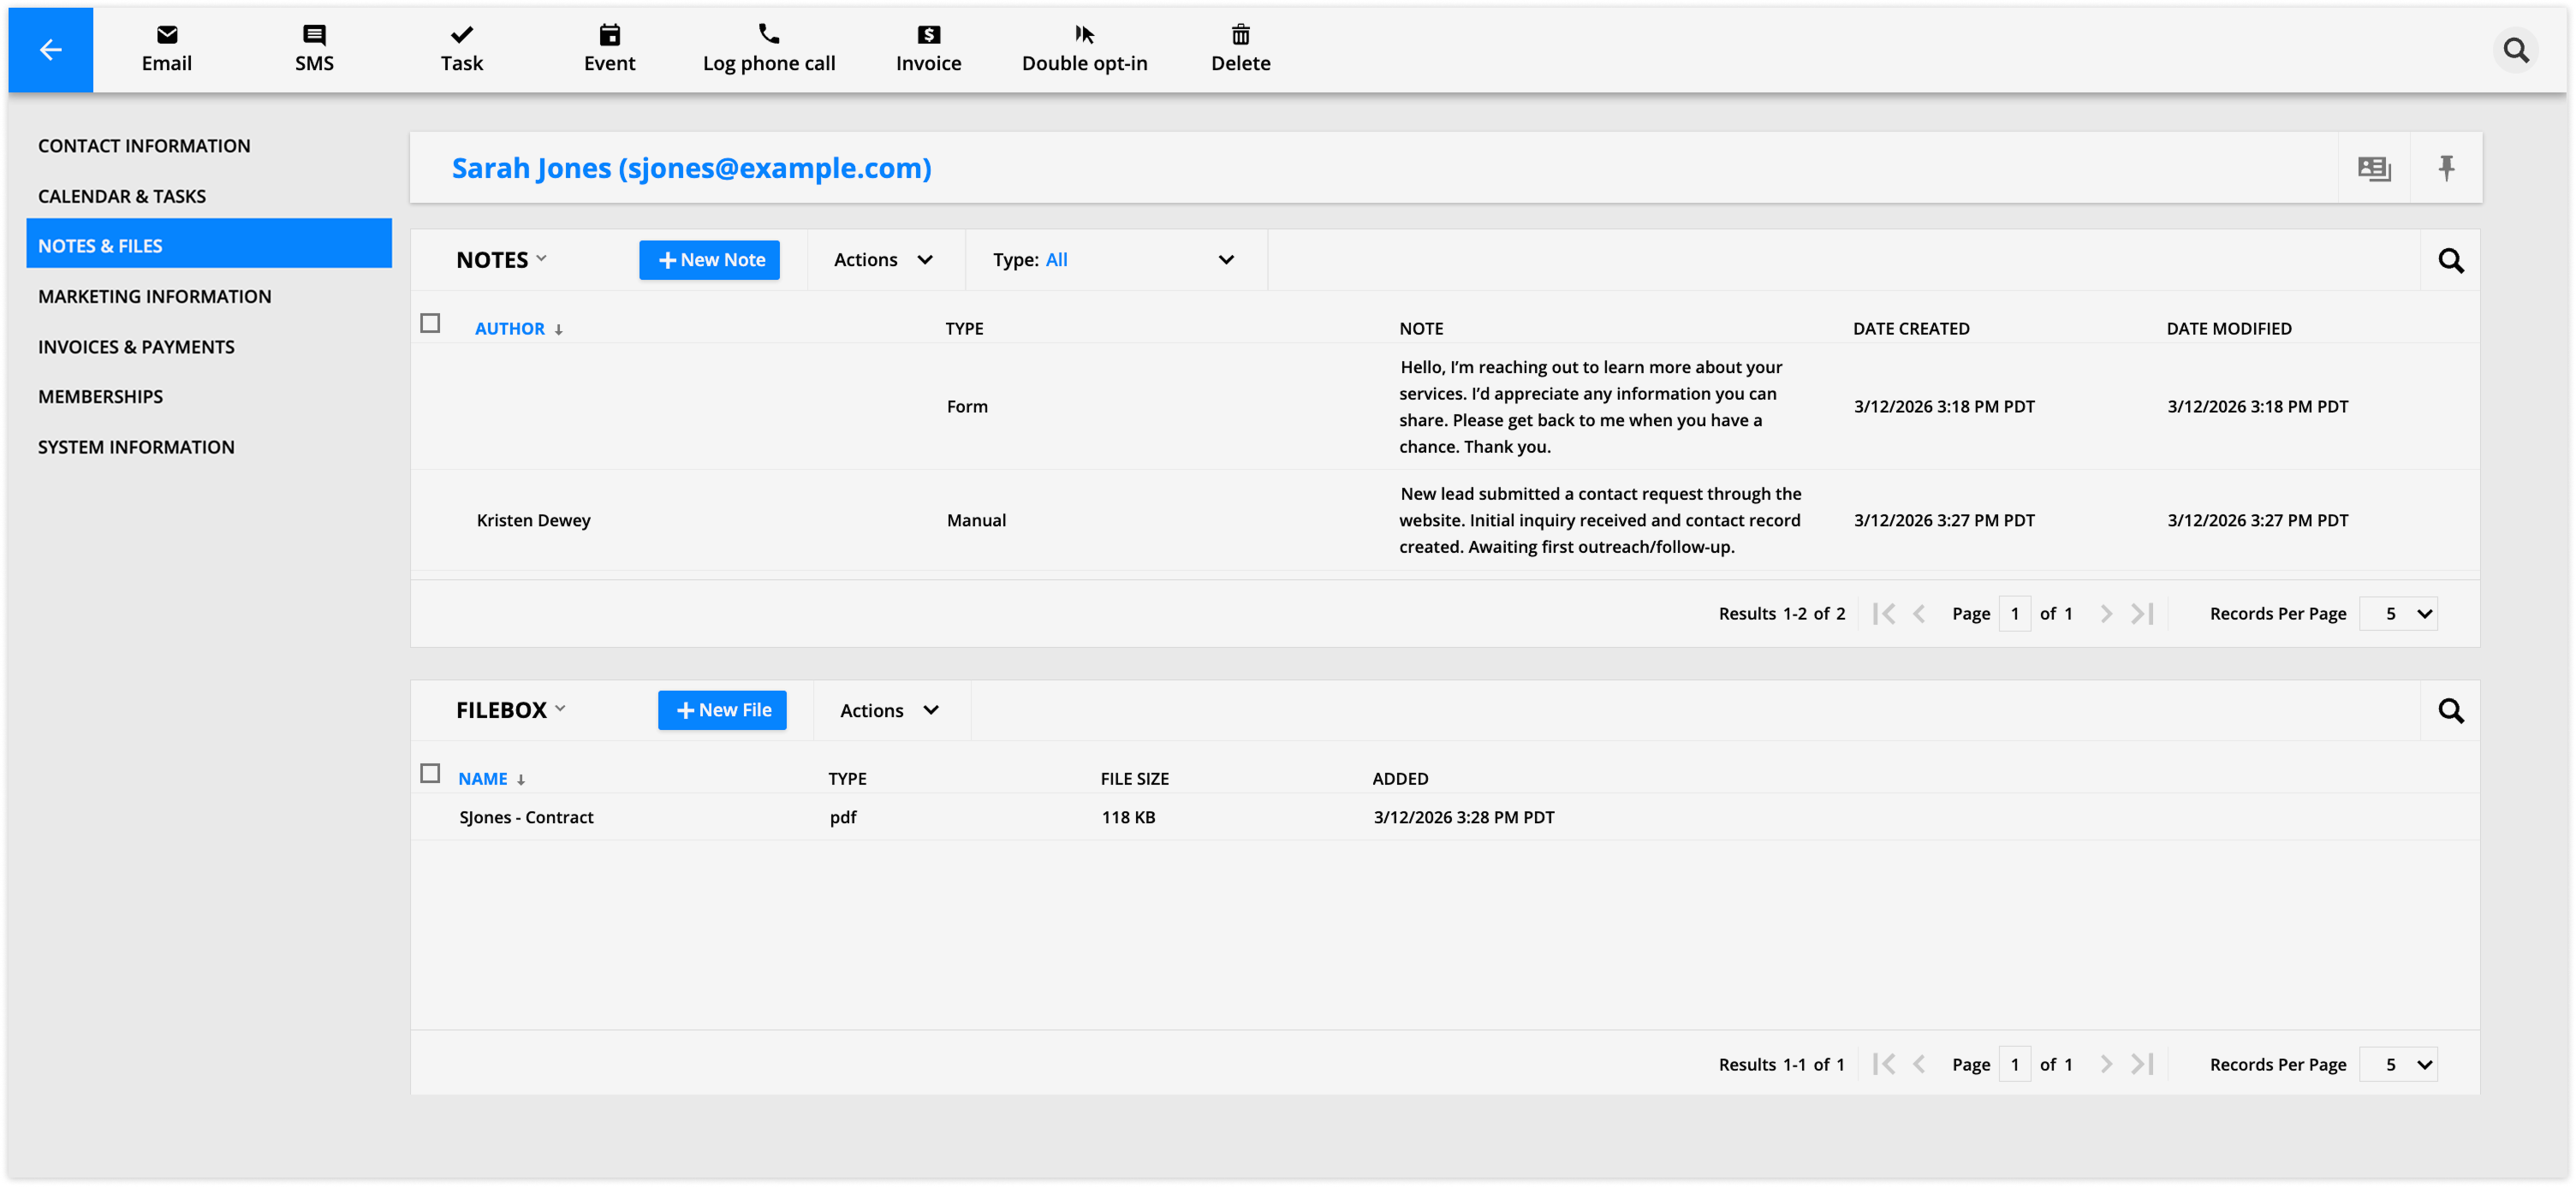
A storage tab for user-left notes about the contact and any files uploaded specifically to their record.
Where to look for info
The Notes subcollection holds all of the notes left by users about this contact.
The Filebox holds all of the files uploaded specifically for them.
What you can do
View and edit existing notes, add new notes for recent interactions
Upload new files to the contact's Filebox.
Marketing Information
Back to top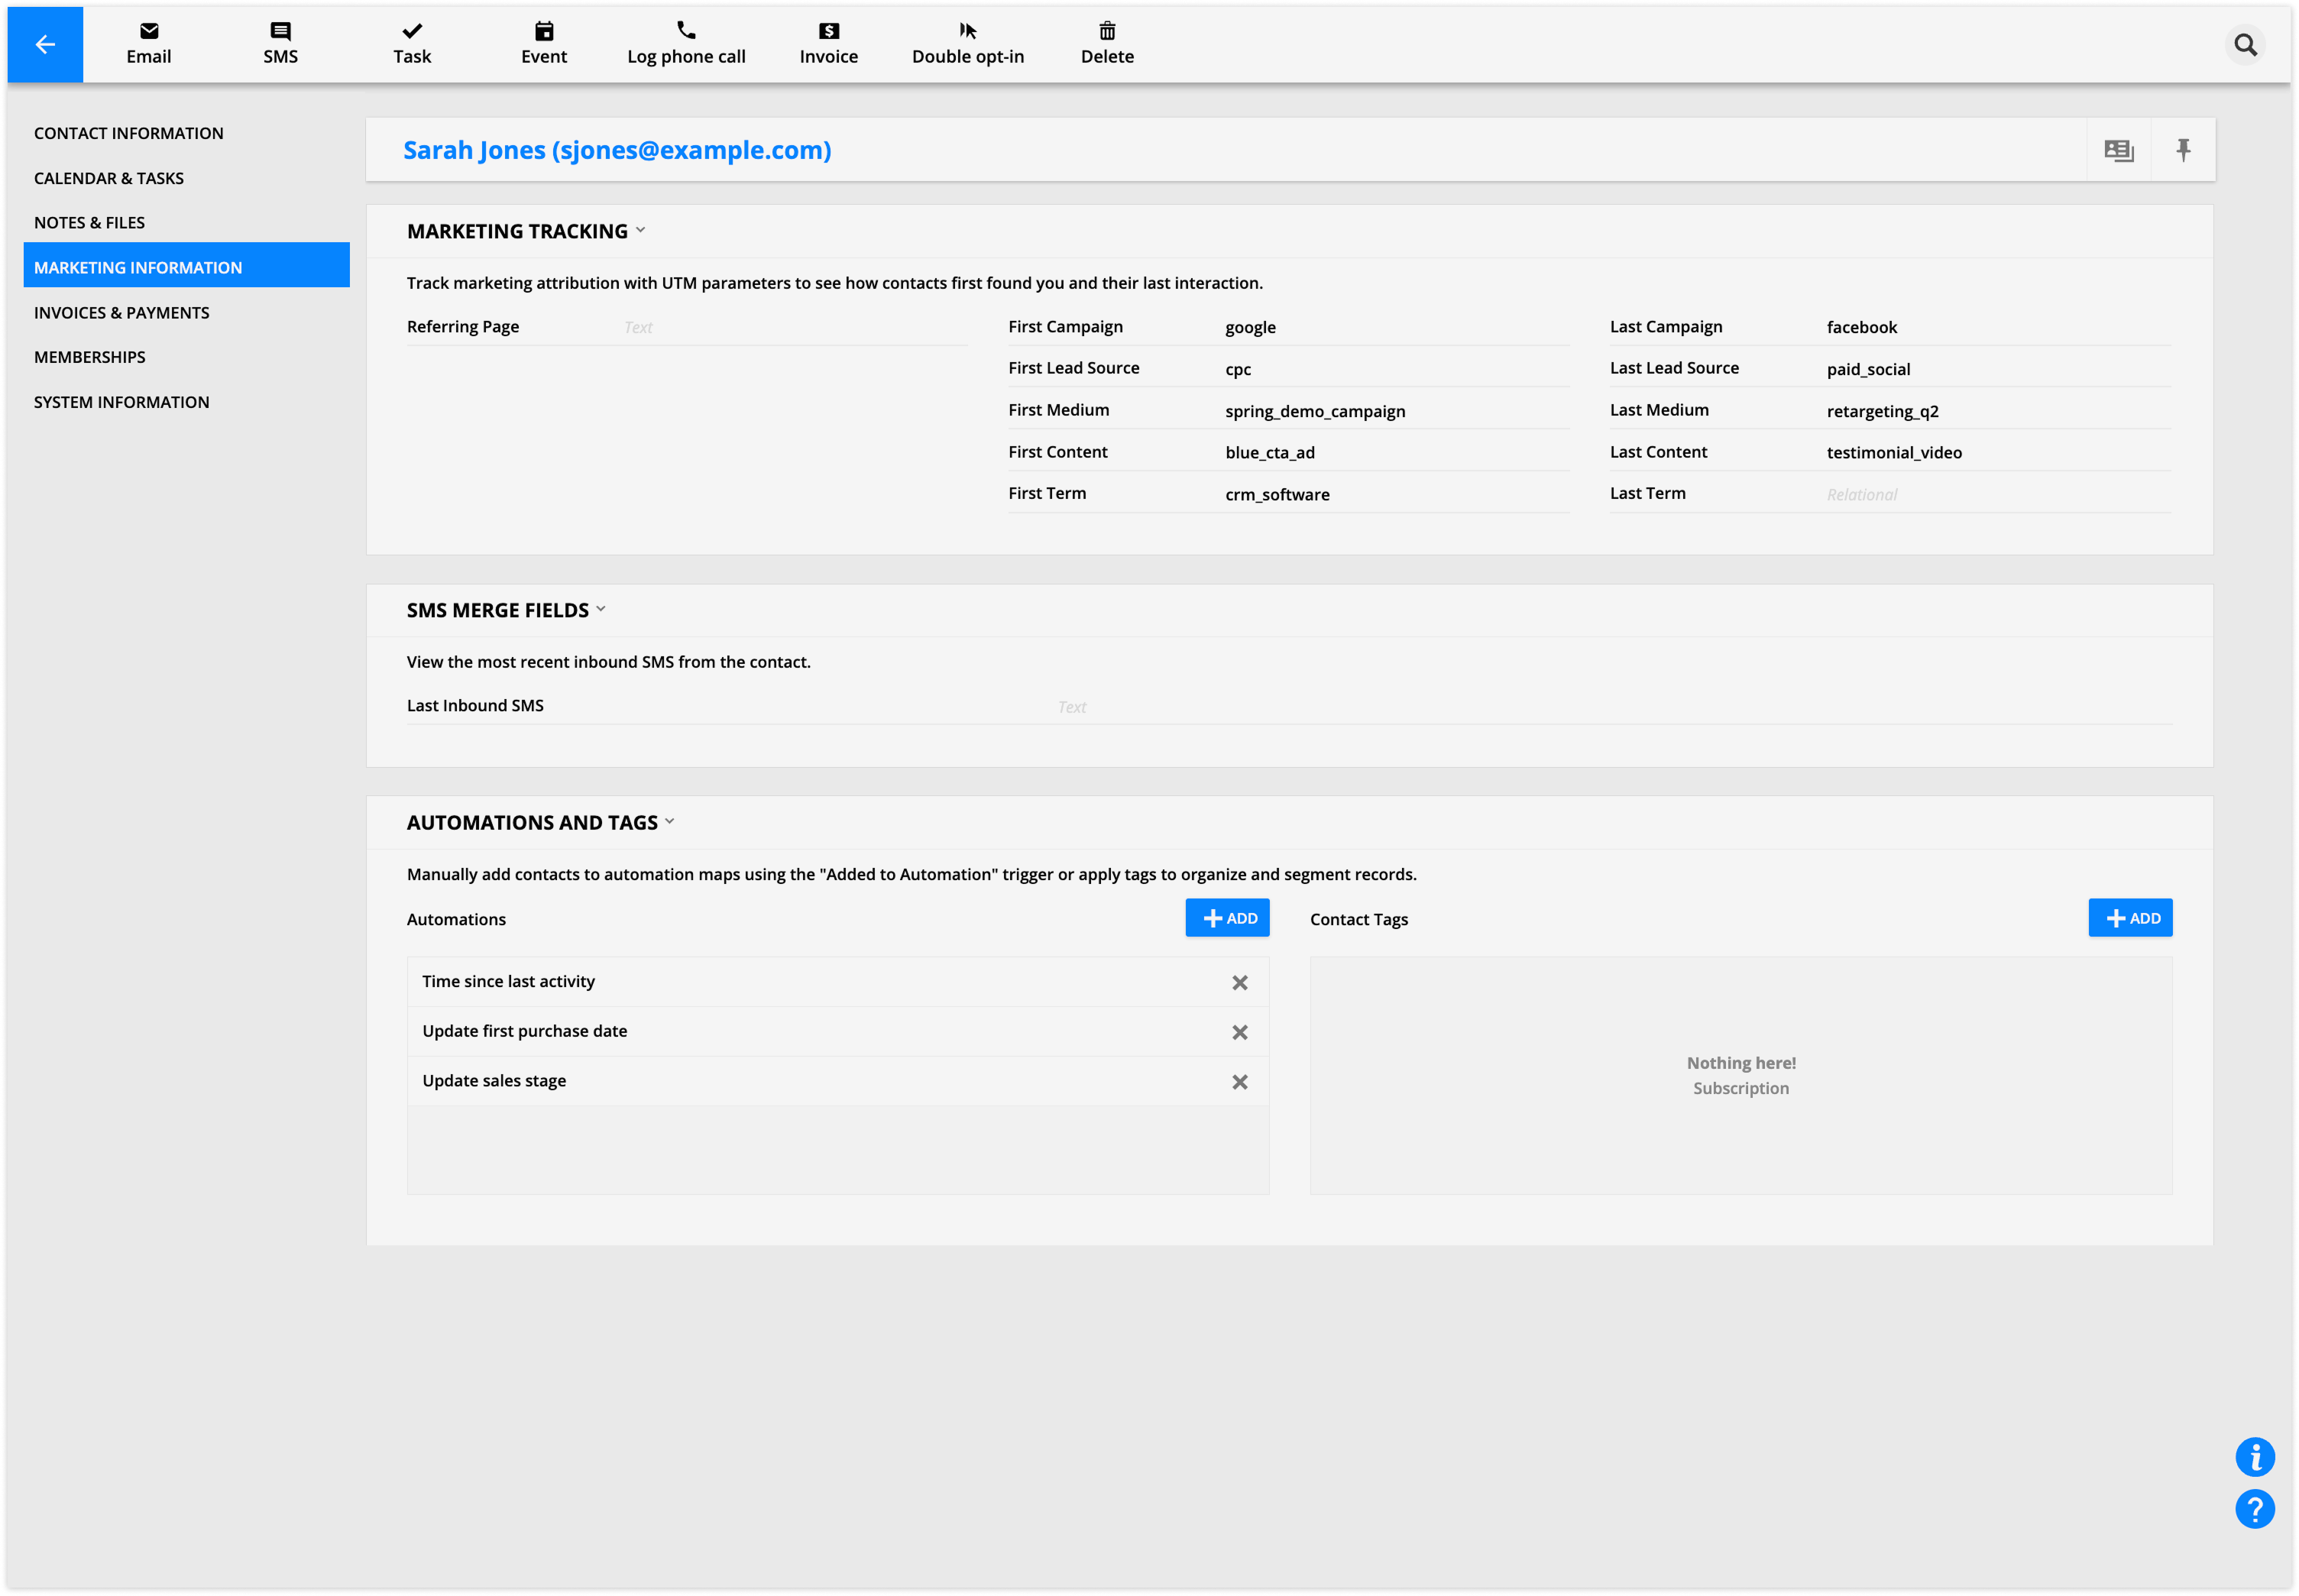
Displays where a contact came from, including referring pages and UTM tracking, their most recent inbound SMS, and tools for adding them to automations or applying tags.
Where to look for info
Use Marketing Tracking to see referring pages and UTM tracking information.
You can also view the most recent inbound SMS from the contact under SMS Merge Fields.
What you can do
Manually add contacts to automation maps using the "Added to Automation" trigger
Apply tags to organize and segment your records.
Invoices and payments
Back to top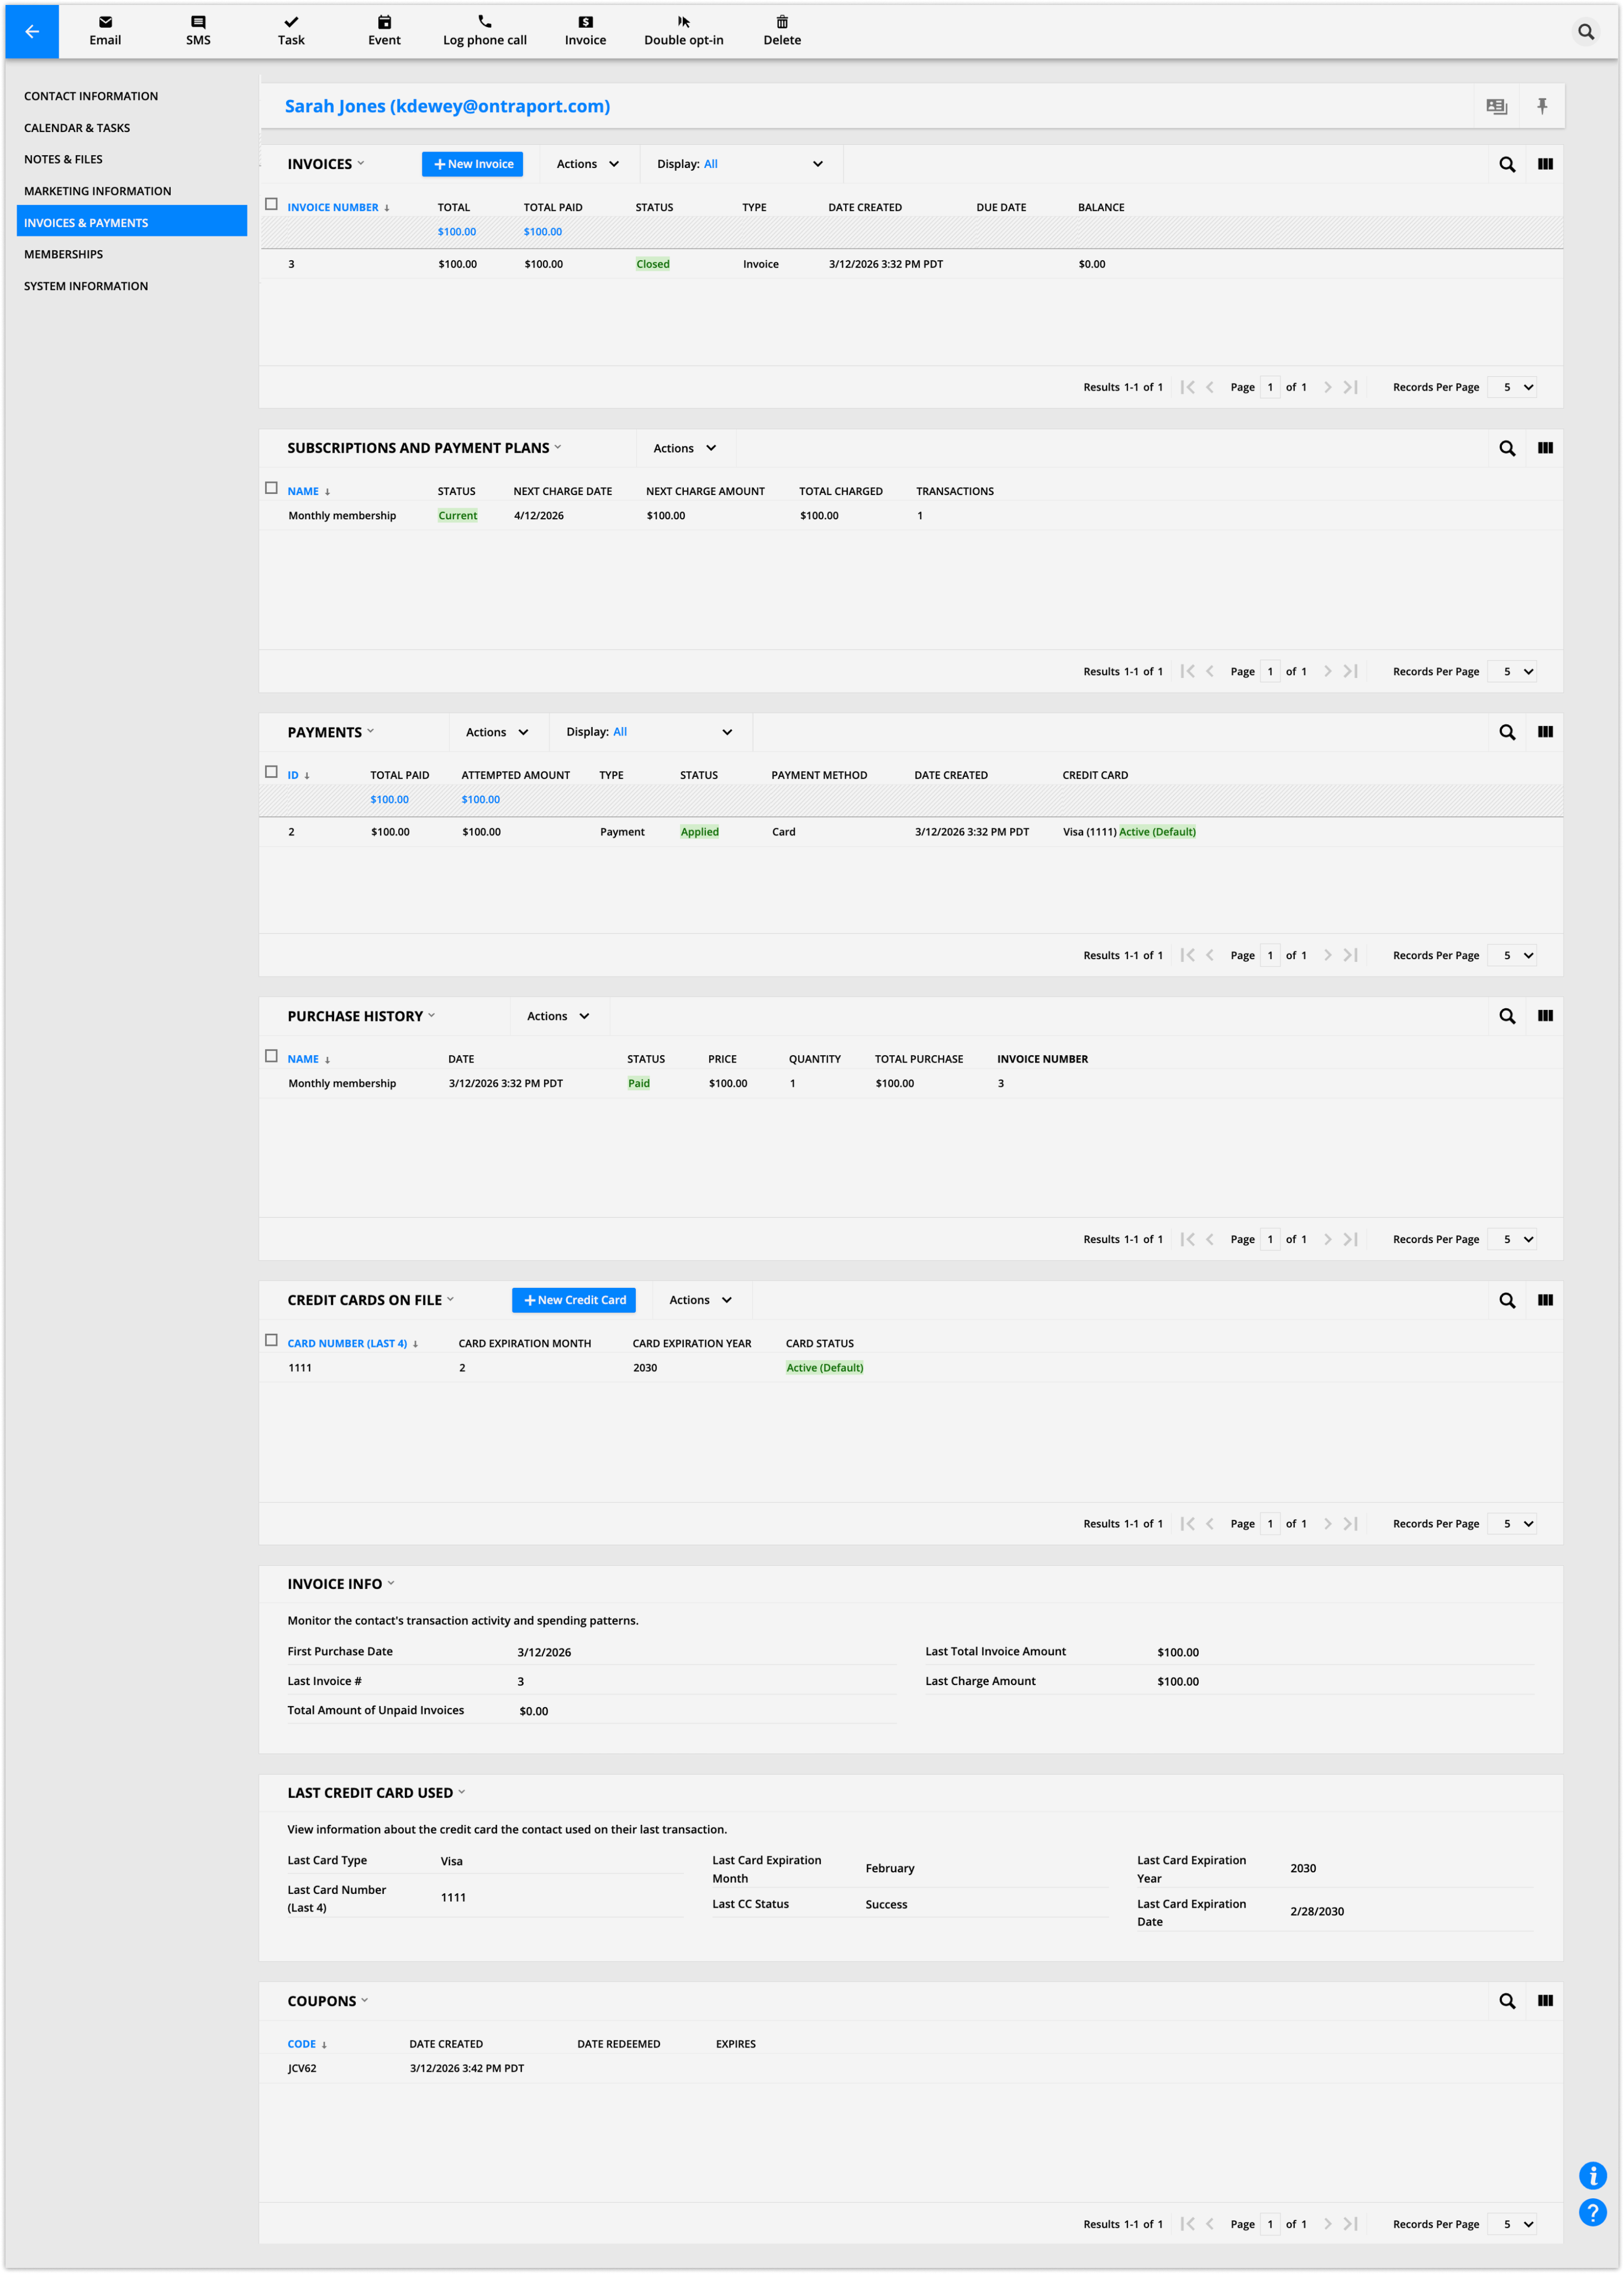
The financial hub for a contact, covering invoices, subscriptions, payment plans, individual payments, purchase history, credit cards on file, and overall spending patterns.
Where to look for info
View open and closed invoices, active open orders (subscriptions or payment plans), payments, purchase history, and monitor the contact's transaction activity and spending patterns.
You can also view credit cards on file (limited to the last four digits and expiration date) and information about the last credit card used.
If you’ve sent any personal coupon codes to the contact, you’ll see them in the Coupons section.
What you can do
Click New invoice to request a payment, log a manual transaction, or charge a credit card manually.
Note on subscriptions: You cannot create a new subscription or payment plan directly from the subscriptions subcollection. Instead, you must create a new invoice and set the product to be a subscription.
Membership
Back to top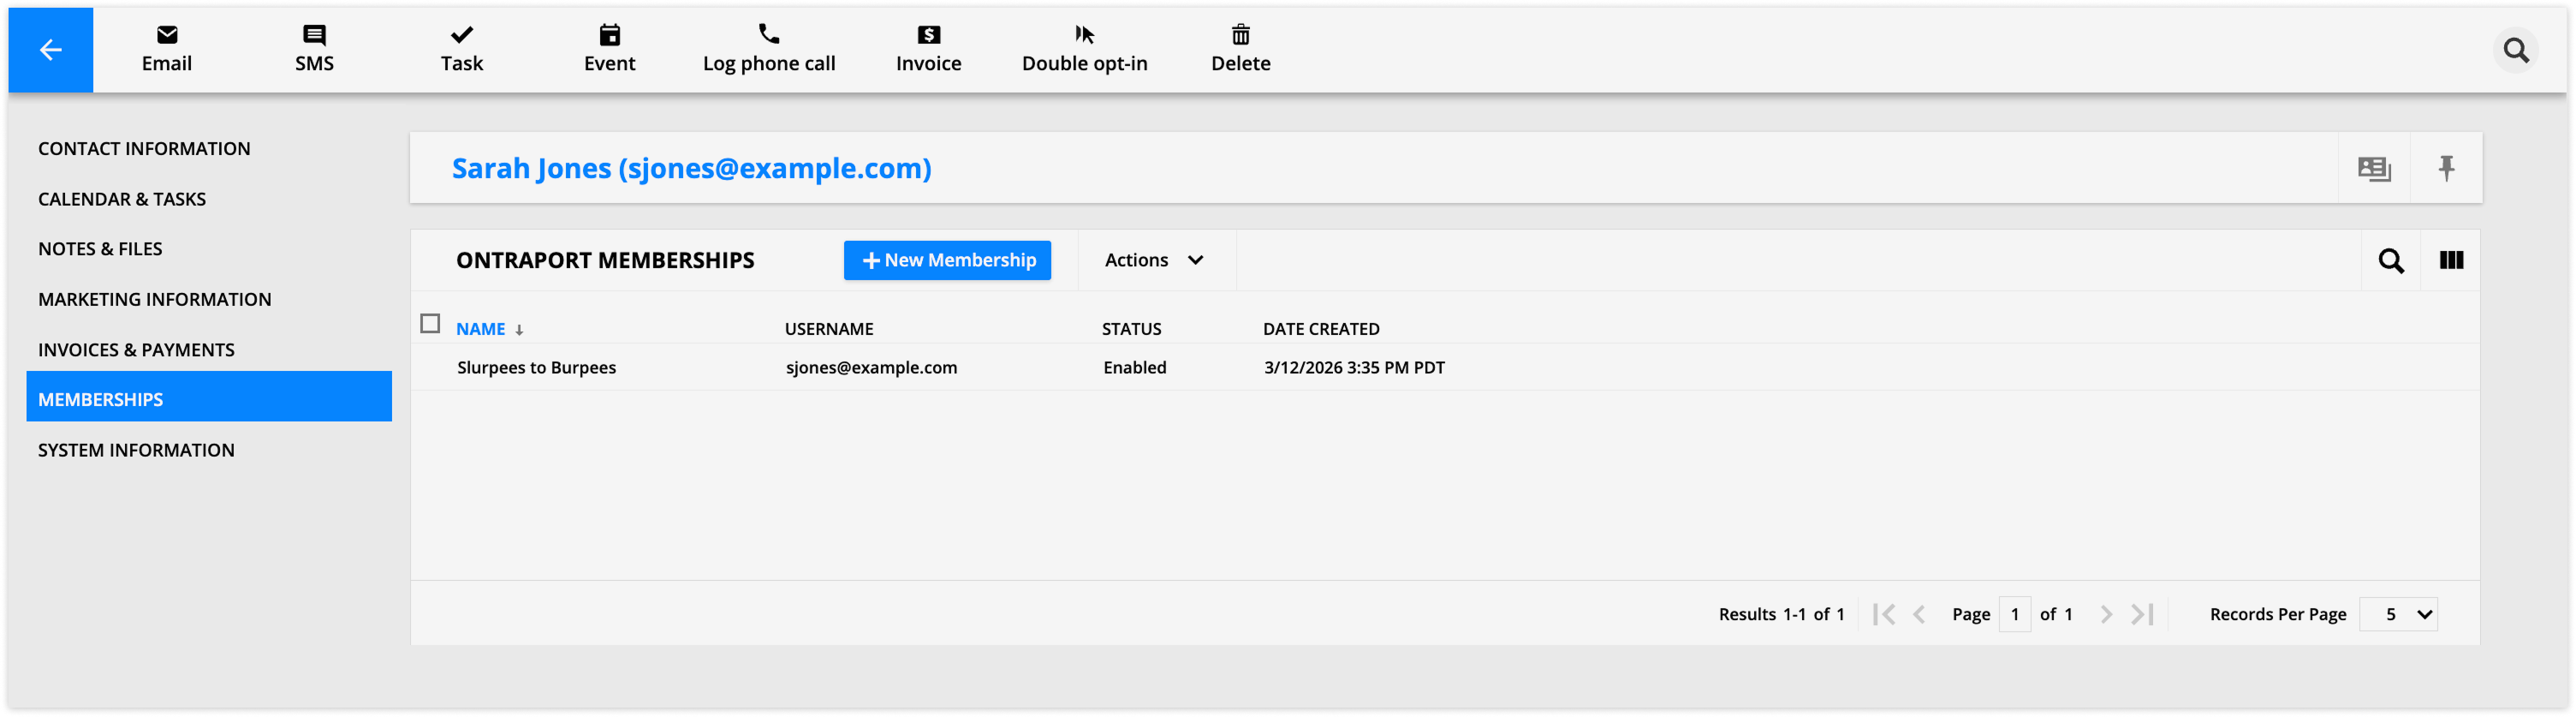
Shows all Ontraport (and WordPress, if enabled) membership sites the contact belongs to, with the ability to add memberships manually.
Where to look for info
Shows all of the Ontraport membership sites that the contact is a member of, as well as all WordPress memberships (if enabled).
What you can do
Users can manually add the contact to a membership from this tab.
System information
Back to top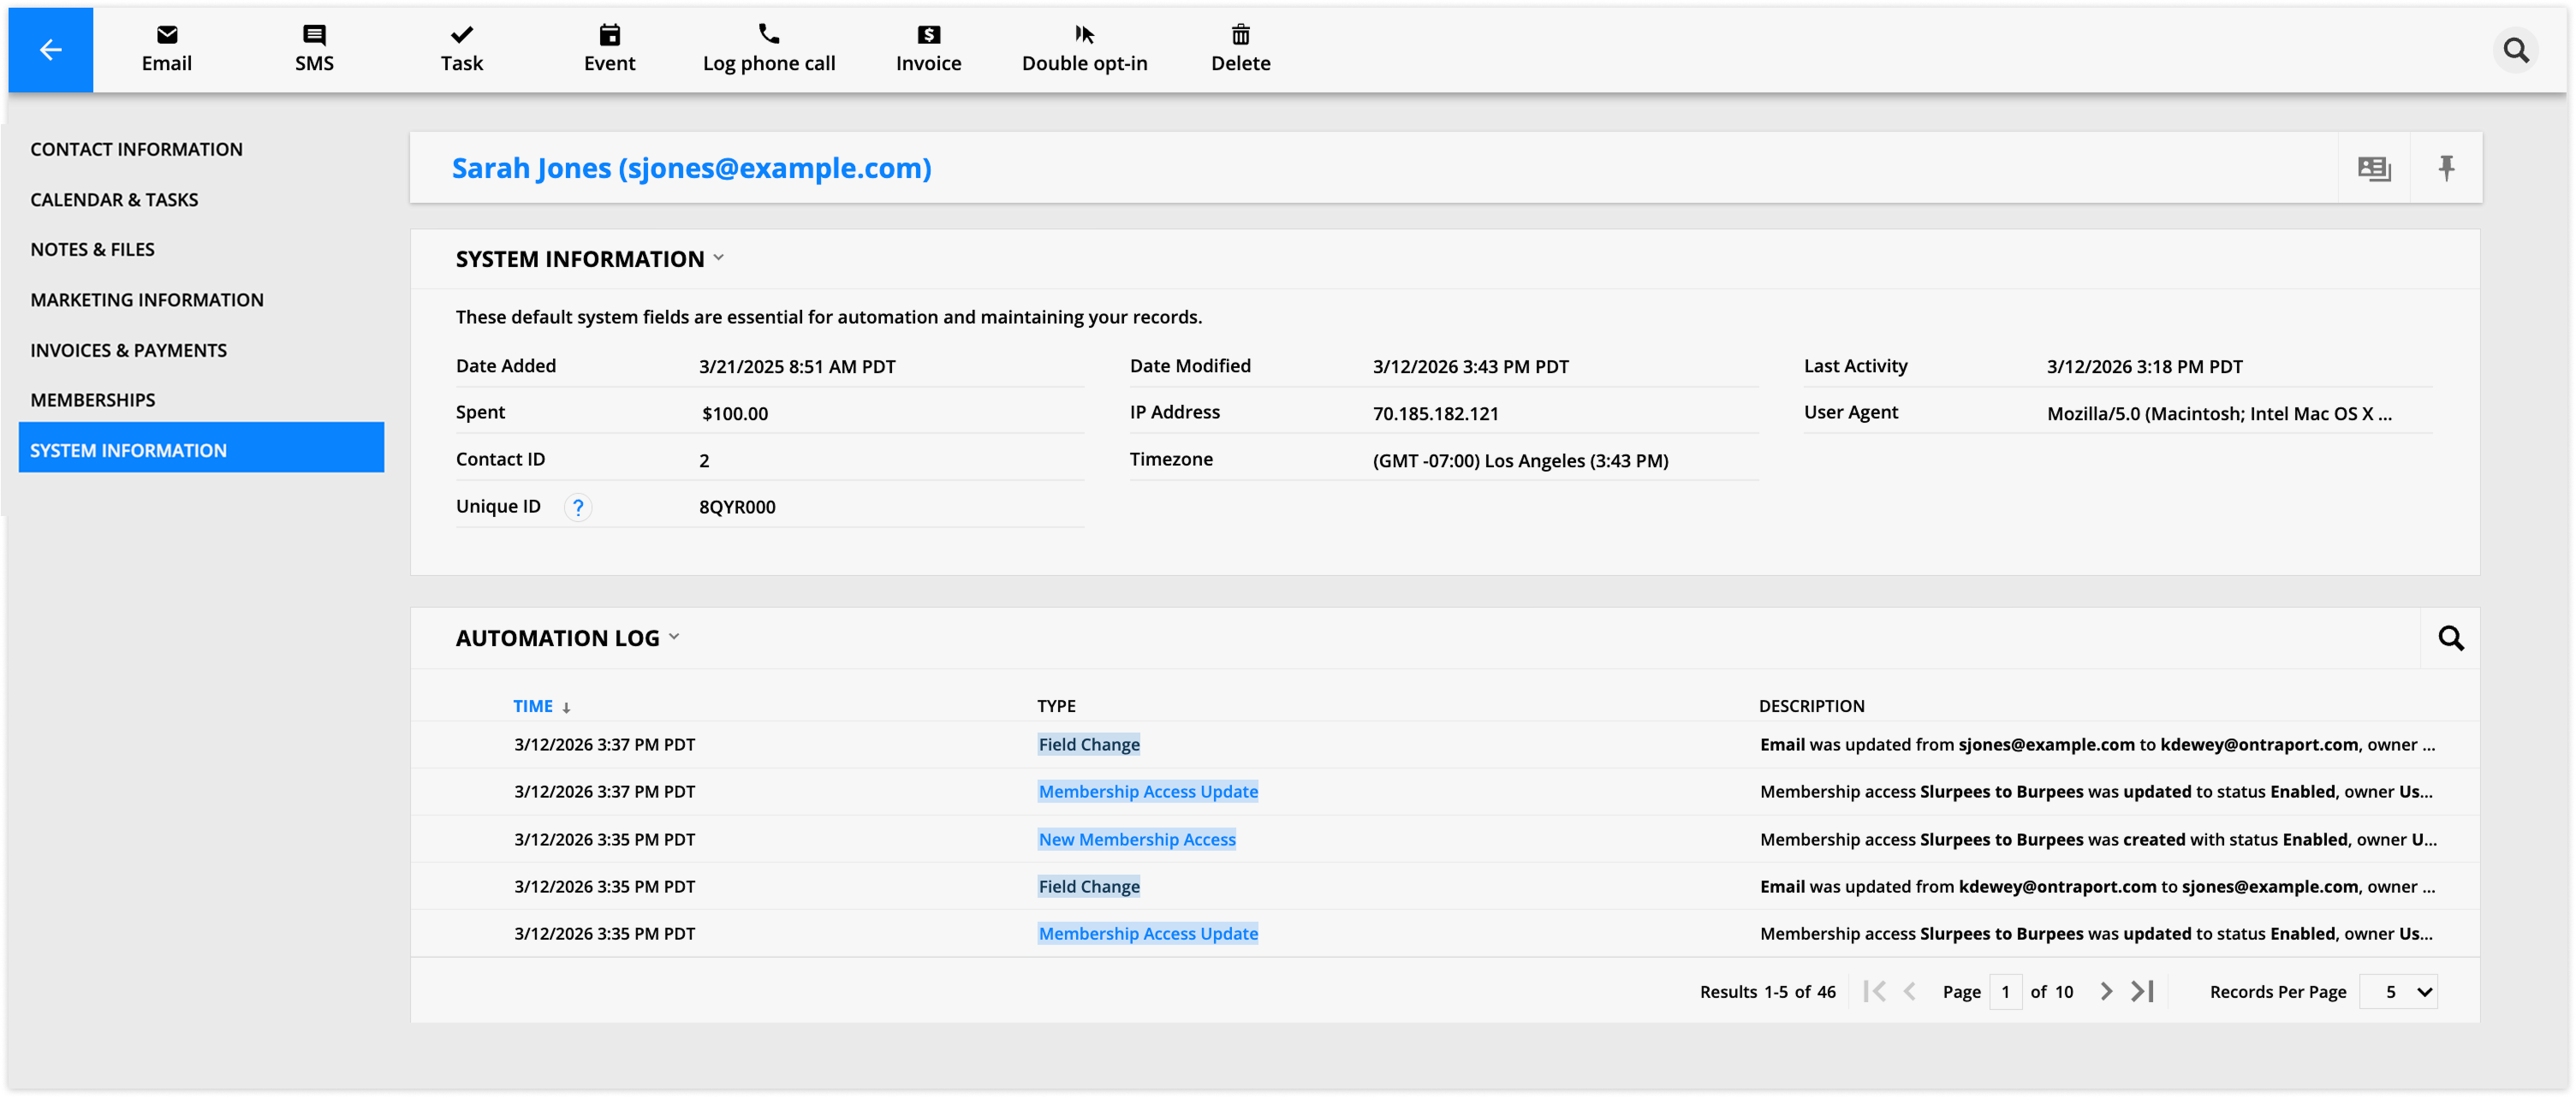
Displays essential system fields used for automation and record-keeping, plus an automation log tracking field changes, automation activity, and invoice history.
Where to look for info
Find default system fields that are essential for automation and maintaining your records.
The Automation log lets you view logs of field changes, automation changes, invoices created or updated, and when the contact was created.
What you can do
Click on line items in the Automation log to view more detailed information.
Referral Info
Back to top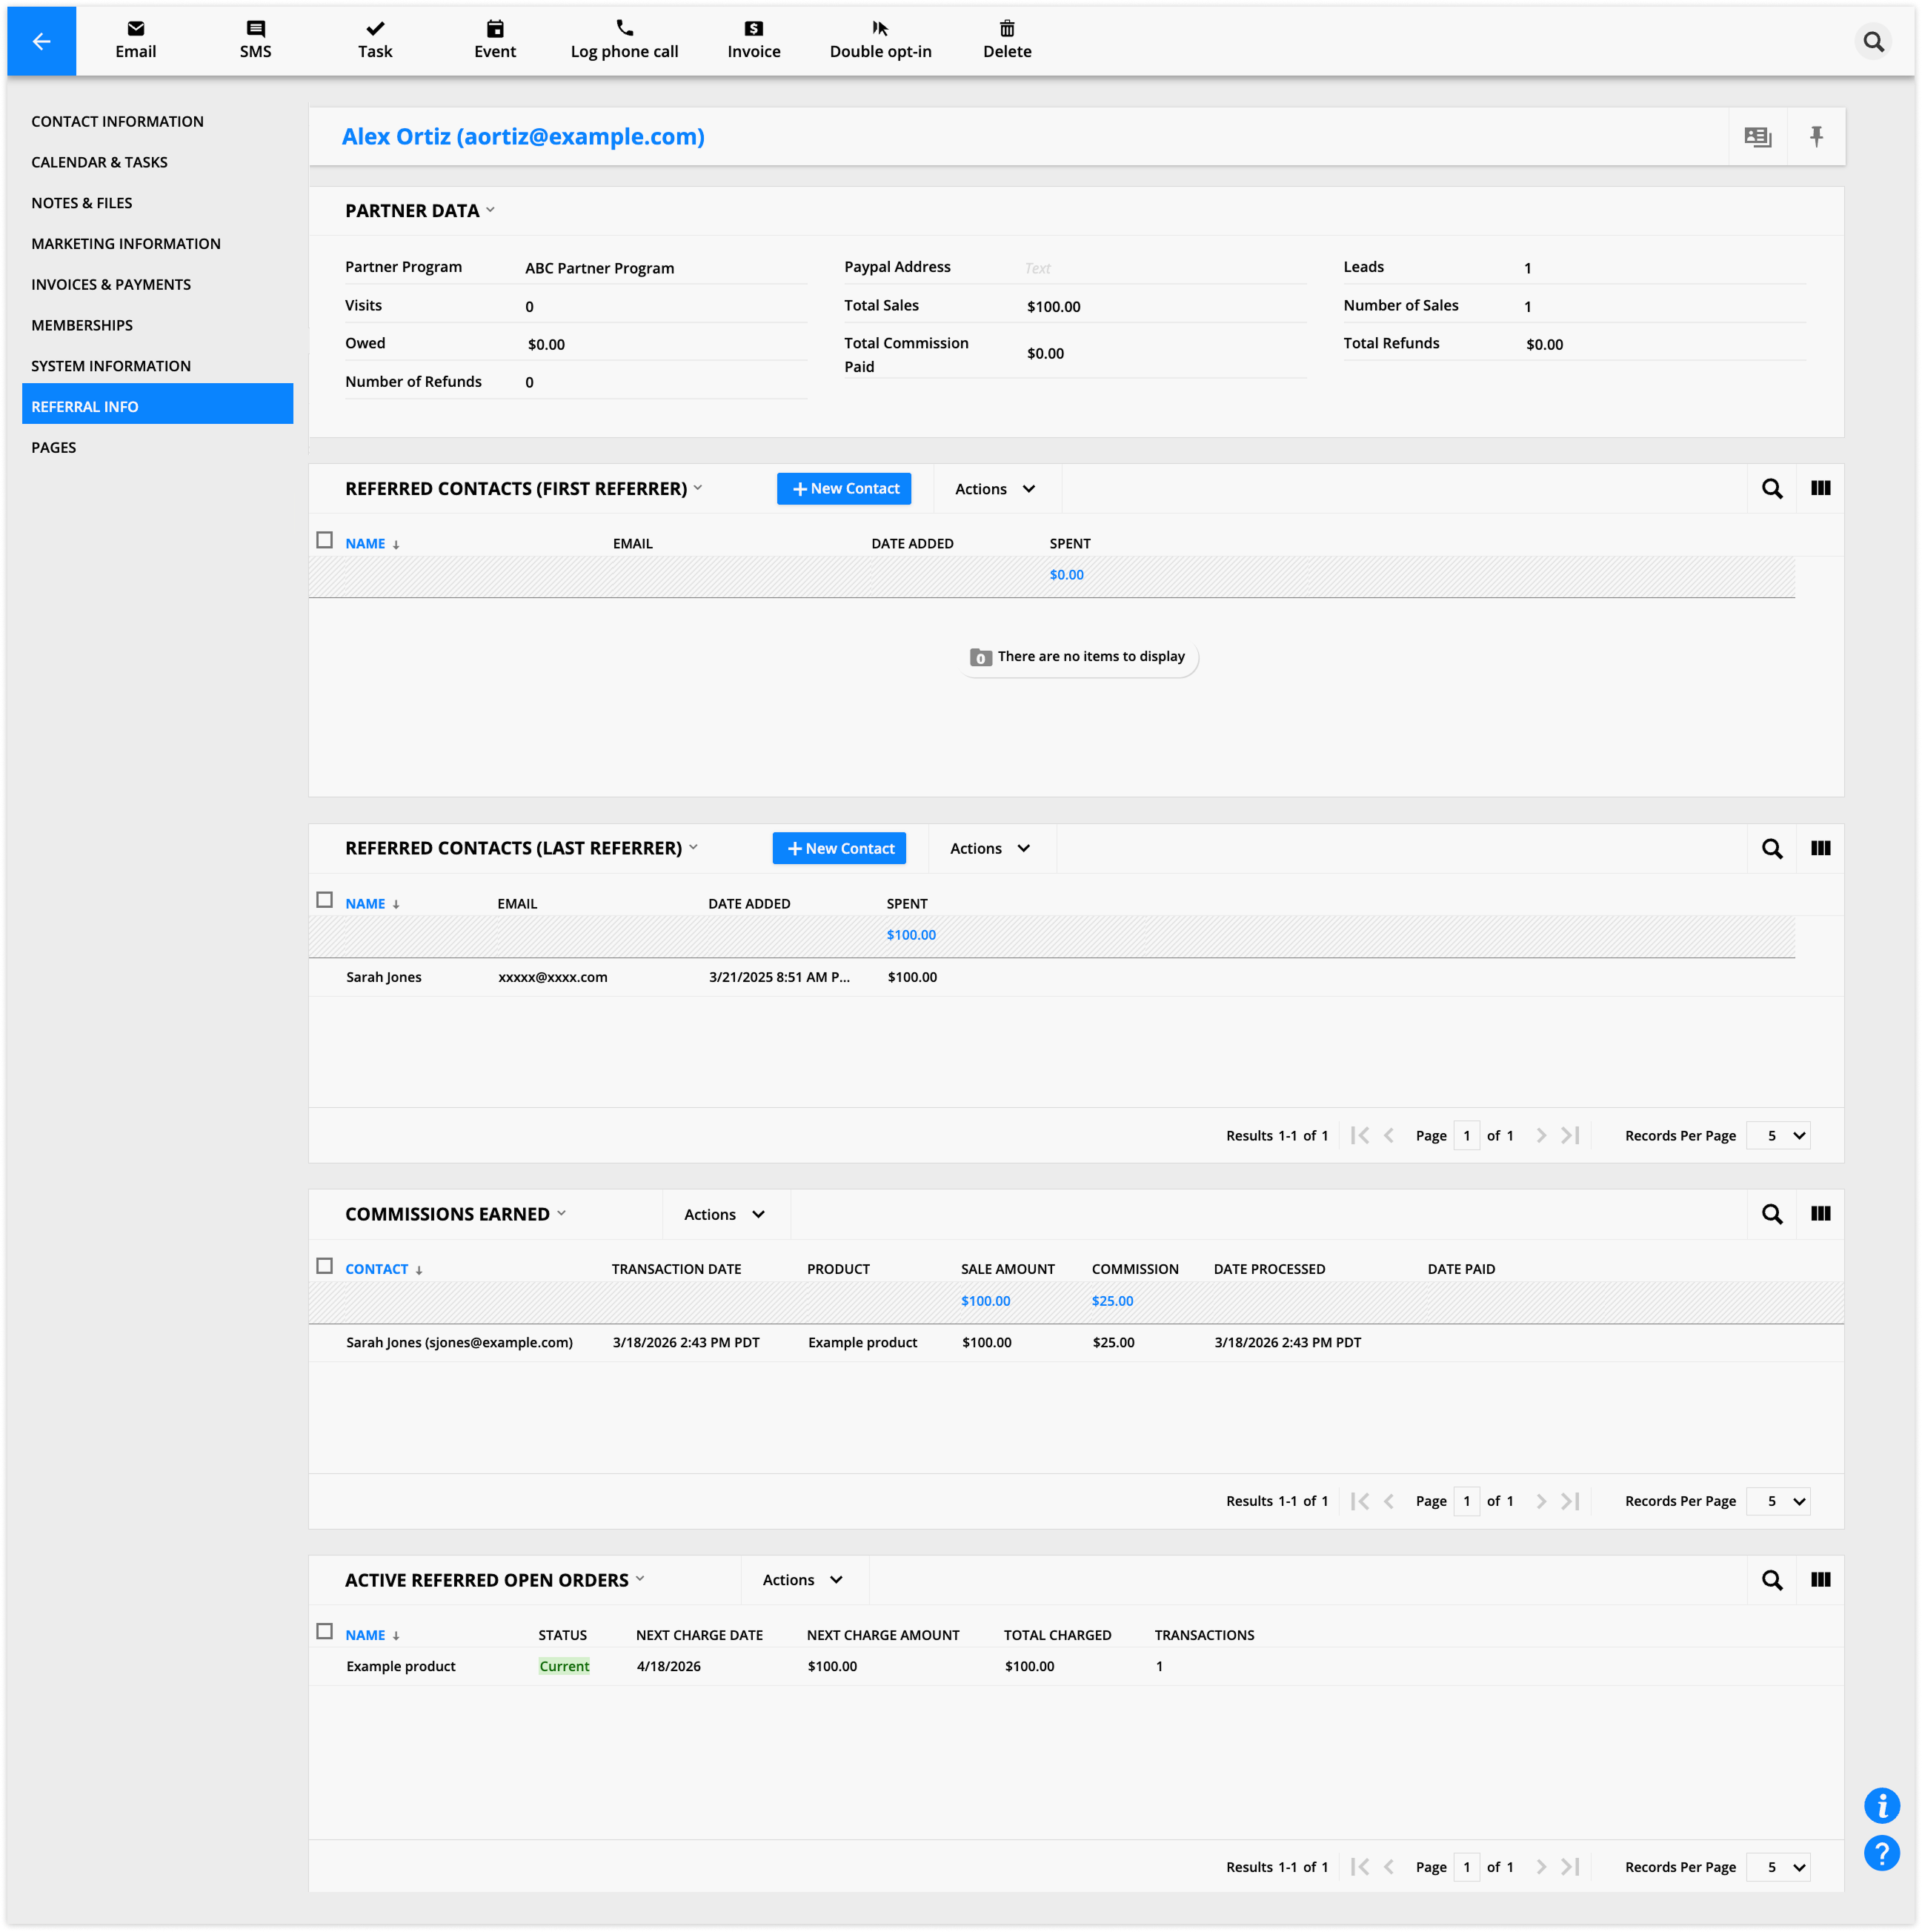
Only visible if the Partners feature is enabled, this tab is the central hub for managing a contact's partner activity. It shows which program they're in, earnings, commissions, refunds, and the contacts they've referred (both as first and last referrer). From here, you can manage referred contacts, approve or cancel commissions, and manage active referred open orders.
Where to look for info
Partner data: View information about which program your partner is part of, how much you owe them, how much they’ve earned, and refund information.
Referred contacts (First referrer): Show all of the contacts that this partner is the first referrer for.
Referred contacts (Last referrer): Show all of the contacts that this partner is the last referrer for.
Commissions earned: View all of the commissions this partner earned when their referrals purchase commissionable products, and check the status field to view the status.
Active Referred Open Orders: View all of the subscriptions or payment plans for commissionable products the partner is earning commissions on.
What you can do
Manage referred contacts: Manually add contacts to either the First or Last referrer subcollections.
This will also update the corresponding referrer field in that contact's lead information section.
Perform group actions: Select contacts from the referred subcollections to take any standard contact actions on them.
Manage commissions: Select a commission to Approve, Unapprove, Email your partner, Export, or Cancel it.
Approving moves the commission from "Pending commissions" to "Pending Payments" for mass payouts, while canceling removes it from the commission collections and from your partner’s data.
Manage open orders: Select an active referred open order to edit it (which allows you to see the partner) or delete it.
Pages
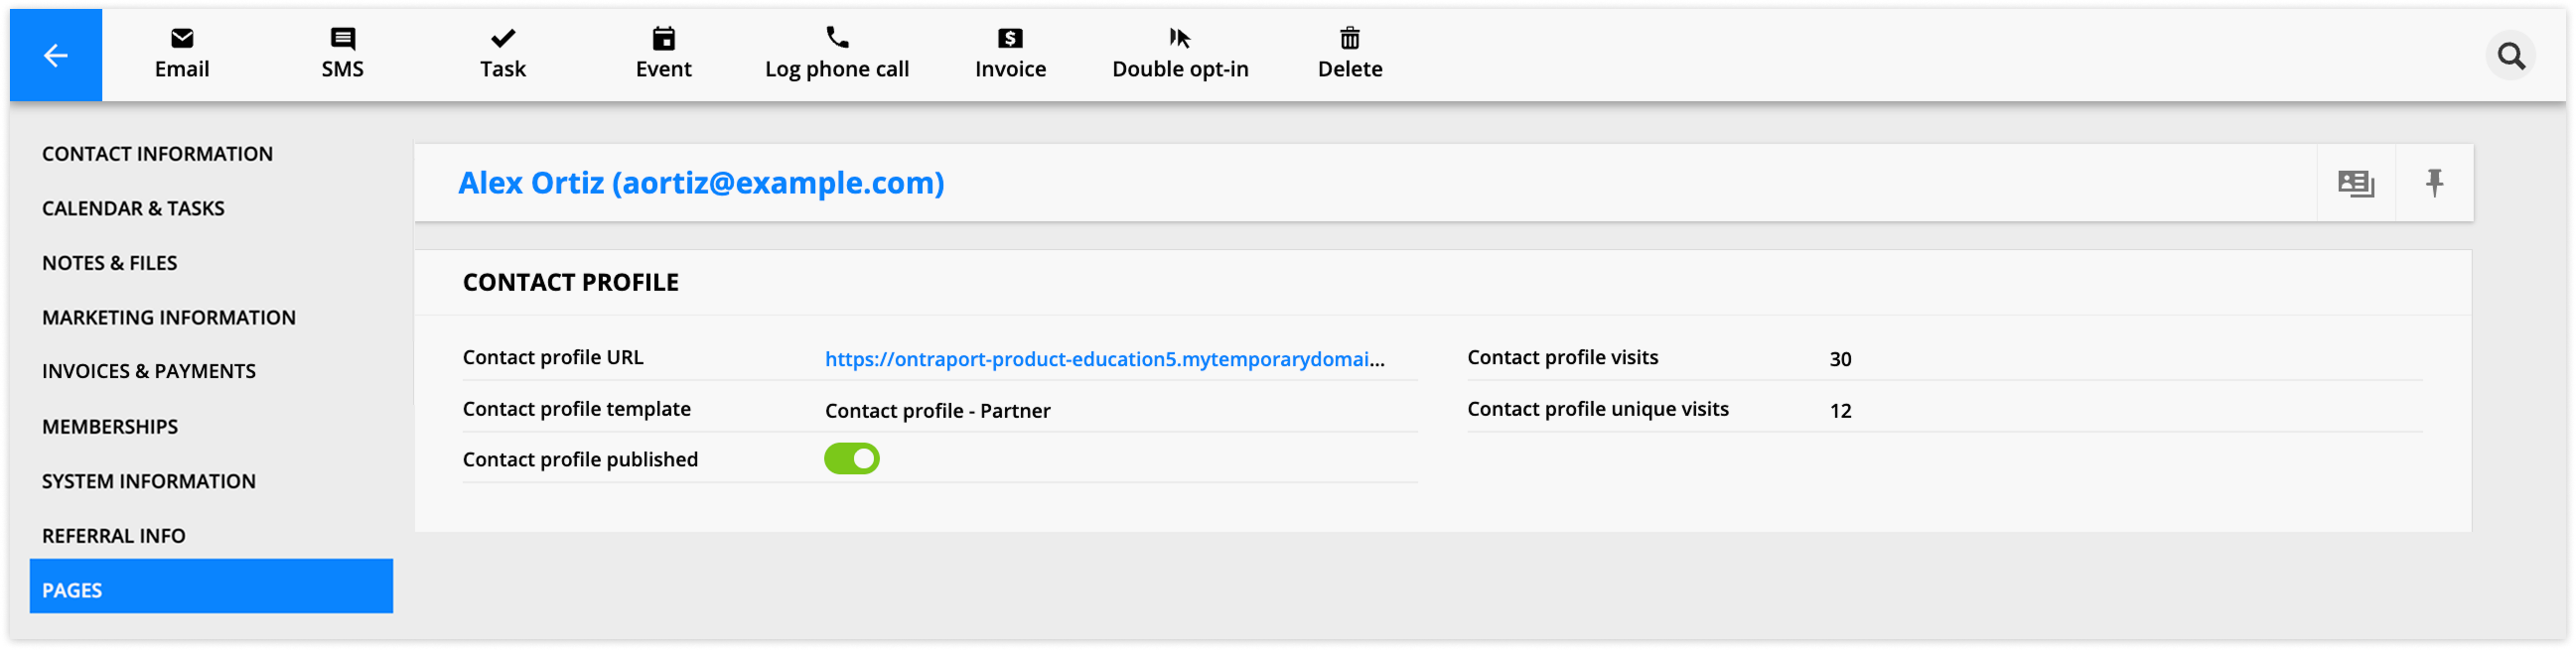
Only appears when a dynamic template has been created for a contacts page. It displays metrics for published pages (URL, publish status, visits, and unique visits) and lets you choose or change templates and publish or unpublish dynamic pages.
Where to look for info
Page metrics: View the URL of published pages, see if the page is currently published or not, and track visits and unique visits.
Dynamic page URL: Find the link to published dynamic pages in each page type section.
What you can do
Choose or change a template for your dynamic page.
Publish and unpublish the dynamic page.