Ontraport offers a number of integrations with top-ranking webinar platforms. Integrate your webinar software with Ontraport to automatically add and update contact information, fire automated reminders and more when a lead registers for your webinar.
Note: Ontraport only offers support for built-in integrations. For assistance with an outside integration, please reach out to their support team using the contact information provided below.
Integrations
GoToWebinar
Integrate GoToWebinar with Ontraport to allow contacts to register for webinars through Ontraport forms, or automatically add registrants to your contact list and more.
- Get connected
- Follow these steps provided by Zapier to integrate with Ontraport
- Follow these steps provided by Zapier to integrate GoToWebinar.
- Use this prebuilt Zap to allow visitors to register using Ontraport forms.
- Use this Zap to add GoToWebinar registrants to Ontraport.
- Or update Ontraport contacts when they attend webinars.
For assistance integrating GoToWebinar with Ontraport, reach out to Ontraport support or Zapier support.
Zoom
Ontraport offers a built in Zoom integration that allows you to add unique Zoom links to meetings scheduled via booking pages or manually created in Ontraport’s calendar.
Follow these steps to set up the integration.
To easily add Ontraport contacts to Zoom webinars, follow these steps:
- Get connected.
- Follow these steps provided by Zapier to integrate with Ontraport.
- Follow these steps provided by Zapier to integrate Zoom with Zapier.
- Use this prebuilt Zap. This template will register your contact in a Zoom Webinar when you add an Ontraport tag.
Follow the steps in the prebuilt Zap. To get connected, the Zap will ask you to:
- Create the tag in Ontraport that you want to use in this Zap — your “Zoom Registration” tag.
- Create a test contact in Ontraport and add the “Zoom Registration” tag to their record.
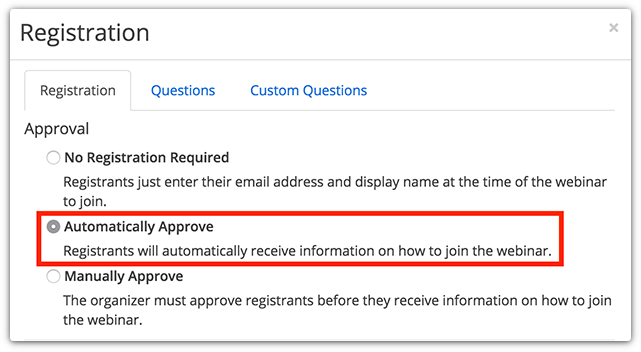
- Create a webinar in Zoom.
- Your webinar’s registration settings should be set to “Automatically Approve.”
(Optional) Create signup automation
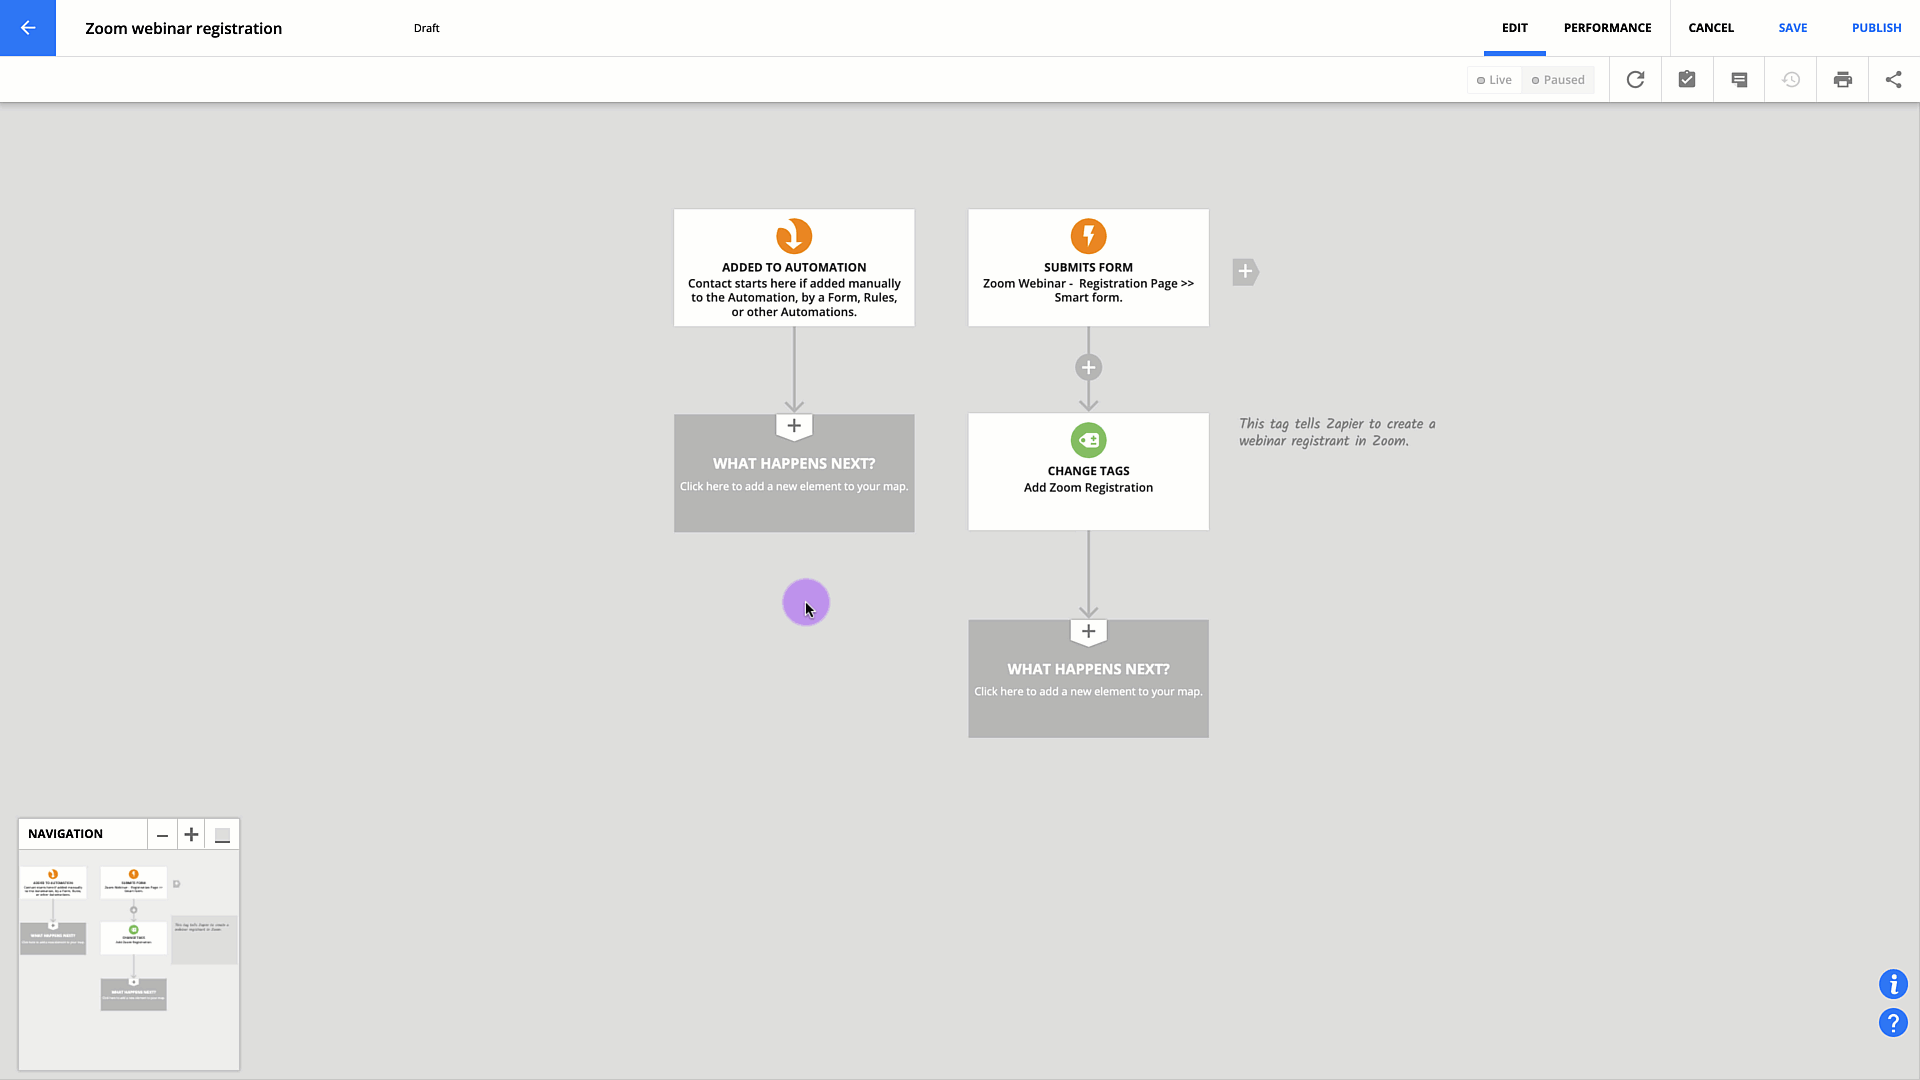
You can always manually add tags to your contacts to register for your webinar. But in most cases you’ll want to create a form in Ontraport where your contacts can sign up for your webinar. Then you can automatically add a tag to contacts who sign up. This automation is very simple to set up and will save you a lot of time. Here’s how:
- In Ontraport, create a signup form for your webinar.
- Save and publish your page before moving on to the next step.
- Go to Automations → New Automation.
- If you have Deals, Companies or any Custom Object enabled go to Contacts → Automations → New Automation.
- Click Start from scratch.
- Add a “Contact submits form” trigger and select the signup you created in step 1.
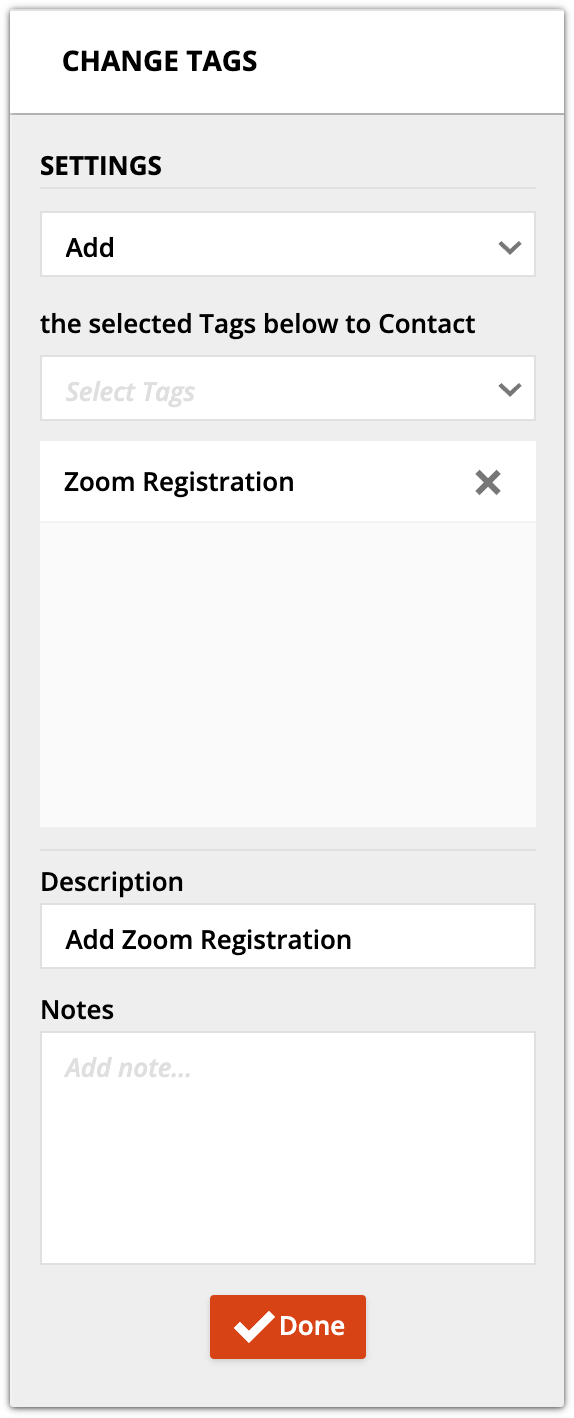
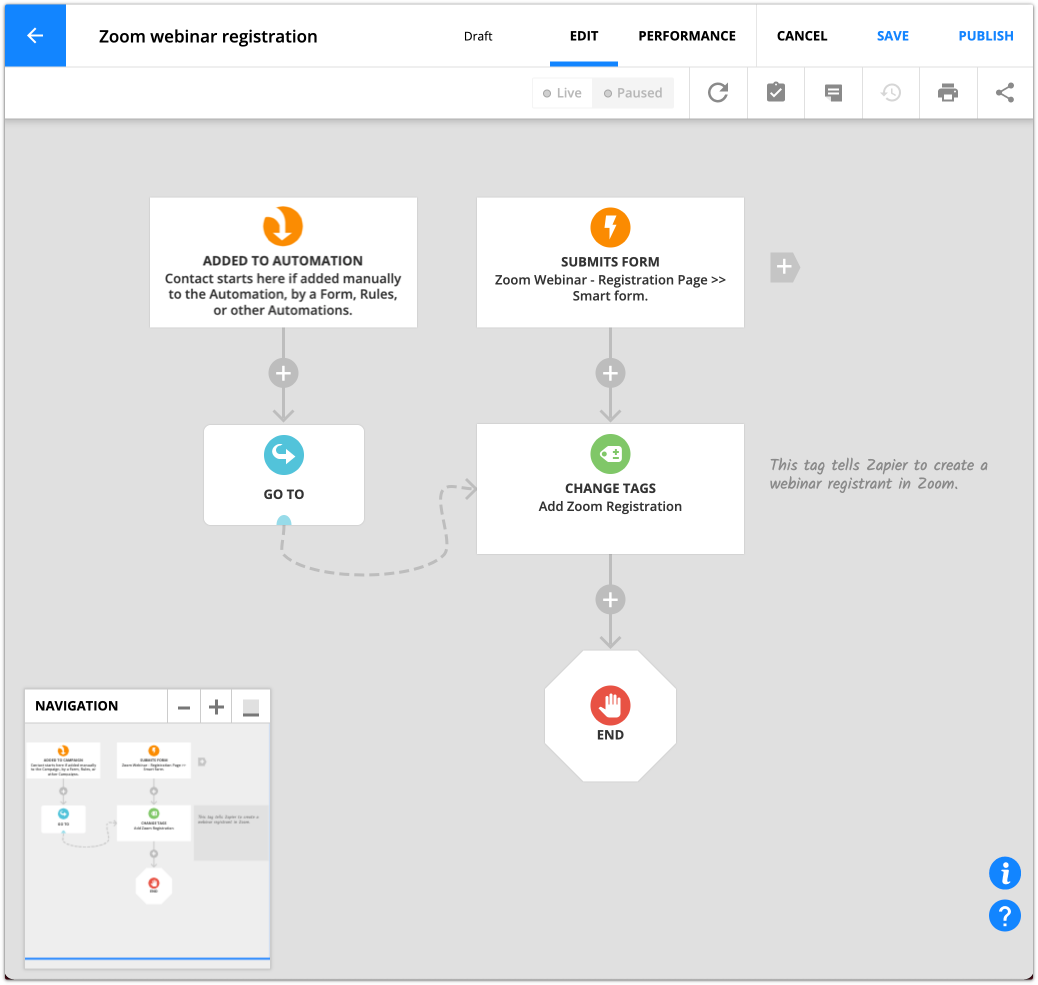
- Below your trigger, add a “Change tags” element.
- Click on your element to open its settings and add your “Zoom Registration” tag.
- Click Done.
- Complete your map by adding an “End” element below your change tags. Then add a “Go-To” element under your default trigger.
- The “Go-To” element lets you manually add contacts to this map.
- Save and Publish your automation.
PlusThis integration alternative
PlusThis also offers an integration between Zoom and Ontraport. A benefit of this integration is that PlusThis will automatically tag attendees and non-attendees so you can send follow-up based on your guests’ behavior.
- Follow these steps provided by PlusThis to get connected.
- Ontraport users can access special pricing for PlusThis here.
Demio
- Follow these steps to obtain an Ontraport API key and app ID.
- Log in to your Demio account and follow these steps for integrating with Ontraport.
For assistance integrating Demio with Ontraport, visit their support page or email support@demio.com.
EasyWebinar
- Follow these steps to obtain an Ontraport API key and app ID.
- Follow the steps provided by EasyWebinar to integrate with Ontraport.
For assistance integrating EasyWebinar with Ontraport, contact EasyWebinar’s Support team, or find answers to your questions on their support page.
EverWebinar
- Follow these steps to obtain an Ontraport API key and app ID.
- Follow the steps provided by WebinarJam to integrate EverWebinar with Ontraport through Zapier.
For assistance integrating EverWebinar with Ontraport, reach out to WebinarJam support.
WebinarJam
- Follow these steps to obtain an Ontraport API key and app ID.
- Follow the steps provided by WebinarJam to integrate with Ontraport through Zapier.
For assistance integrating WebinarJam with Ontraport, reach out to WebinarJam support.
Yondo
- Follow these steps to obtain an Ontraport API key and app ID.
- Follow the steps provided by Yondo to integrate with Ontraport.
For assistance integrating Yondo with Ontraport, contact Yondo’s Support team or go to their support page for more information.
StealthSeminar
- For legacy versions of this integration:
- Follow =these steps to obtain an Ontraport API key and app ID.
- Contact StealthSeminar support, and they will set up the integration for you.
- For StealthSeminar’s beta plugin version, follow their setup instructions.
For further assistance integrating StealthSeminar with Ontraport, visit StealthSeminar’s support page.
Discover Other Ontraport Integrations
Integrations Overview >Know of any webinar tools that integrate with Ontraport that aren’t listed here? Please email pr@ontraport.com to let us know.