If you need to collect information such as demographics, market preferences, or any other feedback from your contacts you can use Ontraport’s Surveys to create surveys and store your responses in their own records.
You also get a record of every survey your leads and customers take, so you don’t have to worry about overwriting any important feedback.
Add a dynamic content package to your account to use this feature. Here’s how:
- Click here to go to your account details page.
- Click Add plan or Start trial next to “Add Dynamic CMS to your account” and choose the plan that fits your needs.
Table of contents
How Surveys works in your Ontraport account
Enable Surveys
Create a survey
Publish your survey
• Method 1: Embed your survey
• Method 2: Make a pop-up survey
Optional survey customization
• Customize your survey questions
• Create a multiple-page survey
Use Cases
How Surveys works in your Ontraport account
The Surveys app is a prebuilt object with a one-to-many relationship with the Contacts object. That means every contact can submit multiple surveys. You’ll find a Survey Information subcollection in your contact records that shows you all of the surveys each contact has filled out.
When you create surveys for your contacts to fill out, simply create a form and add responder fields to it so you know who took the survey.
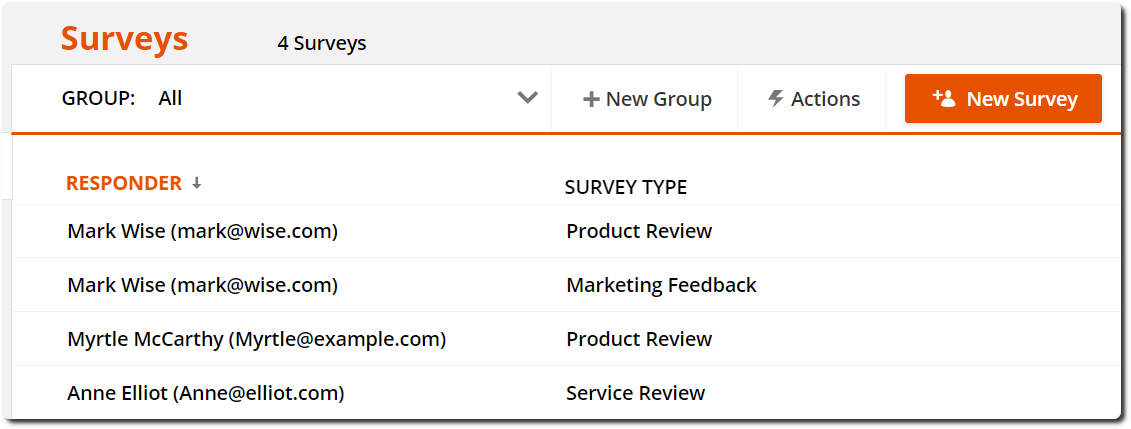
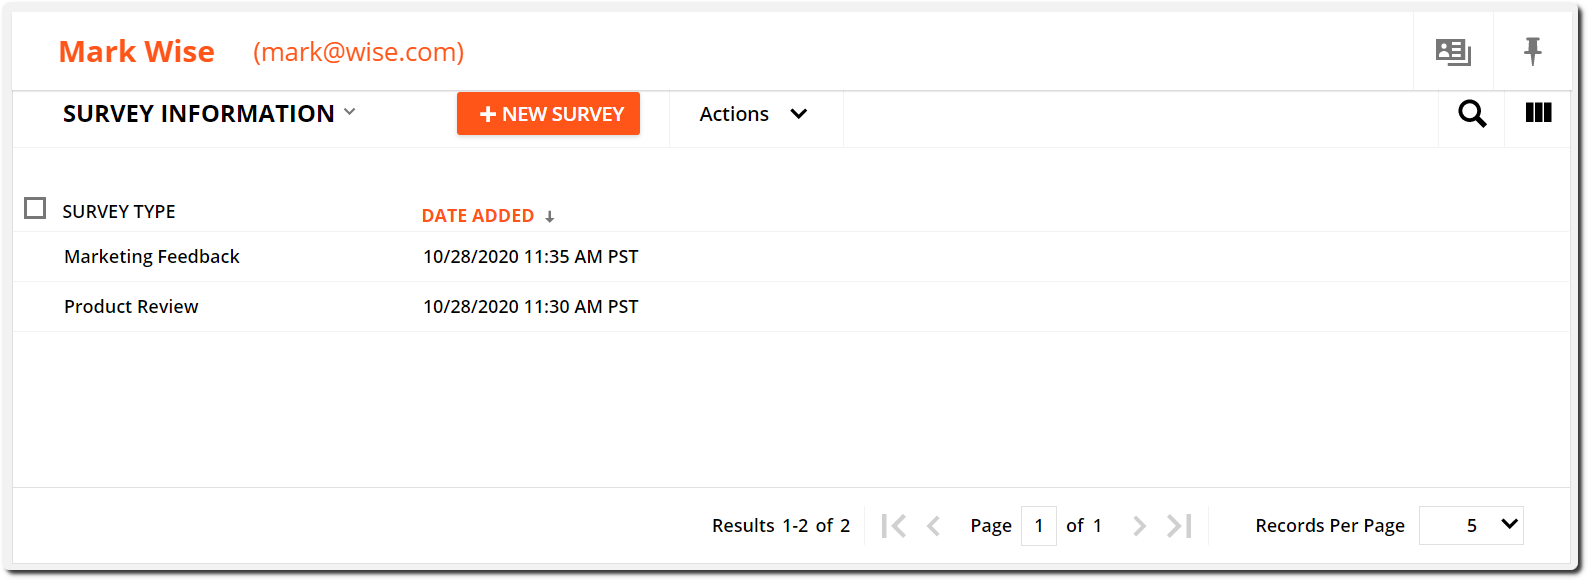
You can refer back to your contacts’ survey responses any time. Click Surveys from your top navigation bar, then click on the survey record you want to look at.
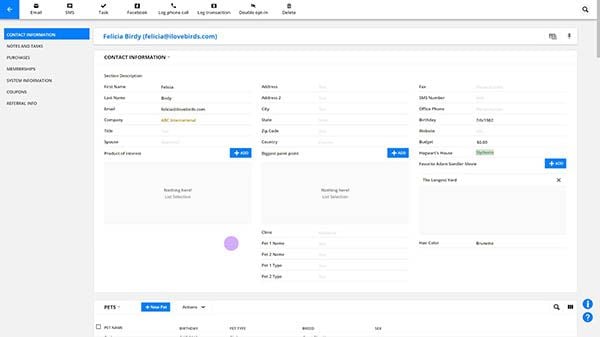
Or take a look at the Survey Information section in each of your contact’s records to see a list of all the surveys that contact filled out.
Enable Surveys
- Go to
.png) → Apps.
→ Apps. - Toggle Surveys on.
Create a survey
Each survey you create is really just a form that you create under your “Surveys” tab, and each of the questions on your survey is just a field also saved under your “Surveys” tab. Surveys come pre-loaded with default fields so you can easily add commonly asked questions to your surveys right out of the box.
Here’s how to set it up:
- Go to Surveys → Forms → New Form → OntraForm.
- Click Start from scratch.
- Click.Add Block → Smart Form.
- Select the template you want to use.
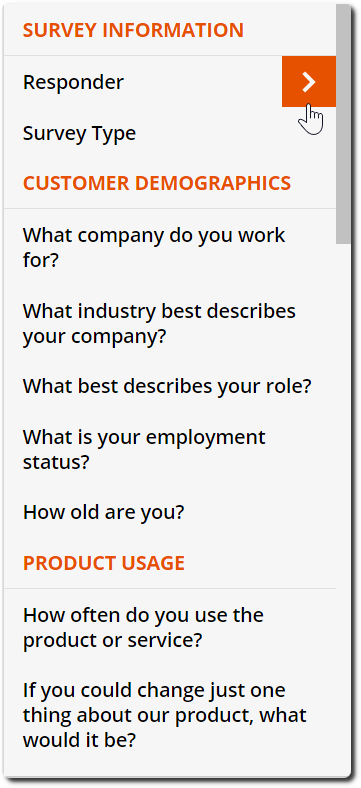
- On the sidebar, click Smart Form → Form → Add and select the survey questions you want from your field dropdown.
- Make sure to add your responder (contact) information, such as name and email, by drilling into the “Responder” field to access your contact’s first name, last name and email fields.
- Click Save.
Publish your survey
Once you create your survey, the last step is to add your survey to a page so your contacts can access it and start sending you feedback.
There are two basic ways to add your survey to an Ontraport page:
- Embed it: You can add your survey in a fixed position on your page.
- Make a pop-up: You can choose to have your survey pop up based on how far your visitor scrolls on your page, how long they’ve been on your page or if your visitor tries to leave your page.
Method 1: Embed your survey
First, you’ll need to copy your form’s embed code.
- Go to your form and click Publish.
- Select Embedded in page.
- Click Copy to clipboard.
Next, you’ll add that code to your Ontraport page by following these steps:
- Create a new page or edit an existing one.
- Add a Custom HTML element to your page and click it to open your custom HTML editor.
- Click Edit Code.
- Select all the default code and replace it by pasting your form’s embed code.
- Click Done → Publish → Save & Publish.
Method 2: Make a pop-up survey
- Create a new page or edit an existing one.
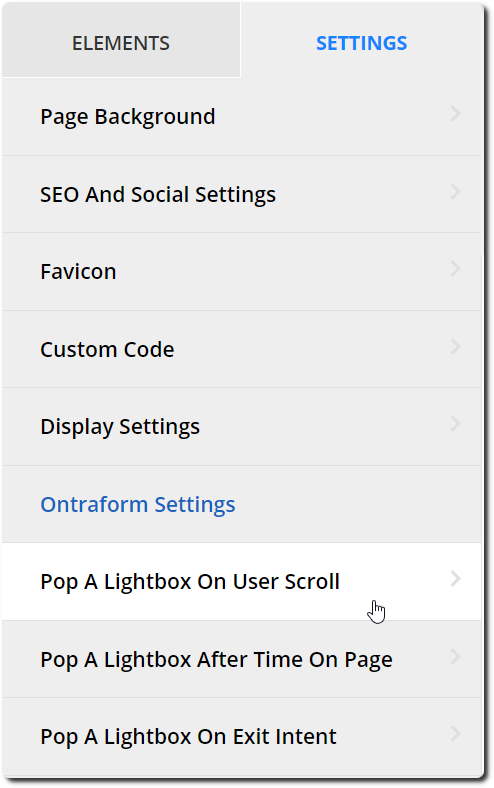
- Click and select when you’d like your survey to appear from the Ontraform Settings section:
- Pop a lightbox on user scroll
- Pop a lightbox after time on page
- Pop a lightbox on exit intent
- Switch the “Enable OntraForm lightbox” toggle to "on."
- Select your form from the dropdown menu and edit your display settings.
- Click Done → Publish → Save & Publish.
Optional survey customization
Now that you know all the basics of creating and publishing your surveys, let’s talk about customizing them:
Customize your survey questions
You can customize your default fields, such as adding new dropdown options, or creating your own custom survey questions, all from your survey’s field editor. Here’s how:
- Go to Surveys→ Settings → Field Editor.
- Follow the steps in this article to edit your survey questions as you’d like.
Create a multiple-page survey
If you’d like to create a long-form survey, it’s best practice to split your survey up into different sections so your contacts don’t have to fill out one long intimidating survey.
Once you’ve created a form for each page of your survey, follow the steps below to connect your forms.
- From your form’s editor, click Smart Form → Form Settings.
- In the Send contacts here section select Pop OntraForm Lightbox and choose the form you want to appear next.
- Click Save on your form’s settings.
- Click Done → Save.
Note, on your last survey page, select a thank you page in your Send contacts here section so your contacts will know when they’re done.
Use Cases
There are a ton of use cases for surveys; see if any of them apply to your business!
After-purchase surveys
If you want to survey your contacts after they make a purchase, you’ll send an email to your customers with a link to your survey inside.
To do this you’ll create a Contact automation map that has a trigger for “product is purchased” followed by a “send an email” element that sends your survey request email.
Membership satisfaction
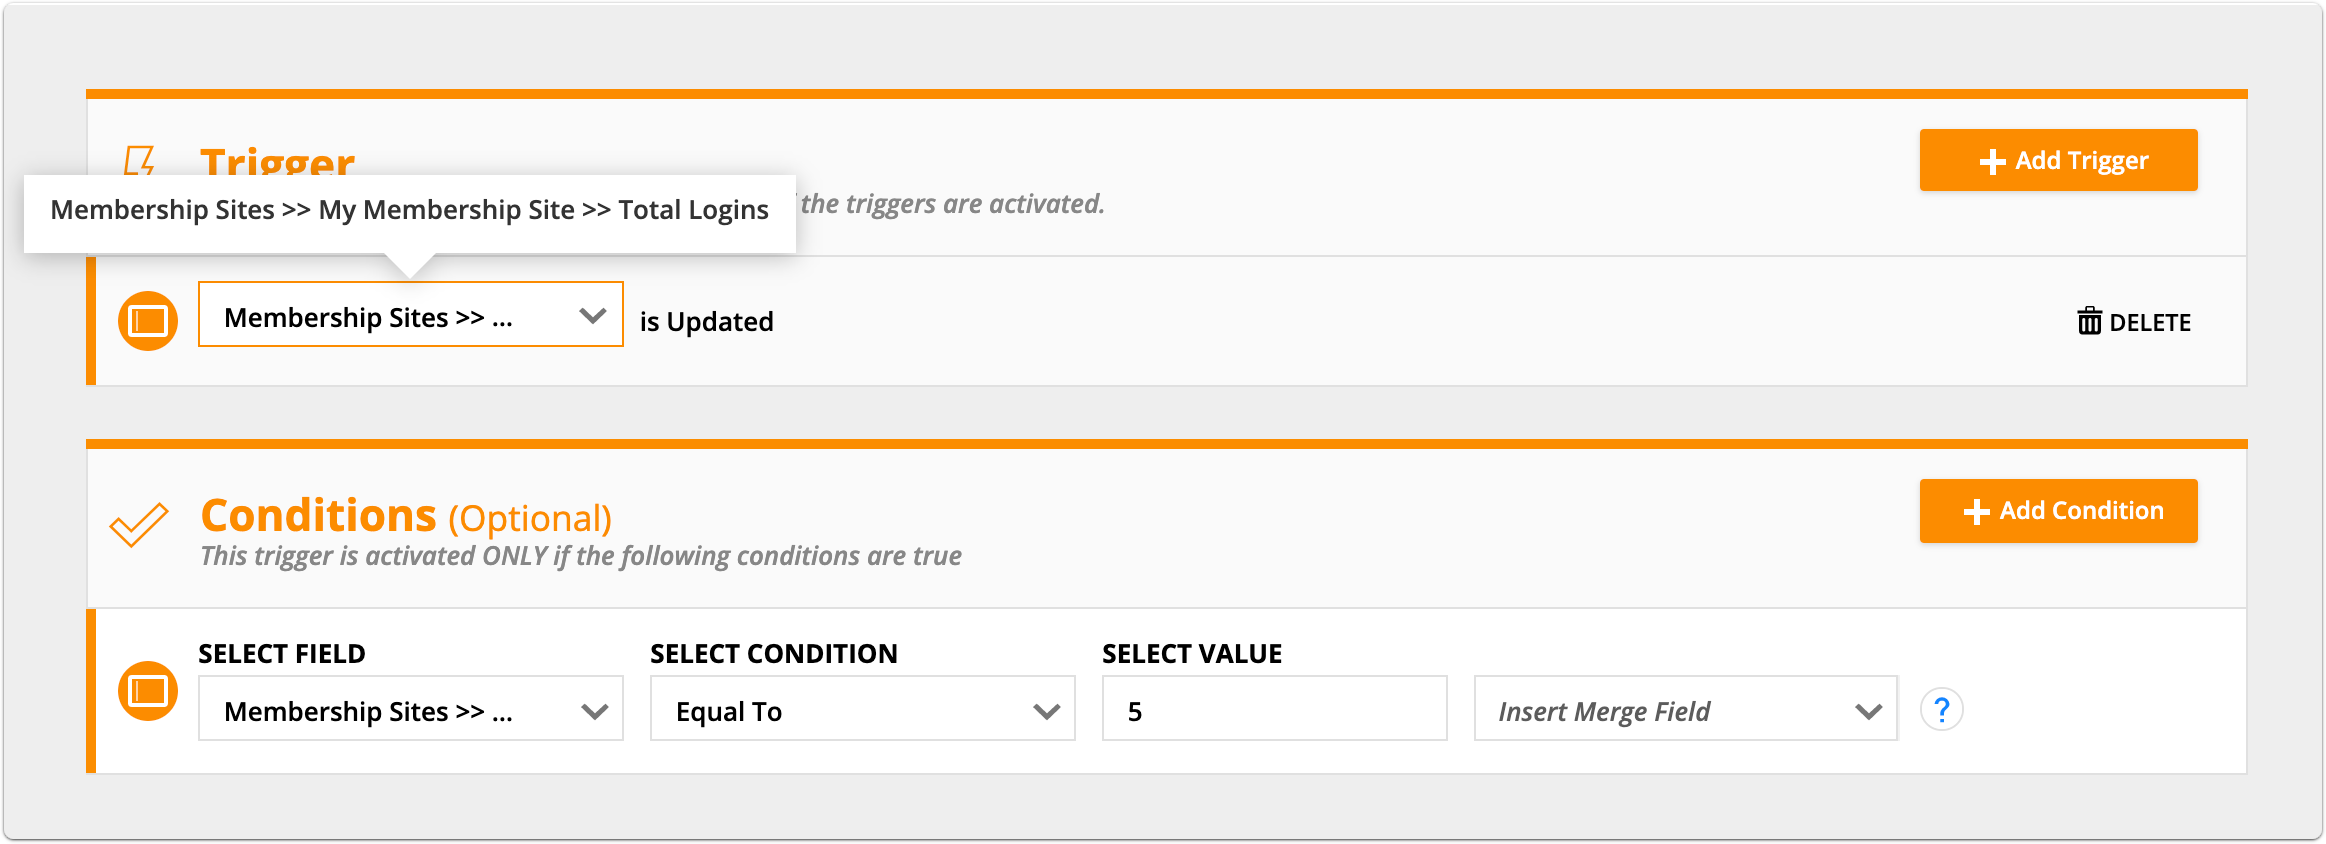
Let’s say you want to survey your membership site subscribers after they’ve logged in five times and have gotten a feel for your course. You’ll create an automation map really similar to the post-purchase survey above but with a different trigger.
To do this you’ll create a Contact automation map and use a “field is updated” element. Then you’ll drill into your membership site’s “Total Logins” field, and stick a condition on your trigger so it will fire when “Total Logins” equals 5.
Managing multiple-page surveys
Your Surveys automation maps can’t launch a survey because a survey isn’t connected to a contact until the “responder” fields on your survey are filled out. So if you want to email your customers a link to a survey, your email always needs to be sent from a Contact automation map.
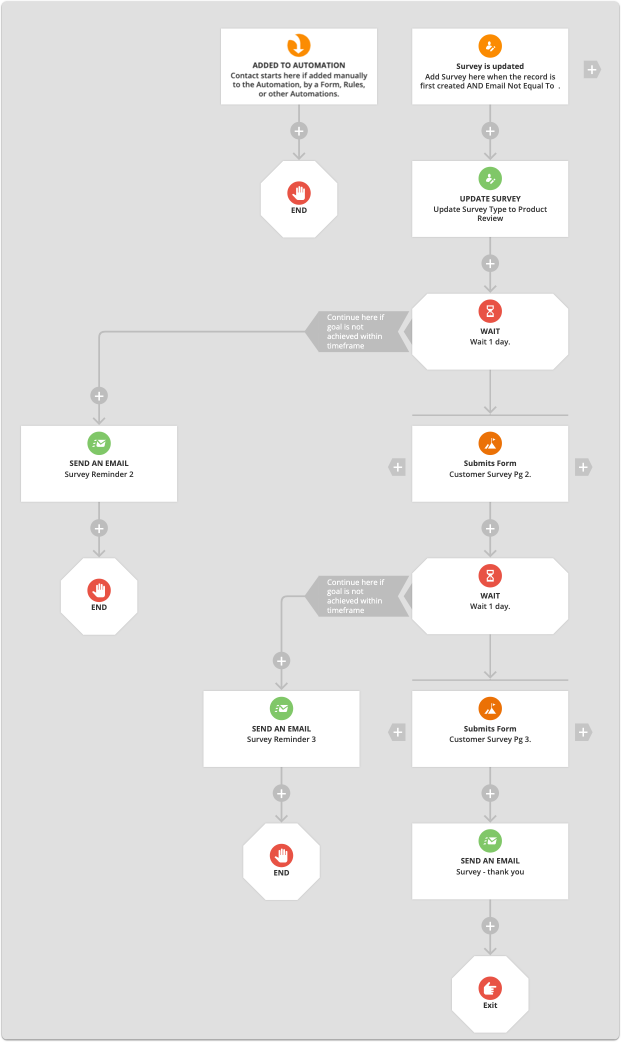
However, your Surveys automations are great for managing multiple-page surveys.
When you give your customers several pages of questions to fill out, you’ll inevitably have some responders who quit and abandon your survey. You can create an automation map that checks to see if each of the pages of your survey are filled out within a certain timeframe. If the next page isn’t filled out in that timeframe, your automation sends a reminder to complete it.
Use a “Survey is created” trigger with a condition “Responder >> Email Not Equal to [Page//Blank].
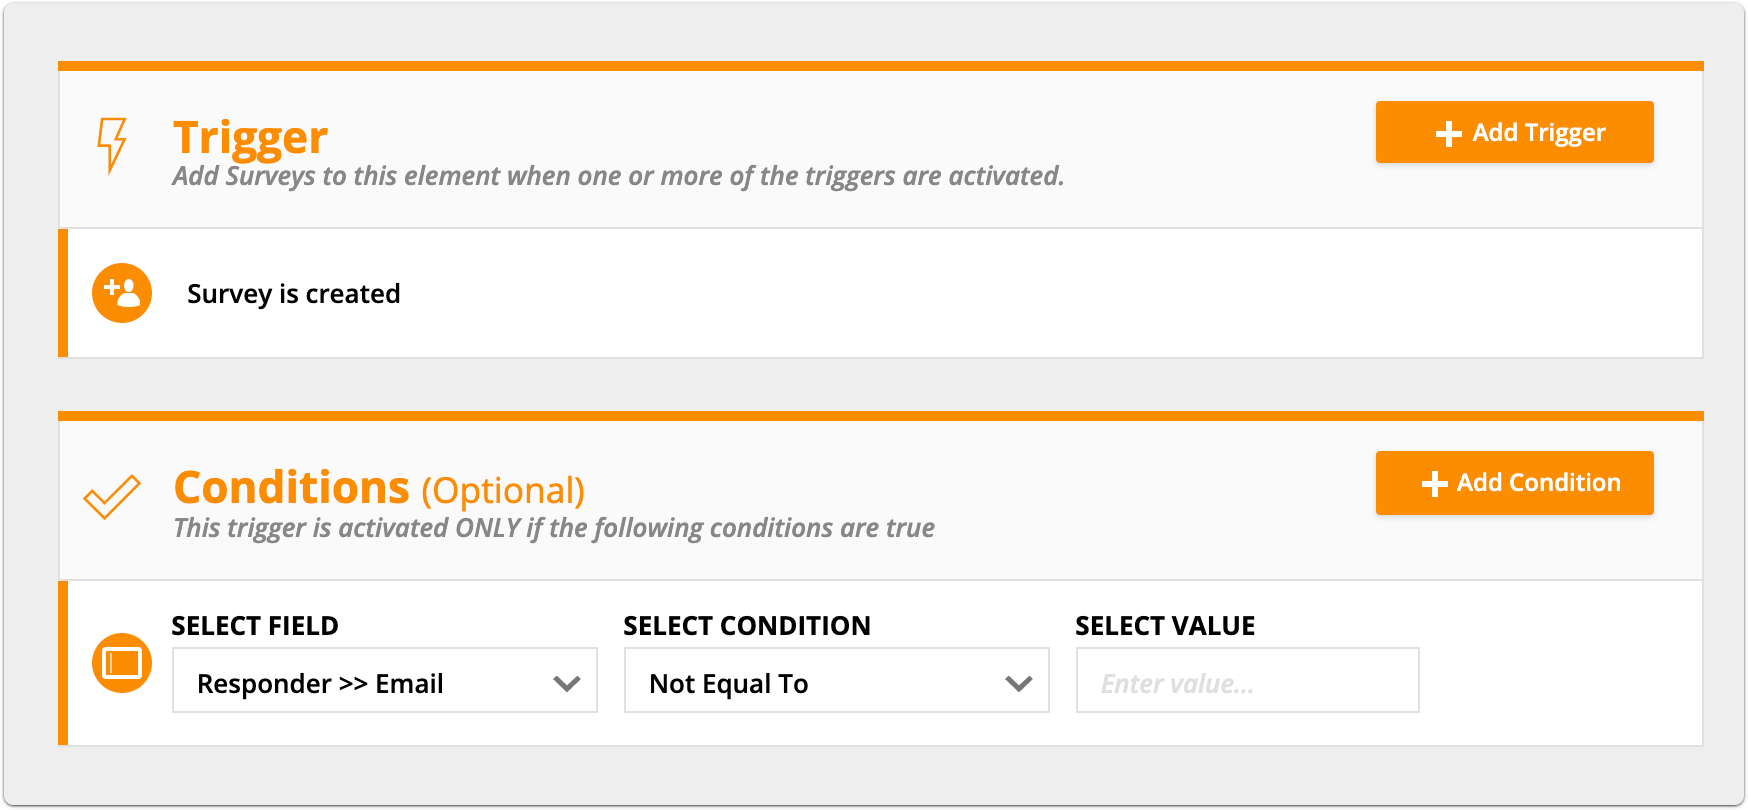
Then use goals to track who fills out your second page of survey questions. If you don’t get a response in one day, then the automation sends your reminder email.