Webhooks are a way to send information from Ontraport to a third-party API or even send information back to Ontraport's API.
Webhooks allow accounts to integrate and "speak" to each other.
This article covers how to customize your webhook's settings, where you can automate webhooks in your account, view your webhook activity logs, use the Live API Documentation and more.
Ontraport's Support team cannot set up or troubleshoot your API requests. If you need assistance setting up webhooks, you might want to hire an Ontraport Expert.
Table of contents
Set up webhooks
• Common header info examples
Automate webhooks
• With automation maps
• Through global rules (Pro accounts and above)
• On form submissions (Pro accounts and above)
Manage and troubleshoot webhooks
• Webhook activity log
• Replay webhooks
• Webhook failure notification
API Webhook Subscriptions
Use the Live API Documentation
Set up webhooks
Here are the ways that you can add webhooks in Ontraport:
There are several ways to automate sending webhooks from your account. Each method uses the same settings that allow you to choose where to send information, preferred webhook method, header info, data to send and advanced settings.
Use the information below as a reference when setting up your webhooks.
Add the destination URL - This is where you'll send your API request. It specifies the server and endpoint to interact with, allowing the API to deliver or retrieve specific data.
Select webhook method - This setting lets you choose what kind of request you'll send. The methods define the webhook's action when triggered, such as sending, retrieving or modifying data.
- GET — Retrieves data from a specified resource or endpoint.
- POST — Sends data to a specified resource to create or process something.
- PUT — Updates or replaces an existing resource with new data.
- PATCH — Partially updates an existing resource with new data.
- DELETE — Removes a specified resource.
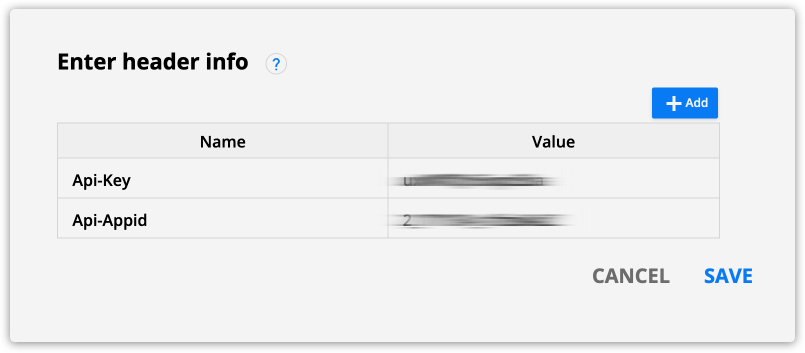
Enter header info - This section allows you to pass additional information with the request or the response. Header info commonly includes authentication credentials such as a unique API key and App ID and any additional information that defines the operating parameters of an HTTP transaction.
Add POST data here — The data to send is commonly sent as a JSON payload. You can tailor the data sent based on your needs and the expectations of the receiving applications. You can merge contact information using the merge field dropdown.
Advanced settings — The advanced settings let you customize the max number of requests per minute (up to 180) and max retries per request (up to 10).
Common header info examples
Back to top
If you use webhooks to interact with Ontraport’s API, you must include an API key and App ID in your header info. If you need to send authentication information to another API, reference their documentation to learn their required data.
- Generate an API key and App ID.
- In your webhook’s settings, add the name, “Api-Key” in the name column, and paste your key in the value column.
- Click Add.
- Add the name, “Api-Appid” in the name column and paste your app id in the value column.
- Click Save.
Another common header is the Content-Type header. Add “Content-Type” to the name column, then add “JSON” or “Form-encoded” in the value.
Automate webhooks
Here are the ways that you can add webhooks in Ontraport:
With automation maps
Back to top
Automation maps are the most common way to send webhooks. This method is helpful because you can view your contacts' flow and add webhook elements anywhere in your automation.
- On your automation map, add a webhook element from the advanced tab.
- Follow the steps above to customize the webhook’s settings.
Through global rules (Pro accounts and above)
Back to top
Another way to send webhooks based on a contact performing a specific action or updating their information to a specific value is to use an advanced feature — Global rules.
This option is helpful if you want to trigger a webhook anytime a contact in your account performs a specific action.
You must enable Global rules to follow the steps below.
- Go to
.png) → Administration → Advanced features →
→ Administration → Advanced features → .png) Global rules.
Global rules.
Once the feature is enabled follow these steps:
- Go to Contacts → Rules.
- Rules are available under all objects.
- Click New rule.
- Select any trigger for the rule.
- (Optional) Click Add a condition if you want to limit the triggers that will send a webhook.
- Click Add action → Send to a webhook.
- Follow the steps above to customize the webhook’s settings.
On form submissions (Pro accounts and above)
Back to top
If you know that you want a webhook to pass information every time that a form is submitted, and you don’t need a full automation map, another option you have is to create a rule on the form submissions.
You must enable rules for form submissions to follow the steps below.
- Go to → Administration → Legacy Features → Rules for Form Submissions.
Once the feature is enabled follow these steps:
- Go to your form’s settings.
- Find the “Always-on rules” section and click Add.
- Order forms have rules for successful and failed payments.
- Name your rule.
- (Optional) Click Add a condition if you want to limit which form submissions will send a webhook.
- Click Add action → Send to a webhook.
- Follow the steps above to customize the webhook’s settings.
Manage and troubleshoot webhooks
Back to top
Troubleshooting webhooks can be a time-consuming pain, but Ontraport’s webhooks activity log simplifies the process. Properly formatted webhooks fail for many reasons such as the receiving server being temporarily offline or experiencing timeouts.
Regardless of the cause, you need tools to manage them. Your account stores logs of the last 10,000 webhook activities. From that list, you can view request details and replay them. You can also subscribe users to receive failed webhook notifications.
Webhook activity log
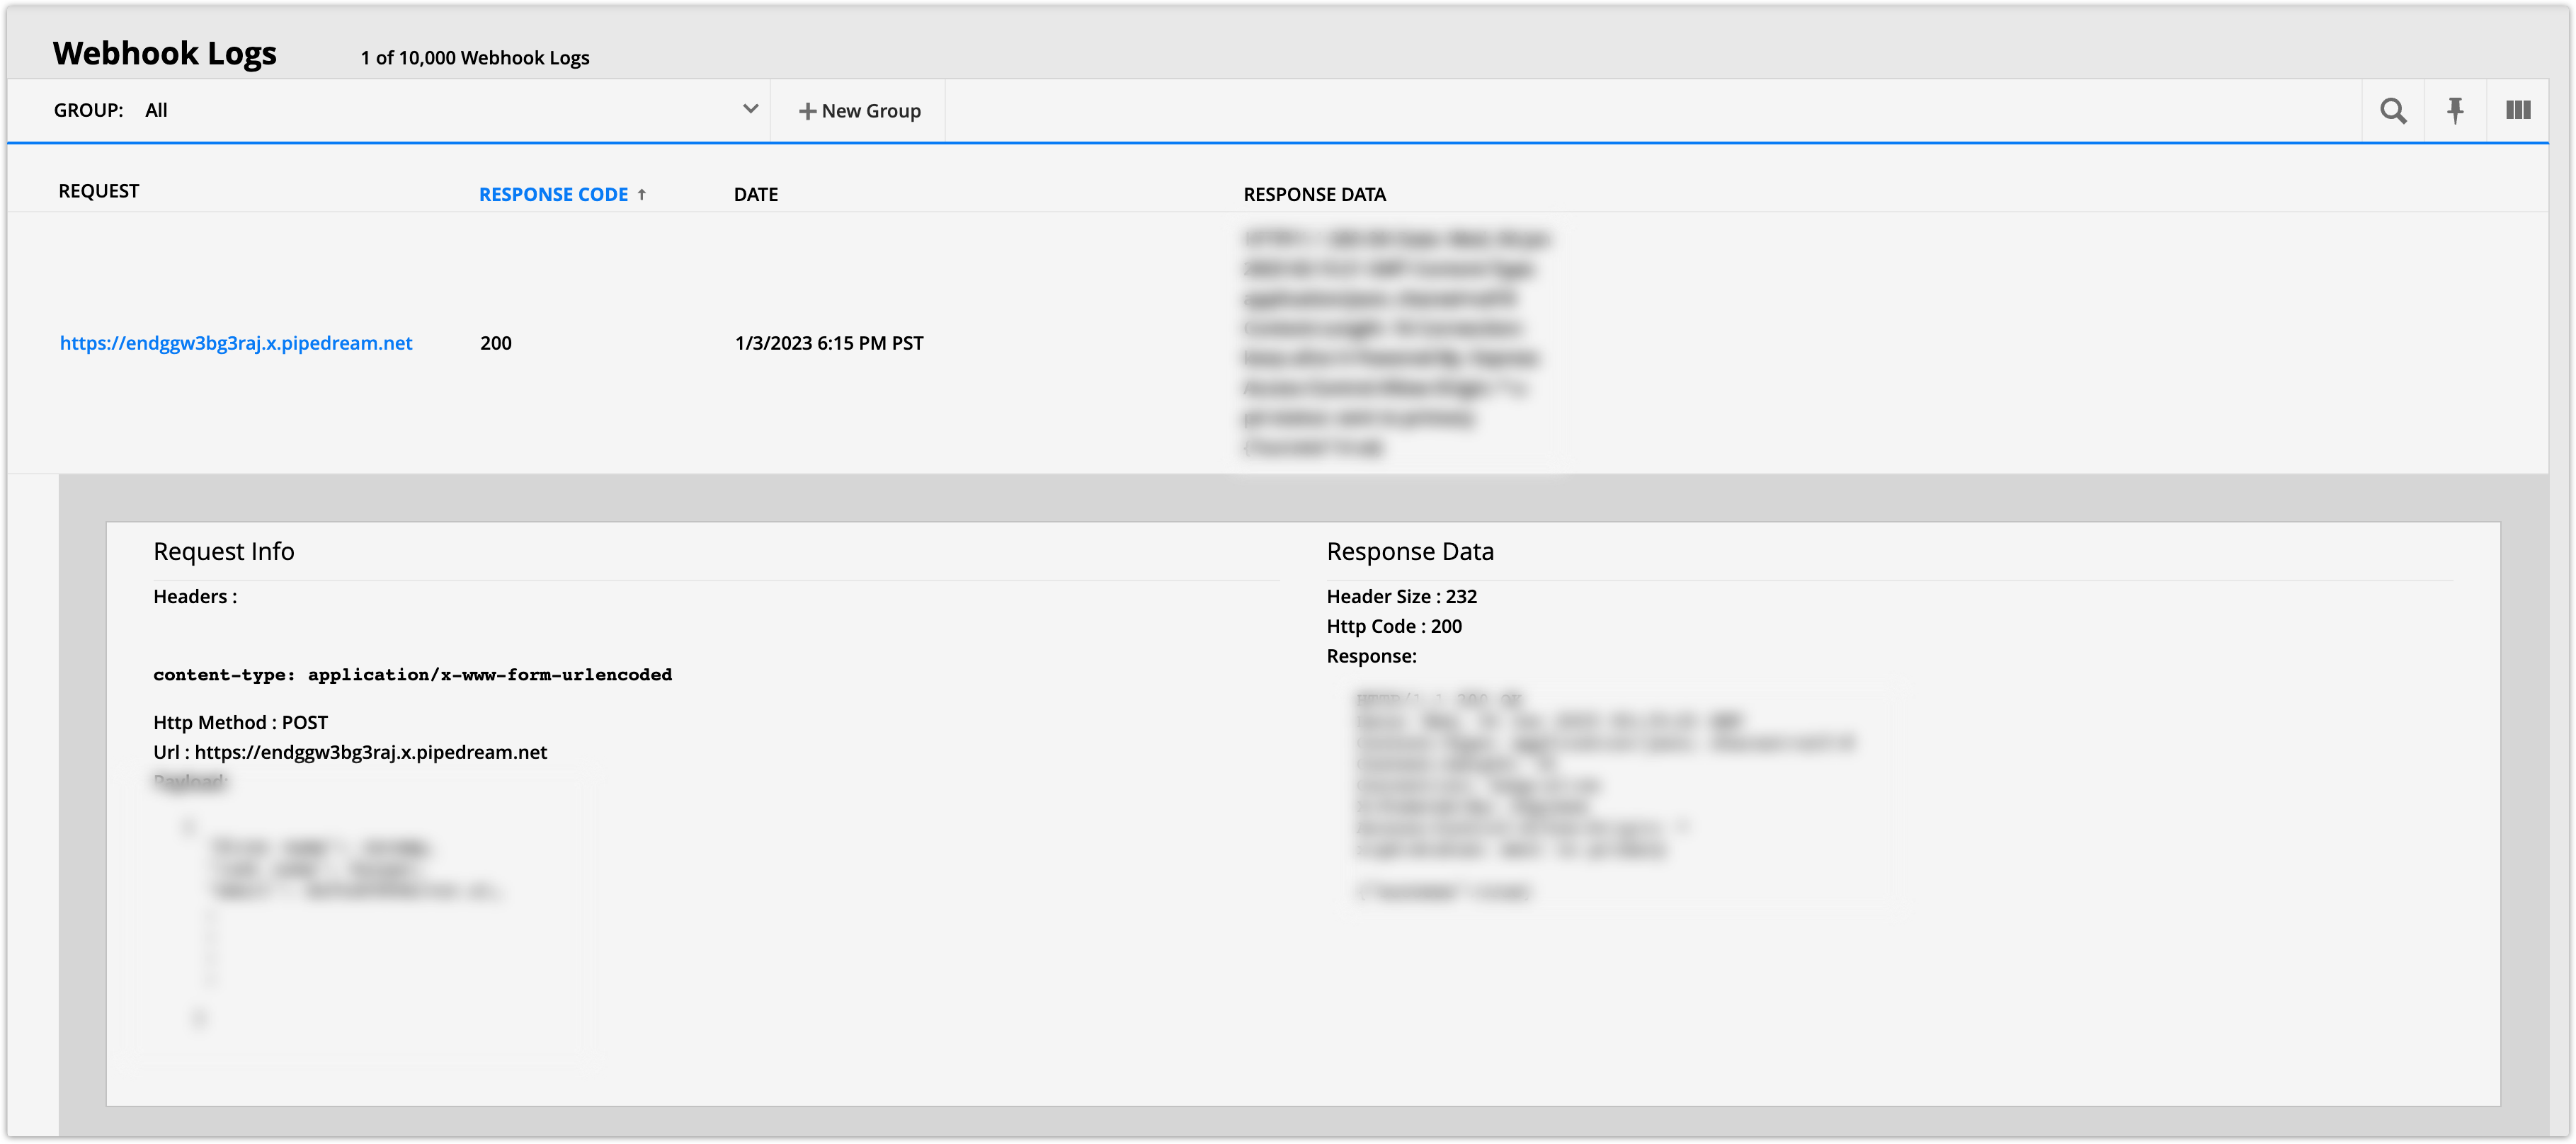
These logs allow you to view your most recent webhooks’ request and response data.
- Go to → Administration → Integrations → Webhook Logs.
- Add the columns that are the most helpful to you:
- Request – Display the request your webhook sent.
- Response Code – Show if your request was successful or if you experienced an error.
- Date – View the date you sent your webhook.
- Response Data – Show your webhook’s response data. This response contains information about the status of the event.
- Object – Display the object your webhook was for.
- Type – See if you sent your webhook via automation maps, API, forms, etc.
- Name – View the name of your webhook’s source. For example, you’ll see your page’s name if a visitor submits a form and triggers your webhook.
- Webhook ID – See the specific webhook’s ID if the source isn’t an API.
- Click on the request you’re interested in to view its data.
Replay webhooks
Back to top
If your webhook fails, you don’t need to rebuild it or manually send it. Instead use the reply action to resend your request. This will create a new webhook activity log and the type will be “Replay.”
- Select one or more requests from the Webhook log.
- Click the Replay action button.
- Confirm the action in the dialog.
Webhook failure notification
Back to top
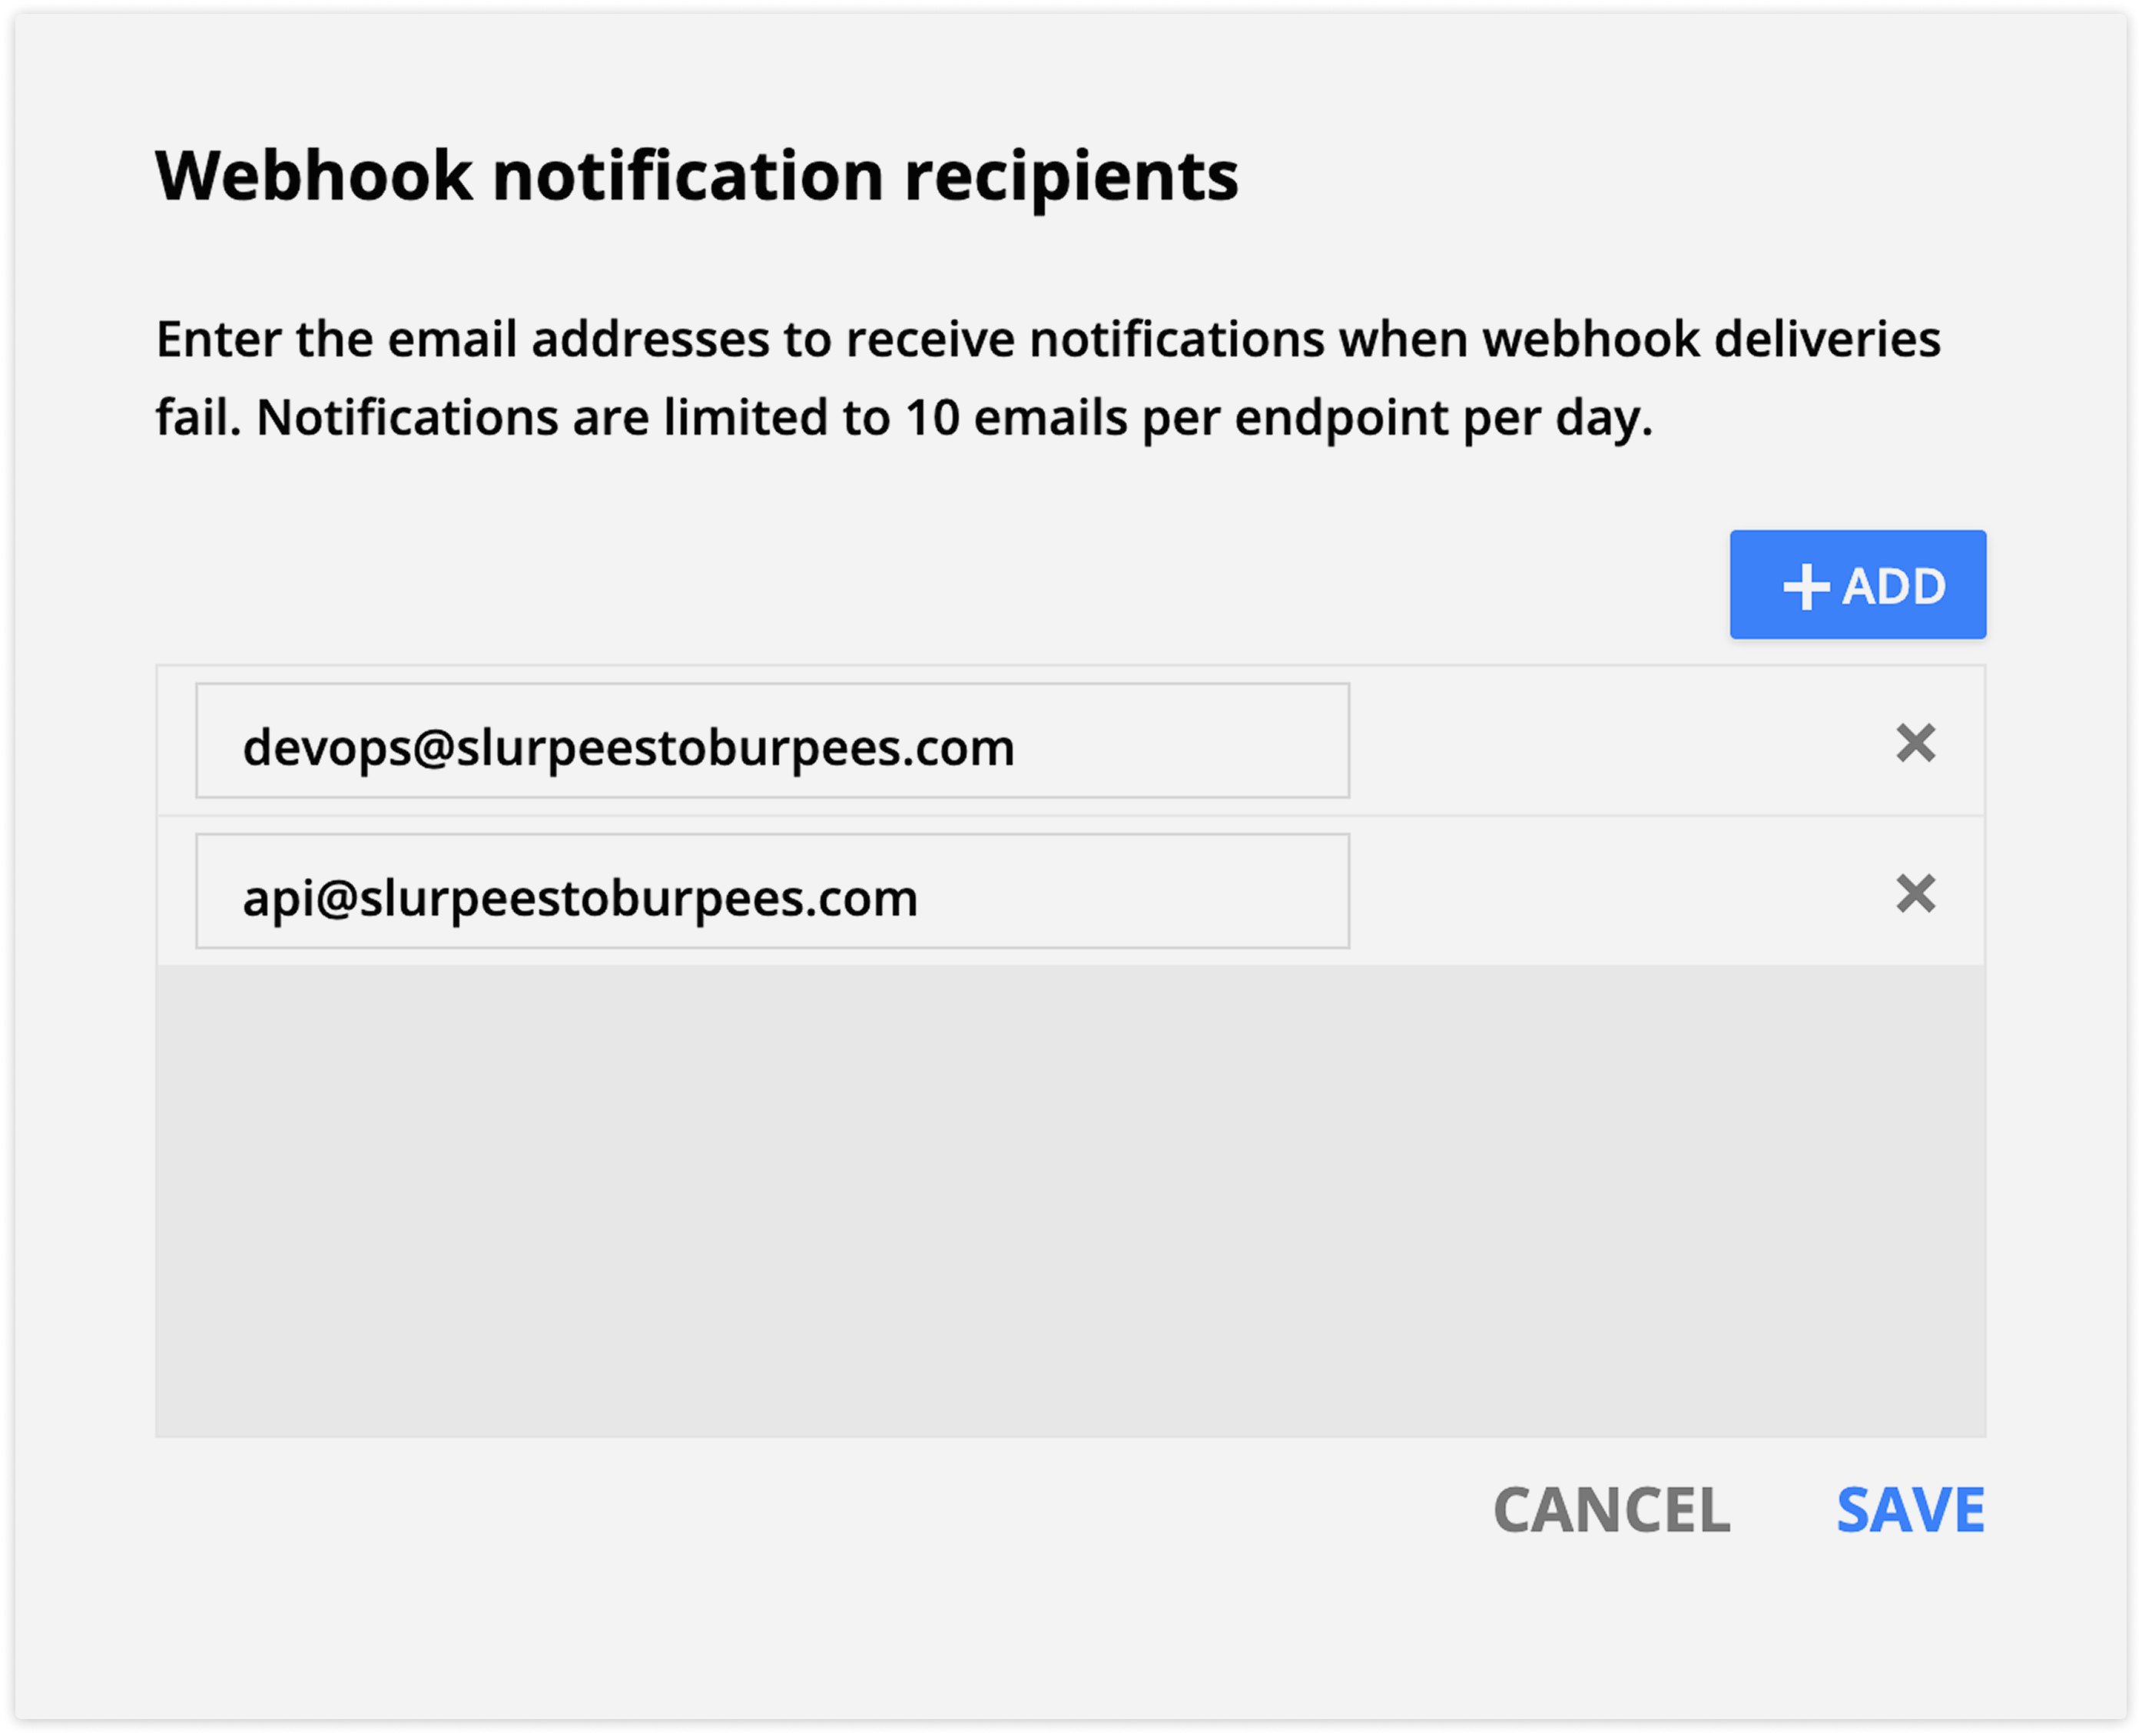
It’s important that your team knows when webhooks fail so they can jump into action. Your account lets you send notifications to specific email addresses. When subscribed, your team receives an email for each failed webhook that includes request endpoint and the response code.
Your account sends a maximum of 10 notifications per endpoint each day.
- Go to → Administration → Integrations → Webhook failure notification.
- Click Add and add the email address you want to notify.
- Repeat for as many people you want to notify.
- Click Save.
API Webhook Subscriptions
Ontraport provides endpoints for applications to subscribe to a webhook via the API so that, when the subscribed event occurs (e.g. someone fills out a form associated with the subscription), Ontraport will send that information to the subscribed URL. This reduces traffic on both the developer’s server and Ontraport’s API servers by eliminating frequent requests checking for new information.
The application will need to subscribe to the API endpoint with a valid API Key and Application ID generated by the associated Ontraport account. The subscription request must include a valid URL which will receive and process the data payload in the webhook.
The available webhook subscriptions available are:
- Object is created (Contact or Custom Object record)
- Form is submitted
- Tag is added
- Tag is removed
- Product is purchased
- Transaction is added
Further webhook documentation can be found in the API doc, and you can use the API Live Doc Webhooks section to check if there are existing webhook subscriptions for your account and to create subscriptions to webhook testing services such as Request.bin.
Use the Live API Documentation
Back to top
The API Live Doc provides up-to-date documentation of API specifics (endpoints, parameters, etc.) and you can interact with your Ontraport account with the documentation itself.
This is a great resource to collect information about your custom objects and learn how to format payload.
The live doc performs your requests on your account data, so use caution when deciding which requests to make.
- Click here to go to the API Live Documentation.
- Generate an API key and App ID.
- Enter the API key and App ID in the fields in the top right corner.
You’ll see all of the available endpoints in your account. Click on them to list the available operations and click on the action you're interested in to try it out.
Download a prebuilt automation map Learn how to use webhooks with examples Unlock the power of API automation with this ready-to-use map! Featuring example webhooks and a step-by-step video walkthrough, this map makes it easy for you to integrate and automate workflows, even if you're new to APIs. Click here to download now and start streamlining your processes today! |