Ontraport’s integration with Facebook Custom Audiences enables you to use Ontraport to add contacts to and remove them from your Facebook Custom Audiences. To use this integration, you’ll need an Ontraport Plus account or above and a free Facebook Business Manager Account with Custom Audiences set up.
Note, in June 2021, Facebook stopped allowing users to “cross-update” their custom audience lists. This means that you can only use audiences you create inside of your Ontraport account. Lists created using other methods, such as website custom audiences or customer list audiences, won’t appear in your Ontraport account.
Update audiences with automation
This is the best way to add contacts to a Facebook Custom Audience because you can add the step to your automation instead of having to manually do it for every contact.
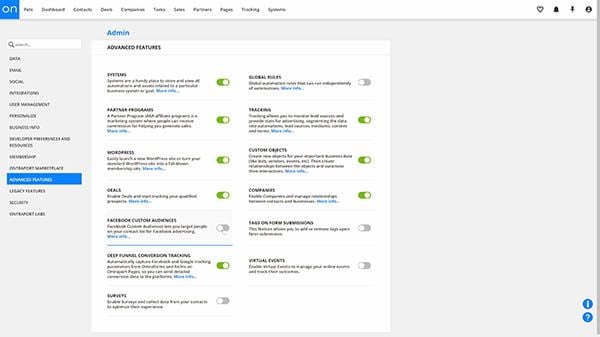
- Set up your Facebook Custom Audiences integration.
- Select an existing automation map or create a new one by clicking Contacts → Automations → New Automation.
- In the area of your map where you’d like to place your Facebook Custom Audience element, click What Happens Next → Advanced → Facebook Custom Audiences.
- In the element settings on the left, choose your Facebook ad account from the dropdown and choose if you want to add or remove contacts.
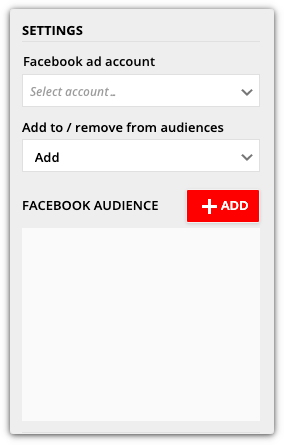
- Then click Add to select your audience.
- If you’ve already created a Facebook Custom Audience in Ontraport, you can select it from the dropdown.
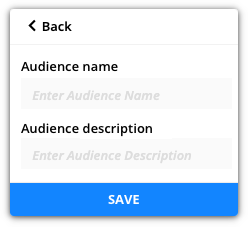
- Or click + Add new audience from the top of the dropdown. Add your audience name and description, then click Save.
- Click Done.
- Finish by adding any other elements you would like on this map, and add End elements at the end of your line(s) of automation.
- Click Publish.
Update audiences manually
You can also manually add contacts to or remove them from Facebook Custom Audiences using a group action.
- In Contacts, select the contacts that you would like to add to your custom audience and click Facebook.
- Select your Facebook ad account, choose if you want to “Add” or “Remove” your contacts and select which custom audience you want to use.
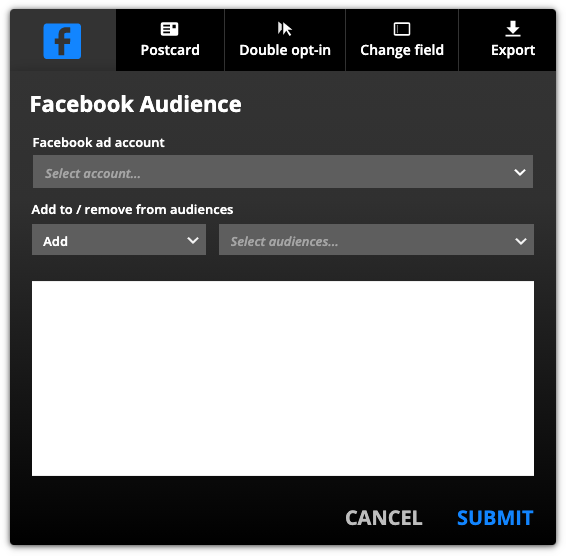
- If you haven’t created an audience in Ontraport yet, click + Add new audience from the top of the dropdown.
- Then add your audience name, description and click Save.
- Click Submit.
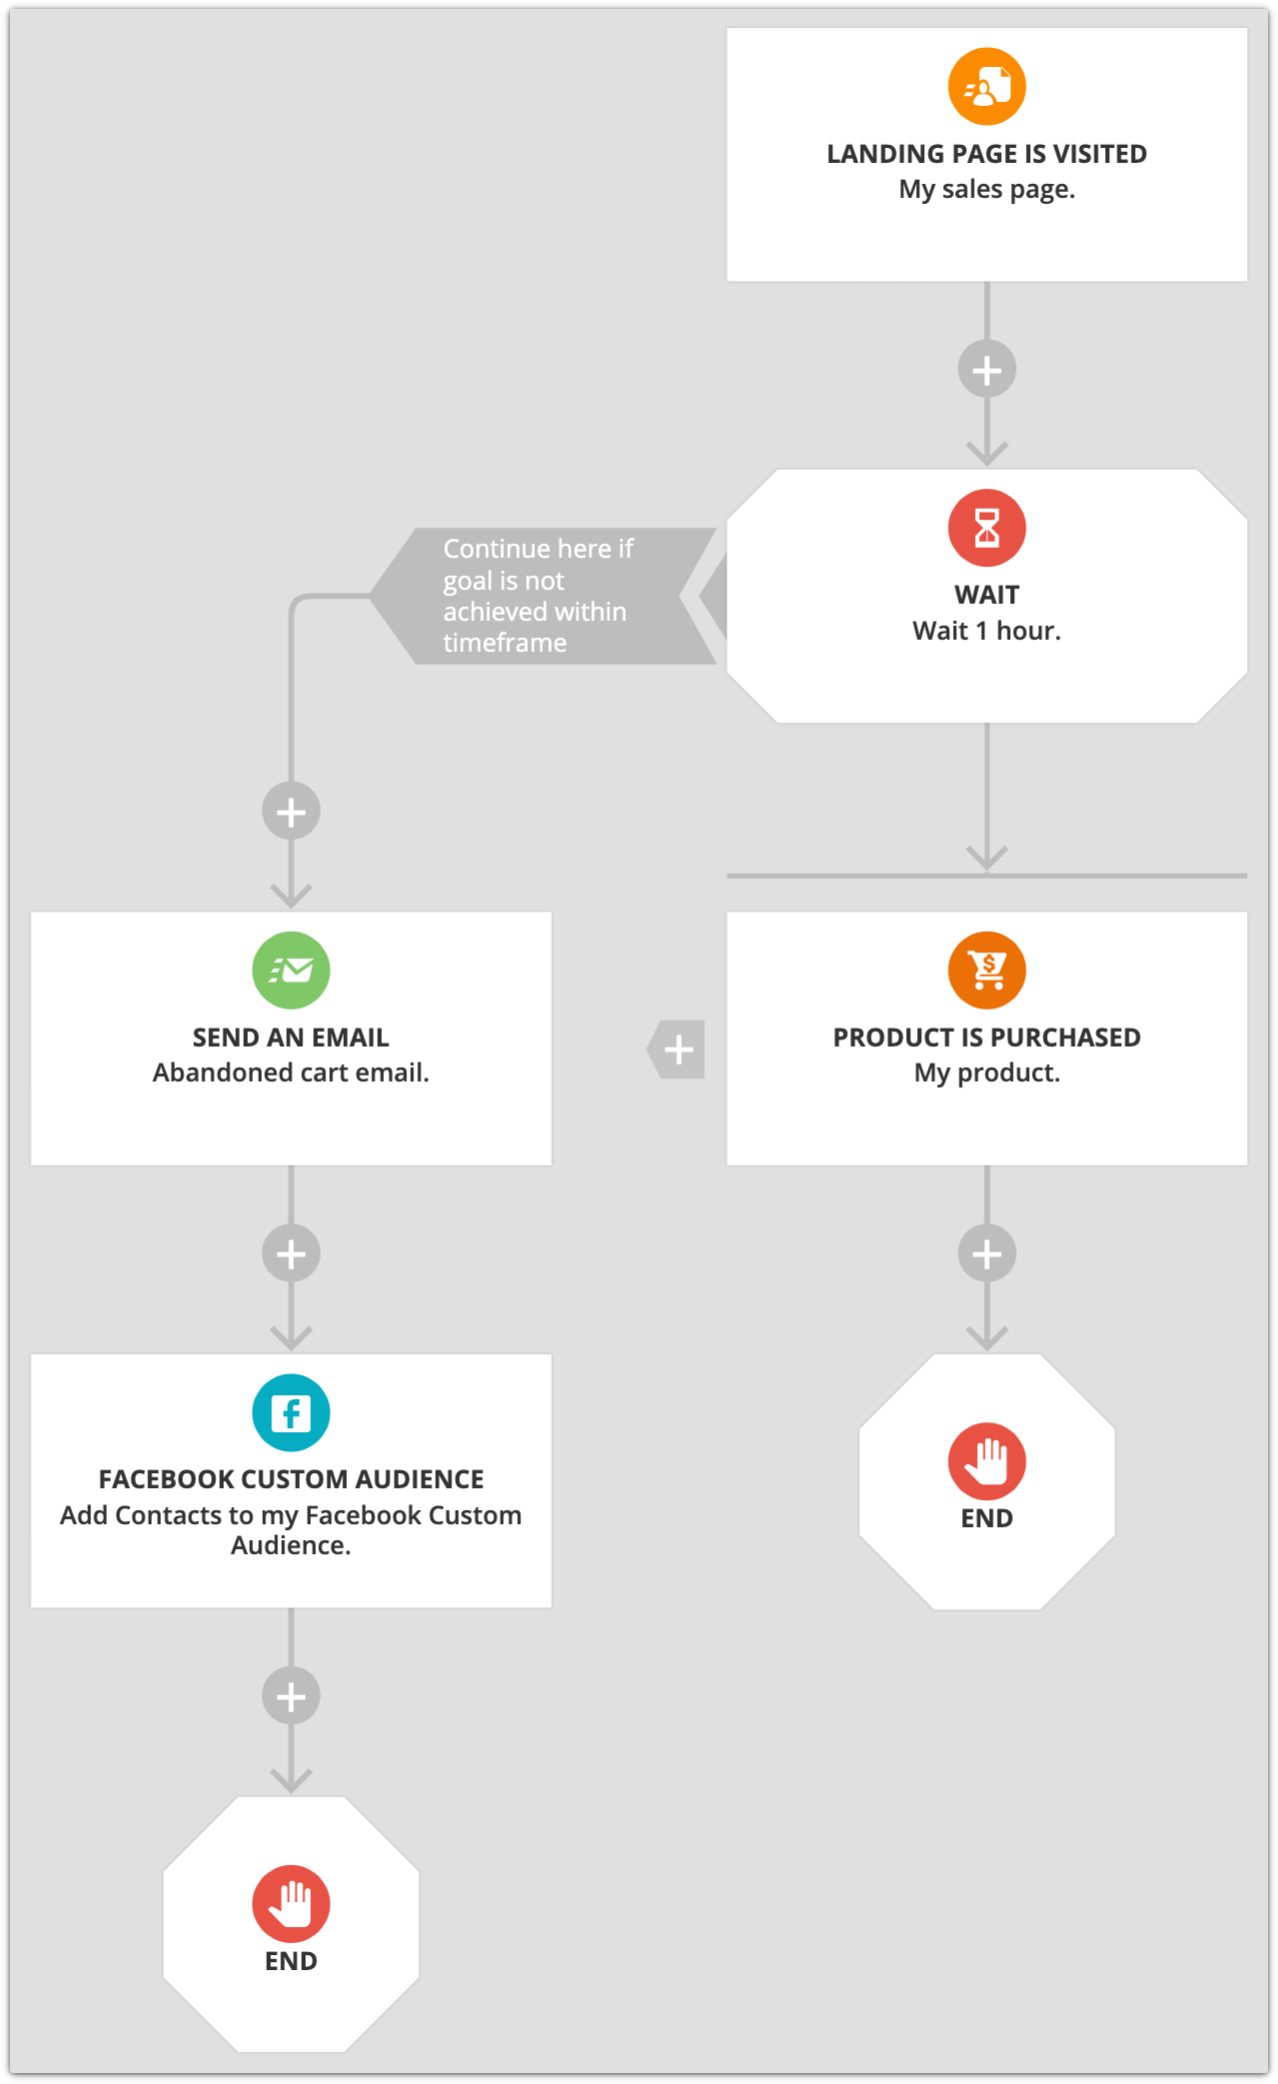
Abandoned cart automation and Facebook Custom Audiences
Abandoned cart automation is a great way to make sure you don’t miss out on sales from hot leads. And you can do even more with your automation by using Facebook Custom Audiences. When your leads leave your sales page without buying, in addition to sending them an email reminder about their cart, you can show them ads about what they left behind. Here’s how:
- Create a new automation map, or edit an existing one.
- Add a Landing Page is Visited trigger, and select your sales page from the dropdown.
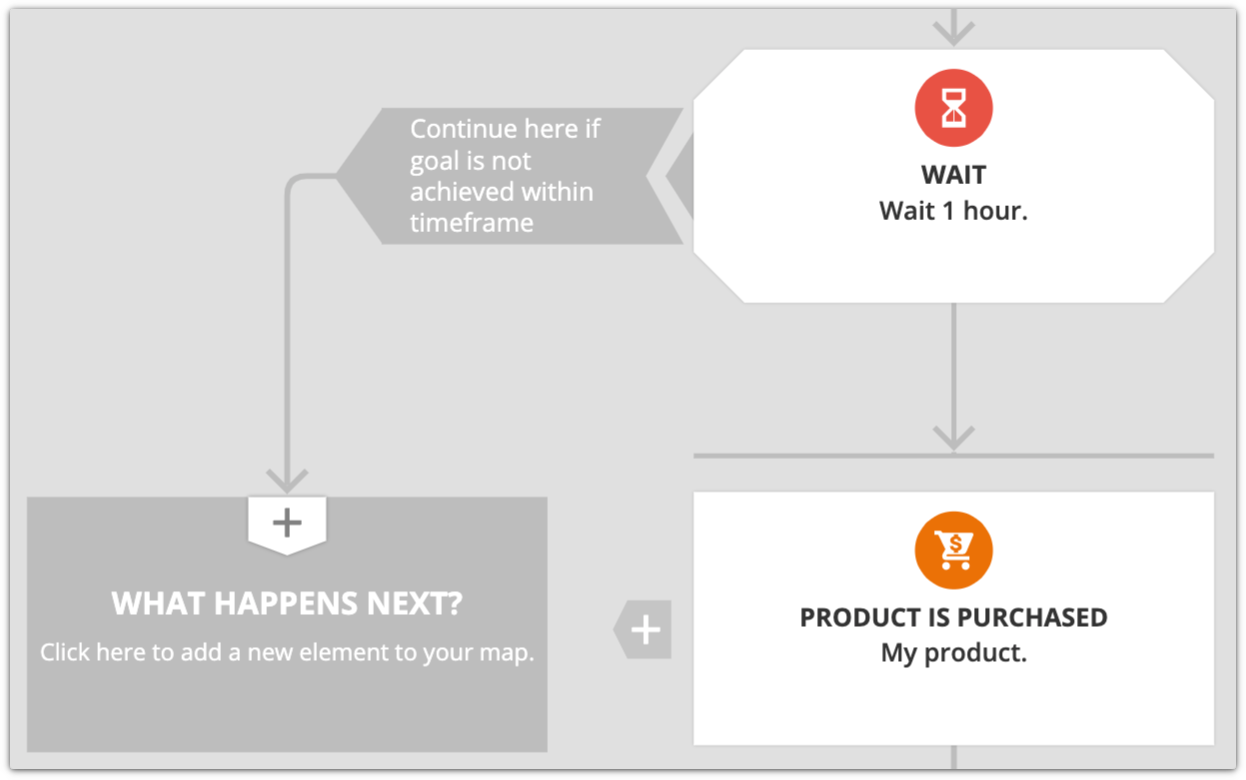
- Click What Happens Next? below your trigger and add a goal element.
- Click your goal element and click Add Goal → Purchases a Product → select your product.
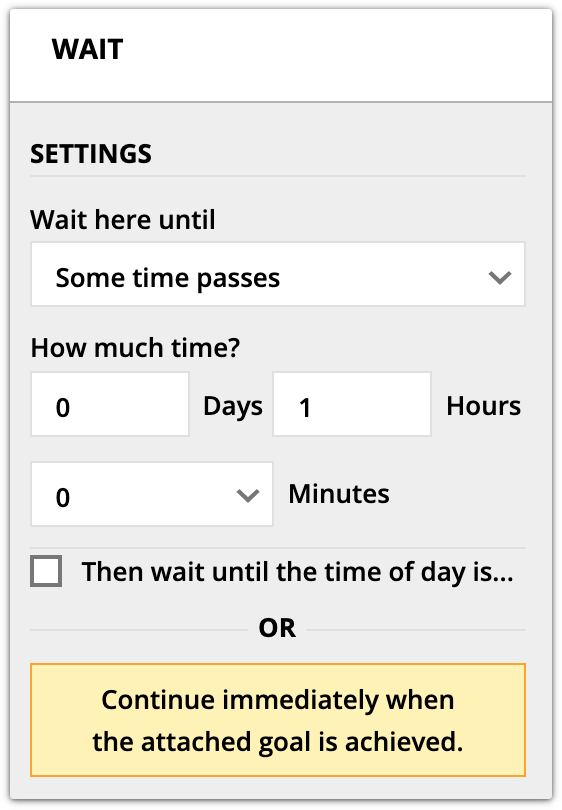
- Click the wait element above your goal, select Some time passes from your “Wait here until” setting and add one hour in the “How much time” section.
- Click What Happens Next? under your alternative path and add a Send an Email element. Then add your abandoned cart email.
- Click What Happens Next? below your abandoned cart email and add a Facebook Custom Audiences element, then select your audience.
- Wrap up your map by adding any other elements you’d like. Add Ends to all your empty What Happens Next? elements, then save and publish your map.