Expand your marketing reach and improve your customer experiences by integrating with social media tools that allow you to retarget, gather leads, and more.
Note: Ontraport only offers support for built-in integrations. For assistance with an outside integration, please reach out to the team that built the integration using the contact information provided below.
Table of contents
Facebook Connect Button
Facebook Custom Audiences
Facebook Lead Ads
Heyo
LeadSync
LinkOntra
Twitter cards with Ontraport pages
Twitter lead generation cards
Viral Sweep
Facebook Connect Button
The Facebook Connect Button allows your leads and visitors to opt in and get added to your Ontraport account using their Facebook email address.
To create this button, you need to create a Facebook app, connect that app to Ontraport, and then add your button to the pages you want.
Here’s how to create a new app in Facebook:
- Set up your free Facebook for Developers account.
- Once you’re registered, click here to go to your apps.
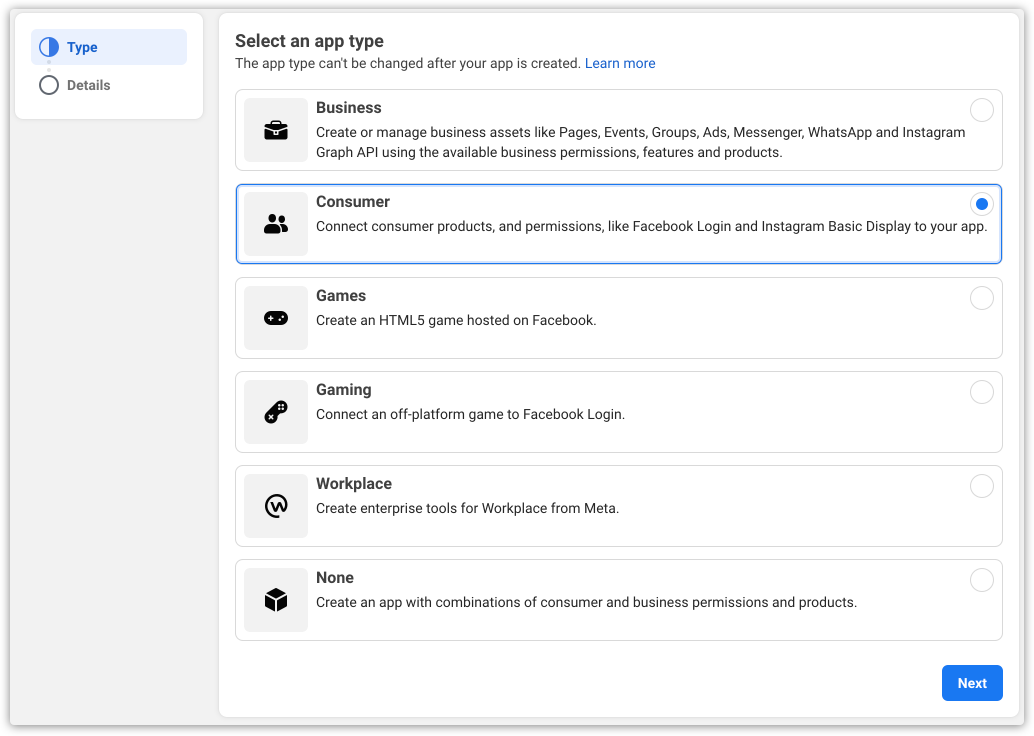
- Click Create App, select the “Consumer” type and click Next.
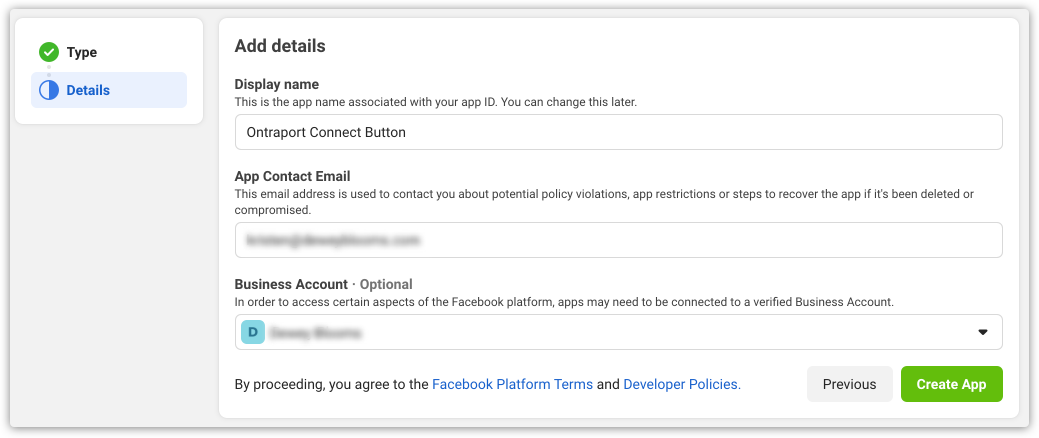
- Name your app, confirm your app contact email address and, optionally, select your business account from the dropdown. Then click Create App.
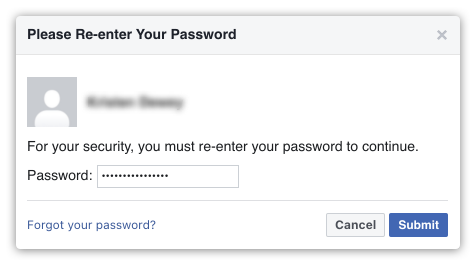
- Re-enter your password and click Submit.
- Facebook will create your app and take you to your app’s page.
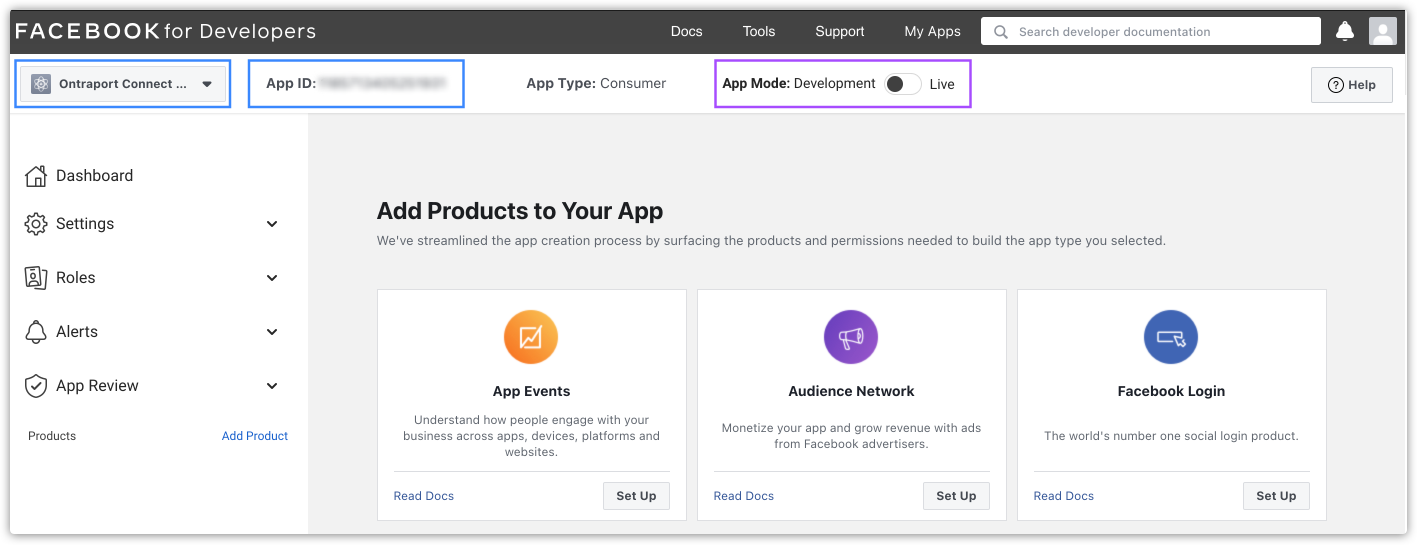
- Click Settings → Basic from the sidebar on the left and fill in your app’s basic settings.
- You can’t turn on your app until these settings are saved. Check out this article provided by Facebook to learn more about these basic app settings.
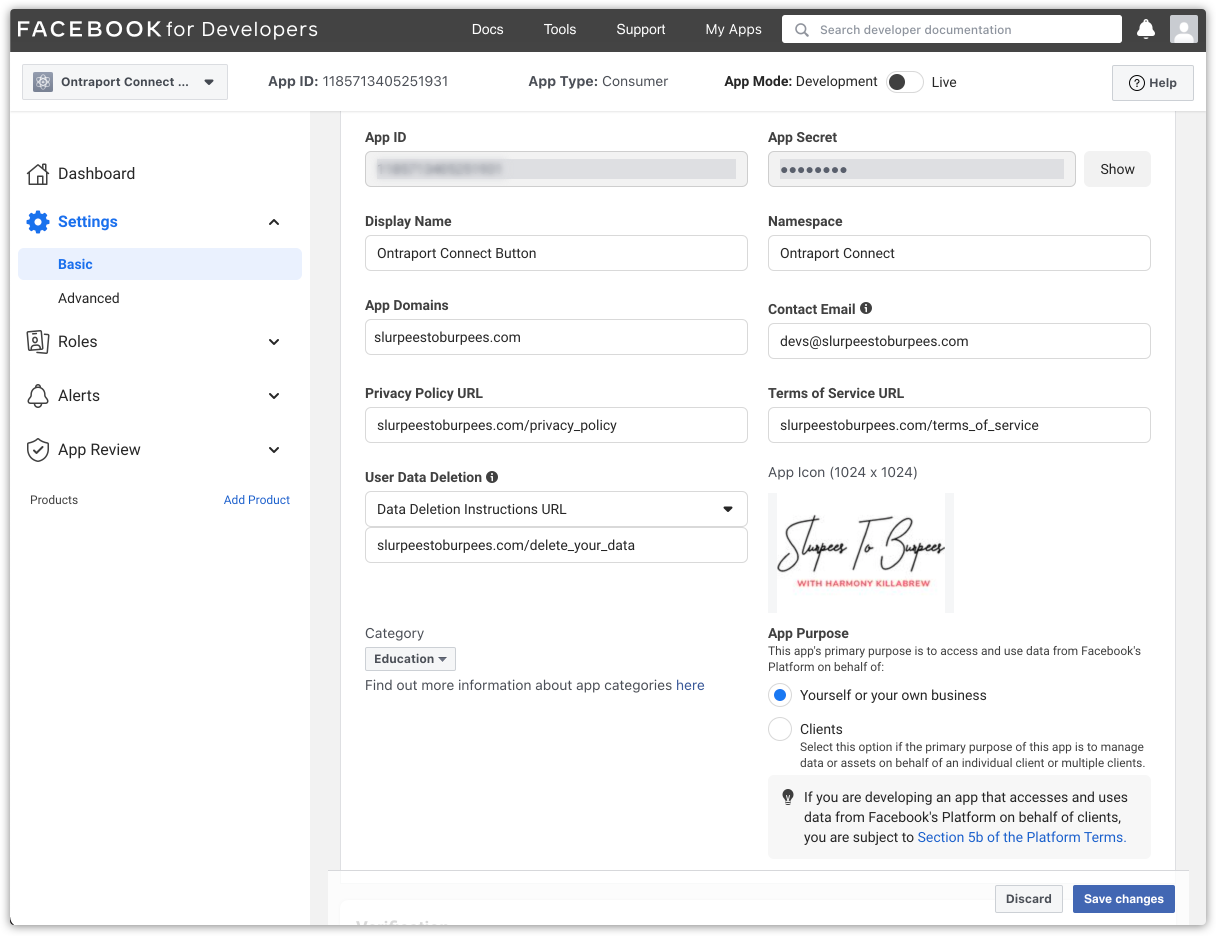
- Toggle your App Mode from “Development” to “Live.”
- Copy your App’s name and App ID and save them for later.
That’s it for steps on Facebook. Now you just need to add your app info to your Ontraport account. Here’s how:
- Log in to your Ontraport account.
- Go to
.png) → Administration → Social → Facebook.
→ Administration → Social → Facebook. - Click New Facebook App.
- Add your app’s name and ID you copied from Facebook.
- In the “Redirect” field, add the URL of the page you’d like new contacts to see after they opt in.
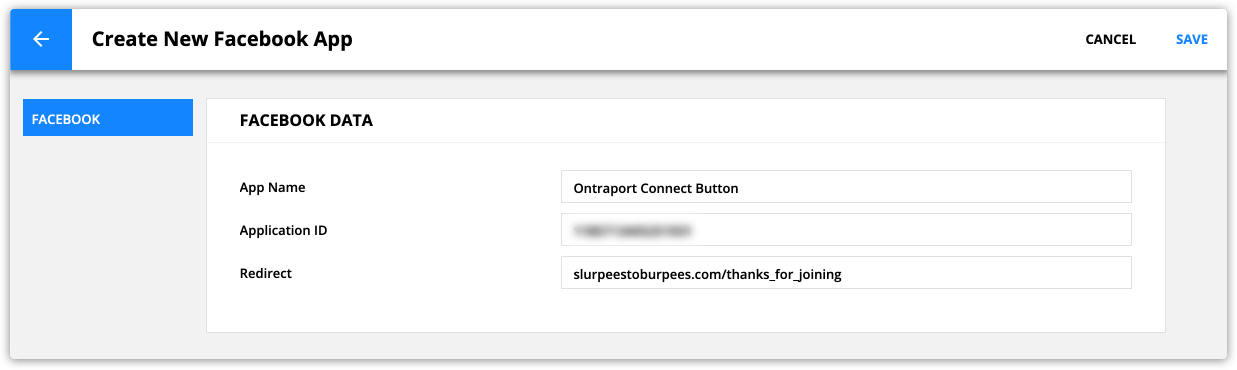
- Click Save.
Once you click save, you’ll be brought to your Facebook App Collection, and all that’s left is to generate your code and add it to a page. Here’s how to do it:
- Select your app, then click Generate Code.
- Copy your code.
- Go to the page you’d like to add your Facebook Connect Button to, and paste your code where you want the button to appear.
- If you are adding your button to an Ontraport Page, add a Custom Code element and paste your code there.
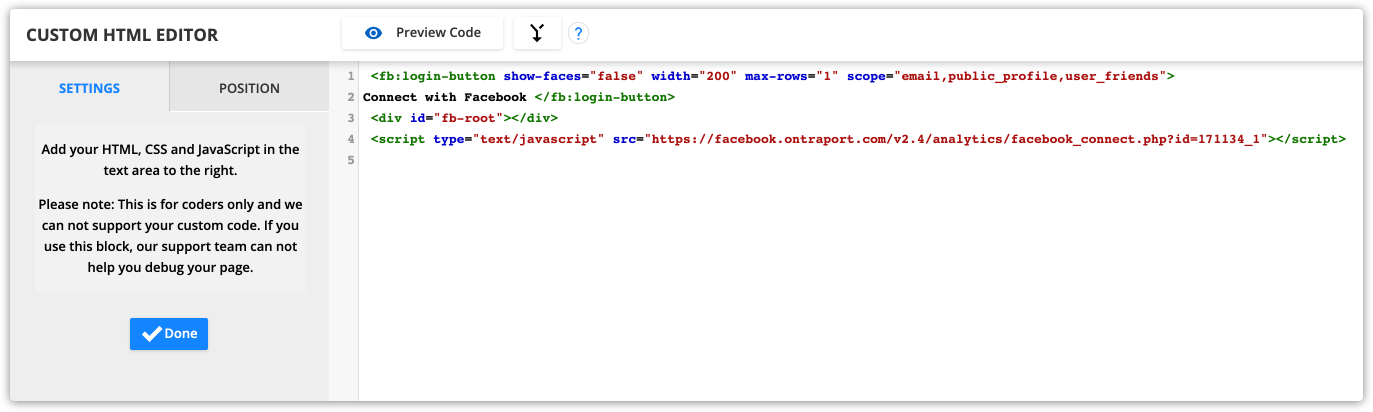
Pro Tip: Facebook may display an error code when you click the button. If it does, edit this line in the code:
scope="email,public_profile,user_location,user_hometown,user_birthday,user_website,user_likes,user_friends"
To read simply:
scope="email,public_profile,user_friends"
For assistance integrating the Facebook Connect Button with Ontraport, visit their support page.
Facebook Custom Audiences
Connect your accounts
- Create a Business Manager account if you haven’t already.
- Log in to Ontraport and go to → Administration → Advanced Features and toggle on Facebook Custom Audiences.
- Once Facebook Custom Audiences are enabled, click → Administration → Social → Facebook API.
- Click Continue with Facebook and follow the prompts to connect your Facebook account with Ontraport.s
- Click Save.
Create a custom audience
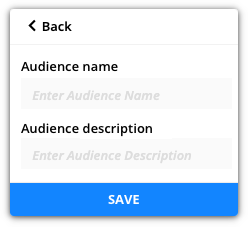
- In Ontraport, when you select a Facebook action or automation element, click Add New Audience.
- Name your audience and add a description.
- Click Save.
When you update that audience, Ontraport sends your data to Facebook to make sure your data’s all synced up.
Note, Facebook doesn’t allow users to “cross-update” audiences. That means, for this integration to work, you’ll need to create your audience inside of Ontraport. If you create custom audiences using other methods, such as website custom audiences or customer list custom audiences, they won’t appear in Ontraport.
For assistance integrating Facebook Custom Audience with Ontraport, visit Facebook’s support page.
- Setting up the Ontraport Facebook integration does not give Facebook access to your Ontraport account. There is no data transferred to Facebook without your authorization using an automation map or group action.
Disconnect your Facebook integration
- Log in to your Facebook account.
- Go to the Business Integrations menu and search for “Ontraport” in the Applications tab.
- Check the box for the Ontraport App and click Remove.
Facebook Lead Ads
- Go to the Facebook business help page and use the search bar to look up Ontraport.
- Follow the steps provided by Facebook to complete the integration with Ontraport.
For assistance integrating Facebook Lead Ads with Ontraport, visit their support page.
Heyo
- Follow these steps to obtain an Ontraport API key and app ID.
- Log in to your Heyo account and click Content → Signup Form → Ontraport → Connect to Ontraport.
- Add in the “Ontraport Nickname” and “API key.” We recommend using a descriptive nickname so you can quickly assign these credentials in future Heyo automation.
- Once Heyo verifies the API Key and App ID, click Publish.
For assistance integrating Heyo with Ontraport, visit their support page or email them at support@heyo.com.
LeadSync
- Follow these steps to obtain an Ontraport API key and app ID.
- Log in to your LeadSync account and click Connect a Service.
- Click on Connection drop-down arrow and select Ontraport. Copy/paste your saved Ontraport App ID and API Key in the corresponding boxes. Click Update connection.
- Both the List and Tags option will appear at the bottom. Select the list and tags that you set up in Ontraport and click Update connection again.
- Once you are back in main LeadSync view, click on Add Facebook Lead Form.
- Select your FB business page (Admin access) and the correct Lead Form (important). For connection, select Ontraport and click on Update Notification.
For assistance integrating LeadSync with Ontraport, visit their support page.
LinkOntra
- Follow these steps to obtain an Ontraport API key and app ID.
- Follow the steps in this video provided by CRM Inputs to set up your integration.
For assistance integrating OntraLink with Ontraport, contact CRM Inputs for support.
Twitter Cards with Ontraport Pages
- Create a new page or edit an existing page.
- Click Settings → SEO & Social Setting.
- Add your page’s:
- Title – a public name for your page
- Description – a text snippet that summarizes your content
- Social image – a unique image that represents your content
- Click Done and save and publish your page.
- Visit the Twitter Card Inspector to update your changes to Twitter.
Note, you can also access a link to the Twitter Card Inspector from your page’s SEO & Social Settings.
For assistance integrating Twitter Cards with Ontraport, visit their support page.
Twitter lead generation cards
- In Ontraport, go to Contacts → Settings→ Field Editor and create two new custom fields: “Full Name” and “Twitter Screen Name” (Twitter is unable to populate the standard “Name” field in Ontraport).
- Click Save.
- Create a Smart Form by navigating to Contacts → Forms→ New Form → Create New.
- Remove the “first name” and “last name” fields. Click Add Field, and add the “twitter screen name” and “full name” fields to the form.
- Name the form, click Save and Publish.
- On the “Publish Form” screen, click Host My Form. Copy the URL and paste it into a new web browser window to display the hosted form.
- Right click on the web page with the form displayed and select View Source. The page HTML code will display. Within this code, there are several items you’ll need to copy to a text file for later use in Twitter:

- The forms processor URL: forms.ontraport.com/v2.4/form_processor.php
- The “Twitter Screen Name”field ID. In our example, it’s f1462 (It will have different numbers after the “f” on your system).
- The “Full Name” field ID. In our example, it’s f1463.
- The form’s “uid.” In our example, it’s p2e83585f10. On your form’s code, it will include the prefix “p2c,” but the rest of the numbers will be different.
- In your Twitter Ads account, click Creatives → Cards→Lead Generation to reveal the cards you created.
- Click the pencil icon to configure the first card.
- Scroll down and select Data Settings to expand it and set the following values:
- Submit URL: use the form’s processor URL you copied from the source code above.
- HTTP Method: Select Post.
- “Custom Key Name” field:
- On the line with “Name,” paste the code for “Full Name” you copied above.
- On the line with “email,” type “email.”
- On the line with the “screen name” label, paste the code for “Twitter Screen Name” you copied above.
- If there isn’t a space to add an entry under the “Custom Hidden Data Values” title, click Add Another Hidden Field. Then, on the left side, type in “uid.”
- On the right side, copy and paste the form’s uid copied above. This will start with “p2c”.
- Click Update Card.
- Repeat steps to configure the rest of your Twitter Lead Generation Cards. Each card must be configured with the Submit URL, HTTP method and with the field information as shown above.
For assistance integrating Twitter Lead Generation Cards with Ontraport, visit their support page.
Viral Sweep
- Follow these steps to obtain an Ontraport API key and app ID.
- Follow these steps provided by Viral Sweep to integrate with Ontraport.
For assistance integrating Viral Sweep with Ontraport, contact their support team using this contact form.
Discover Other Ontraport Integrations
Know of any social media tools that integrate with Ontraport that aren’t listed here? Please email pr@ontraport.com to let us know.