Ontraport’s drag-and-drop page editor makes creating beautiful interactive web apps easy. However, there’s a limit to what’s possible to build using that editor. That’s why we created dynamic list HTML tags.
Ontraport’s dynamic list HTML tags help you create sophisticated designs without some of the limits of the visual builder.
For example, you can create a sidebar of related articles or an image gallery. Anything you dream up is possible if you have access to someone with web development skills.
The dynamic list HTML tag is an advanced feature and is meant for users who are comfortable using CSS and HTML to create the design they want. Watch our lesson on Dynamic lists with HTML here to learn more!
Note that the Ontraport Support team cannot troubleshoot your custom code.
Only available to some Dynamic CMS plans.
- Check out the “Dynamic CMS add-ons” chart on our pricing page for information about each plan level.
Add a dynamic content package to your account to use this feature. Here’s how:
- Click here to go to your account details page.
- Click Add plan or Start trial next to “Add Dynamic CMS to your account” and select your plan.
Table of contents
New to HTML? Start here
• HTML elements
• HTML attributes
• HTML paragraphs
• HTML styles
• HTML formatting
How it works
Customize your dynamic list with HTML attributes
• Using AND and OR operators
• Using merge fields in attributes
Field names with apostrophes
Use cases
New to HTML? Start here
If you are new to HTML, there are a few concepts to learn before you dive into Dynamic Lists HTML. Below you’ll find the most important HTML elements you should feel comfortable using before diving into Dynamic Lists HTML.
This basics section is not a comprehensive HTML course — it’s just a starting point. You can add any HTML or CSS you’re comfortable formatting and troubleshooting to your dynamic lists.
If you prefer, you can hire a Certified Expert to create your Dynamic List using HTML.
HTML elements
The main HTML element that you use for Dynamic list HTML is your dynamic list element:
<DynamicList></DynamicList>
Check out this W3School lesson on HTML Elements to learn more.
HTML attributes
You customize the information you want to display on your dynamic list using HTML attributes.
You can do this with HTML attributes specific to dynamic content. Click here to learn more.
Attributes generally come in name and value pairs, such as "source=Contacts."
Check out this W3School lesson on attributes to learn more.
HTML paragraphs
Paragraph formatting will help you customize how your data will display in your dynamic list. For example, if you’d like to display contact data formatted like this:
John Doe
johnd@example.com
(888) 321-7654
You’d use paragraph tags to separate each line you want to display. Like this:
<p>[First Name] [Last Name]</p>
<p>[Email]</p>
<p>[SMS Number]</p>
Check out this W3School lesson on paragraph tags to learn more.
HTML styles
Styling options will help you customize the color, font, size etc. of your dynamic list. For example, if you want your headline text color to be red, you’ll use a styling tag:
<p style="color:red;">[Headline]</p>
Check out this W3School lesson on HTML styles to learn more.
HTML formatting
Formatting options help you customize your text, such as making your content bold or italicized.
<p><i>[Headline]</i></p>
Check out this W3School lesson on HTML formatting elements to learn more.
How it works
The dynamic list HTML tag — <DynamicList></DynamicList> — added to a custom code element allows you to create dynamic lists.
Put simply, dynamic lists work just like dynamic blocks; the only difference is that you create them with HTML and CSS. With dynamic lists, you’ll design a list the way you want it to look, and all of the content inside of your dynamic list tag will be repeated with data from each record.
First, you choose a source for your dynamic list. This source can be any of the objects in your account, a dynamic page or block object.
Then, the system will repeat whatever code you put between the dynamic list tag, using the data from a new record each time.
If you want to create a list of Contacts, your Dynamic List HTML would look like this:
<DynamicList source="Contacts"><p>[First Name] [Last Name]</p></DynamicList>
Create dynamic lists based on the records saved in any of the objects found in your Objects collection.
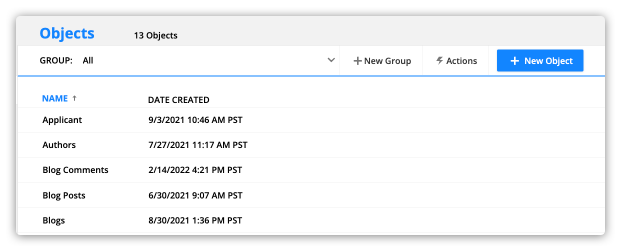
For example, the code below will create a list of links to your blog posts:
<DynamicList source="Blog Posts"><p><a href="[Blog posts URL]" target="_blank">[Post Title]</a></p>
</DynamicList>

Add any custom code you want between your dynamic list tags. Whatever code you place in there will be repeated on your list.
By default, any merge fields used in a dynamic list will come from the Contacts object. That means if the source of your dynamic list is a custom object, and the name of a field in your custom object matches a Contact field, your list will pull in Contact information.
If this happens to you, add “List//” before your field name. For example, if your custom object includes a “First Name” field, your merge field should look like this, “[List//First Name].”
Customize your dynamic list with HTML attributes
Customize your dynamic list element by adding any of the following attributes to your dynamic list HTML tag.
You can add more than one of these modifiers to ensure that your HTML dynamic list tag renders a list that fits your needs.
source
This is the only required attribute
| Purpose | This attribute identifies the data source for the dynamic list tag. |
| Format | source="SOURCE" |
| Source options | Add the names of your objects as your source. Refer to your Objects collection to see your options. OBJECT_NAME Add your object’s name as the source when you want to add information saved in your objects, such as Deals, Companies, Contacts, etc. Visitor//SUBCOLLECTION_NAME Create a dynamic list based on a subcollection saved in your visitor’s record, such as Visitor//Notes, Visitor//Transactions, Visitor//Deals, Visitor//Subscriptions and Payment Plans, etc. Page//SUBCOLLECTION_NAME Build a dynamic list based on a subcollection saved in your dynamic page’s source record, such as Page//Notes, Page//Comments, etc. Block//SUBCOLLECTION_NAME Build a dynamic list based on a subcollection saved in your dynamic blocks’ source record. For example, use Block//Notes to display contact notes inside a dynamic block with Contacts as the source. |
| Note | When your source is a subcollection of a record, use merge fields from that subcollection. For example, if your source is Block//Notes, use the merge field [Note] in your dynamic list to add your contacts’ notes. |
| Example | <DynamicList source="Contacts"> Your dynamic list content. Use merge fields to add information saved in your records. Use HTML and CSS to create the design you want. </DynamicList> |
| Result | A dynamic list based on your contacts. |
numRecords
| Purpose | Choose the number of records to display. |
| Format | numRecords="NUMBER_OF_RECORDS" |
| Example | <DynamicList source="Contacts" numRecords="6"> Your dynamic list content. Use merge fields to add information saved in your records. Use HTML and CSS to create the design you want. </DynamicList> |
| Result | A list that displays six contact records. |
| Note | If you do not include this variable, your list will default to display 10 records. The limit is 60. |
sortBy
| Purpose | Choose a field to use to sort your records, or use “Random” to randomize your list.
|
| Format | sortBy="FIELD_NAME" |
| Example | <DynamicList source="Contacts" sortBy="Contact ID" Your dynamic list content. Use merge fields to add information saved in your records. Use HTML and CSS to create the design you want. </DynamicList> |
| Result | A list of contacts sorted by their IDs. |
| Note | If you do not include this variable, your list will be sorted by the “Date Added” field. |
sortOrder
| Purpose | Choose the order you want to display your list. Use this with the sortBy attribute above. |
| Format | sortOrder="ORDER" |
| Sort order options | Choose either “Ascending” or “Descending.” |
| Example | <DynamicList source="Contacts" sortBy="Contact ID" sortOrder="Descending"> Your dynamic list content. Use merge fields to add information saved in your records. Use HTML and CSS to create the design you want. </DynamicList> |
| Result | A list of contacts sorted in descending order based on their ID. |
| Note | If you do not include this variable, your list will be sorted in “Descending” order. |
startOn
| Purpose | Choose the record you want to start your list. This attribute is helpful when you want to display certain records in one design and display the rest of your list with another design. |
| Format | startOn="NUMBER" |
| Example | <DynamicList source="Contacts" sortBy="Contact ID" sortOrder="Descending" startOn="1">Your dynamic list content. Use merge fields to add information saved in your records. Use HTML and CSS to create the design you want. </DynamicList> |
| Result | A list of blog posts that starts on the post who was most recently published. |
| Note | If you do not include this variable, your list will start on the first record based on your sortBy and sortOrder attributes. |
includeIf_tags_contains
| Purpose | Use this attribute to only display records with a specific tag. |
| Format | includeIf_tags_contains="TAG_NAME" |
| Example | <DynamicList source="Contacts" includeIf_tags_contains="Interested in cardio"> Your dynamic list content. Use merge fields to add information saved in your records. Use HTML and CSS to create the design you want. </DynamicList> |
| Result | A list of contacts who have the tag “Interested in cardio.” |
| Note | Add multiple tags by using the AND or OR operators, learn how below. |
includeIf_tags_does_not_contain
| Purpose | Use this attribute to only display records that do not have a specific tag. |
| Format | includeIf_tags_does_not_contain="TAG_NAME" |
| Example | <DynamicList source="Contacts" includeIf_tags_does_not_contain="Interested in strength training"> Your dynamic list content. Use merge fields to add information saved in your records. Use HTML and CSS to create the design you want. </DynamicList> |
| Result | A list of contacts who do not have the tag “Interested in strength training.” |
| Note | Add multiple tags by using the AND or OR operators, learn how below. |
includeIf_field_equals
| Purpose | Only display records that have a specific value saved in a field. |
| Format | includeIf_field_equals="'FIELD_NAME'='FIELD_VALUE'" |
| Example | <DynamicList source="Contacts" includeIf_field_equals="'State'='CA'"> Your dynamic list content. Use merge fields to add information saved in your records. Use HTML and CSS to create the design you want. </DynamicList> Alternatively, you can use the full state name: <DynamicList source="Contacts" includeIf_field_equals="'State'='California'"> Your dynamic list content. Use merge fields to add information saved in your records. Use HTML and CSS to create the design you want. </DynamicList> |
| Result | A list of contacts who live in California. |
| Note | Multiple fields and values can be added using the AND or OR operators, learn how below. |
includeIf_field_does_not_equal
| Purpose | Only display records that do not have a specific value saved in a field. |
| Format | includeIf_field_does_not_equal="'FIELD_NAME'='FIELD_VALUE'" |
| Example | <DynamicList source="Contacts" includeIf_field_does_not_equal="'State'='CA'"> Your dynamic list content. Use merge fields to add information saved in your records. Use HTML and CSS to create the design you want. </DynamicList> Alternatively, you can use the full state name: <DynamicList source="Contacts" includeIf_field_does_not_equal="'State'='California'"> Your dynamic list content. Use merge fields to add information saved in your records. Use HTML and CSS to create the design you want. </DynamicList> |
| Result | A list of contacts who do not live in California. |
| Note | Multiple fields and values can be added using the AND or OR operators, learn how below. |
includeIf_field_contains
| Purpose | Only show records that have a partial match to a specific value saved in a field. |
| Format | includeIf_field_contains ="'FIELD_NAME'='FIELD_VALUE'" |
| Example | <DynamicList source="Contacts" includeIf_field_contains="'Title'='C'"> Your dynamic list content. Use merge fields to add information saved in your records. Use HTML and CSS to create the design you want. </DynamicList> |
| Result | A list of contacts who have C-level titles. |
| Note | You can add multiple fields and values using the AND or OR operators, learn how below. |
includeIf_field_does_not_contain
| Purpose | Only show records that do not have a partial match to a specific value saved in a field. |
| Format | includeIf_field_does_not_contain="'FIELD_NAME'='FIELD_VALUE'" |
| Example | <DynamicList source="Contacts" includeIF_field_does_not_contain="'Email'='gmail'"> Your dynamic list content. Use merge fields to add information saved in your records. Use HTML and CSS to create the design you want. </DynamicList> |
| Result | A list of contacts who don’t have Gmail email addresses. |
| Note | Multiple fields and values can be added using the AND or OR operators, learn how below. |
Relationship attributes
The following attributes are based on relationships between objects.
- Check out this Ontraport University lesson to learn more about the three relationship types.
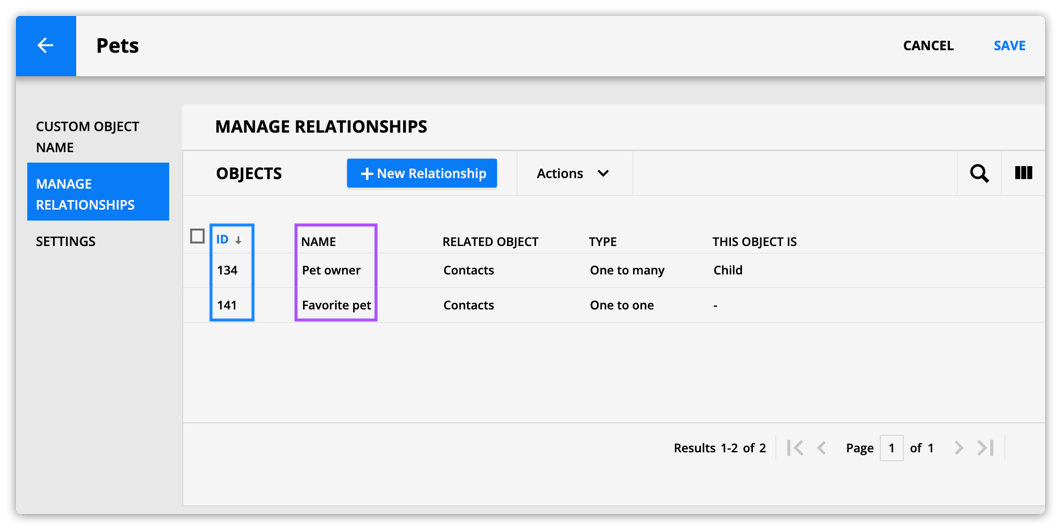
Add your relationship ID or relationship name to tell your system which relationship you want to use in your HTML attribute.
Follow these steps to find a relationship name and ID:
- Go to your Custom Objects collection.
- Click on your object’s name → Manage Relationships.
- Add the “ID” column to your subcollection to view the IDs of your relationships.
- Add the “Name” column to your subcollection to view your relationship names.
includeIf_is_related
| Purpose | Only display records that have a relationship to a page’s source. |
| Format | includeIf_is_related="'Page'='RELATIONSHIP_ID'" |
| Example | <DynamicList source="Virtual Events" includeIF_is_related="'Page'='144'"> Your dynamic list content. Use merge fields to add information saved in your records. Use HTML and CSS to create the design you want. </DynamicList> |
| Result | A list of registered attendees for the event your dynamic page is based on. |
| Note | You can also use the “RELATIONSHIP_NAME” in place of the “RELATIONSHIP_ID“. <DynamicList source="Virtual Events" includeIF_is_related="'Page'='Registered Attendees'">Your dynamic list content. Use merge fields to add information saved in your records. Use HTML and CSS to create the design you want. </DynamicList> |
For relationships between the page’s visitor and dynamic block records
| Purpose | Only display records that the page visitor has a relationship with. |
| Format | includeif_is_related="'Visitor'='RELATIONSHIP_ID'" |
| Example | <DynamicList source="Virtual Events" includeIF_is_related="'Visitor'='144'"> Your dynamic list content. Use merge fields to add information saved in your records. Use HTML and CSS to create the design you want. </DynamicList> |
| Result | A list of events the visitor has registered for. |
| Note | You can also use "RELATIONSHIP_NAME" in place of the "RELATIONSHIP_ID". <DynamicList source="Virtual Events" includeIF_is_related="'Visitor'='Registered Attendees'"> Your dynamic list content. Use merge fields to add information saved in your records. Use HTML and CSS to create the design you want. </DynamicList> |
Includeif_is_not_related
For relationships between the page’s source and dynamic block records
| Purpose | Only show records that do not have a relationship with your page’s source. |
| Format | includeIf_is_not_related="'Page'='RELATIONSHIP_ID'" |
| Example | <DynamicList source="Virtual Events includeIf_is_not_related="'Page'='144'"> Your dynamic list content. Use merge fields to add information saved in your records. Use HTML and CSS to create the design you want. </DynamicList> |
| Result | Display a list of events your contact hasn’t signed up for yet. In this example, the page’s source is contacts. |
| Note | You can also use the "RELATIONSHIP_NAME" in place of the "RELATIONSHIP_ID". <DynamicList source="Virtual Events" includeIf_is_not_related="'Page'='Registered Attendees'"> |
For relationships between the page’s visitor and dynamic block records
| Purpose | Only show records that your visitor does not have a relationship with. |
| Format | includeIf_is_not_related="'Visitor'='RELATIONSHIP_ID'" |
| Example | <DynamicList source="Virtual Events" includeIf_is_not_related="'Visitor'='144'"> Your dynamic list content. Use merge fields to add information saved in your records. Use HTML and CSS to create the design you want. </DynamicList> |
| Result | A list of events your visitor hasn’t registered for. |
| Note | You can also use the "RELATIONSHIP_NAME" in place of the "RELATIONSHIP_ID". <DynamicList source="Virtual Events" includeIf_is_not_related="'Visitor'='Registered Attendees'"> |
Using AND and OR operators
You can use boolean operators “and” and “or” to segment your list further for several of the HTML attributes described above.
The examples below show two conditions together, but you can use as many as you like.
Using the AND operator
| Purpose | Only include records where all conditions are true. |
| Format | includeIf_field_equals="'Sales stage'='New prospect'&&'State'='CA'" Alternatively, you can use the full state name: includeIf_field_equals="'Sales stage'='New prospect'&&'State'='California'" |
| Example | <DynamicList source="Contacts" includeIf_field_equals="'Sales stage'='New prospect'&&'State'='CA'"> Your dynamic list content. Use merge fields to add information saved in your records. Use HTML and CSS to create the design you want. </DynamicList> Alternatively, you can use the full state name: <DynamicList source="Contacts" includeIf_field_equals="'Sales stage'='New prospect'&&'State'='California'"> Your dynamic list content. Use merge fields to add information saved in your records. Use HTML and CSS to create the design you want. </DynamicList> |
| Result | A list of contacts who are new prospects in California. |
| Note | Negative conditions must be connected by the AND operator to properly excluded values.
|
Using the OR operator
| Purpose | Include records where any of the conditions are true. |
| Format | includeIf_field_equals=”‘City’=’Santa Barbara’||‘City’=’/Austin'” |
| Example | <DynamicList source="Contacts" includeIf_field_equals="'City'='Santa Barbara'||'City'='Austin'"> Your dynamic list content. Use merge fields to add information saved in your records. Use HTML and CSS to create the design you want. </DynamicList> |
| Result | A list of contacts who live in Santa Barbara or Austin. |
| Note | Negative conditions must be connected by the AND operator to properly excluded values.
|
Using merge fields in attributes
When you add merge fields to your dynamic list HTML, it’s always best to use the merge field dropdown rather than manually typing them. The dropdown ensures that your merge fields are correctly formatted. However, since you are creating your dynamic lists using HTML, sometimes you may need to tweak your merge field’s formatting.
Say you use dynamic list HTML to create a list of contact information on a regular Ontraport Page. You’ll only have access to visiting contact merge fields, which look like this: [Visitor//First Name].
If your dynamic list’s source is “Contacts,” you can remove “Visitor//” from your merge field, like this [First Name].
Below you’ll learn how to format merge fields for different sources.
Using Page/Block/Visitor merge fields
You’ll use merge fields to display specific information from your records, and you can also use them in the attributes of your dynamic list HTML.
When you add merge fields to your dynamic content using the drag-and-drop editor, you can choose between merge fields for:
- Visiting contacts
- Your dynamic block’s source
- Your dynamic page’s source
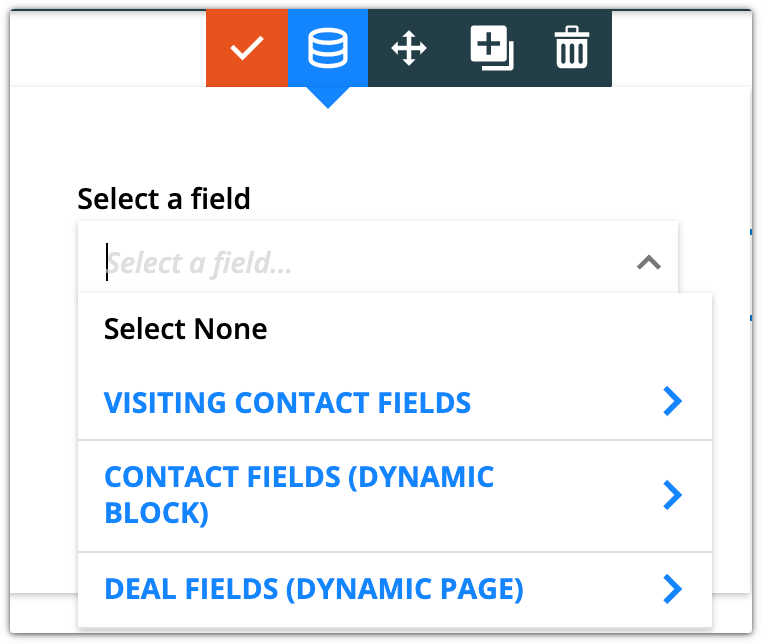
You can use these same merge fields in your dynamic list HTML.
For example, if you have a blog and want to create a sidebar with “related posts” from the same category as the post you’re looking at, you could use:
<DynamicList source="Blog Posts" includeIf_field_equals="'Category'='[Page//Category]'">
<p><a href="[Blog Post URL]">[Blog post title]</a></p>
</DynamicList>
You can use all merge field types:
[Page//FIELD_NAME] — page source fields
[Block//FIELD_NAME] — block source fields
[Visitor//FIELD_NAME] — Visiting contact’s fields
Using merge fields from parent relationships
Sometimes you’ll want to automatically segment your list of child records based on a field in the parent’s record. You can do that by “drilling in” to the parent’s fields and adding a merge field from the parent’s record.
Say you’ve linked your Pets object to your Contacts object so you can see which contacts own which pets. And you’d like to create a page based on your contact’s information and show all the pets owned by that contact.
To do that, you’ll want to include only pets that have the same “Pet owner” as the page you’re on. In this example, we’re using the pet owner’s email field:
<DynamicList source="Contacts" includeIf_field_equals="'Pet owner//Email'='[Page//Email]'">
<p>[Pet Name]</p>
<p><img src="[Pet Picture]" width="500" height="600"/></p>
</DynamicList>
Field names with apostrophes
Including a field name in your dynamic list attributes that contains an apostrophe will break the dynamic list tags. You can fix that by replacing the apostrophe with our custom HTML entity — &mrqt;.
Say you have a field called “User’s Info.” The apostrophe in the field’s name will break your dynamic list HTML if you don’t replace it with &mrqt;.
<DynamicList source="Contacts" includeIf_field_contains="'User's Info'='awesome'"><p>[Contact ID]</p></DynamicList>
becomes this:
<DynamicList source="Contacts" includeIf_field_contains="'User&mrqt;s Info'='awesome'"><p>[Contact ID]</p></DynamicList>
Use cases
Here’s an example of the type of dynamic lists you can create using the dynamic list HTML tag.
Related blog posts sidebar
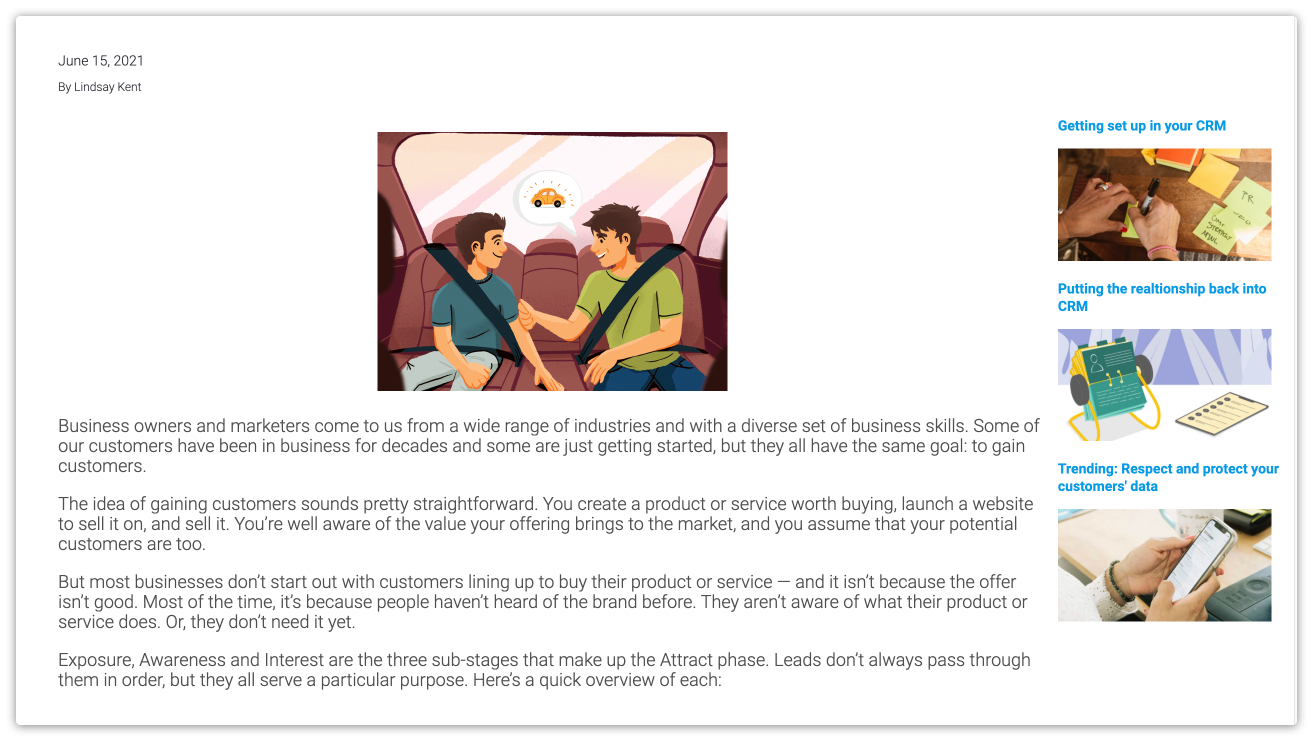
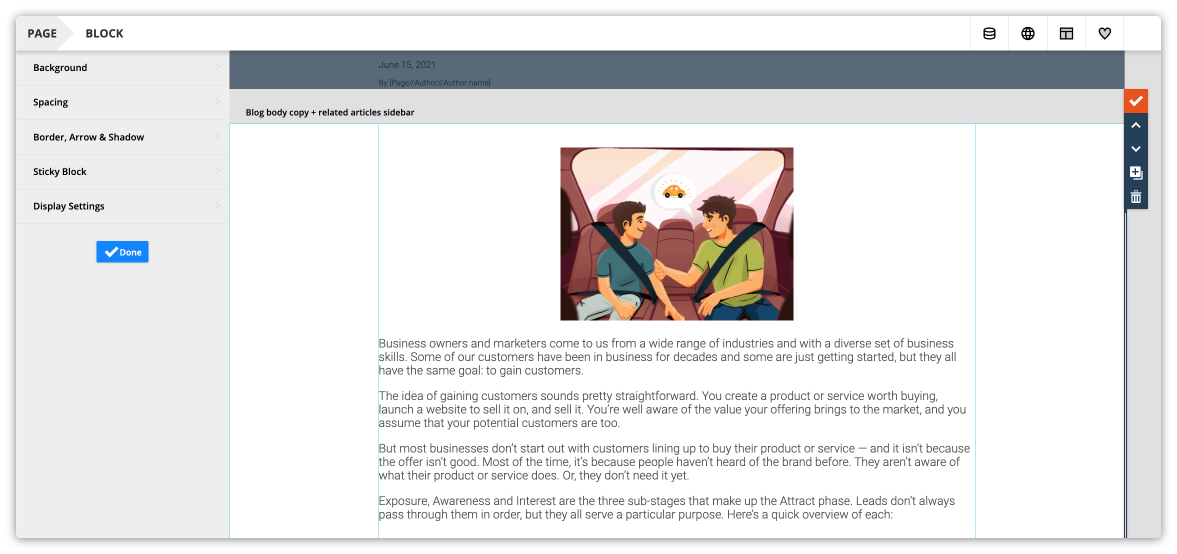
If you want to add a navigation sidebar to your blog post article, the first step is to create a space in your page’s layout where you want to add your dynamic list. In the example below, the body copy is contained in one column, and the block includes two empty columns, one on either side.
Once you’ve identified where you want your dynamic list to go, click and drag the /pages-elements-custom_HTML.png) element to that location. For this example, we add the dynamic list to the right side of the blog article.
element to that location. For this example, we add the dynamic list to the right side of the blog article.
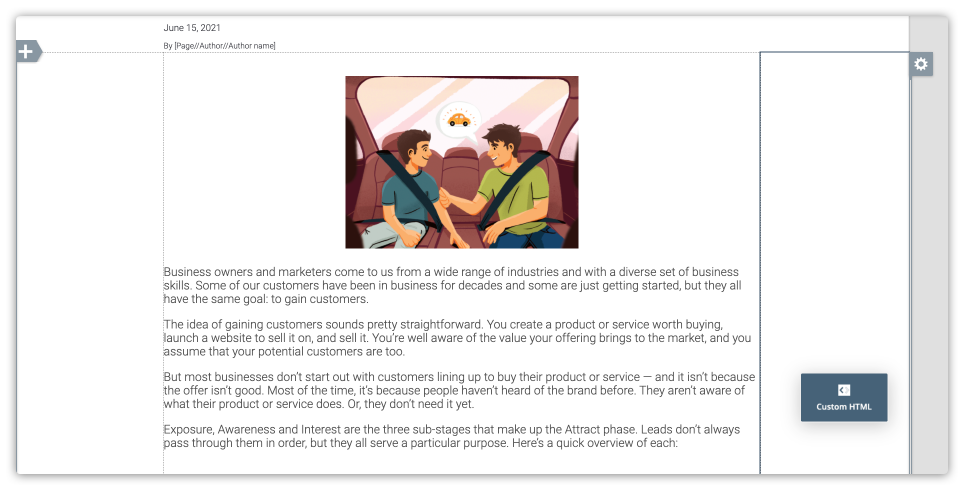
Click on your custom code element and click Edit Code. Then replace the default code with your dynamic list tag.
<DynamicList source="Blog Posts">
<p><a href="[URL]">[Page Name]</a></p>
<p><img src="[Link image ##link]" alt="[Link image alt text]" width="100%"/></p></DynamicList>
