Ontraport’s dynamic content features help you build your website quickly and easily. This search feature allows you to add a search bar with basic or advanced filters to your site. Search and filters help your leads and customers easily find the information they want.
Add a dynamic content package to your account to use this feature. Here’s how:
- Click here to go to your account details page.
- Click Add plan or Start trial next to “Add Dynamic CMS to your account” and choose the plan that fits your needs.
Table of contents
Add search to your site
Advanced search
• Exclude specific dynamic blocks on your results page
• Add additional fields to search
Search results page
Add search filters to your site
• Step 1: Set up your search filter object
• Step 2. Set up your dynamic search results block
• Step 3: Build your search form
• Step 4: Customize a search filter URL
• Putting your URL together
Step 5: Add your search filter URL to your form
Add search to your site
The search element is a powerful tool that allows your site visitors to quickly and easily find what they want.
Every search element requires a results page. Your visitors will view their results using a dynamic block on this results page. The dynamic block includes merge fields that represent the visitor’s search results.
Visitors can search specific dynamic blocks on a results page and select the fields they wish to search within those blocks.
Your basic search settings allow you to choose your search results page. You can also add placeholder text to add a call to action to your search bar, such as “Enter your search term.” Check out the section below to learn how to set up a results page.
Here’s how to set up a basic search:
- Drag and drop the search element to your page.
- Click on your search element to open its settings.
/pages-search_element_settings.png)
- Select your search results page.
- (Optional) Customize your call to action in your placeholder text field.
/pages-search_placeholder_context.png)
- By default your call to action is “Enter search term…”
- (Optional) Click Advanced and add a value you’d like to prefill.
- For example if you want the default value in your job listing search bar to match your visitor’s “Preferred role” field, you can add a merge field to the “Prefill this field’s value” section. That way your visitors can quickly search for roles you know they’re interested in.
/pages-search_prefill_context.png)
Advanced search
Use the advanced search setting to limit your search to specific dynamic blocks. You can specify the fields you want your visitors to be able to search and add fields that aren’t visible on your dynamic block. Here’s how:
- Follow the steps above to create a simple search.
- Toggle “Advanced search” on.
From the advanced settings you can customize your search in the following ways:
Exclude specific dynamic blocks on your results page
This setting is helpful if you have dynamic blocks on your search page that you want to avoid including in your search results. For example, if you have a dynamic block containing related blog articles, excluding that block from your visitors’ search would be helpful.
- Locate the block you want to exclude from your search.
- Toggle the “Search this block” off.

Add additional fields to search
By default, the search will only look for matching text in the fields you have merged onto your dynamic block. However, you can add additional fields to search.
Searching fields that aren’t visible on your results block is helpful if you don’t want to display all the searchable fields. For example, your job listings records may contain a long description that doesn’t fit your page design. However if that description also contains terms that visitors would search for, then you can add it to the fields to search section. Here’s how:
- Click Add next to the “Fields to search” label.
- Select the field you’d like to make searchable.
/pages-search-fields_to_search_context.png)
By default, the Fields to search section contains “All visible fields.” If you remove this, your page visitors can only search the fields you add to this section.
Search results page
By default, the Search results page dropdown selects the page you’re on as your search results page. If you don’t toggle on the Advanced search setting, your search element will search visible fields on all dynamic blocks on your results page.
However, you can select another page from your Search results page dropdown if you’d like to send your visitors to another page when they search.
Create a search results page
Your results page is simply a page containing a dynamic block selected in your search element’s settings. When you make the content on your block dynamic, you add “visible fields.”
If your visitor’s search term matches the value of a visible field on your dynamic block, the corresponding record will appear in your results.
Here’s how to create a search results page:
/pages-search-results_block_example.png)
- Add a dynamic block to your page.
- Add the fields you want to make searchable by making your content dynamic.
/pages-search-merge_data_results_block_example.png)
- Publish your page if you are using a stand alone results page.
Add search filters to your site
A search filter option allows users to easily find what they are looking for on your website. Visitors can narrow search results based on specific criteria such as price, category, or product features. Filters are great for sites with a lot of content; they make it easier for users to find relevant results.
Check out these videos from the CEO about filters here. And see a live demonstration of search filters here.
If you only need a simple search for your site, use the search element instead of this option.
Before creating your search filter, take a look at this feature’s components. There are four:
1. The search object
A search object is a custom object in your account named “Search.” It keeps track of your visitors’ search history and ensures that more than one person can search at once.
You can call your search object anything you want, such as “Queries” or “Search Terms.”
- The name of your object doesn’t matter, but the fields in that object do. Check out “Step 1: Set up your search filter object” for more information.
2. The search filter URL
This URL is the destination of your search form. It tells your results page what to display based on your visitor’s query.
You’ll create a custom search URL for each of your search forms.
3. The search form
Your visitors will use this form to add their search terms. Put all of the fields you want to make searchable on this form.
4. The dynamic block
This block displays your search results. Add fields to match the merge fields in your search URL by making text elements dynamic. If you don’t include fields that match the fields on your form, your visitors won’t be able to search for them.
Step 1: Set up your filter search object
You don’t have to create relationships when creating your search object. All you need to do is recreate the fields you want to be searchable. For example, if you want to allow members to search your blog posts by title, your search object must include a “Blog Title” field.
Here’s how to set up your search object:
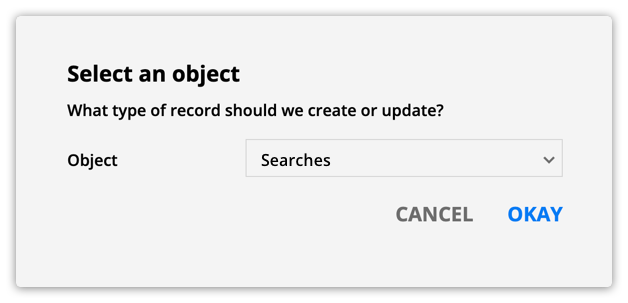
- Follow the steps in this article to create a new custom object.

Step 2. Set up your dynamic results block
You’ll need a dynamic block to display the results of your visitors’ queries. When visitors use your search form, you’ll send them to a page with this block using the form’s destination URL. You’ll also configure that URL with special variables and merge fields that will become the data your users searched for. When your dynamic block reads the URL, it will know which results to display.
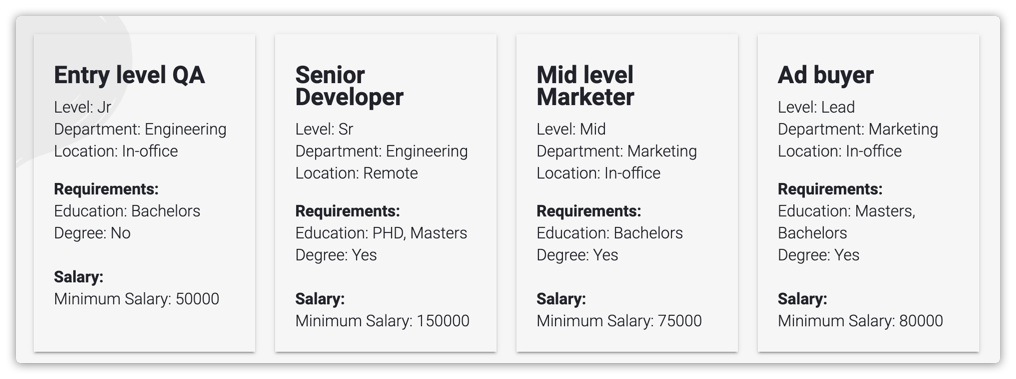
For example, say a user is creating a job listings page. The goal is to filter the results based on job title, minimum salary and education requirements. Your results block shows your visitors all of the jobs that fit their query. For this example the job title, level, department, requirements and salary are dynamic text elements on your dynamic block.
- Follow the steps above to create your results block.
- Add merge fields that match the search fields on your form and any other design you want.
- Finish your page’s design and publish your page.

Step 3: Build your search form
Your search form is where your visitors will add their queries. If you are creating a simple search, you may have a single search field. If you’re creating an advanced search, you’ll have a lot of filtering options.
Building a search form is just like creating a lead capture form. The difference is that your search form needs to include fields you want visitors to filter their search results by. For example, if you’re putting together an advanced job search, include fields like “Job title” and “Minimum salary.”

- Create a new form.
- Your form’s source should be your search object.
- Add all of your search fields to your form.
- Go to your form’s settings and check the “Don’t redirect to thank you page until automations added to this form have run” option in the advanced section.
- Save your page — don’t publish it yet.
Check out this Ontraport University lesson to learn more about building forms.
Step 4: Customize a search filter URL
This URL is like a bridge between your search form and your results page. It tells your results page what to show your visitor based on their search query. You’ll create a custom URL for each search form. And you can personalize how your search functions by using different keywords and operators.
You can further personalize how your search will function by combining the URL variables below.
Here’s what each component of a search URL does:
| Destination URL | This is the URL of your results page |
| ? | This question mark belongs directly after your destination URL. This character tells the browser that everything that comes after are URL variables — not part of the URL. |
| Keywords | searchFor= This keyword searches all the fields you added to your results block.
Searching “William” will show you “William” and names that contain “William.”
If you do not want a partial search and instead want an exact search, put quotes around your search term.
This is the most inclusive keyword. And you can also format it to include a value only and no field name. When you exclude a field name, your results block will display any record that contains the value your visitor searched. searchFilter=Only available to some Dynamic CMS plans.
This keyword searches the fields you specify for specific values. Results will display only if there is a match with one of the fields added to this keyword. You can add multiple values by separating them with commas. Then your search results will show records where any search value matches the field’s values. This is the most exclusive keyword. It’s great for advanced searches and filters where visitors want to narrow their results. For example, if you’re shopping for a blender on Amazon, you can view only blenders manufactured by Vitamix. searchFilterALL=Only available to some Dynamic CMS plans.
This keyword is similar to searchFilter. However, use this one to find results that match ALL the values your visitor searches for |
| Field | The field variable is the name of the field you want to make searchable. Capitalization is important in this component. Make sure the name you add here matches your field’s name perfectly. |
| Tags | The tags variable allows you to search by object tags. Instead of adding your field’s name, you’ll always use the variable “Tags” in your URL. |
| Operator (for most fields) | The operator follows the field in your URL. The operator pairs the field with its corresponding value. You’ll use a colon for any field that is not a date, date and time, numeric or price field. : (Contains) The contains operator will return results that contain any of the specified values. |
| Operators (for date, date and time, price and numeric fields) | If your search includes a date, date and time, numeric or price fields, you can choose from the following operators: = (Equals) This operator means there must be an exact match. For example, use this operator to find a precise number or date. != (Not equal) The not equal operator will return results that are not equal to the value you add to the URL. > (Greater than) Greater than will return results that show a number larger or a date later than the specified value. < (Less than) This operator will return results that show numbers smaller than the specified value. Or, if you’ve added a date field, the results will show dates before the selected date. >= (Greater than or equal to) Greater than or equal to is the same as the greater than operator, but it also includes exact matches. <= (Less than or equal to) Less than or equal to is the same as the less than operator, but it includes exact matches. |
| Value | The value is simple! Add a merge field that matches your “Field” variable. When your visitor fills in your search form, their search term replaces the merge field in your value variable. The merge fields in your URL take your visitors’ search terms and deliver them to your results page. For example, say you have a simple blog search. The field on your form “Post Title” paired with the “[Post Title]” merge field allows visitors to search for different blog titles. Using static values If you want to add a specific value to your URL, use the following formats for different field types: Text Add any text value Checkbox
For unchecked values use:
Date
Use the format that matches your account’s localization settings. Date and time |
| ; | Use this character to search multiple fields using the same keyword. Check out the examples in the “Putting your URL together” section to see how to use this character. |
| & | Use this character to add multiple keywords to your search URL. Add a “&” between each of your keyword strings. |
Putting your URL together
Now that you’ve seen all of the components of a search URL, here’s how you can put them together. The keywords and operators you choose will change how your search functions.
Here are several examples:
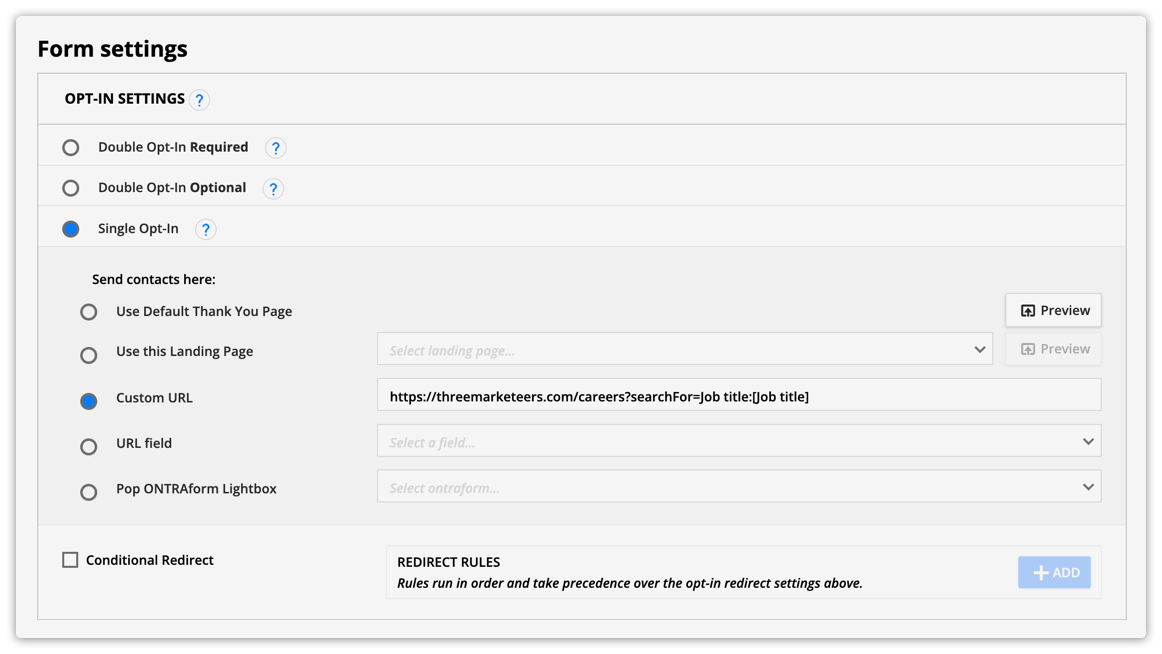
https://threemarketeers.com/careers?searchFor=Job title:[Job title]
This is the basic format of your search URL.
https://threemarketeers.com/careers?searchFor=[Job title]
This example shows a search URL that doesn’t include a field to search. This example will search the merge fields on the dynamic search results block for a match to your search’s value.
https://threemarketeers.com/careers?searchFor=Tags:[Tag]
This example shows a search URL that uses tags.
https://threemarketeers.com/careers?searchFor=Minimum Salary>=[Minimum Salary]
This example uses the “greater than or equal to” operator because the field “Minimum Salary” is a price field. You’ll use the special operators for any numeric fields, price, date or date and time fields.
https://threemarketeers.com/careers?searchFor=Job title:[Job title];Minimum Salary>=[Minimum Salary]
This example includes search terms for both job title and minimum salary.
https://threemarketeers.com/careers?searchFor=Job title:[Job title]&searchFilter=Education:[Education]
This example shows a search URL that includes more than one keyword. In this example, the “Education” field is a list selection, so visitors can tell you they have bachelor’s and master’s degrees.
The “searchFor” keyword will search your results block for the value your visitors add to the job title field. The “searchFilter” keyword ensures results only show records that have the value(s) your visitor added to the education field.
Step 5: Add your search filter URL to your form
Now that you have your search URL, you’ll add it to the “Custom URL” field in your search form’s settings. Here’s how:
- In the block where your form fields and submit button are located, click on your submit button.
- Click Form Settings at the bottom left.
- In the “Send contacts here” section, select the “Custom URL” option and paste your URL in the field.
- Click Save and save and publish your page.

And you’re all done! You’ve created a search form, a dynamic search results block and a custom URL to connect the two.
