Before sending your email or adding it to your automation, you’ll use email settings to add your email subject line, determine which email address your message will be sent from, set up email tracking, and more.
The Advanced Mail editor also includes email settings specific to that editor such as setting your email background and adding custom code.
This article defines each of your general email settings, Advanced Mail specific settings and how to add new from names and addresses to your account.
Table of contents
General email settings
Advanced Mail email settings
Add a new “from” email address
Add “From” name and “Reply to” email address
General email settings
Ontraport offers three email editors, each with the same email settings; however, the settings appear in a slightly different format depending on which editor you are viewing.
Simple Mail.png)
Advanced Mail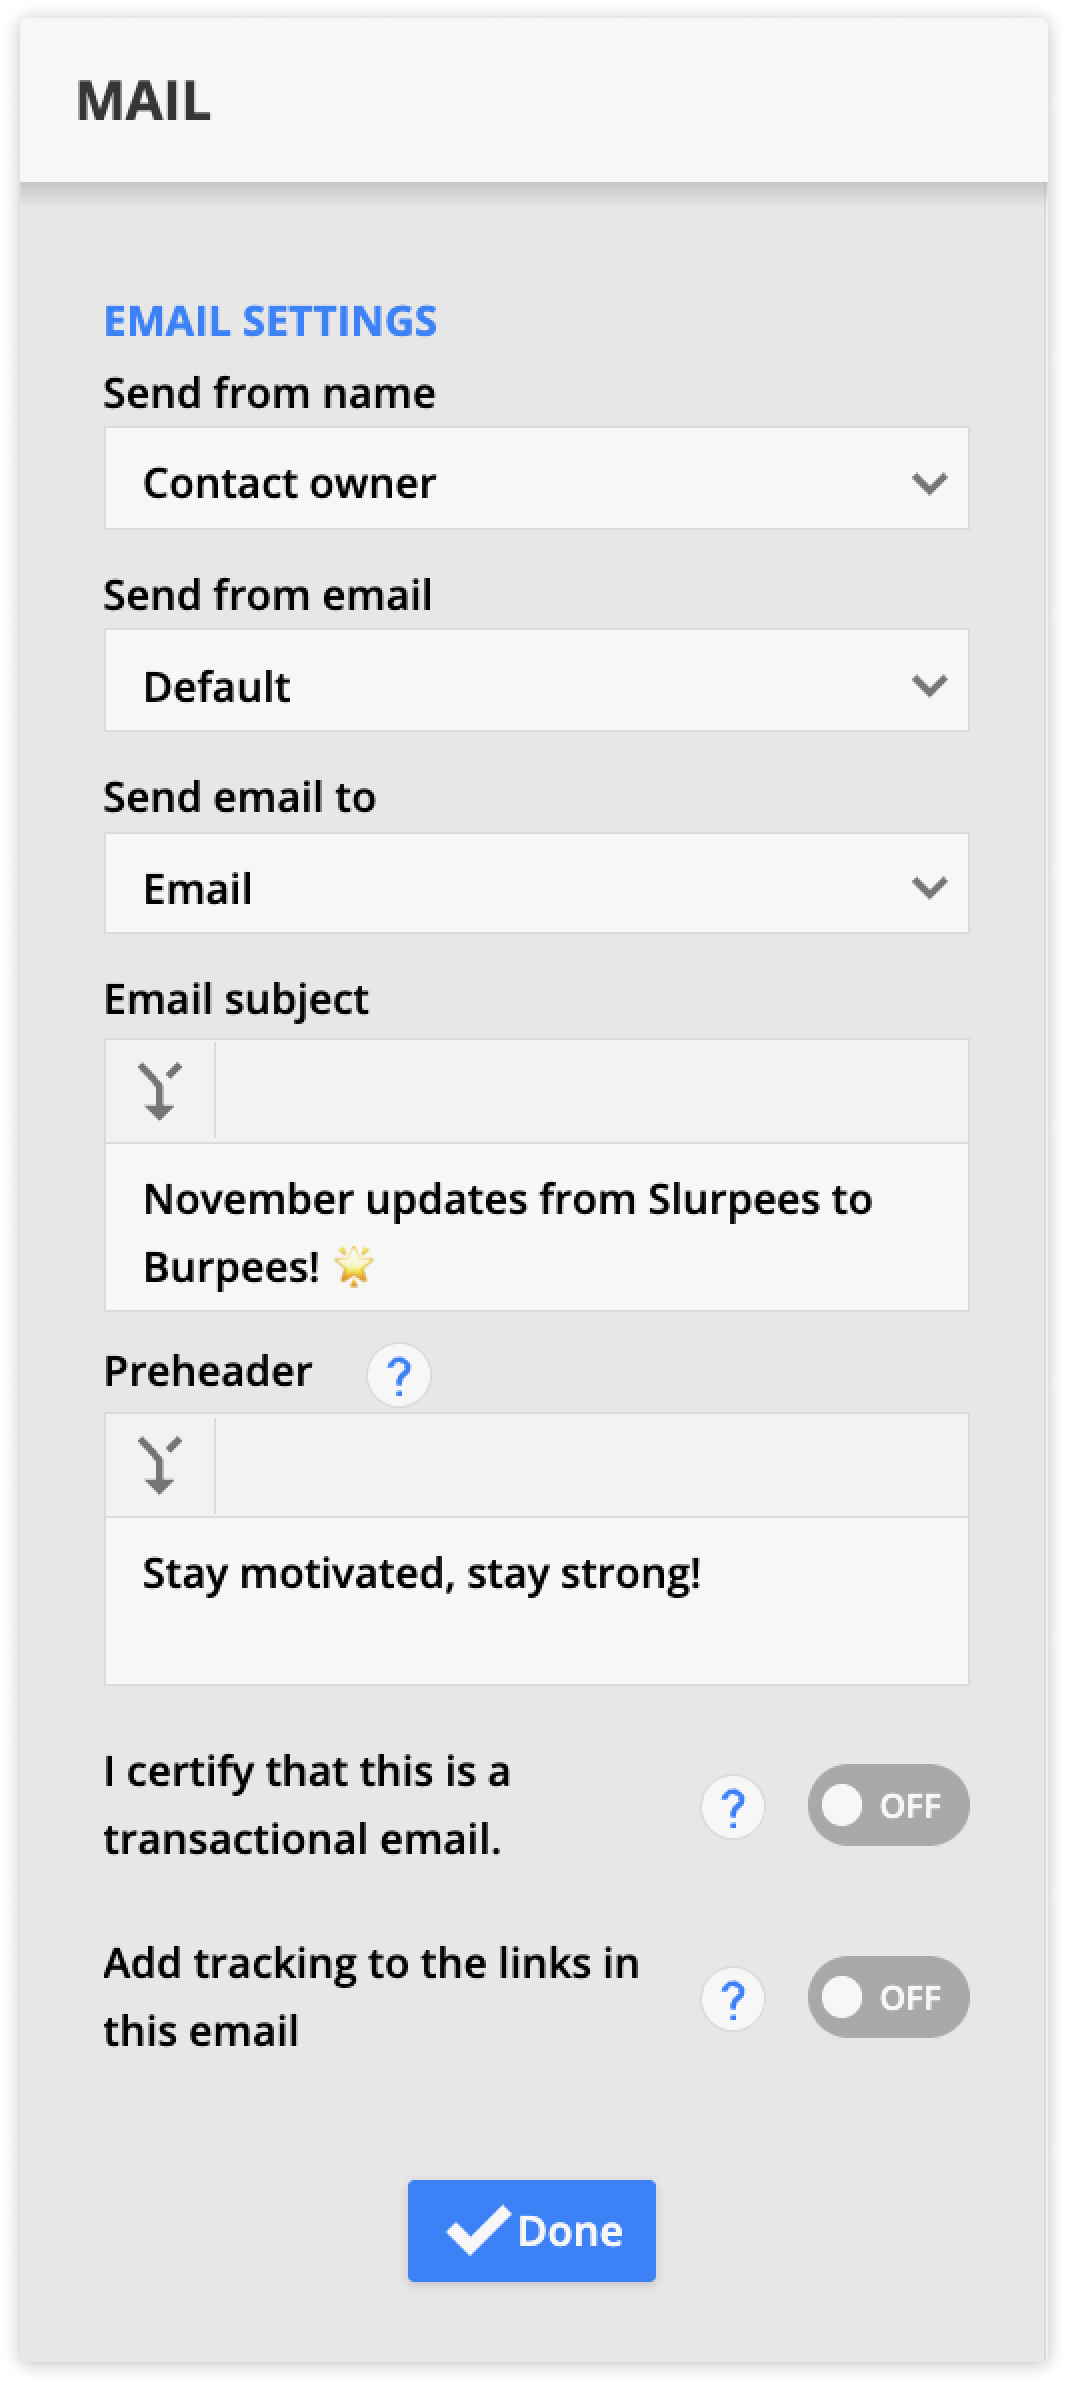
Send from field
The Send from field determines the send from name, email address, and reply address used for outgoing messages.
Choose from user relationships to dynamically populate sender information.. For example, if you select “Sales Rep,” the message will appear from each contact’s specific sales rep.
Or select a specific user to keep the same sender information for all sends.
When you choose the option “Custom,” you can add a custom “from” name and add any of your send from addresses as the “reply to” email address. You can also select your account's default no reply address that uses the format noreply+[account ID]@ontramail.com.
Send email to
Select which related email address you want to send your message to. For example, suppose you’re sending an email from a company record. In that case, you can select the email address of a specific contact at the company or all contacts that work for the company.
Email subject
Add the subject line of your message; this is what contacts will see before they open the email.
Preheader
This is the text that appears after the subject line in your contacts’ inboxes, and it gives your readers more information about your email.
Transactional Mail
Transactional email is used for non-marketing emails such as confirmations and purchase receipts, messages about changes to your privacy policy, or sending login credentials to a purchased membership product. These emails are sent to contacts even if they have unsubscribed from your marketing emails. Enable this setting if your email falls into the transactional category.
Add tracking to the links in this email
Enabling this option adds UTM tracking parameters to each link in the email (available to Ontraport Pro accounts and above). All links in the email will add the same utm_campaign, utm_source, utm_medium, utm_content and utm_term to each link.
If you want to edit these links manually, keep the box unchecked.
Plain text email
Ontraport sends this version along with your HTML email so that recipients who have turned off HTML will receive the plain text version of your email. Ensuring your message always has an up-to-date plain text version stored will tremendously help your messages reach the inbox.
You should also update the plain text version each time you update your email's content. Click Copy from HTML, or if you create an Advanced Mail message, you can enable an option to update each time you publish..png)
Spam Score
The spam score is provided by the open-source and third-party application SpamAssassin. SpamAssassin works as an email spam filter using sophisticated detection techniques to scan your emails before they go out. The score goes up if your emails are questionable or seem spammy. The spam score for your email, if available, will be listed as a number and may state “this email looks good” to the right of that number.
Emails with a spam score of 5.0 or greater cannot be saved or sent.
The Advanced Mail and Raw HTML Email editors allow you to click Spam Score to discover the spam rules that caused your score and see how to lower it.
Advanced Mail email settings
Back to top
The Advanced Mail editor has a settings tab that allows you to customize the message’s background, email settings, plain text email and add custom code.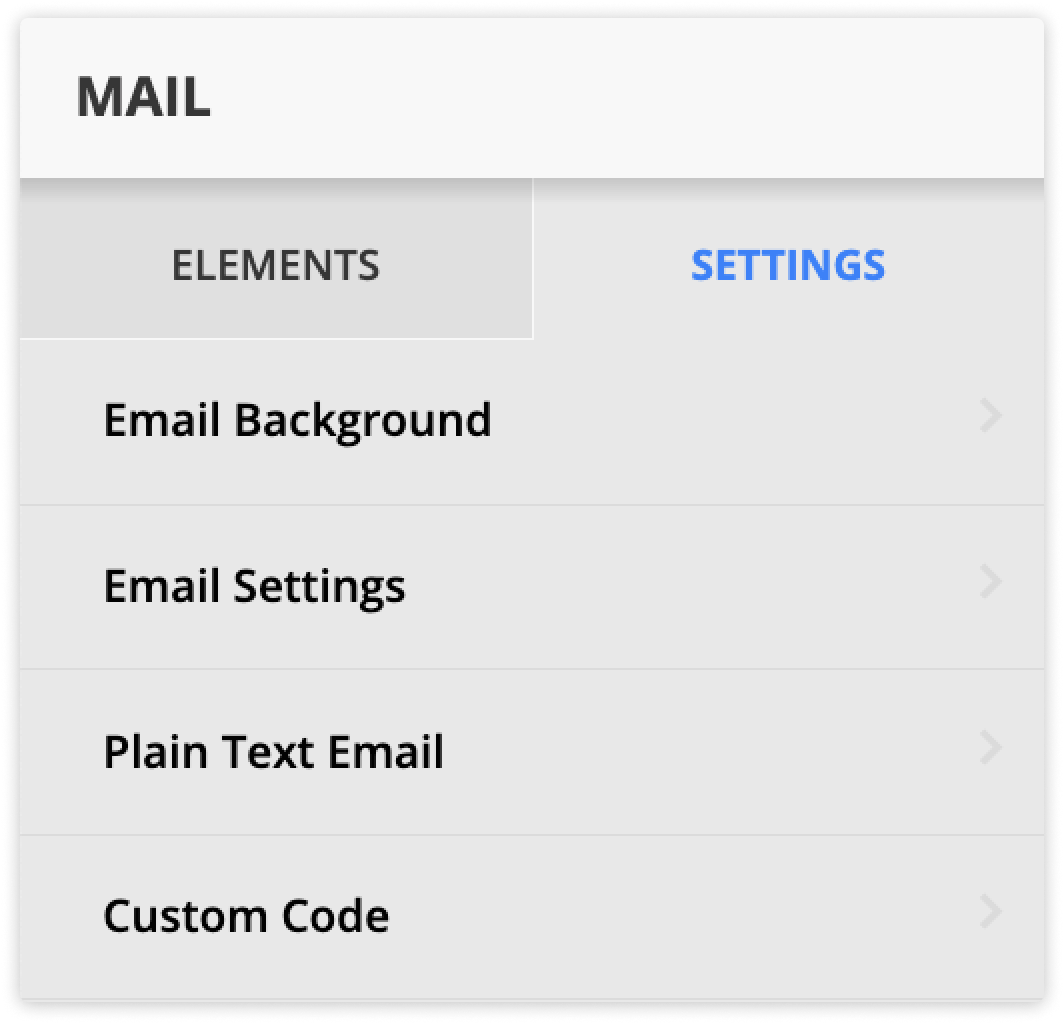
Email background
The email background setting allows you to set a specific color or an image as your message’s background.
Email settings
The email settings tab includes all of the options described in the first part of this article.
Plain text email
The Advanced Mail editor has the most options and allows you to automatically update your plain text each time you publish the message.
- Open the message you want to edit or create a new one.
- Click Settings → Plain text email.
- (Optional) Toggle on the “Wrap long lines” option to make the plain text version more readable.
- (Recommended) Toggle on “Sync plain text on publish” to update your plain text automatically each time you publish.
- Click Edit to update your plain text email manually.
- This option is not available if you sync plain text on publish.
Custom code
The custom code tab allows you to add custom code to your message’s header, body or footer.
Add a new “from” email address
Back to top
When your contacts view your emails in their inbox, your email “from” name and address let them know who sent the message. We recommend that you set up an address that your recipients will recognize. The first send “from” address in your account will be the email you used to sign up for your account; however, you can add new addresses at any time.
You cannot add a free email address to protect your email delivery. You can only add email addresses from custom domains you set up to send email.
- Click
.png) → Administration → Email → Email ‘From’ Address Setup.
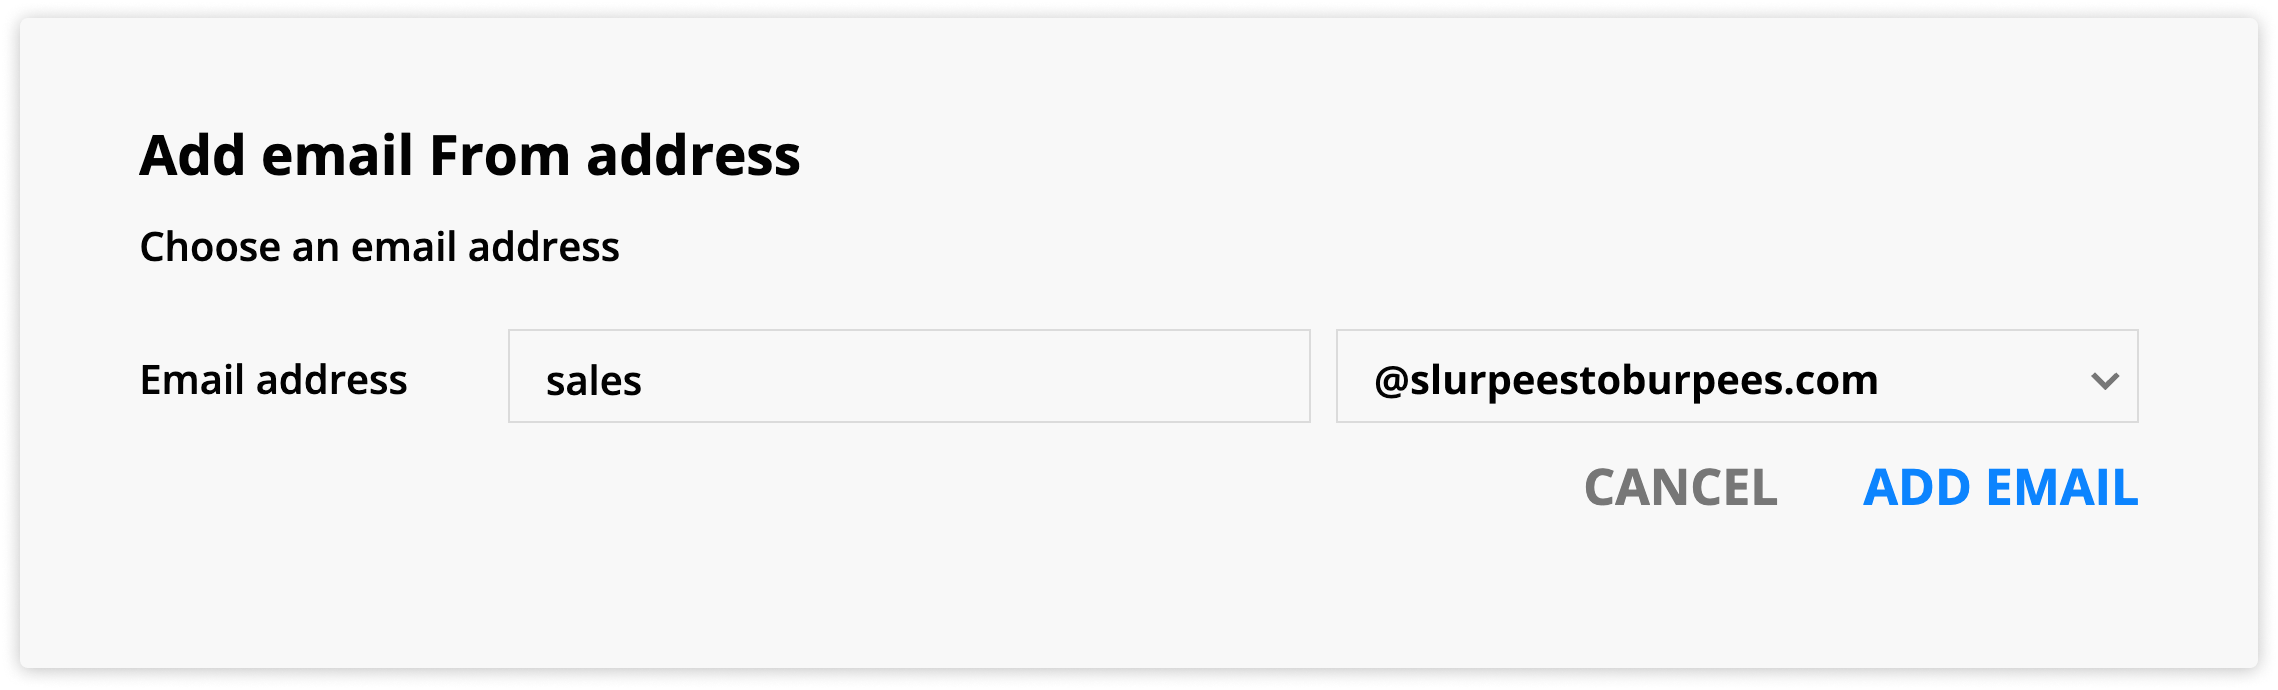
→ Administration → Email → Email ‘From’ Address Setup. - Click Add email.
- Add your email prefix in the first field.
- Select your custom domain from the dropdown to the right.
- You’ll only see custom domains with the domain type “Email” or “Pages + Email.”
- Click Add email to confirm.
- Check the inbox of the email you added for your confirmation email, and click Confirm my “from” address.
- If you have more than one “Email From” address, be sure to set the correct email as your default.
Add “From” name and “Reply to” email address
Back to top
The from name is similar to your from address, but it shows the sender's name when your recipients receive your emails.
Your reply to address is the address messages will be sent to when a contact replies.
Note that generic send “from” names can result in ISPs sending messages to your recipients' spam folders. For example, if your send “from” name is just "Joe," it's likely that Gmail will flag the message as suspicious.
- Click → Manage Users → and select the name of your user.
- Add the email “from” name and click
 .
. - In the same section, add your “reply to” email and click .