As an Ontraport account owner, you perform user management tasks like adding users, settings permissions, creating roles and much more. In this article, you’ll learn about users, roles and permissions and how to use them to manage your team in Ontraport.
Note, your subscription level determines how many users are included in your account. Check out the “Platform and support” chart on our pricing page to see what each plan offers.
Table of contents
The relationship between users, roles and permissions
• Role hierarchy
• The “Account Owner” role
• Assign ownership of records
Understanding permissions
• Yes/No Checkbox"
• "Can view" dropdown
• "Can create" dropdown
• "Can delete" dropdown
Add a role and set permissions
User permission exceptions
Agency permissions
The relationship between users, roles and permissions
Before adding roles and setting up permissions, it’s helpful to understand how users and roles are connected in your account.
Users are the people who sign in to your account. Individual users have their own username and password combination.
- Follow these steps to create a new user.
Roles
Every user in your account is assigned a role, and multiple users can have the same role. For example, members of a sales team would have the role “Sales Representative” and members of your support team would have the role “Customer Support Representative.”
Permissions control what areas of your account each role is allowed to view, edit and delete.
Role hierarchy
Every role has a manager except for the “Account Owner.” Your role managers allow you to create a hierarchy within your roles. This makes it easy for your managers to oversee their subordinate roles’ work.
- Go to
.png) → Administration → User Management → Team Roles & Permission Management.
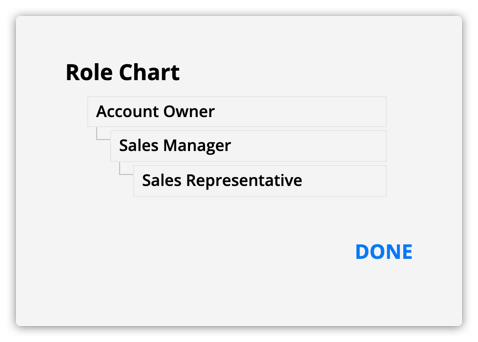
→ Administration → User Management → Team Roles & Permission Management. - Click Role Chart to view your role hierarchy tree.
This will help you visualize which roles are subordinate to others. For example, in the image below, “Sales Manager” and “Sales Representative” are both subordinate roles to “Account Owner.” And “Sales Representative” is a subordinate role to “Sales Manager.”
The “Account Owner” role
The highest level role in your account is “Account Owner,” and that is the person who signed up for and pays for your account. This is the only role in your account who doesn’t have a manager.
As the account owner, you have complete control over your Ontraport account. This includes the ability to create new roles, add users and set permissions in your account.
Assign ownership of records
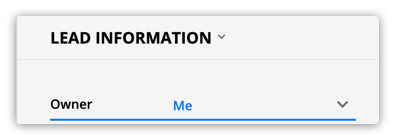
Record ownership is at the core of Ontraport’s permission management capabilities. It allows you to choose which users and roles should be able to view and edit specific records. Every record in your account has an “owner” drop down field, and you can select one of the users. You’ll see a list of all of the records you own from the “Records Owned” tab in your personal profile.
There are several ways to automatically update your records’ owner fields.
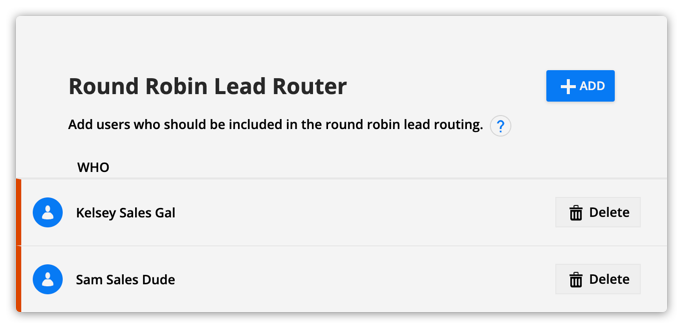
Contact records can be updated using a lead router. A lead router automatically updates the “owner” field in contact records. The example below shows a round robin lead router which assigns contacts evenly across users. But you can also set up a weighted random to send more experienced reps a higher percentage of leads.
- Check out this article on lead routing to learn more.
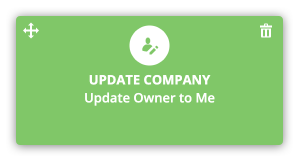
All other records, such as deals or companies, can be updated using the update action element.
Another way to automatically update the “owner” field in your records is from your form’s settings.
Every form’s settings contain a “Notification and Routing” section. From there you can select a user or a lead router from the “If this is a new Contact make the Contact Owner” drop down field.

For example, you can create a booking form for each of your sales reps. This ensures that the new leads who book a call using that form are owned by the rep they booked with.
You can even create custom relationships to make it more clear how and why your users and records are related.
For example, if you want to assign a “Sales coordinator” or “Onboarding representative” to your contacts, create a new relationship between contacts and users.
Check out this article to learn more.
Understanding permissions
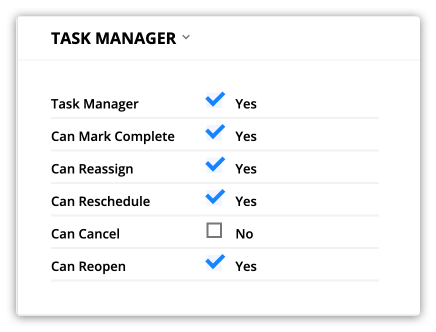
Yes/No Checkbox

Many permissions only have a checkbox next to them. When you check the box, you are giving your role permission to view and use a particular feature. When a permissions is set to “No,” users assigned that role won’t be able to see or interact with that feature.
For example, if your “Sales Representative” role does not have permission to cancel tasks, it would look like this:
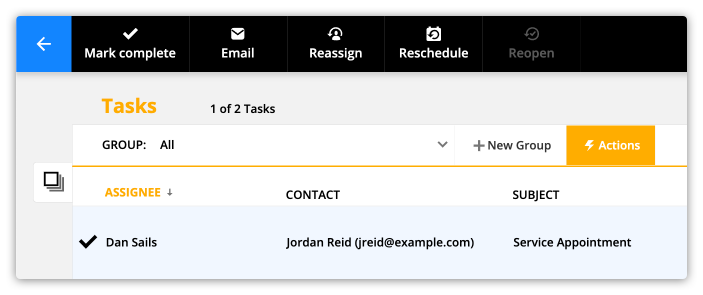
Your sales reps won’t see the “Cancel” action when they select a task:
“Can view” dropdown
These options let you control which records your user can see.
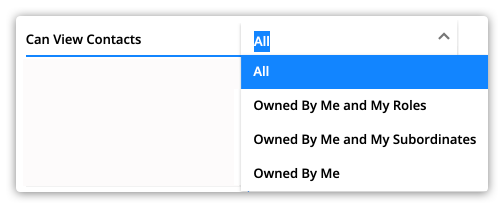
Here’s what each option means:
| Owned by me and my roles | Owned by me and my subordinates | Owned by me |
| This role can see the records they own and the records owned by users with the same role. | This role can see the records they own and the records owned by subordinate users. | This role can only see records that they own. |
The owner of each record is determined by the user selected in your record’s “owner” field:
“Can create/edit” dropdown
- These options control which records your user can create or edit.
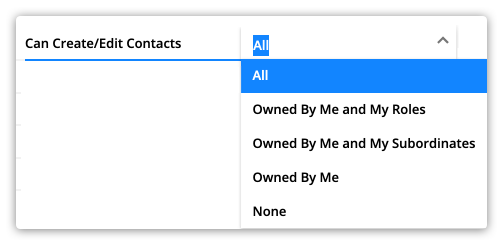
Here’s what each option means:
| Owned by me and my roles | Owned by me and my subordinates | Owned by me | None |
| This role can create new records. This role can also edit records they own and records owned by users with the same role. | This role can create new records. This role can also edit records they own and the records owned by subordinate users. | This role can create new records. This role can also edit records they own. | This role can only view records — they cannot edit any records or create new records. |
“Can delete” dropdown
- These options control which records your user can delete.
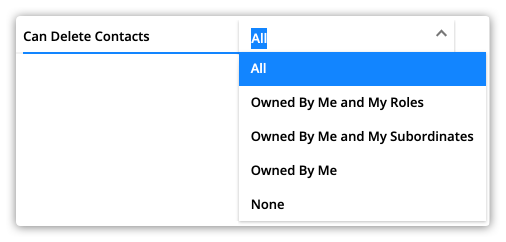
Here’s what each option means:
| All | Owned by me and my roles | Owned by me and my subordinates | Owned by me | None |
| This role can delete any record. | This role can delete records they own and the records owned by users with the same role. | This role can delete records they own and the records owned by subordinate users. | This role can only delete records they own. | This role cannot delete any records. |
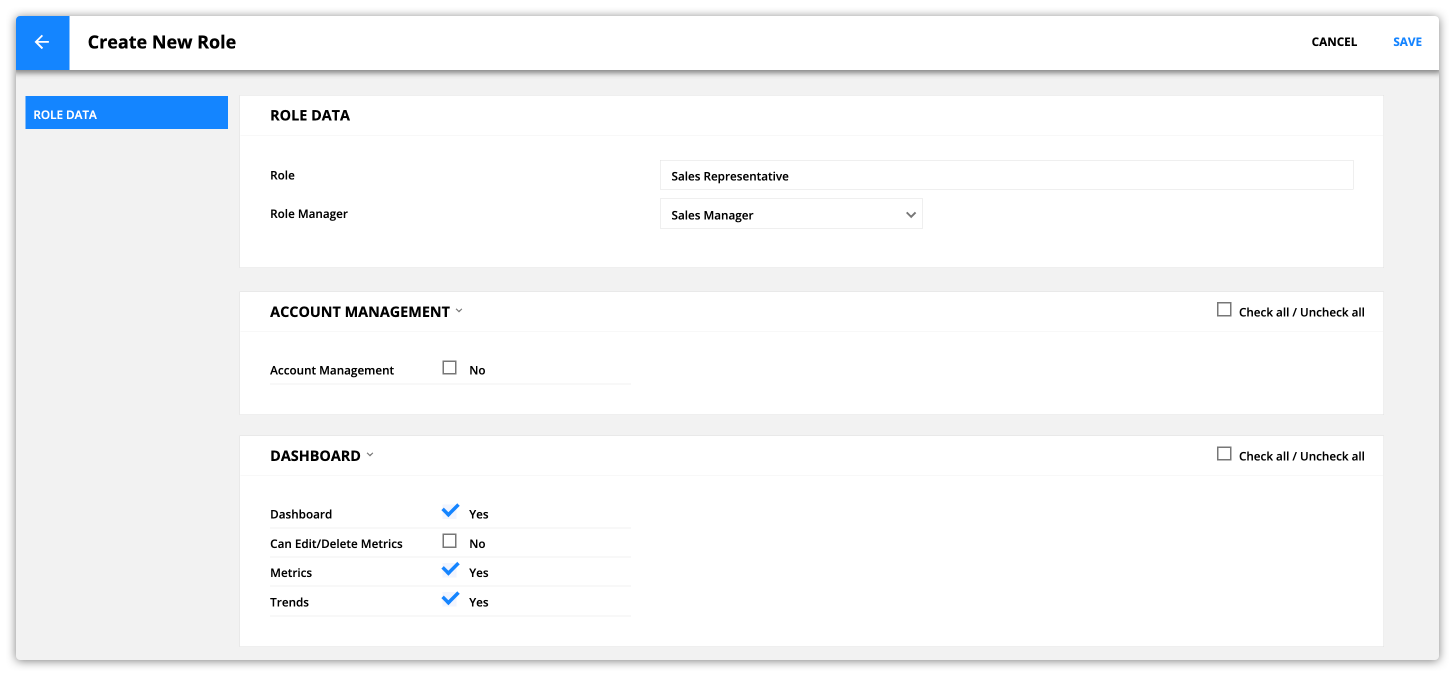
Add a role and set permissions
We suggest adding your roles and setting permissions before you add your users; this way, when your new users log in for the first time, they can only access what they have permission to.
- Go to → Administration → User Management tab → Team Roles & Permission Management.
- Click New Role at the top.
- Type in the name of your new role (e.g., “Sales rep”, “Customer Service Rep,” “Graphic Designer”).
- Select a manager from the “Role Manager” dropdown.
- Go through each of the permission settings and set your preferred permissions for the role.
- Check out the “Understanding permission” section below to learn what each permission controls.
- Click Save.
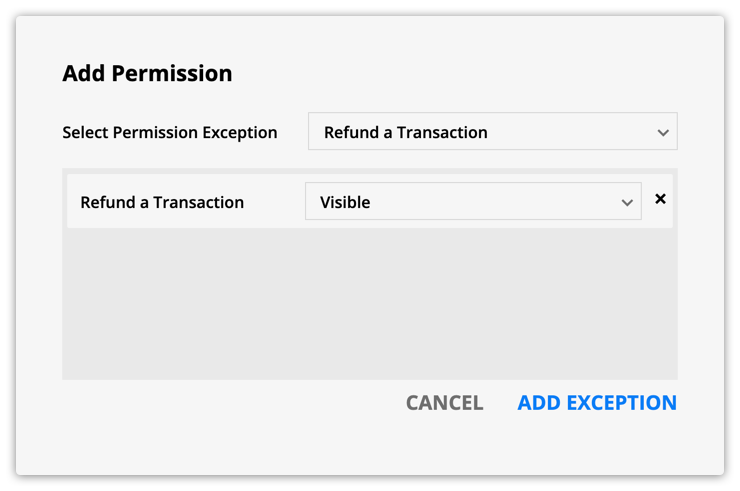
User permission exceptions
In some cases, you may want a specific user in your account to have different permissions than the other users with the same role. With user permission exceptions, you can add and remove permissions for specific users in your account. Here’s how:
- Go to
.png) → Manage Users and click on a user.
→ Manage Users and click on a user. - Scroll down to the “User Permission Exceptions” section and click New User Permission Exceptions.
- Select an exception from the dropdown.
- Choose if the exception should be set to “Visible” or “Not Visible.”
- “Visible” means your user has access to the feature.
- “Not Visible” means the user does not have access.
- Click Add Exception.
For example, this setting would allow your user to use the “Refund Transaction” action on contact purchases:
Account manager permissions
You can grant the agencies and Ontraport Experts you work with access to your account without creating a user seat for them. Instead, grant access through your Account Managers subcollection and choose a role that will allow your account managers to access the assets and features they need for their work. You can select from the default roles Ontraport has created for you or edit them to create your custom permissions.
Learn more about account manager permissions in this article and account manager features in this video.