Your Personal Profile in Ontraport allows you to customize the settings for your user seat. Personal Profile settings include contact information that you can use in merge fields in your assets, how your emails will appear in your contacts’ inboxes, passwords, social logins and more.
To create a new user in your account, fill in the details of their Personal Profile. To update it later, navigate back to any user and edit.
- To access your Personal Profile, go to
.png) → Personal Profile.
→ Personal Profile.
If you’re an account owner, you can also access and update the Personal Profiles of users in your account.
- To access other users’ Personal Profiles, go to
.png) → Manage users then click on a user’s name.
→ Manage users then click on a user’s name.
Table of contents
Tabs and sections of the Personal Profile
• User Information
• Contact Information
• Email Information
• User Details
• Login Details
• Social Login
• User Permission Exceptions
• Tags and Automations
• Integration
• Calendar
• Records Owned
• Create new user relationships
Create a new user
User actions
Custom user fields
• Default merge fields
Tabs and sections of the Personal Profile
By default, the Personal Profile has four tabs that allow you to store information about yourself and your team:
- User Information
- Integration (Plus accounts and above)
- Calendar (Plus accounts and above)
- Records Owned
User Information
The User Information tab stores basic information about your user, such as location, email send information and login details.
Contact Information
The fields in your “Contact Information” section can be used as merge fields in your assets to add your contact information.
- Note the email field here is not connected to the email address you use to log in to your Ontraport account. Use this field to merge this email address into your pages and emails to give your visitors and contacts an email address to reach you.

Email Information
In the “Email Information” section, you can customize how your emails will look in your contacts’ inboxes.

Email “From” Name
This field determines what name will appear next to the subject line of emails sent by this user, like this:

“Reply to” email
The “Reply to email” is the email address where you will receive your contacts’ replies. If left blank in a user’s profile, replies will flow to the account owner’s “reply to” email address.
User Details
The “User Details” section lets you personalize other aspects of your account, such as a user’s role and preferred language.

Role
The role field determines what actions users are allowed to perform and what information they can view.
- Learn more about user roles here.
Language
Choose the language you’d like to see when logging in to your account.
Login Details
The “Login details” section controls the information you use to log in. You can update your login email, password, and cell phone number for multi-factor authentication.
As an account owner, you can update your team’s login info too.
Note that Ontraport’s security protocol prevents you from logging in while using a VPN.

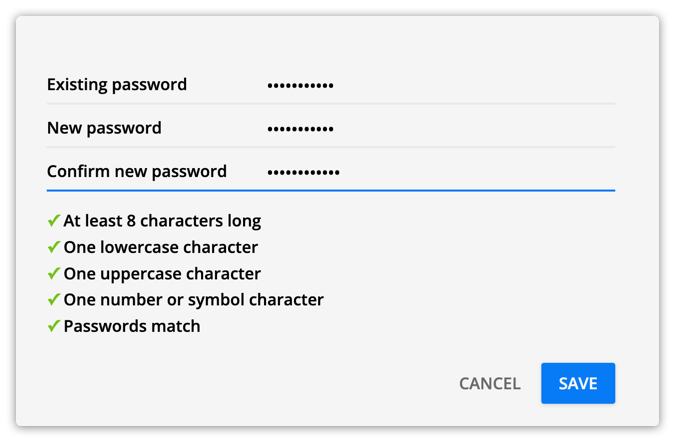
Update your password
- Click the password field.
- Enter the existing password.
- Enter your new password.
- Click Save.

Update your login email
This is the email address you’ll use to log in to your account and receive multi-factor authentication verification codes.
- Click the login email field.
- Enter your login email.
- Confirm your login email.
- Click Save.

Update your cell phone (for authentication) number
This is the SMS number where you’ll receive multi-factor authentication verification codes.
- Click the cell phone (for authentication) field.
- Enter your cell phone number.
- Only include numbers or the “+” symbol.
- Click the checkmark to save your number.
Social Login
The “Social Login” section lets you connect your existing account to social apps. You can log in to your Ontraport account using your Google or Facebook credentials.

You must enable this feature in your account before getting connected. Follow the steps in this article to learn how.
User Permission Exceptions
The “User Permissions Exceptions” section allows you to add user permission expectations to any user in your account. Permission exceptions are helpful when you want to give extra access to specific users or remove access to particular features.
Learn more about user permissions exceptions here.

Tags and Automations
The “Tags and Automations” section allows you to add tags to your users and add users to automation maps.

In the User Tags section, you can add tags to your users just like you can add tags to contacts.
- Go to your User Tag collection by going to
.png) → Administration → User Management → Manage Tags.
→ Administration → User Management → Manage Tags.
In the Automations section you can manually add users to user automation maps.
- Go to your User Automation collection by going to
.png) → Administration → User Management → User Automations.
→ Administration → User Management → User Automations.
Integration
The Integration tab is where you and your users set up your Google Calendar integration.
Check out this article to learn how.
Calendar
The Calendar tab shows all of your own calendar events.
Check out this article to learn more.
Records owned
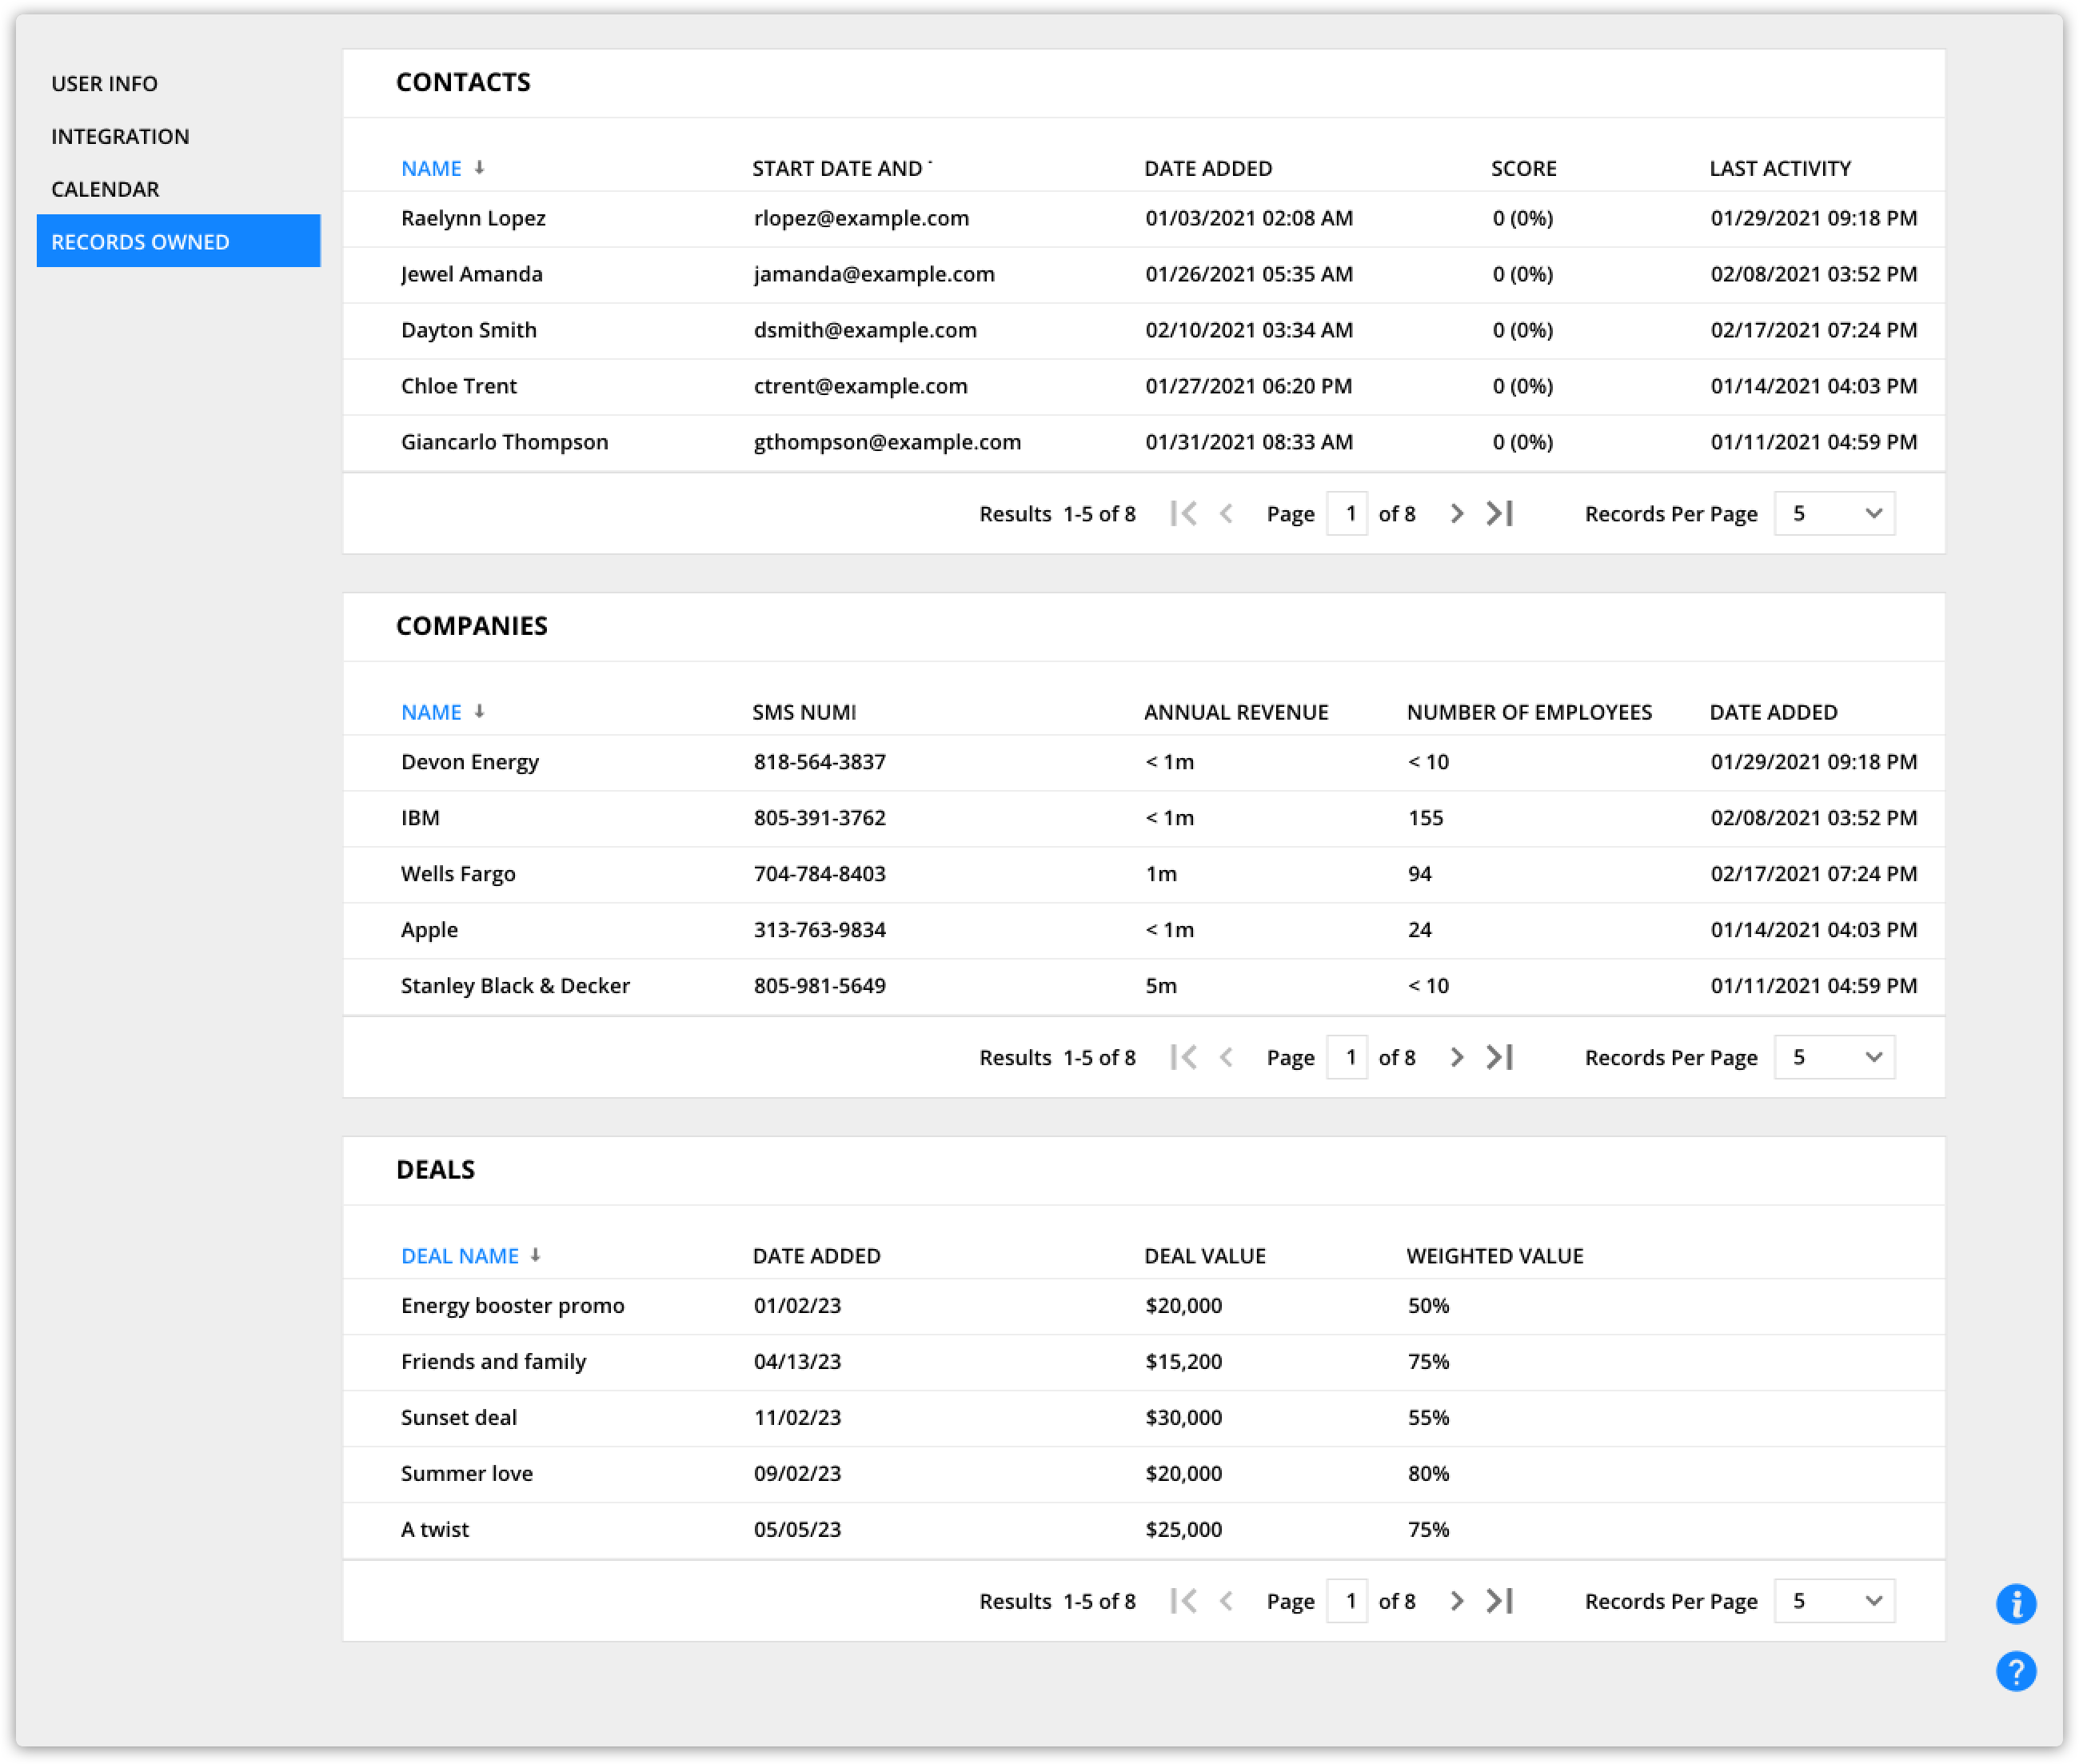
Each record in your account contains an “owner” field. This field reflects the default one-to-many relationship between records and users in your account, and it indicates which user is responsible for the record. The Records Owned tab of your personal profile shows you all the records you own.
If you create custom relationships between your users and records, we recommend consolidating all your user relationship fields in this tab.

Create new user relationships
You can even create custom relationships to make it more clear how and why your users and records are related.
For example, if you want to assign a “Sales coordinator” or “Onboarding representative” to your contacts, create a new relationship between contacts and users.
Check out this article to learn more.
Create a new user
- Go to
.png) → Manage users.
→ Manage users. - Click New User.
- If you’ve exceeded the number of account users included in your subscription plan, you’ll see a pop-up that lets you know how much your additional user seat will cost. The price of user seats depends on your account level.
- Click Agree to continue.
- Fill in all the required fields.
- Click Save.

User actions
You can perform actions on individual users or groups of users to manage their account access, send communications, or update their records.
- Go to → Manage users.
- Select one or more users to access the action bar. From there you can take the following actions:
- Reset password - can only be used on one user at a time.
- Log out - can only be used on one user at a time.
- Lock out - can only be used on one user at a time.
- Users who have been locked out of your account, can be unlocked, have their status updated to “Active” and allowed to log back in to your account.
- Task
- Event
- Tags
- Automation
- Change field
- Update relationships
- Delete - can only be used on one user at a time.
Custom user fields
Custom user fields are a valuable way to merge information about your users into your assets. For example, you can create a custom disclaimer or signature field and merge fields to your pages and emails. Here’s how:
- Go to
.png) → Administration → User Management → User field editor.
→ Administration → User Management → User field editor. - Add the fields, sections and/or tabs you’d like to include in your user records.
- Follow the same steps to add new fields as you used adding custom fields to your contact records.
- Click Save.
Default merge fields
If you add a merge field to an asset and your user doesn’t have a value saved for that field, you can use default merge fields to ensure your content will still make sense. These default fields replace blank fields with filler content.
For example, if you’ve created a company directory page and your user doesn’t have a public email address in their record, add a default support address as the default public email field.
User default merge fields work exactly just like contact default merge fields.
Here’s how to set up your user default merge fields:
- Go to
.png) → Administration → User Management → Default Merge Fields.
→ Administration → User Management → Default Merge Fields. - Type a default value into the fields of your choice.

- Click Save.
