When a contact opens their inbox, the first thing they look at is who sent the message. Setting up a recognizable "From" name and email address not only builds trust with your audience but also directly impacts whether your emails land in the inbox or the spam folder.
This guide will show you how to add and configure your custom "From" email addresses, "From" names, and "Reply-to" destinations to ensure your branding is seamless and your email deliverability remains high.
Table of contents
Add a new “from” email address
Add “From” name and “Reply to” email address
Add a new “from” email address
Back to top
When your contacts view your emails in their inbox, your email “from” name and address let them know who sent the message. We recommend that you set up an address that your recipients will recognize. The first send “from” address in your account will be the email you used to sign up for your account; however, you can add new addresses at any time.
You cannot add a free email address to protect your email delivery. You can only add email addresses from custom domains you set up to send email.
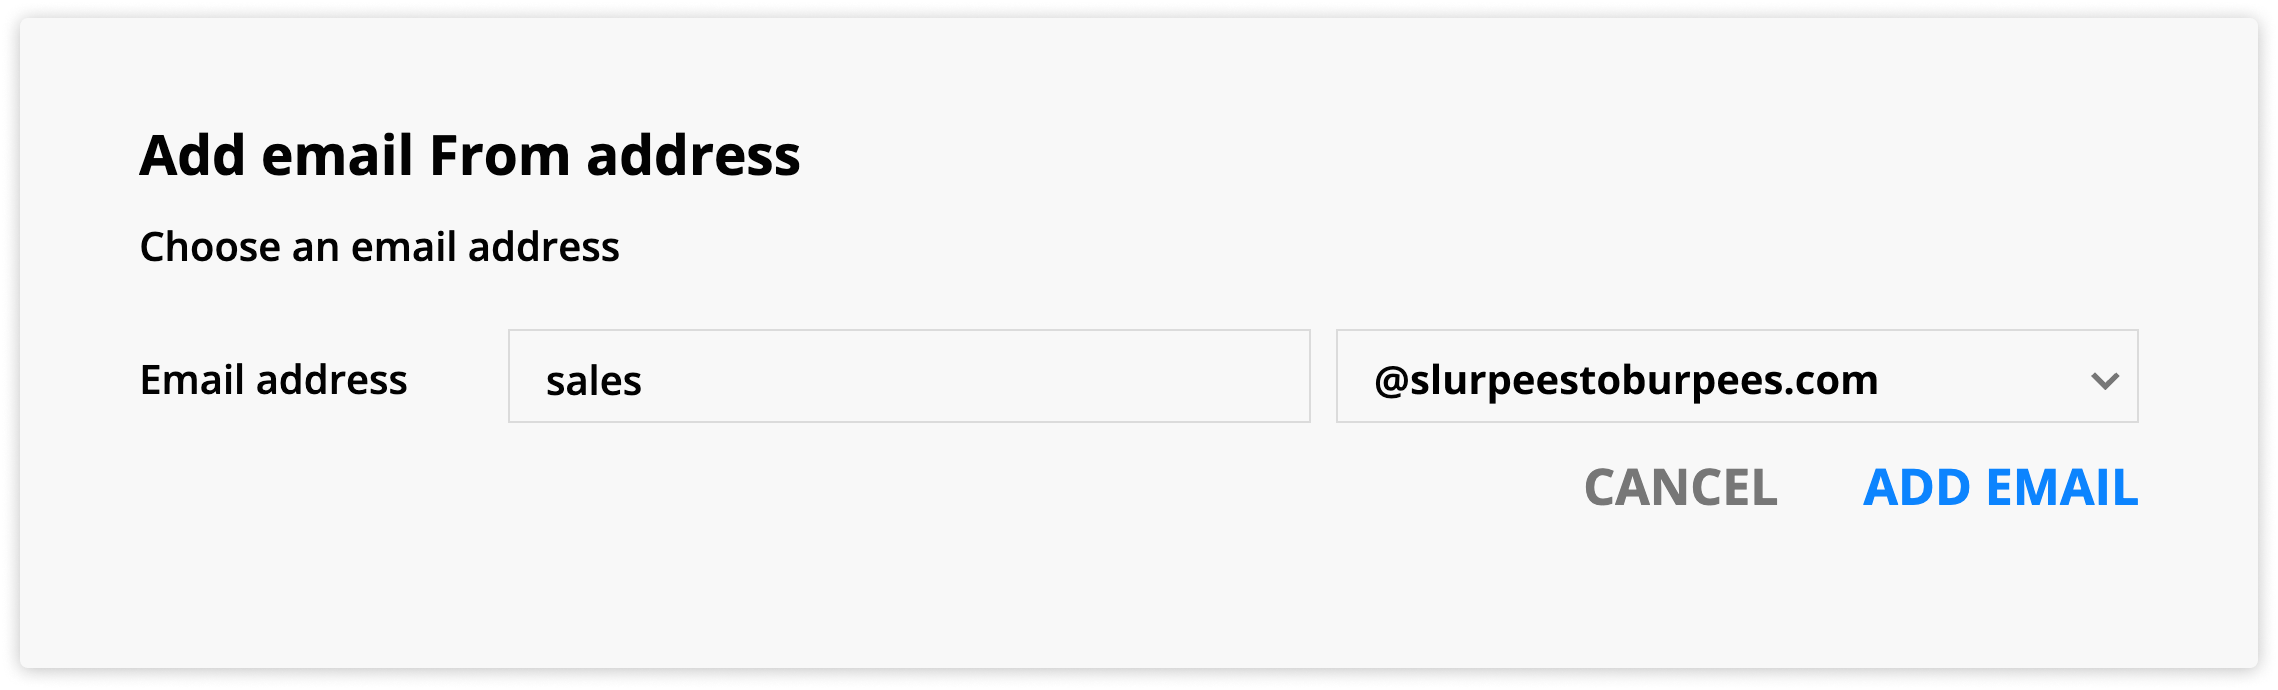
- Click
.png) → Administration → Email → Email ‘From’ Address Setup.
→ Administration → Email → Email ‘From’ Address Setup. - Click Add email.
- Add your email prefix in the first field.
- Select your custom domain from the dropdown to the right.
- You’ll only see custom domains with the domain type “Email” or “Pages + Email.”
- Click Add email to confirm.
- Check the inbox of the email you added for your confirmation email, and click Confirm my “from” address.
- If you have more than one “Email From” address, be sure to set the correct email as your default.
Add “From” name and “Reply to” email address
Back to top
The from name is similar to your from address, but it shows the sender's name when your recipients receive your emails.
Your reply to address is the address messages will be sent to when a contact replies.
Note that generic send “from” names can result in ISPs sending messages to your recipients' spam folders. For example, if your send “from” name is just "Joe," it's likely that Gmail will flag the message as suspicious.
- Click → Manage Users → and select the name of your user.
- Add the email “from” name and click
 .
. - In the same section, add your “reply to” email and click .