Ontraport Pages and Advanced Mail messages are created by stacking blocks on each other. Blocks are made up of rows and columns; within those are elements like images, text buttons, and forms. Learn more about Ontraport’s block-based builder here.
Blocks on Ontraport Pages have more customization options than Advanced Mail messages, and this article shows you the page-specific settings you can use to customize your pages.
Table of contents
Border, arrow and shadow
Sticky block
Display settings
Sticky column
Border, arrow and shadow
Only the arrow borders are unique to the Page editor’s block settings. Check out this article to learn about setting up block borders or shadows.
Arrow borders allow you to add an arrow to the bottom of your block. Your arrow will always use your block’s background color, meaning this option does not appear on blocks with transparent backgrounds, images or videos.
These settings are simple. To add an arrow border, select “bottom” from the type dropdown.
![]()
Sticky block
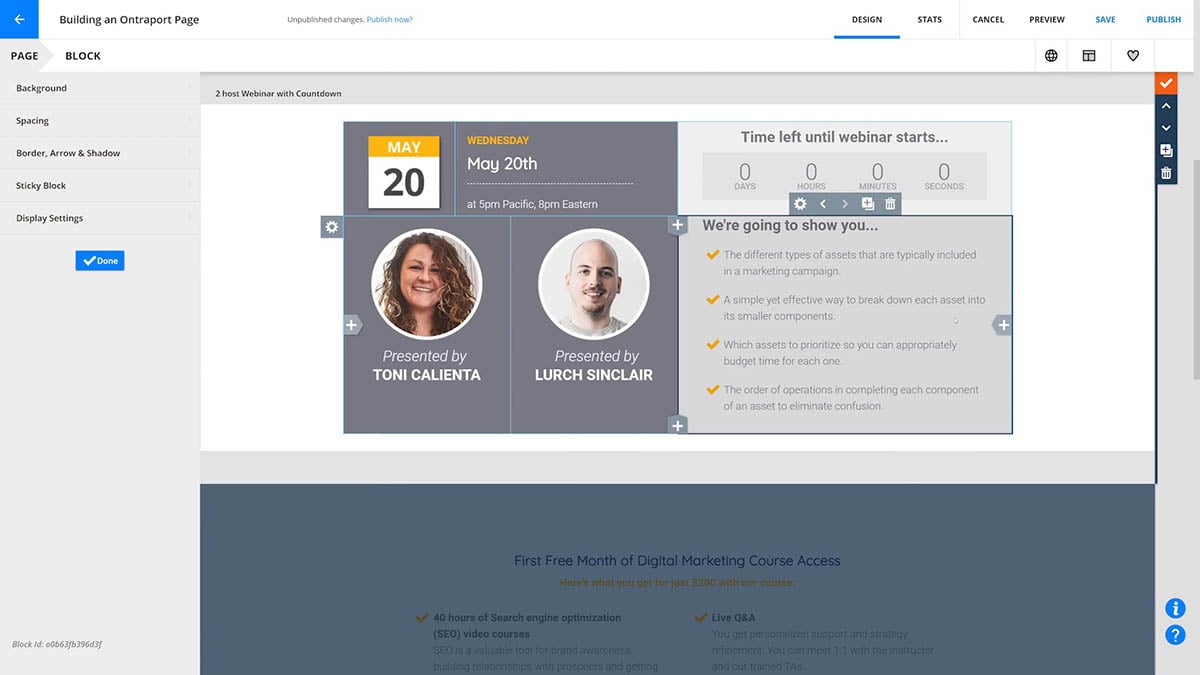
Sticky blocks will “stick” to the top of your page once your visitors scroll past it. These blocks are great when you want to keep a promotion or opt-in form at the top of your visitors' minds.
When you toggle on the sticky block setting, you can hide your sticky block when your visitors scroll down the page.
- If you leave this setting off, your block will be visible at the top of your page while your visitors scroll.
/pages-blocks-sticky_block_settings.png)
Display settings
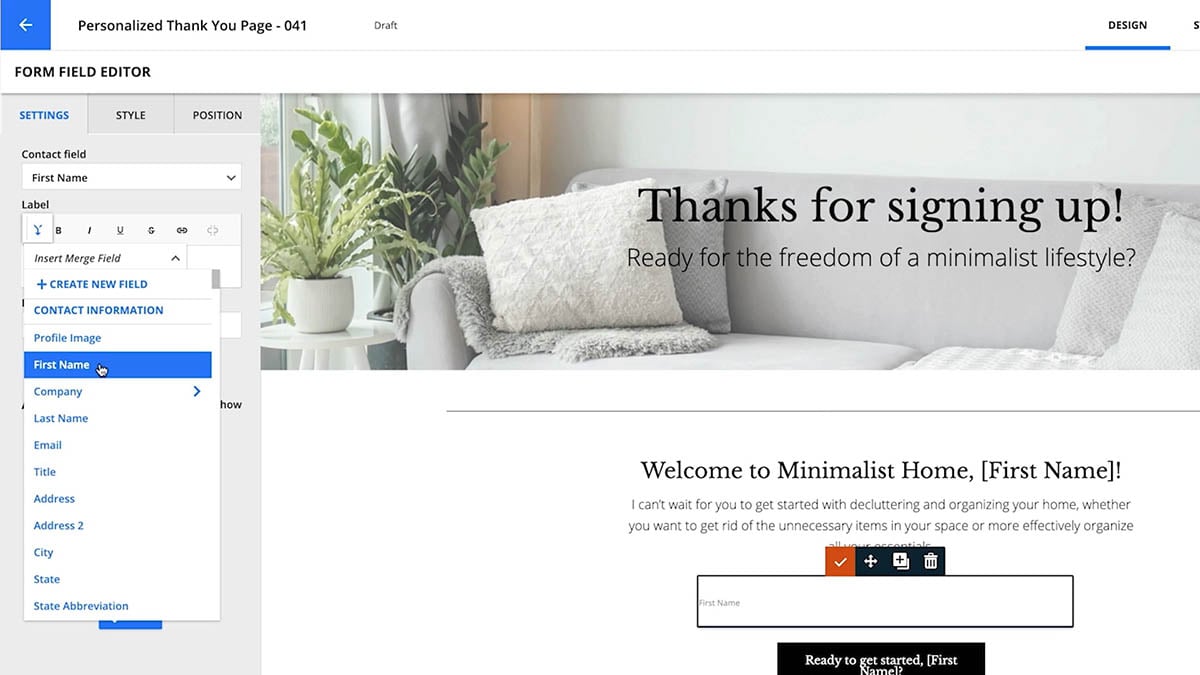
Your block’s display settings are a powerful tool for personalization. They allow you to choose when your block should appear.
These settings allow you to show your content to a specific group. For example, you can show your block to only mobile visitors or visitors who stay on your page for a specific amount of time.
The device display setting appears in both the Advanced Mail and Pages editors. The display settings below are specific only to pages.
You can also show your opt-in form to only anonymous visitors to collect new leads.
Or connect the UTM variables you use on your ads to create personalization. If someone clicks on a “50% off first month’s subscription” offer, you can show them a block on your page with the coupon code they should use to get that offer.
Learn more about personalizing your pages in this video./pages-blocks-default_display_settings.png)
This allows you to select who can view your page block. This is especially useful for gating content in a membership site.
From the "Display this block to whom?" dropdown, you can set your blocks to show for:
- Everyone
- Anonymous visitors only – Visitors who aren’t cookied by Ontraport
- Identified visitors only – Visitors who have the Ontraport cookie
- Some identified visitors – Visitors who have the Ontraport cookie and fit your condition*
- All logged in members – Members who have logged in to your membership site
- Some logged in members – Members who have logged in to your membership site and fit your condition*
- Everyone except logged-in members – Anyone who isn’t logged in to your membership site
If you choose to display your block to “Only some identified visitors” or “Some logged in members,” you can add conditions to show different blocks to different page visitors. You can choose from the following conditions:
- Was subscribed to automation before or after a certain date
- Has been on an automation for a certain amount of time
- Contact is paused or active on automation
- Field is this value
- Contact has tag
- Contact doesn’t have tag
- If contact is subscribed to fulfillment list
- If contact is not subscribed to fulfillment list
- Relationship does or does not exist
- Has ordered a certain amount of product
- Is subscribed to product
- Access to Ontraport Membership Site is this status
The “All logged in members” and “Everyone except logged in members” display conditions can be used to create helpful navigation blocks. Check out this use case to learn how./page-settings-dispay_this_page_to_whom.png)
If you display your block to “Only some identified visitors” or “Some logged-in members,” you can add conditions to show different blocks to different page visitors. You can choose from several conditions based on information such as a field's specific value or whether the contact is subscribed to a product.
Personalizing a visitor's experience with block display conditions based on purchase history is simple. You can tailor your messaging by showing similar blocks with slightly different content to three distinct groups: potential repeat customers, identified visitors who haven't made a purchase yet, and brand-new site visitors. Create blocks with these display conditions to achieve this use case:
- Purchased (Identified Visitors): Use "Some identified visitors only" with the condition "Has ordered > greater than or equal to 1 > of any product." This block will show content to users who have made at least one purchase.
- In this block, you can show a discount code as a thank you to returning customers.
- Not Purchased (Identified Visitors): Use "Some identified visitors only" with the condition "Has ordered > equal to 0 > of any product." This block will display content to users who haven’t made any purchases.
- Use this block to highlight a first-time buyer discount.
- Anonymous Visitors: Use "Anonymous visitors only" with no conditions. This block will show content to visitors who are not logged in or identified.
- Display a sign-up prompt in this block.
Watch this demo video to see how to set this up.
This setting allows you to show your block to visitors only when the URL contains a specific variable, such as UTM variables or any other text in your subdomain, domain or path.
- This advanced marketing feature lets you optimize your customers’ post-click experiences by sending leads to a page with content that perfectly fits your ad’s design and message.
Here’s how:
- Toggle “Only show this block if the page URL contains specific text” on.
- Click Add condition.
- Select “contains” or “does not contain.”
- Add your URL variable.
- Click Done.
/pages-blocks-display_conditions_URL_contains_example.png)
Show this block when today's date is
This setting allows you to show and hide your block relative to today’s date. This option is great when you want to promote upcoming content with a “Coming soon” block and publish your new content automatically on the release date, promoting upcoming events and more!/page_display_settings-show_this_block_when_todays_date_is.png)
Here’s how:
- Toggle “Show this block when today’s date is” on.
- Choose the relative date condition:
- On
- Not on
- After
- Before
- On or after
- On or before
- Select a date and time.
- Time is ignored for On, Not on, On or before, and On or after. These conditions only use the selected date.
- Click Done.
Sticky column
This option lets you make columns stick to the top of the page while a site visitor scrolls. This functionality is similar to sticky blocks. However, a sticky column allows you to have only one part of your block stick rather than the entire block. You can also have the option of having that column remain sticky until a visitor scrolls to the end of a block.
Creating a sticky column makes it easy to keep important content visible and easy to find, no matter where your visitors are on a page. This is essential for a good user experience on content-heavy websites.
For example, you could create a sticky column for navigation, course outlines, ads, or product categories. You could also insert an order form into a sticky column so it is easily accessible to prospects.
Here’s an example of a sticky column in a block at the top of a page:
/column_settings-stick_column_example.png)
And here’s what visitors will see as they scroll down the page:
/column_settings-stick_column_example2.png)
Here’s how to make your column sticky:
- Click Edit block on the block that contains the column you want to make sticky.
- Hover over the column you want to make sticky and click
/page-edit_block-setting_icon.png) to open your column settings.
to open your column settings. - Click Sticky Column and toggle “Make this column ‘stick to the top of the page when it reaches the top?” on.
- (Optional) Toggle “Make this column ‘stick’ only to its row?” on.
- This allows your visitors to scroll past your sticky column once they are past the row that contains it. This option is great if you don’t want to cover up blocks placed below your sticky column.
- Click Done.
- Click Publish → Save & Publish to make your changes live.
/column_settings-sticky-column-make_this_column_stick_only_in_its_row.png)

 . Your copied condition will appear under your original where you can customize it to fit your needs.