You can add membership functionality to any Ontraport site. Membership is a system designed to protect and grant access to content on your site. It is essential to understand a few main concepts of membership in Ontraport sites:
Protecting access to pages: Once you've enabled membership on your site, then you'll choose which pages you want to make only accessible for members through the page's display conditions.
You can choose to limit access to only members or a specific group of members, such as limiting pages for different membership levels.
When you protect a page, you can select a redirect page to send visitors without access.
Granting page access to members: When you give contacts membership access, Ontraport sends a registration email that allows your new member to create a password to log in to your site. This registration email is sent to you whenever a new member is given access, whether it is through automation or manually.
Automatically generated assets: When you enable membership, a login page, registration flow and forgotten password functionality are automatically generated for you. You do not have to set up or manage your systems for these basic membership site features. They will fit the branding you set in your site's settings.
Table of contents
Enable membership to your Ontraport site
• Customize membership settings
• Protecting membership pages
• Protecting membership blocks
Grant members access to your site
• Give members free access to your site
• Manually give access
Add additional, optional functionality
• Create a customer center
• Create membership levels
• Display targeted content to only some members
• Drip content to your members
• Upsell members to the next access level
• Customize your registration email
• Automate debt recovery
Enable membership to your Ontraport site
To add membership functionality to your Ontraport site, navigate to the Membership tab. Then click Enable to access the membership site settings.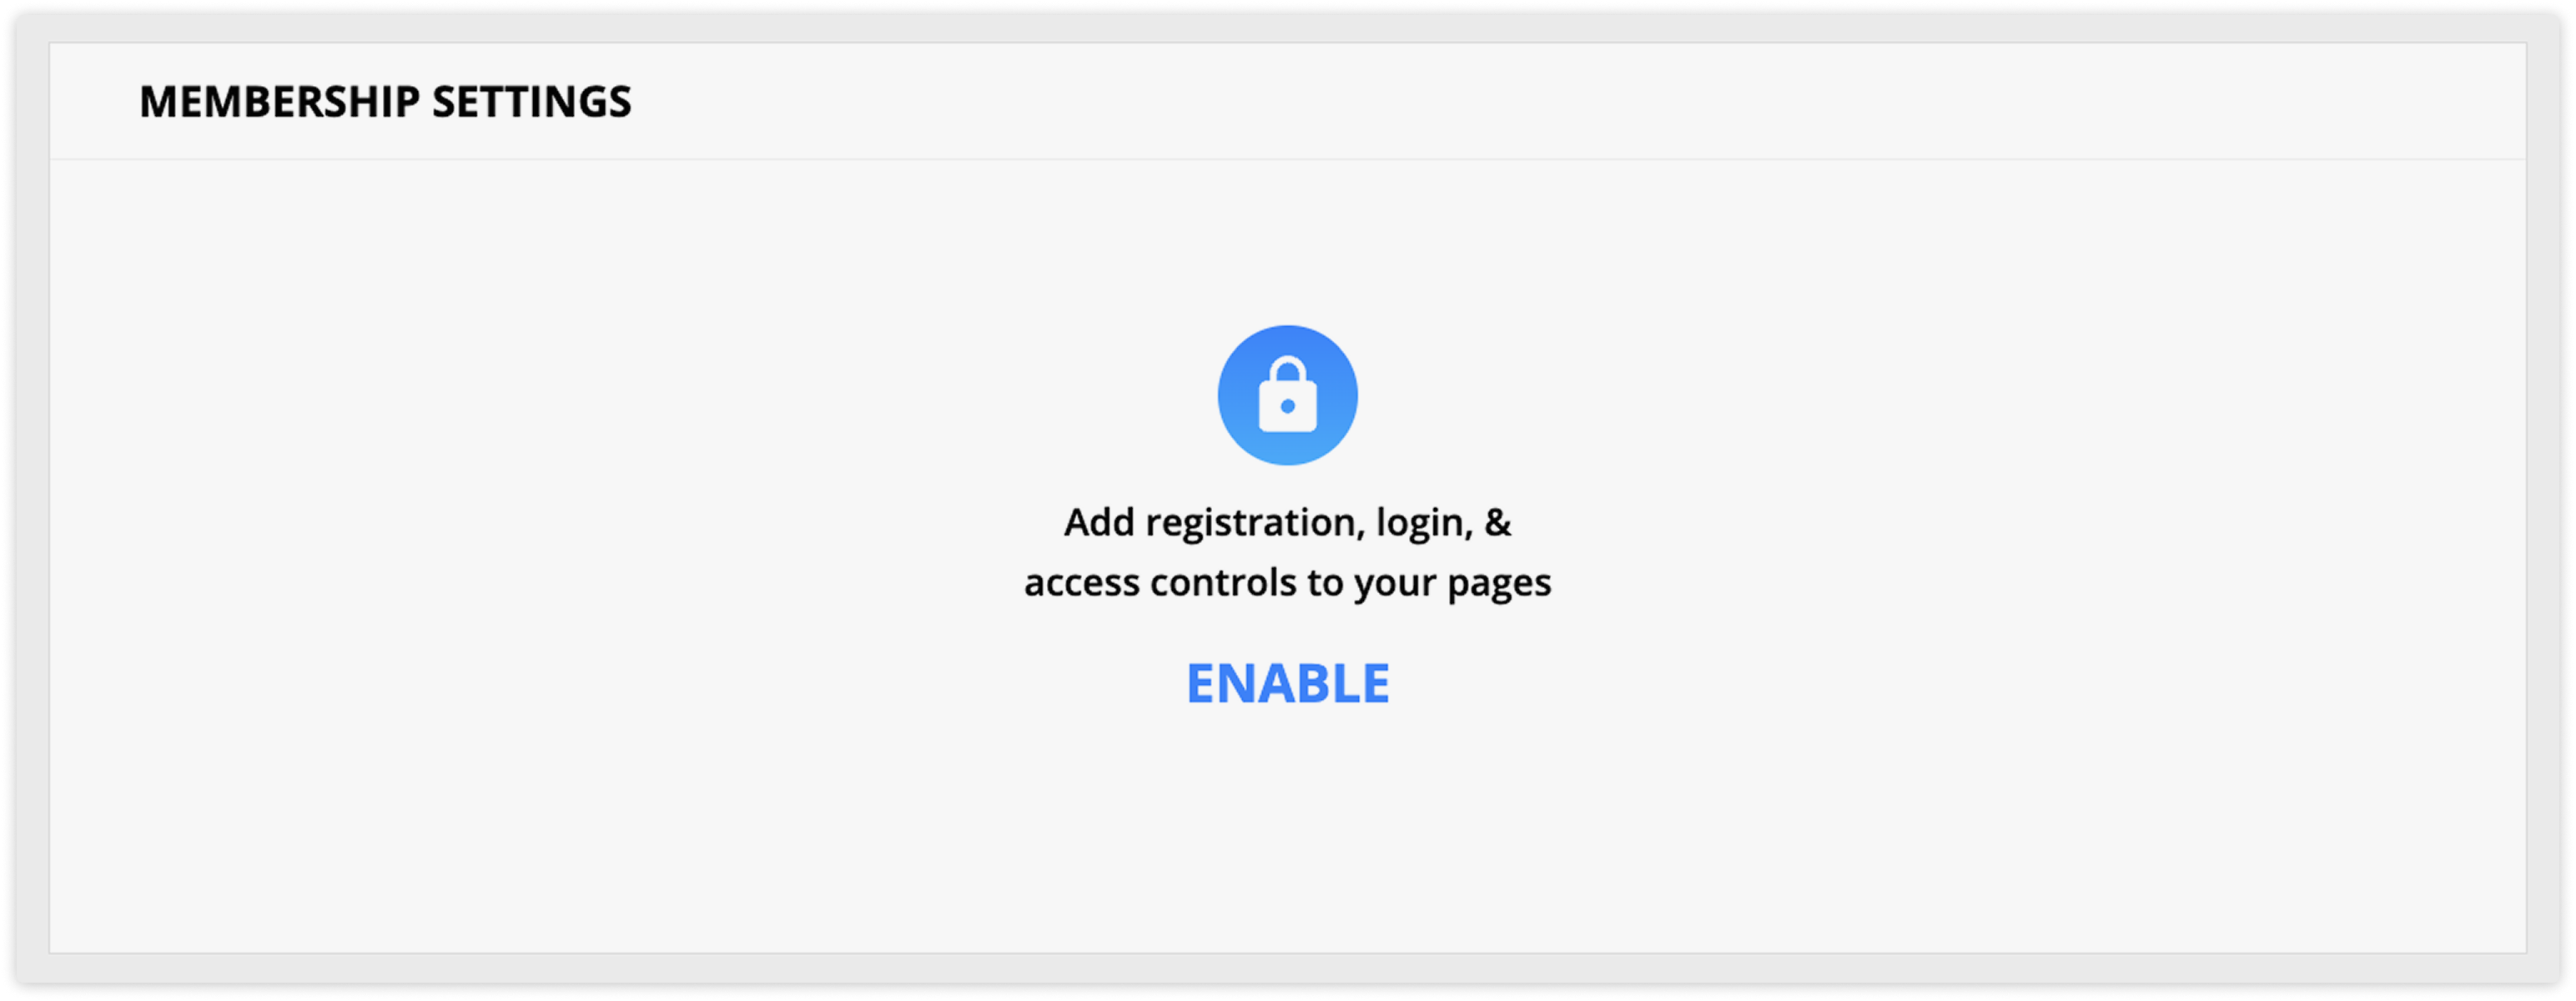
When you do this, you’ll expose the membership site settings.
Customize membership settings
Back to top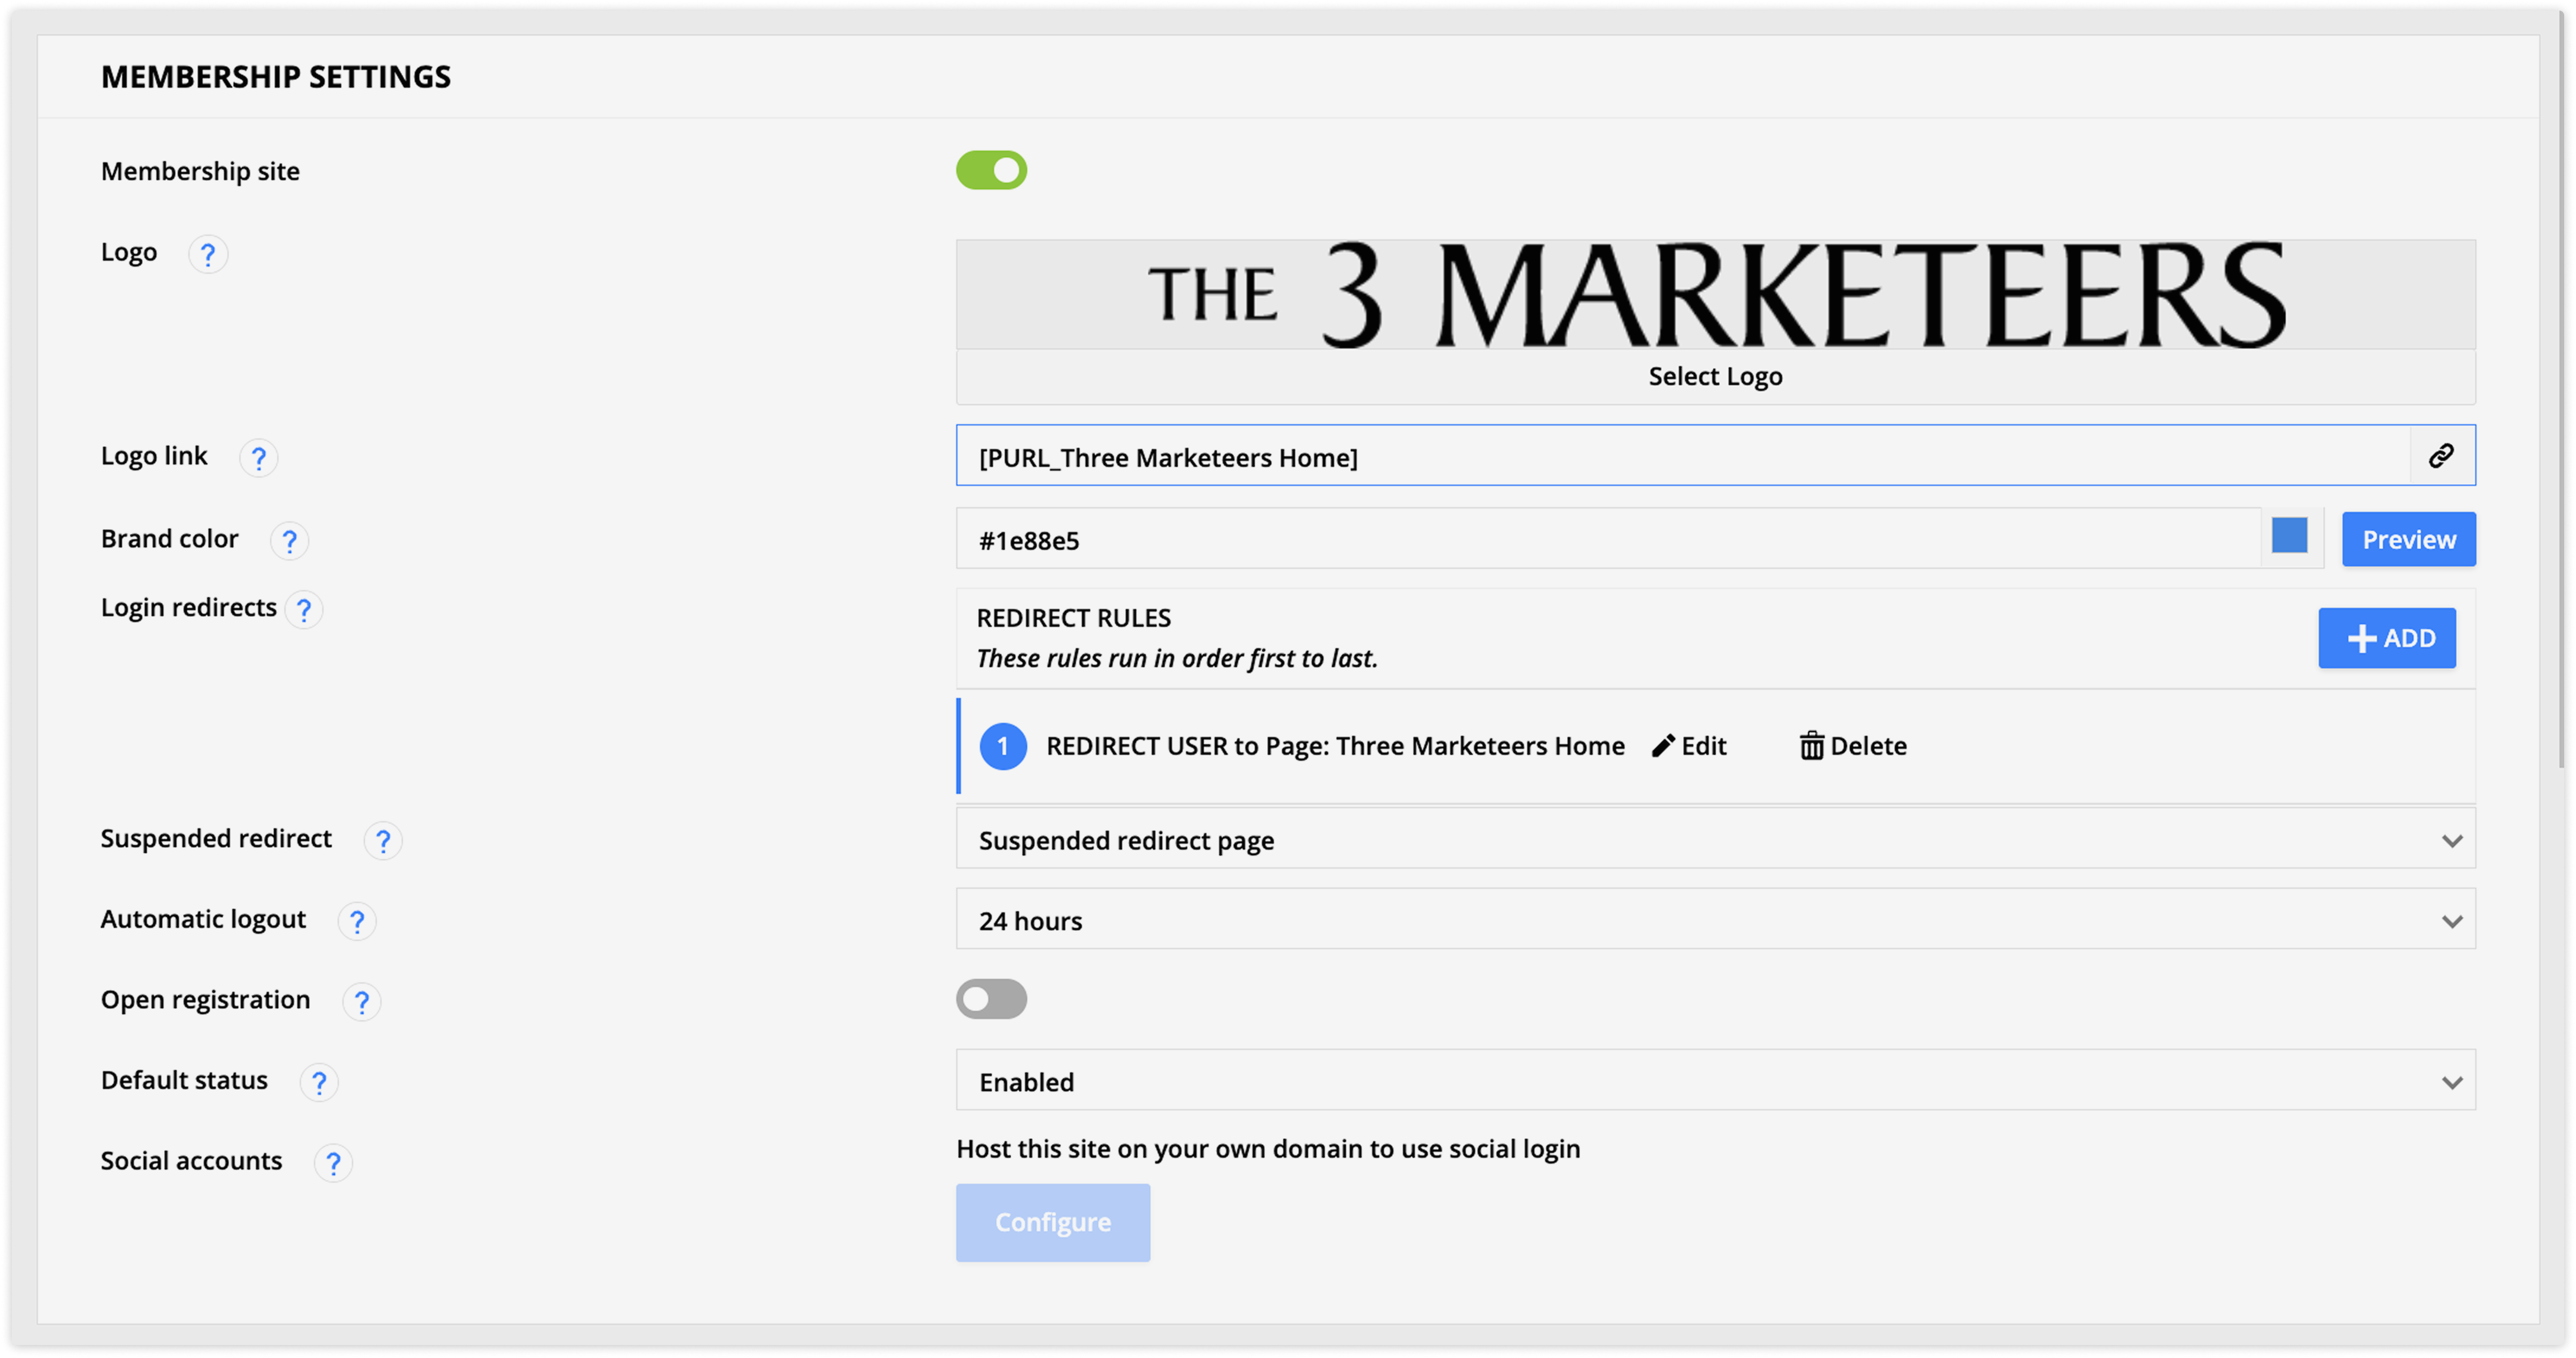
The basic settings for your membership customize the branding on your automatically generated assets, determine how your site will function, and control where your members will be sent when they log in. You can also specify which page members should see if their membership is suspended.
Membership site (toggle)
Once you’ve enabled membership, you can remove it from your site at any time.
- If you toggle membership off, it will prevent your members from logging in. Any membership elements and settings on your site will not work correctly and might require edits.
Login redirects
Your site’s login redirects determine where your members will be sent when they log in, such as a course overview page or a partner center.
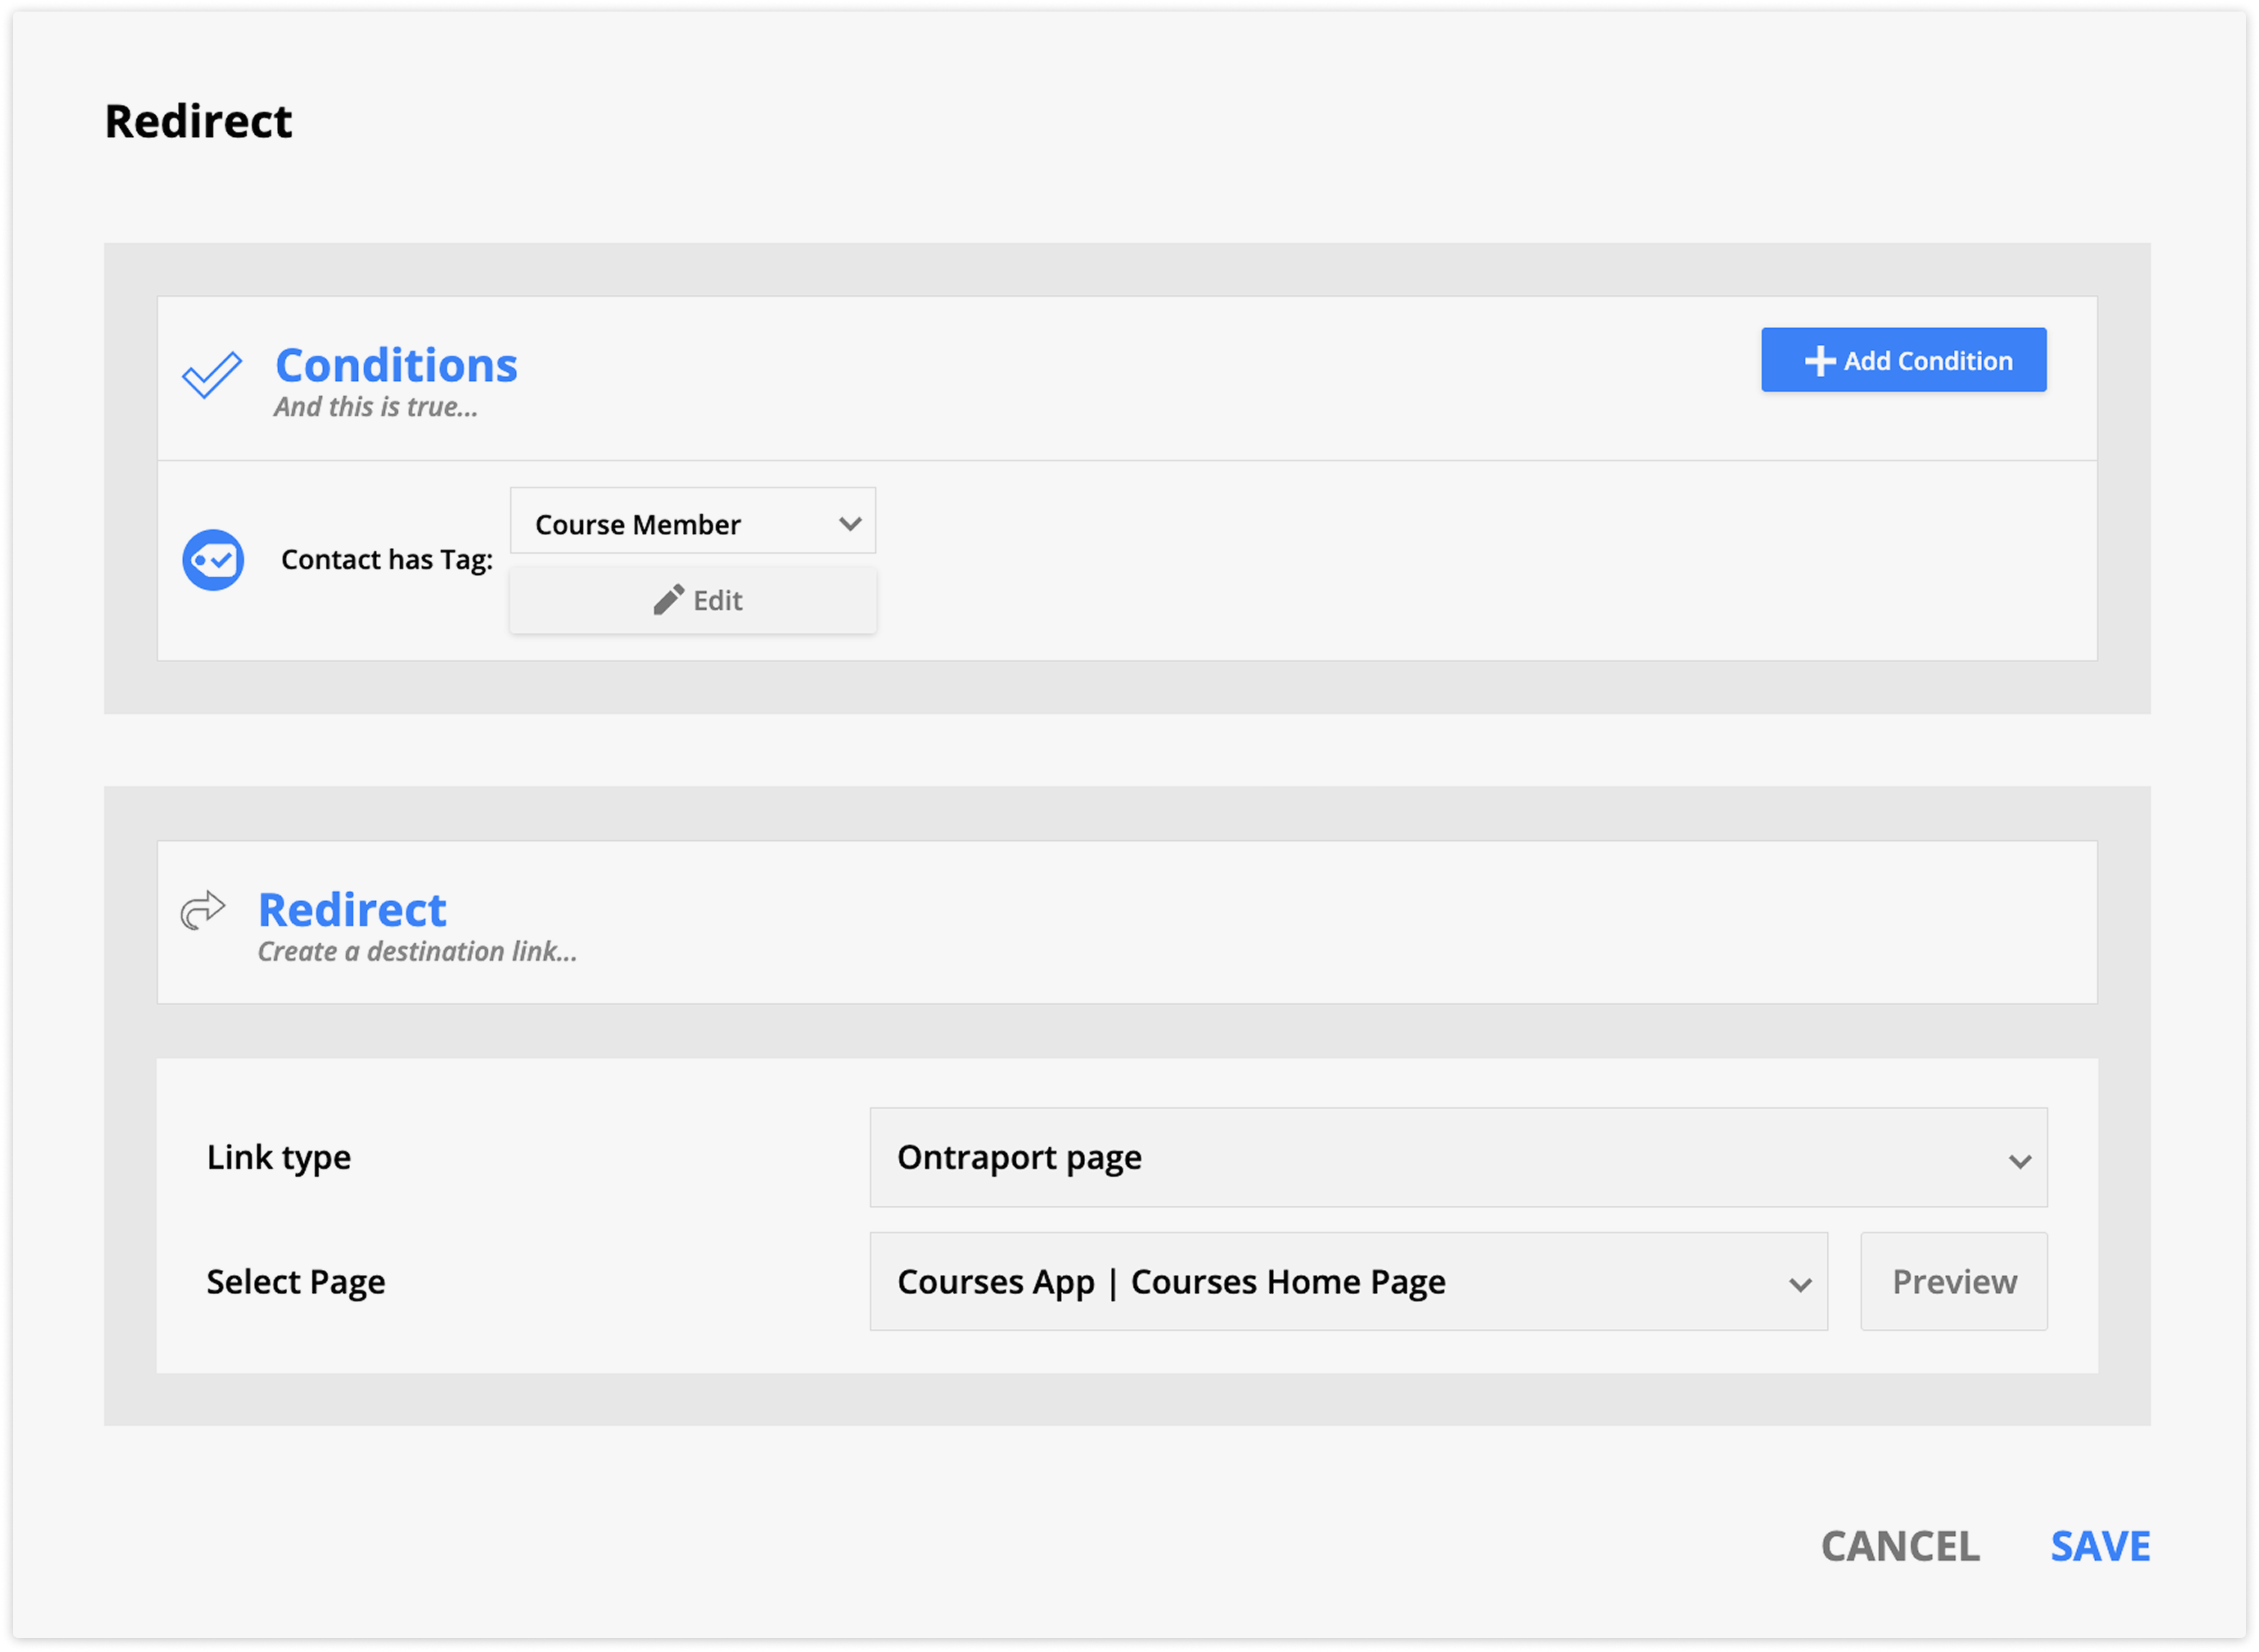
If you have groups of members that you’d like to send to different pages when they log in, then you can add multiple redirects to send each group to the correct page. For example, you could send partners to the partner center and customers to their customer portal.
- Click Add, then add a condition to determine which type of member will be redirected by this rule.
- Then, in the Redirect section, select the page you want to send those members to.
Suspended redirect
The suspended redirect setting determines the page to which suspended members will be redirected when they log in. It’s helpful to create a page that informs suspended members of the need to update their payment information and includes an update credit card page element, allowing suspended members to update their payment method.
- Select the page from the dropdown.
Automatic logout
The automatic logout determines how long your members can be inactive before being automatically logged out. If your site contains sensitive information, we recommend selecting a shorter time frame.
From the dropdown you can choose from:
- 5 minutes
- 1 hour
- 24 hours
- 7 days
- 30 days
- Never
Open registration (toggle)
Open registration allows visitors to sign up for access to your site directly from the login page without needing to fill out a form and obtain access through your automation.
This functionality provides new members with instant access to your free content, helping you grow your audience more quickly. It’s especially useful if you want to offer a seamless signup experience and promote paid content later on.
When you enable this option, you can choose if the status of new members should be:
- Enabled
- Suspended
- For security purposes, we recommend using the status “suspended.” You can then create automation that updates the status of your new members.
- Disabled
Social accounts
Another way to make it easier for members to log in to your site is to configure your social accounts. Adding social login to your membership site to allow members to log in using their Google, Facebook or Microsoft accounts.
- In order to use this feature, you need to create a social login app on Google, Facebook, and/or Microsoft. Learn more about setting up a social login app here.
Once you’ve customized your membership settings, click Save to apply your settings.
- When you do this your automatically generated registration, login and forgotten password pages and emails will be generated for your site.
You can also enable Single Sign-On (SSO) using OpenID Connect for an even smoother login experience through services like Okta or Google Workspace. To get started using OpenID Connect, reach out to the Support team.
Protecting membership pages
Back to top
When you’ve enabled membership on your site, you can pick and choose which pages you want to make members only, and which ones you want visitors to be able to reach.
You can make pages accessible to all members or to specific groups of members such as partners only or specific membership levels.
This is determined by your page or template’s display settings. Learn more here.
Protecting membership blocks
Back to top
You can protect blocks in the same way as whole pages. You can choose to display them to all of your logged in members, some logged in members and even show blocks only to visitors who aren’t logged in.
You’ll use block display conditions to protect specific blocks. Learn more here.
Grant members access to your site
Back to top
The most common way to give contacts access to your site is to automate the process, allowing visitors to purchase access and receive immediate access. You can also manually give access to individual contacts.
When someone becomes a member of your site, their membership details appear in two places:
- The Members subcollection in your site’s Membership tab.
- The Ontraport Membership subcollection in the Membership tab of their contact record.
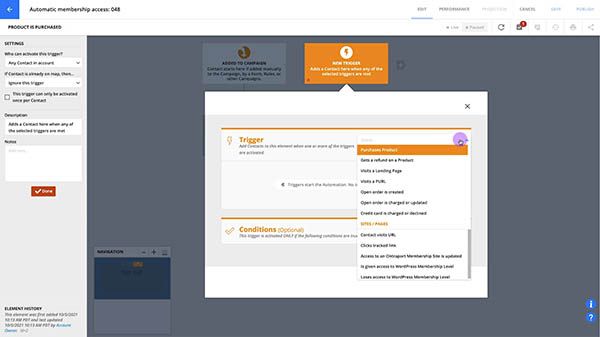
- Go to Contacts → Automations → New automation → Start from scratch.
- Add a “purchases product” trigger and select your membership product sold on your order page.
- Adjust your trigger settings if needed.
- Click Done.
- Click What happens next? under your trigger and select Update Membership Access and click it to edit the settings.
- Select your site from the “Membership site” dropdown.
- Select “Enabled” from the “Status” dropdown.
- Click Done.
- Add a Go to element below the default trigger and connect it to the Update Membership Access element, allowing you to give access manually.
When a contact’s membership status is enabled, Ontraport will automatically send the contact a registration email (with your site’s logo and colors) that contains a link to create a password.
When the member creates their password, they will be automatically logged in to your site and will be able to log in on your login page on the next visit.
Give members free access to your site
Back to top
If you’d like to give contacts access for free, such as giving your friends and family access, you can manually add them to your automation.
- To give free access to your site, go to Contacts and select the contact(s) you’d like to add.
- Click Automations and select the option to add the contact(s) to your membership site automation.
- Click Submit.
Manually give access
Back to top
You can also manually give contacts access to your membership site.
- Go to the contact’s record and go to the membership tab.
- Click New membership.
- Select your site and the status, “Enabled.”
- Click Save.
Add additional, optional functionality
Back to top
When you’ve enabled membership on your site, there are a wide variety of additional features you can add so you can do more with your membership site. Here are some ideas and directions for adding functionality.
Create a customer center
Back to top
Your customer center is all about giving your customers a self-service station. And you can customize your own center to look and function the way you want. All the page elements from your Customers section will automatically use your membership site's branding.
Just drag and drop the page elements you want your customers to use, such as:
- Update their password
- Update their payment info
- View info about the items they've bought
Here’s how to create your own customer center:
- Go to Pages → New Landing Page → Start from scratch.
- Or click View by type → Customers to select a prebuilt page.
- Name your page in the top left corner.
- Click Add Block.
- Click Customers from the “Pre-designed” blocks to choose prebuilt customer center blocks.
- Or select the block layout you want from the “Build your own block” section.
- Add the Customers page elements to your block to add the following functionality to your page:
- The Update CC button allows your customers to update their saved credit card numbers and choose which card they want to use as their default.
- The Change PW button allows your customers to update their own password to your site.
- The Payment info button shows your customers information about their payment history, download invoices and information about their subscriptions and payment plans.
- Click Settings → Display settings.
- Change your “Display this page to whom?” setting to “All logged in members.”
- Click Publish → Save & Publish.
Create membership levels
Back to top
With Ontraport, you have the flexibility to dictate access to your membership site pages based on information in your members’ contact records, or you can create standard membership levels such as bronze, silver, and gold with a custom dropdown field for your membership levels.
Here’s how to create a custom dropdown field and use it to grant access to your site’s pages based on the level each of your members purchased:
- Create a new field for your membership levels. Dropdown and list selection fields both allow you to add all your membership level options to one field. However, list selection fields allow your members to belong to multiple membership levels. In contrast, dropdown fields limit them to a single selection.
- Create an automation map with a trigger to add contacts who purchase a membership level to your site.
- Under your trigger, add an Update Contact element and click it to edit the settings.
- Select your membership level field from the “Update the field” dropdown.
- Click Add and select the appropriate membership level.
- Add an Update Membership Access element to grant access to your site.
- Add any other automation you’d like to complete your automation map.
Set up redirects based on membership level
You can set up rules with conditions for sending members to pages based on their membership level or other information stored in contact records. Create a login redirect, then add a condition for each of your membership levels. Here’s how:
- In the “Conditions” section, click Add condition and select “Field is this value.”
- Select your membership level field from the “Select field” dropdown, add the condition “Contains,” and choose your membership level value.
- In the “Redirect” section, select which landing page to send your members to.
- Click Save.
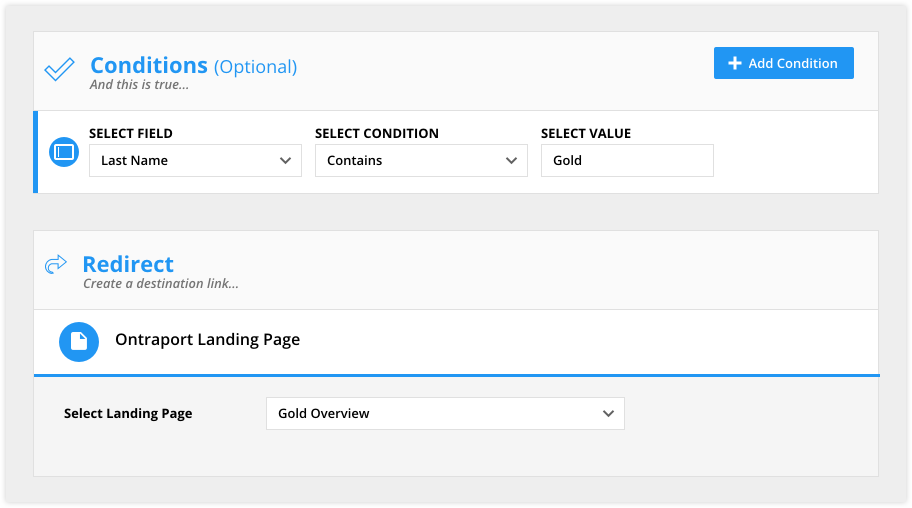
The conditions run in order from top to bottom. When your members log in, they will be redirected to the page of your choice based on the first condition they meet. For example, if your contact has two membership levels — gold and silver — and your first rule redirects gold members, and your second rule redirects silver members, your subscriber will be sent to your gold page when they log in.
Display targeted content to only some members
Back to top
You can select content on your page’s blocks to show or hide for specific members by editing your block’s display settings.
- Hover over the block you’d like to protect, and click
/ontraport+pages+-+builder+-+edit+block+(gear+icon).png) → Display settings.
→ Display settings. - In the “Display this block to whom?” dropdown, select “Some logged in members,” click Add a condition → Add condition and select “Field is this value.”
- Select your membership level field in the first dropdown and set the condition to “contains,” then select the appropriate membership level. You can also set up custom membership level protection by using other display conditions.
Drip content to your members
Back to top
If you'd like to release your content to your members over time, the simplest way is to use custom fields. When you create a custom list selection field, you can add values to it that represent the content you'd like to release, such as "week 1," "week 2," etc. Then, you can use your field and values on your page and block display settings to only show the page to contacts who have the appropriate value in their record.
Once you've used your custom field to protect your content, the next step is to add automation that will give your members access based on your site's content release schedule by alternating "wait" and "update contact" elements. Be sure to set up your update contact element to "add these values to existing" so that previous values are not replaced.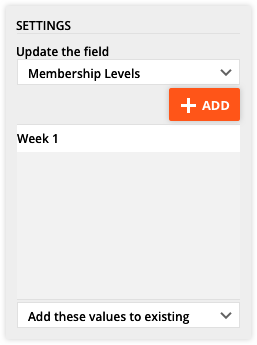
Upsell members to the next access level
Back to top
When site visitors try to visit a page they don’t have access to, rather than simply directing them to an error or login page, you can show them a specific page by using your page’s “Redirect users with no access” setting (you’ll find this in your page settings under Display Settings).
That page can serve as an opportunity for you to suggest that visitors purchase access to the page they were trying to visit. You can do this on a per-page basis, meaning you can customize the redirect page based on which content the person is trying to access.
Customize your registration email
Back to top
Your system-generated emails to manage registration and “forgot password” do not need to be customized to be functional and will automatically include your brand’s logo, color and physical address. You can customize the content of your registration email and the “send from” information of your “forgot password” email.
- Go to Sites and select your site.
- Go to the Membership tab and scroll down to the “Messages” section and hover over the message you’d like to edit and
.png) the box to its left.
the box to its left. - Click Edit.
- Make your changes and click Save.
Automate debt recovery
Back to top
If your site is a paid subscription site, you can create automation to manage missed payments or credit card failures so you don’t have to do it manually.
To create the automation map, follow the steps below, or you can follow these steps to customize your account’s recharge settings.
- Create a new automation map, or select an existing map you’d like to add your recharge automation to.
- Add an “Open order is charged or updated” trigger to your map.
- Select your product from the first dropdown.
- Select “Charged but declined” on the second dropdown.
- Click Add condition and select “Access to Ontraport Membership Site is this status.”
- Select your site in the first dropdown.
- Select “Enabled” in your second dropdown.
- Edit your trigger settings to fit your automation.
- Click Done.
- Click What happens next? and add an Update Membership Access element.
- Click Update Membership Access to edit the settings.
- Select your site in the “Membership site” dropdown and “Suspended” in the “Status” dropdown.
- Click Done.
- Click What happens next? and add a Goal element.
- Click Add goal and select “Open order is charged or updated.”
- Select your membership product in the first dropdown.
- Select “Charged and successful” in the second dropdown.
- Click Done.
- Click What happens next? under your goal element and add an Update Membership Access element.
- Select your site from the “Membership site” dropdown and “Enabled” from the “Status” dropdown.
- Click Done.
- Add an End below your “Update membership access” element.