Invoice receipts are proof of a transaction between you and your customers. They are created automatically when you sell products via order forms, manual transactions and by sending unpaid invoices. These receipts are also transactional emails, so they have to follow specific standards. Ontraport reviews all custom receipt templates and changes to existing templates to ensure they comply with those standards. Your account also has a default invoice receipt so you always have an approved one.
You can add your branding and personalization to custom receipt. Personalized assets help you create a cohesive brand experience for your customers. In this article, you'll learn about invoice standards, the review process and how to create a custom invoice.
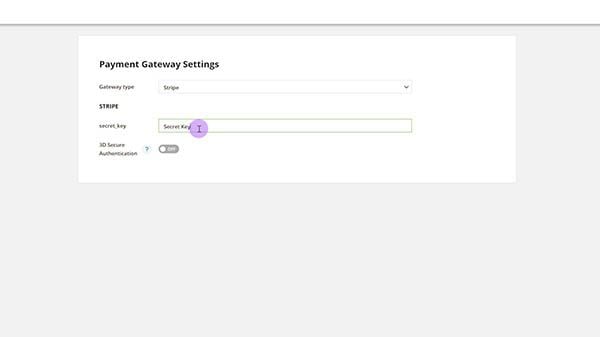
This feature is available to users with Ontraport Plus accounts and above.
Check out this Ontraport University lesson on invoice receipts:
Table of contents
Invoice receipts
• Invoice receipt standards
• Create invoice receipts with the OntraMail editor (Recommended)
• Create invoices with the HTML editor (Advanced)
• Customize your default invoice
Invoice Receipts
Your account can automatically send a receipt when a payment is processed, whether it’s from a paid invoice, an order form, or a manual card charge. You can choose which receipt template to send for each transaction.
Invoice receipt standards
Ontraport reviews all custom invoice receipts to ensure they fit the required standards. The team will complete the review within two business days.
If your template does not meet the standards listed below, we will deactivate it.
- If this happens, we’ll send an email to your account administrator with instructions on how to fix the issue. Your account will use your default invoice to avoid interrupting your sales process.
Standards | |
|---|---|
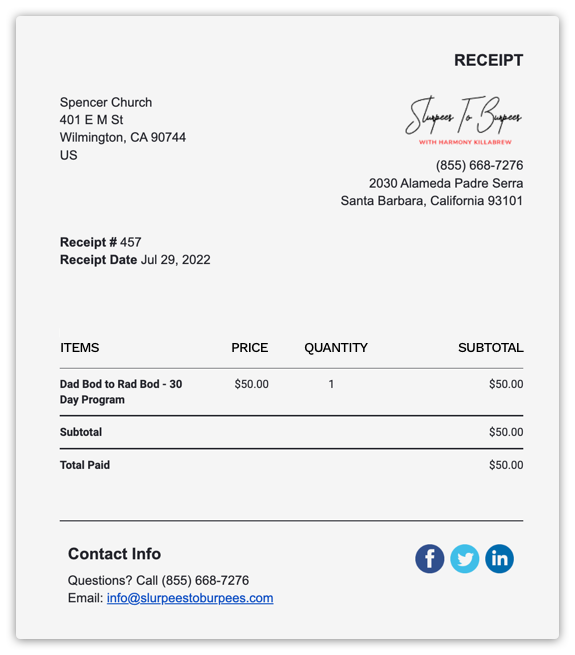
The receipt DOES NOT include:
This is important because invoices are transactional emails. They will be sent to your contacts even if they’ve opted out of your marketing emails. You can include your website URL, logo and other non-marketing information. | The receipt DOES include:
This information is essential for creating a complete and functional invoice receipt that provides your customers with all the necessary details. It ensures the receipt is clearly linked to your business, offers a reliable method for customers to follow up if needed and includes essential information about the purchase. |
To learn more about the difference between marketing and transactional email, watch this Ontraport University lesson.
Create invoice receipts with the OntraMail editor (Recommended)
You can use an "invoice" block when creating a receipt with the OntraMail editor. These blocks are pre-designed to include merge fields about the purchased items.
- Click Sales → Settings → Double Opt-in / Invoice Receipt Manager → New message template.
- Or create a new receipt from your order form settings.
- Click Invoice (OntraMail) → Start from scratch.
- Click Add block → Invoice and select a block.
- Invoice blocks automatically include merge fields for purchased items and grand total.
- Complete your invoice receipt design and be sure to include merge fields for:
- Business name
- Contact info
- Purchase date
- Click Settings and add your subject line and edit your email settings.
- Click Save.
Create invoice receipts with the HTML editor (Advanced)
You can use the HTML invoice receipt editor if you want more control over your design.
- Click Sales → Settings → Double Opt-in / Invoice Receipt Manager → New message template, or create a new invoice from your order form settings.
- Click Invoice receipt: HTML Editor.
- Click Insert merge field and select these required fields:
- Your business contact info
- Business name
- Purchased items
- Grand total
- Date of purchase
- Complete your invoice receipt design and click Save.
Note, your local laws may require more information. It is your responsibility to ensure your template meets your local requirements.
Customize your default invoice receipt
Ensure your default invoice receipt is on-brand by adding your logo and brand color to your business info.
- Go to
.png) → Administration → Business Info.
→ Administration → Business Info. - Click Business information.
- Click the color picker for the “brand color” field and select a color.
- Or add hex code in the space provided.
- Click Select logo and upload your logo.
- Click Save.