Giving your leads and customers discounts with coupon codes is a great way to boost engagement. You can increase sales, gain new leads and help move surplus inventory.
With Ontraport you can create two types of coupons:
Group coupons: These are codes groups of people can use, such as “BF2022” for a Black Friday discount. These are fantastic for targeting a specific market or channel, such as adding your coupon code to a Facebook ad. Or you can reward your existing members by adding a coupon code on your membership site homepage.

Personal coupons: Personal coupons are only meant for one person, and they can only be used once. They are unique codes that Ontraport generates for your contacts, such as “F07DL.” These codes are ideal for people who visit your sales page but don’t buy or for offering customers a discount on an item similar to one they purchased.
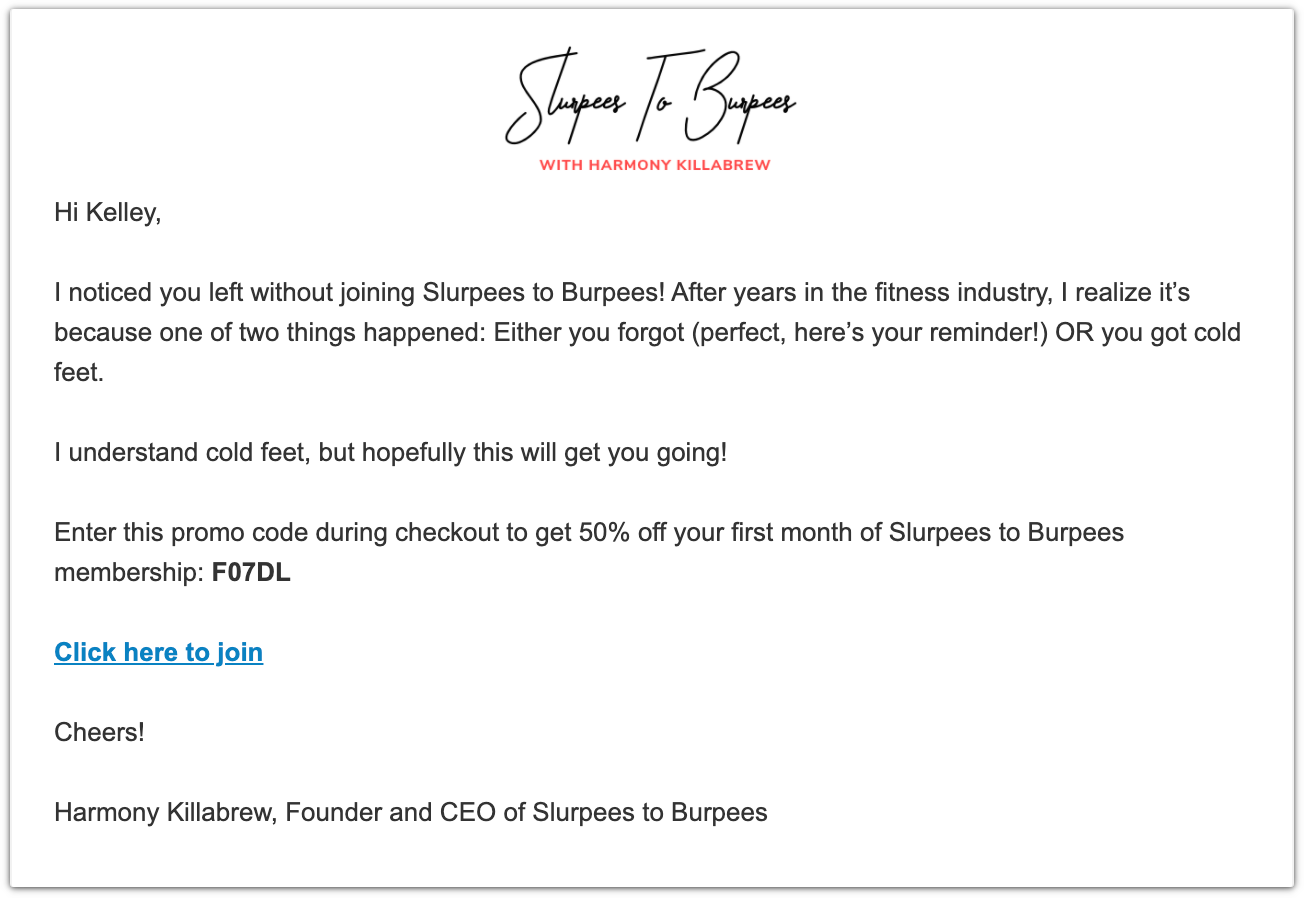
With Ontraport you can create coupon codes that:
- Offer a percentage or dollar value discount
- Offer a free trial of a subscription product
- Apply to all or specific products
- Have a valid start and end date
The coupon code feature is available to those with Ontraport Pro accounts and above.
Table of contents
Create coupon codes
Deliver coupon codes
Enable coupon codes on order forms
Create coupon codes
In order to give your leads and customers coupons, you need to first create the coupon codes. Here’s how:
- Go to Sales → Settings → Coupon Codes.
- Select New Coupon, then select “Group Coupon” or “Personal Coupon.”

- Name your coupon.
- We recommend that you preface your coupon’s name with the type of coupon it is, such as “Group: Holiday coupon.” Your customers can’t see this label, so you can use a naming convention that helps you stay organized. When you use your merge fields to send your coupon codes, those labels make it easy to tell your coupons apart.
- Fill in the coupon fields as prompted.
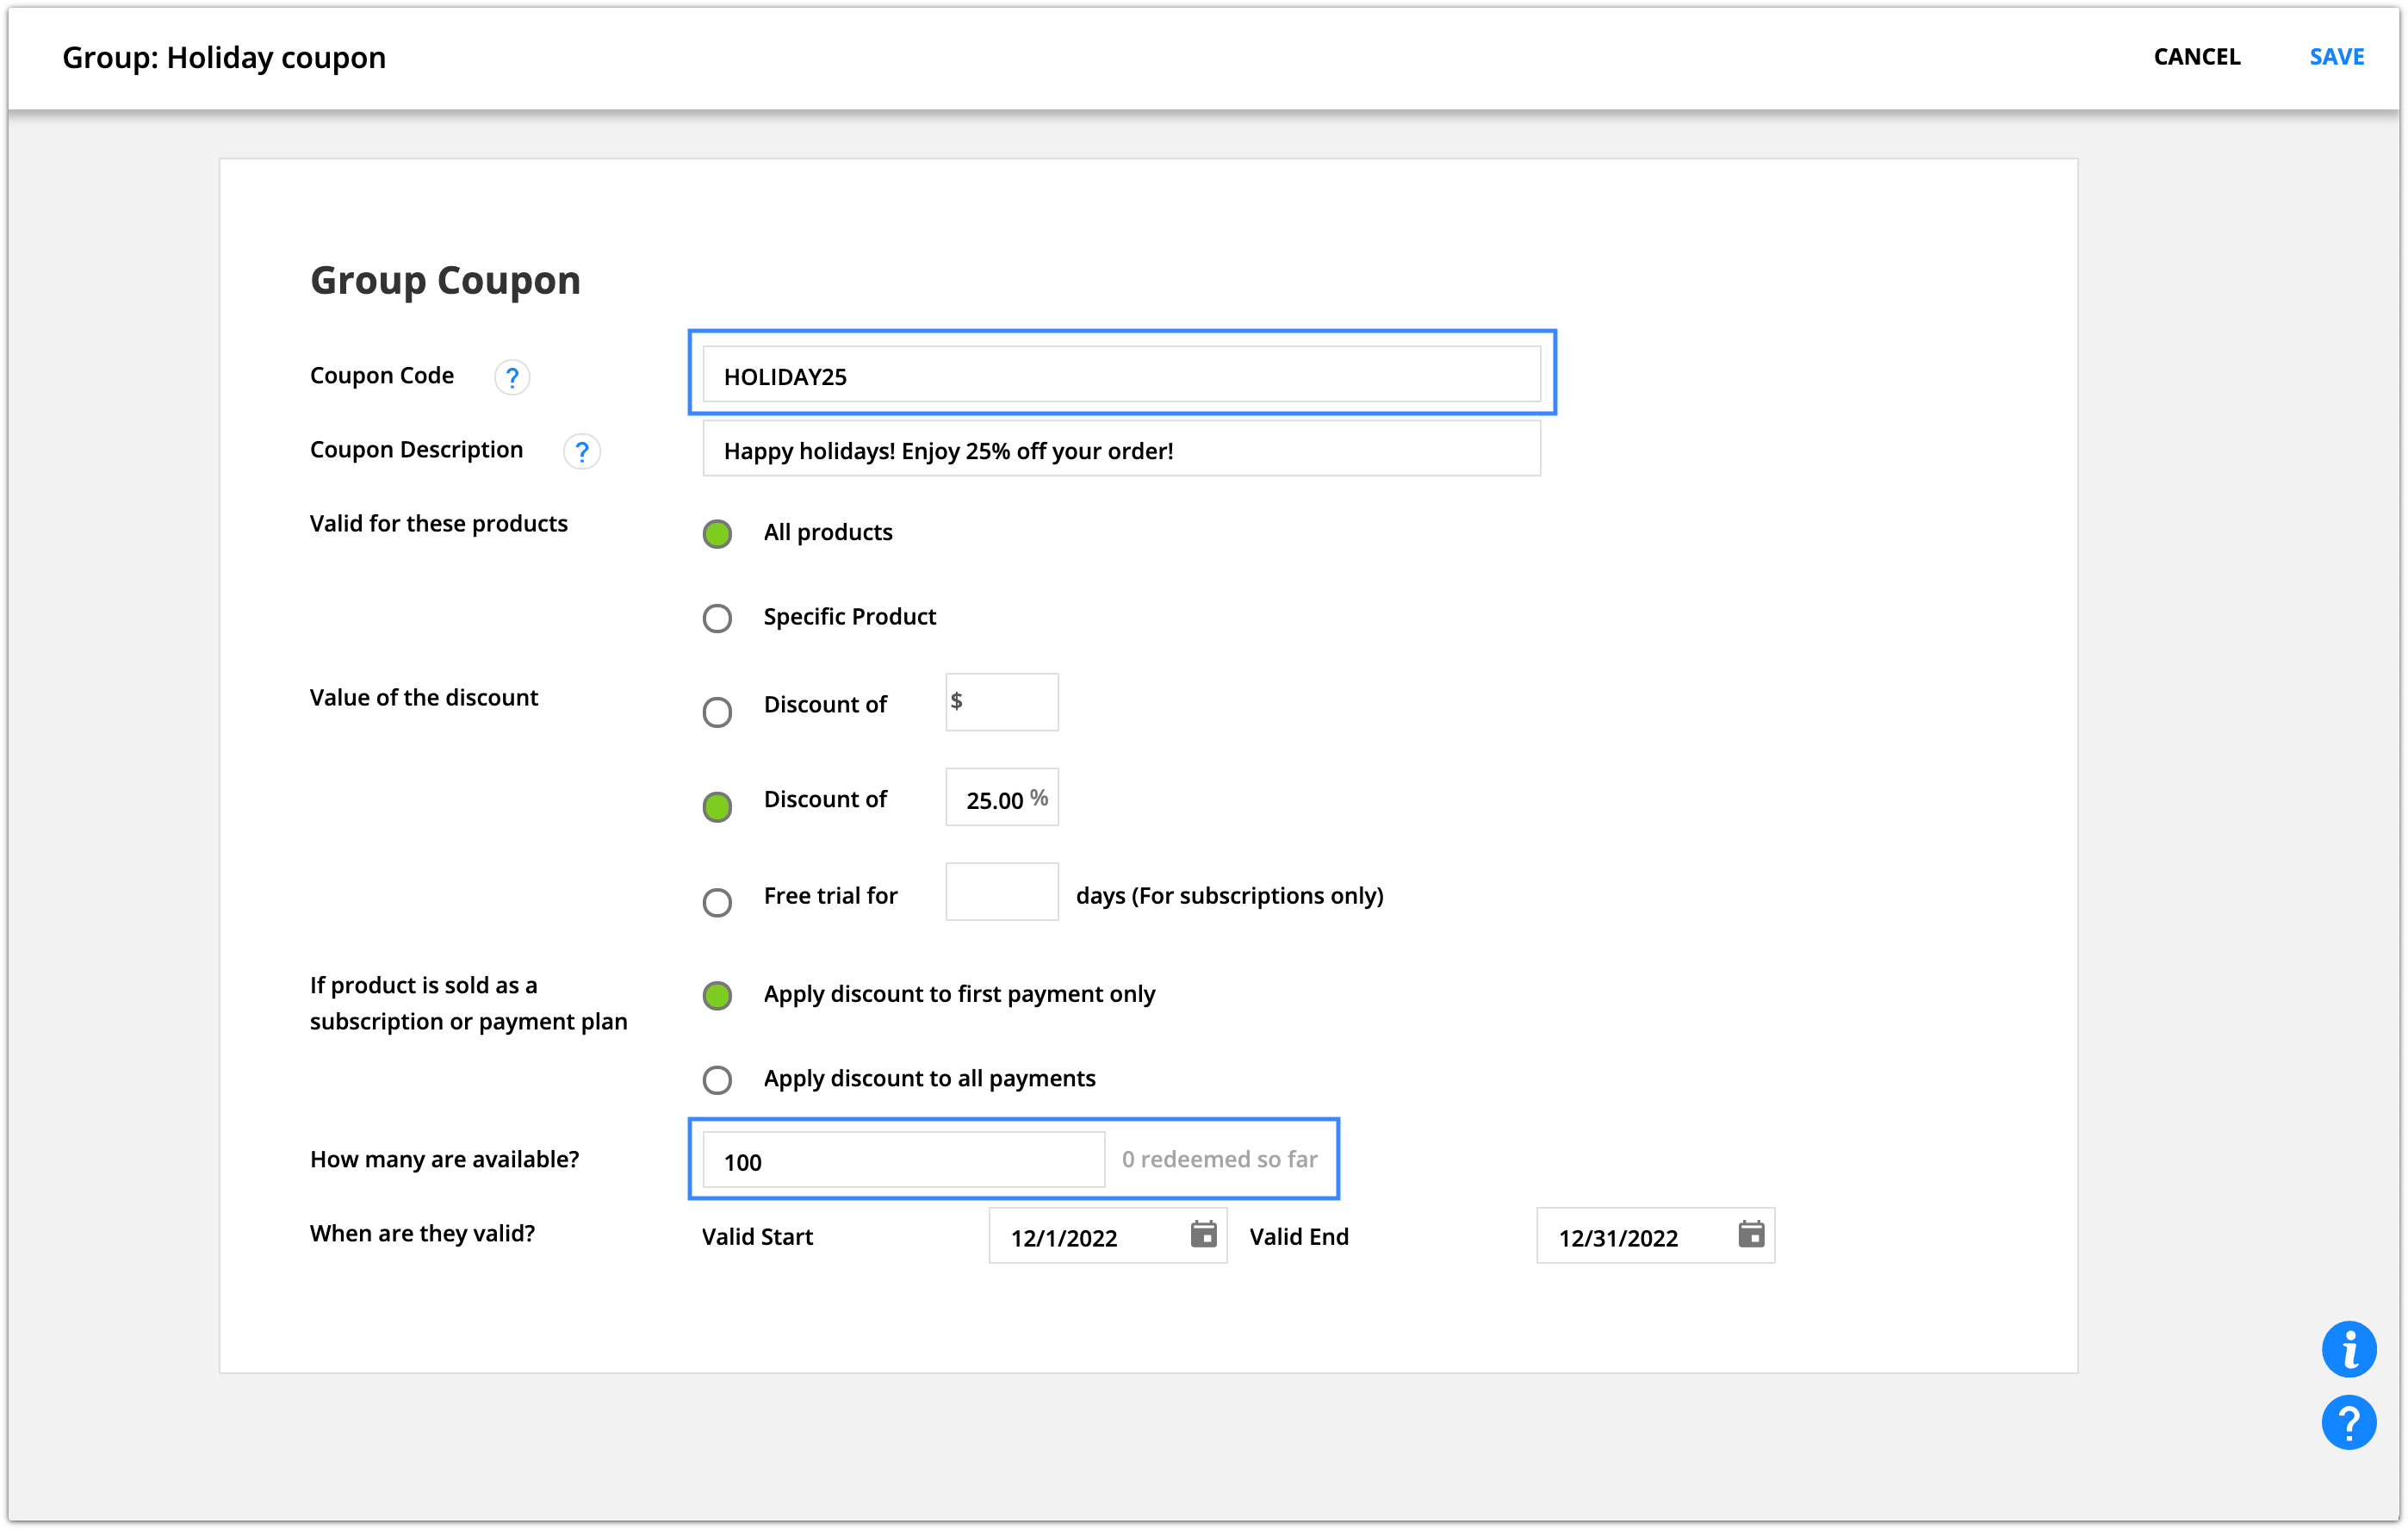
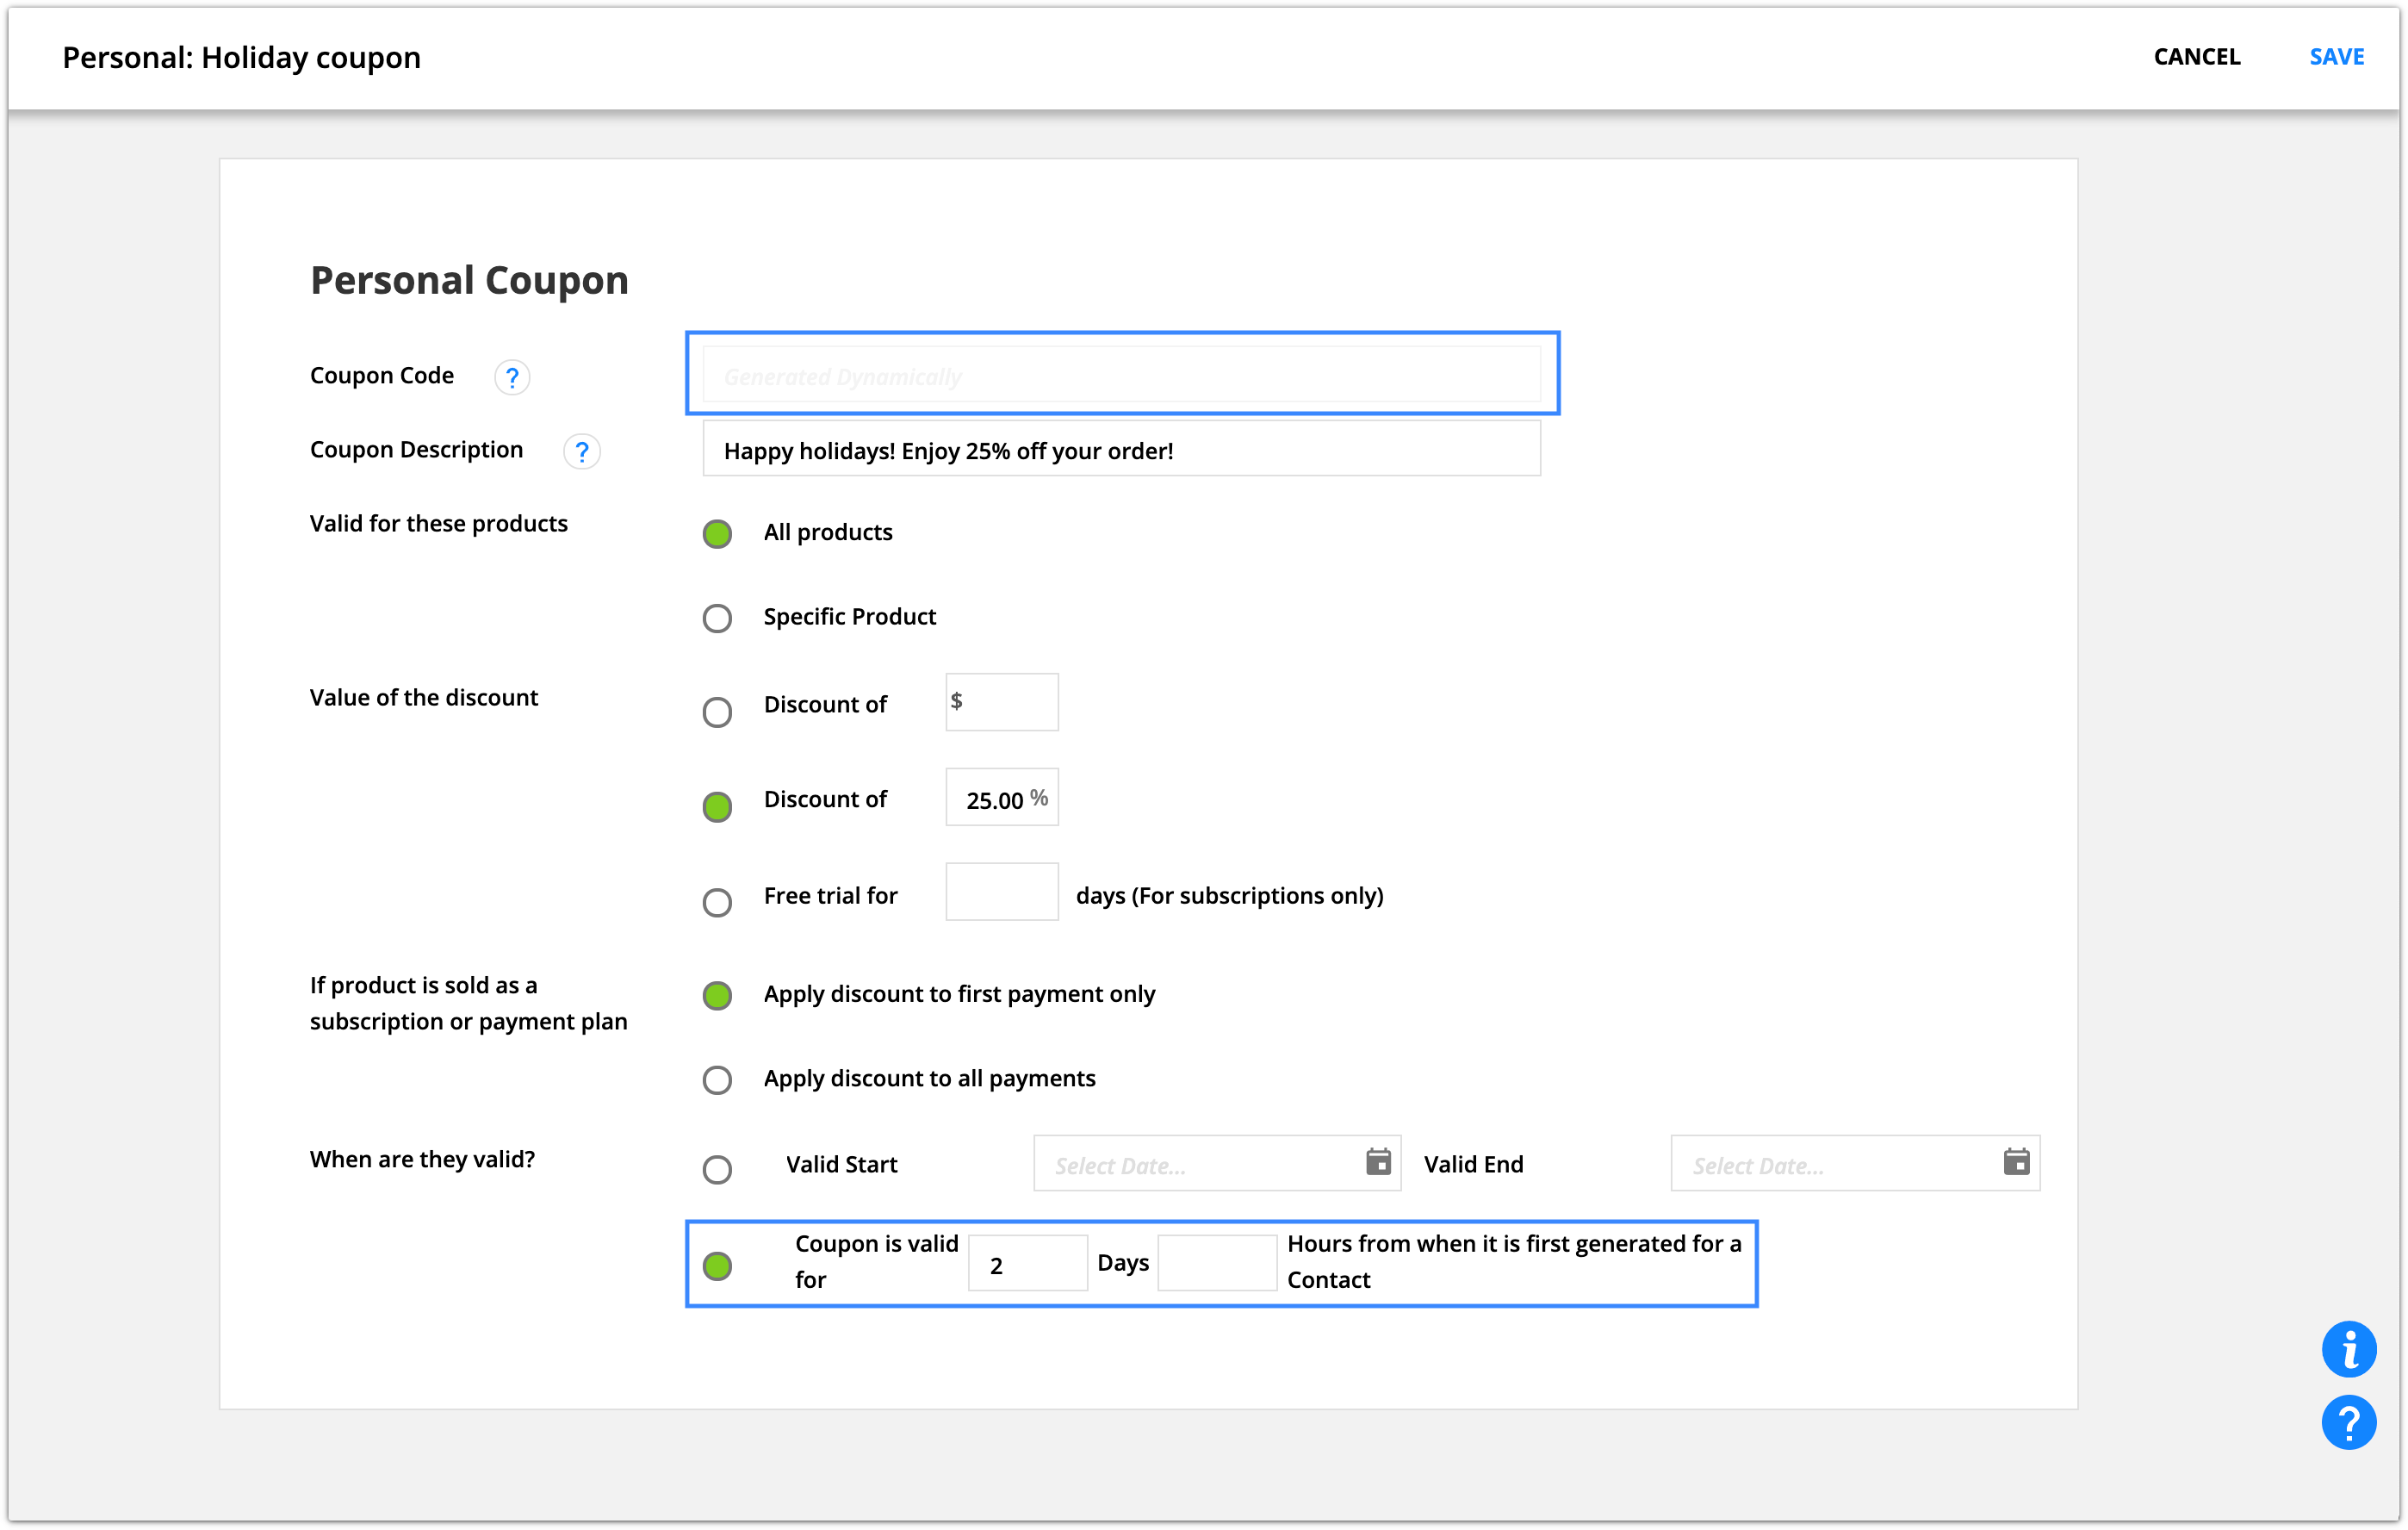
- Most of the settings are the same, but there are a few unique settings for each type:
- Group coupons let you type in the code you want to use in the “Coupon Code” field. You also have the option to choose how many coupons are available.
- Personal coupons’ codes are automatically generated, so your “Coupon Code” field is greyed out. With these codes, you can choose how long the coupons you send will be valid.
- Most of the settings are the same, but there are a few unique settings for each type:
- Click Save.
Deliver coupon codes
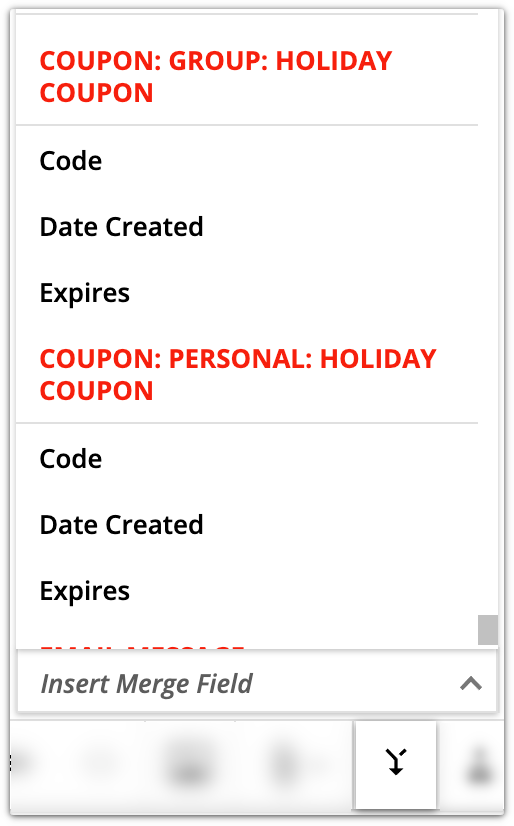
You can easily add your coupon codes to your assets using merge fields. This allows you to generate personal coupon codes in emails. Merge fields are also useful for group coupons because you can ensure you add the correct code — no typos.
- From a text section, click
.png) and scroll to the coupon section. You’ll find your coupon merge fields under the label “Coupon: [your coupon’s name].”
and scroll to the coupon section. You’ll find your coupon merge fields under the label “Coupon: [your coupon’s name].”
Enable coupon codes on order forms
In order for your customers to use their coupon codes, they need somewhere to enter them on your order forms. By default, your order forms don’t display a coupon code field, but it only takes a click to add it. And in order to add a coupon code field, your form requires an order summary element.
- Choose an existing or create a new landing page with an order form block on it.
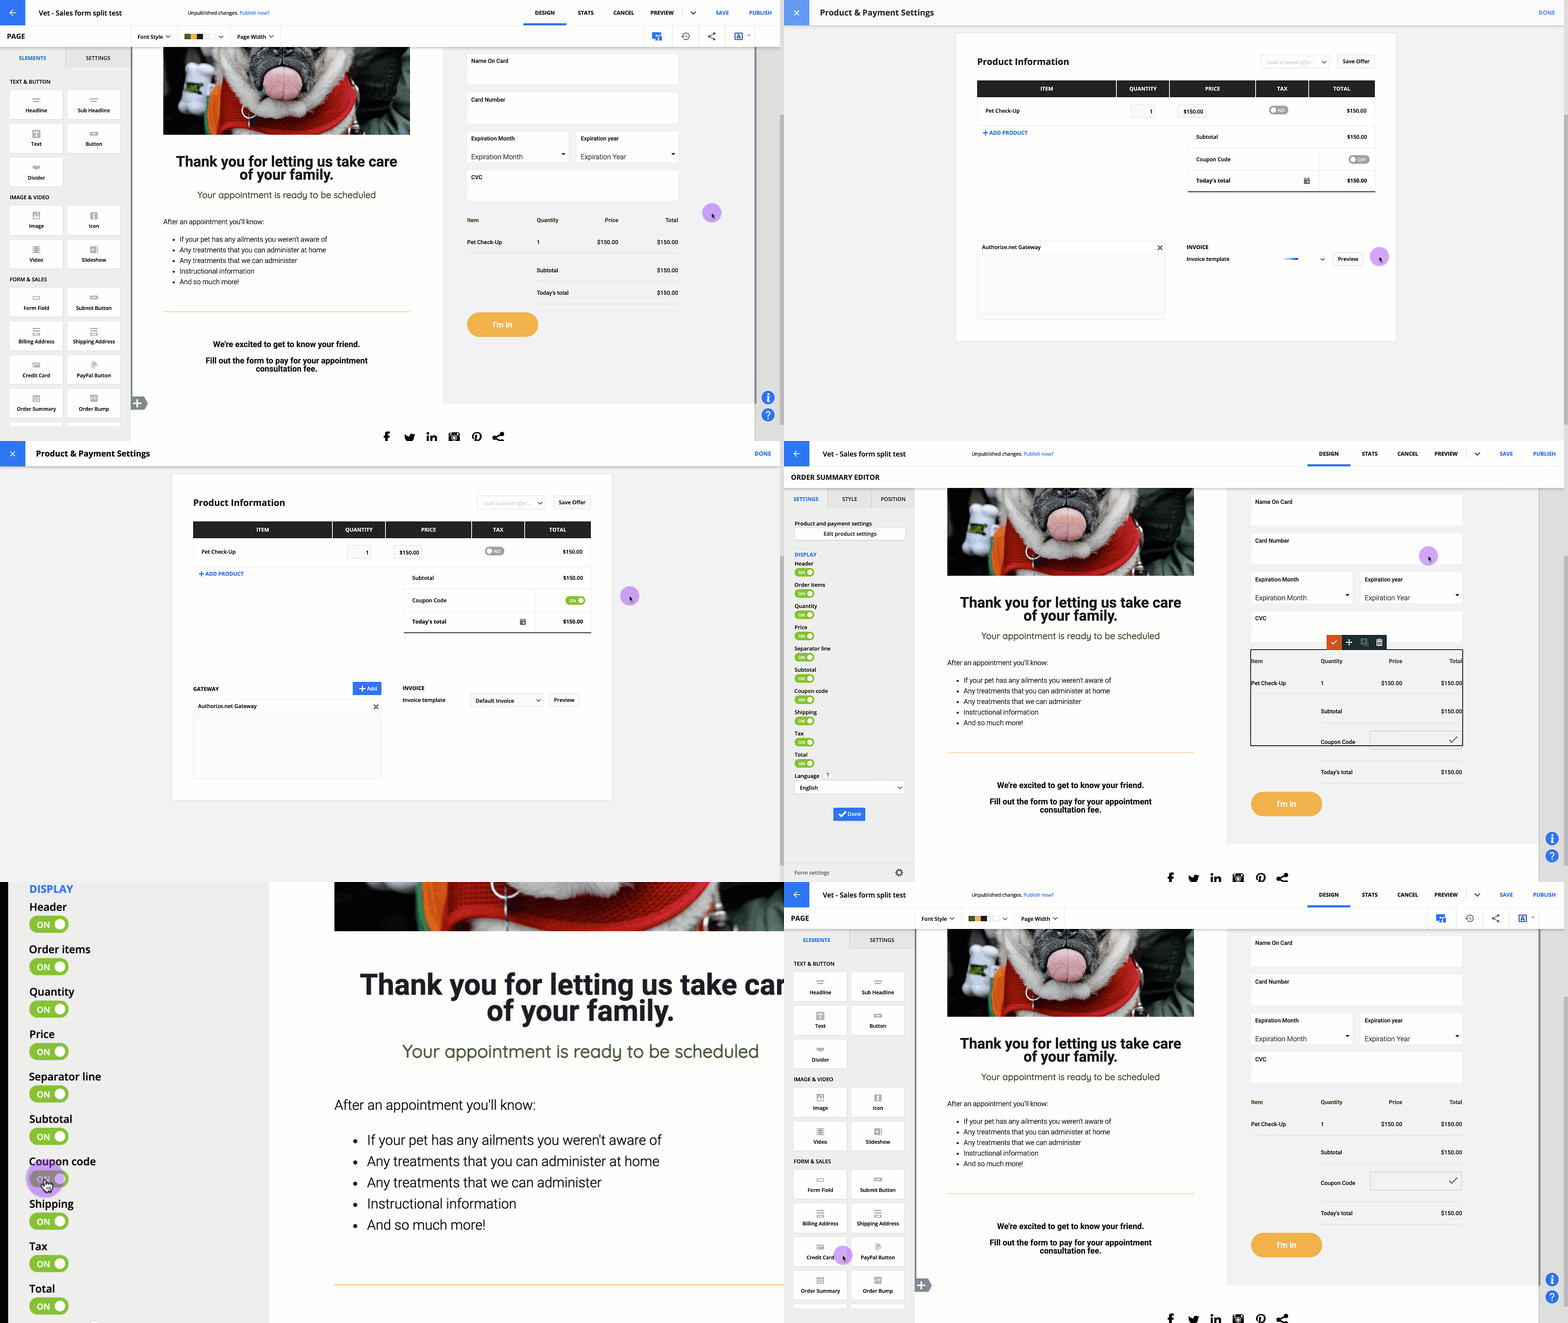
- Hover over your order summary element and click Add / Edit Product.
- Locate the Coupon Code toggle above “Today’s total” and toggle it on.
- Click Done.
- Check your order summary settings to make sure the coupon code display setting is toggled on.
- Save and publish your page.
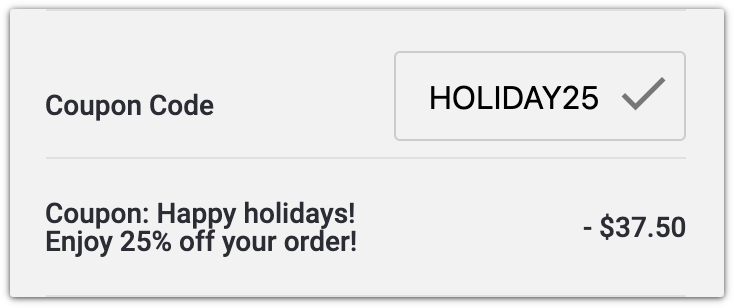
When your customers add a valid coupon code, they’ll see the discount on your form’s order summary.
If someone enters an invalid coupon, they’ll see an error.

