Dynamic video elements make it possible for you to create templates for video pages. For example, you can create templates for your video blog posts, training courses, customer portals, etc.
Setting up dynamic videos is a time saver for coaches, teachers and anyone who sells access to videos. It’s much quicker to update a video field in a record than it is to update the video elements on each of your lesson pages.
In this article, you’ll learn how to create custom fields to store your video links and how to make your video elements dynamic.
Dynamic video is available for YouTube, Vimeo and Wistia videos. When you upload your video to one of those providers, they will generate a link for your video. Once you have your video link, you’ll be able to save your videos in the records they belong to.
Add a dynamic content package to your account to use this feature. Here’s how:
- Click here to go to your account details page.
- Click Add plan or Start trial next to “Add Dynamic CMS to your account” and choose the plan that fits your needs.
Table of contents
Create a video URL field
Connect video elements
Connect block background videos
Use cases
• Use case #1 – Add dynamic video to lesson templates
• Use case #2 – Share personal videos on membership pages
Create a video URL field
Your first step is to create a custom URL field to store each video’s link. Once that’s done, you’ll be able to make your video elements dynamic from the element’s settings.
Create a custom URL field for every video you want to save in your records. Here’s how:
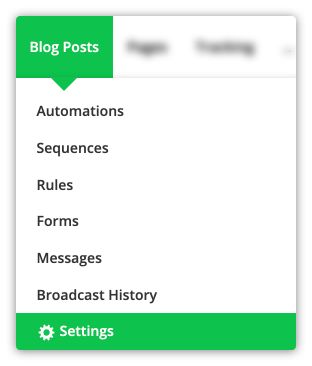
- Hover over your object’s name in your main navigation bar to expand your options.
- Then click Settings → Field Editor.
- On the left, select the tab you’d like to add the field to. Then find the section in that tab where you want to add your field.
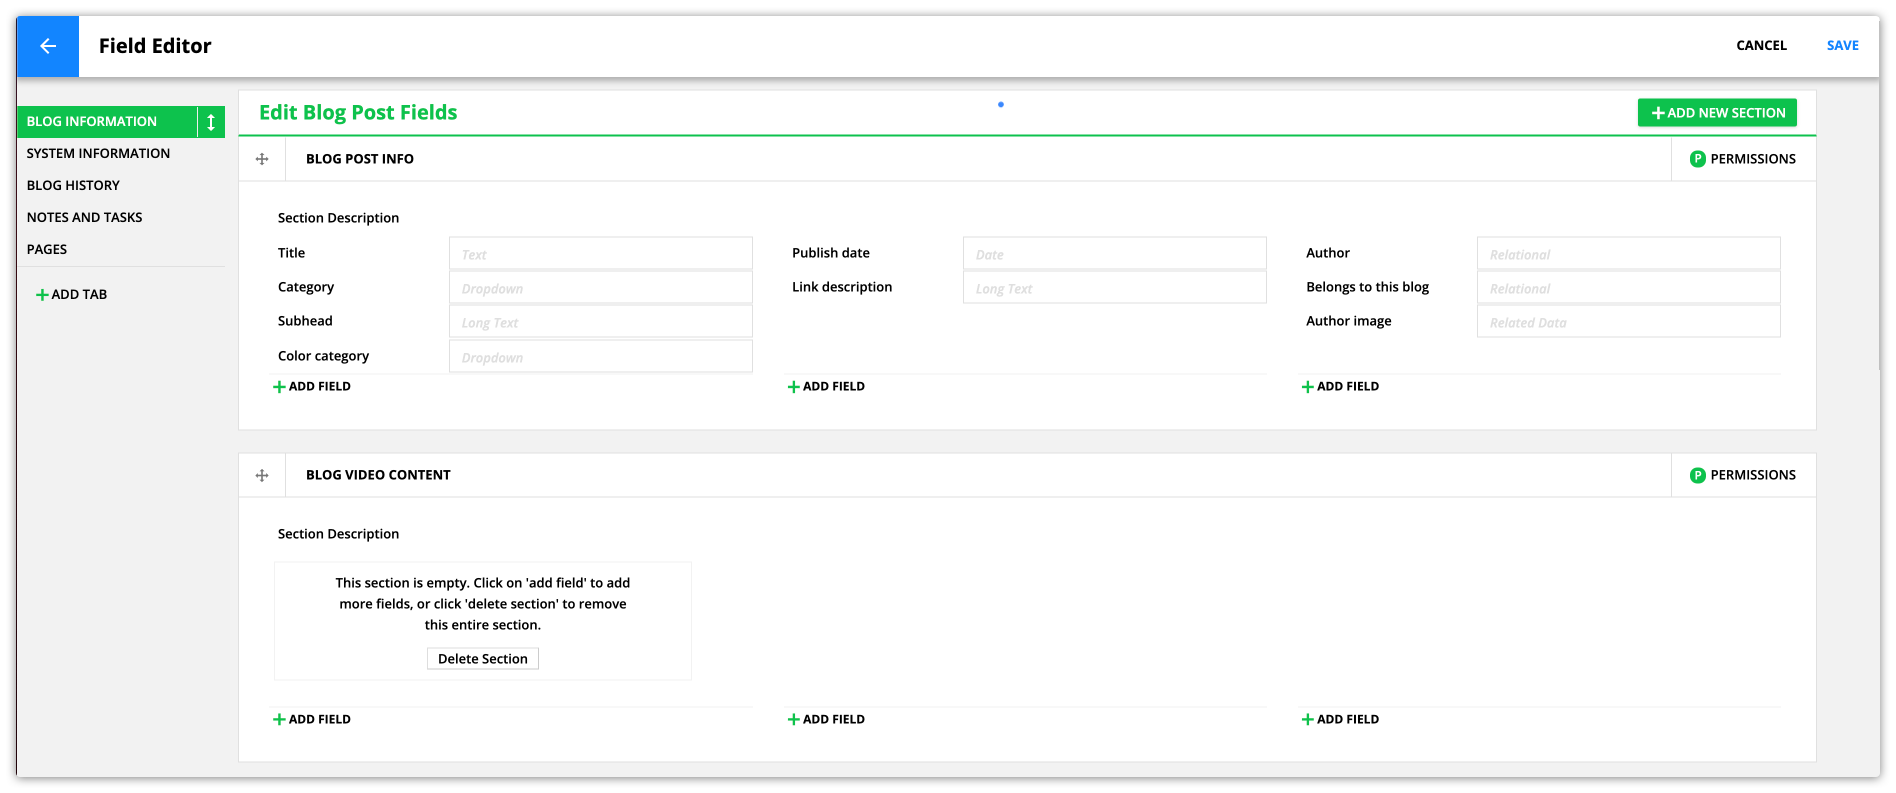
- Click Add Field.
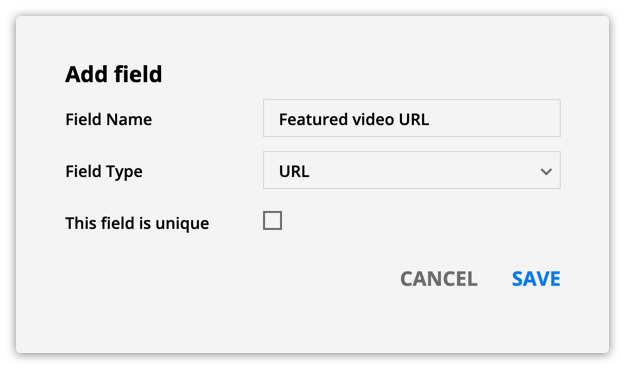
- Name the field.
- Select the “URL” field type.
- Click Save on your add field pop-up.
- Click Save in the top right to save your field editor settings.
Make video elements dynamic
Once you’ve created your custom video URL field, you can add it to your dynamic templates and blocks.
Here’s how:
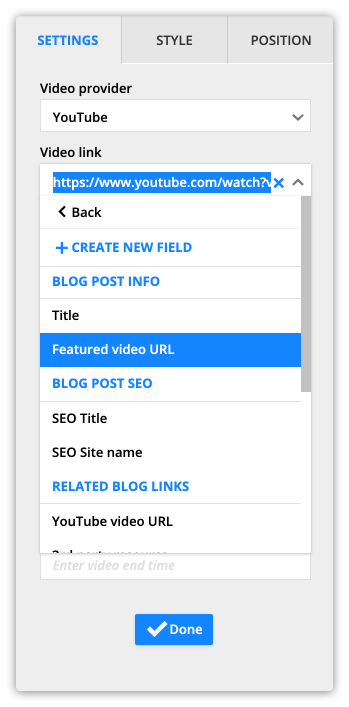
- Click the video element to edit it.
- In the “Video Provider” dropdown, select YouTube, Vimeo or Wistia.
- Click
 next to your video link field, and select your source.
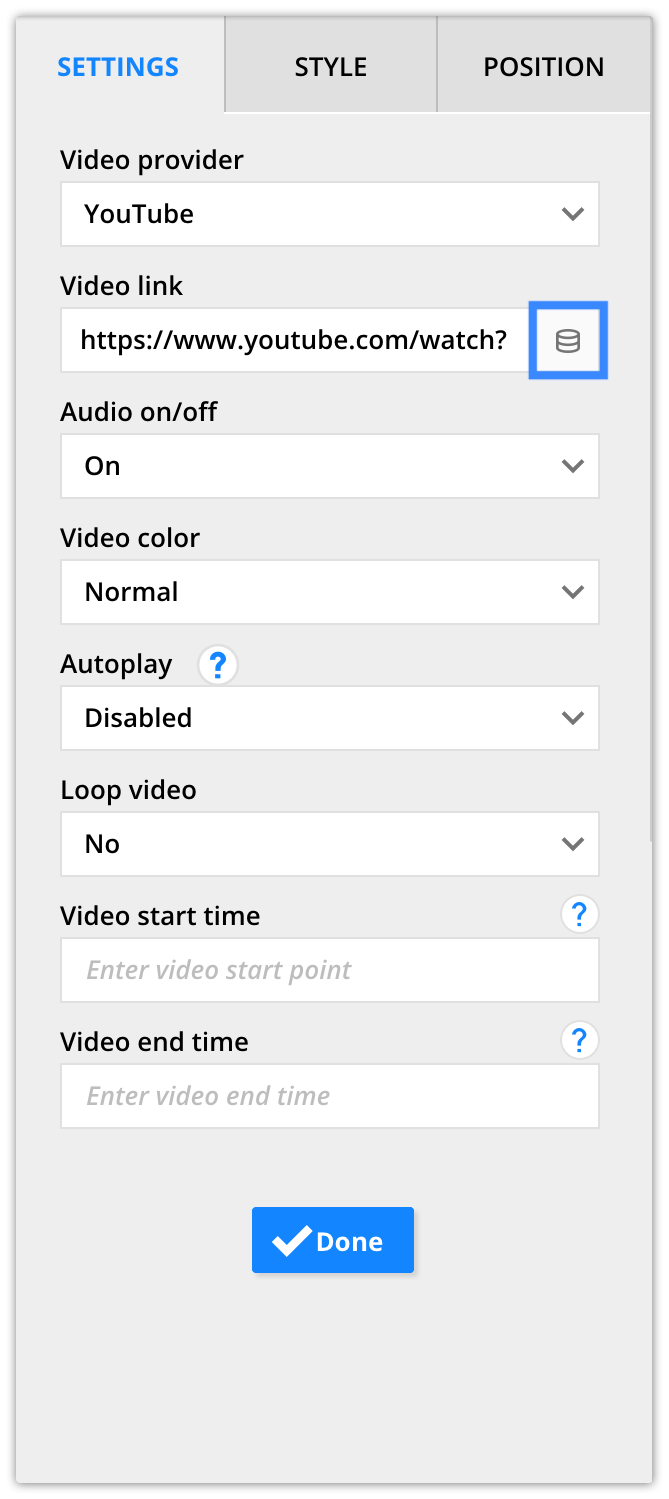
- Click the “Select a field” dropdown, and select your video URL field.
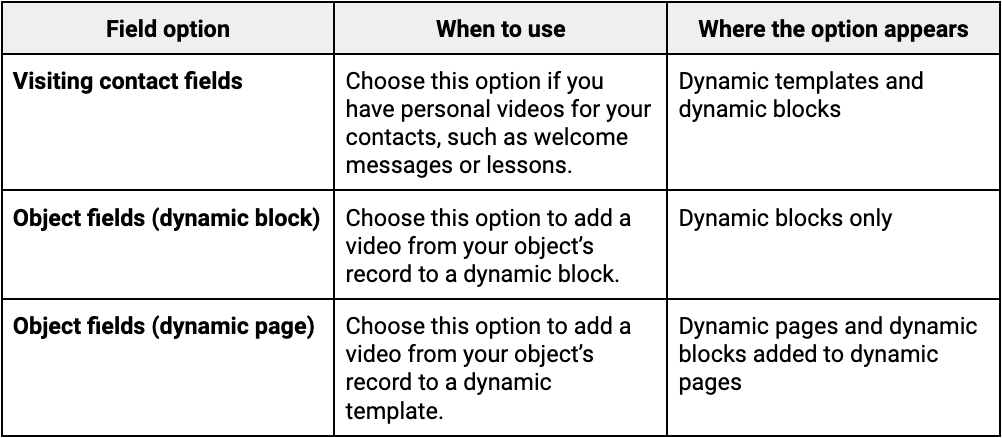
- Depending on where you are adding your dynamic video, you’ll have different options to choose from. Here’s what each option means and when you’ll be able to access them.
- Click Done.
Connect block background videos
Another way to add dynamic videos to your pages is to add them as block backgrounds. Here’s how:
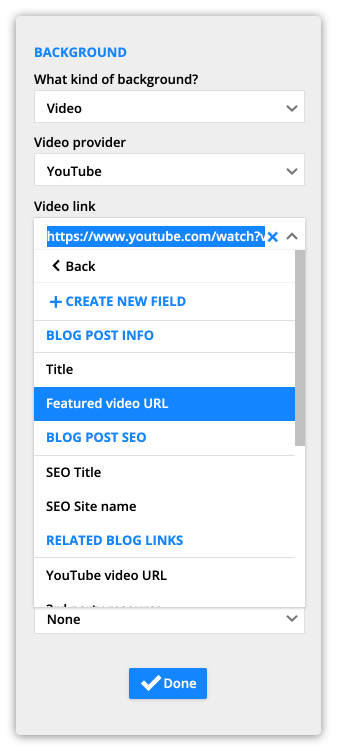
- Click your block to edit it then click Background.
- Choose “Video” from the “What kind of background?” dropdown.
- Select YouTube, Vimeo or Wistia from the “Video provider” dropdown.
- Click and connect your video background to your custom URL field.
- Click Done on your background settings and save and publish your page or template.
Use Cases
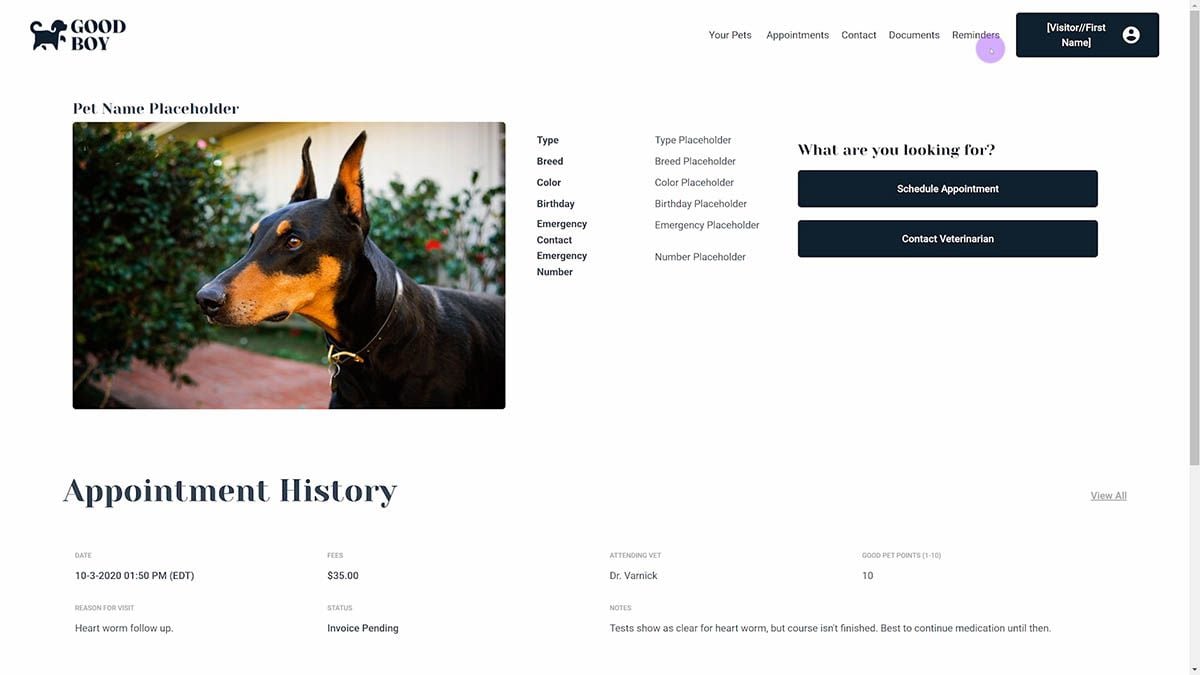
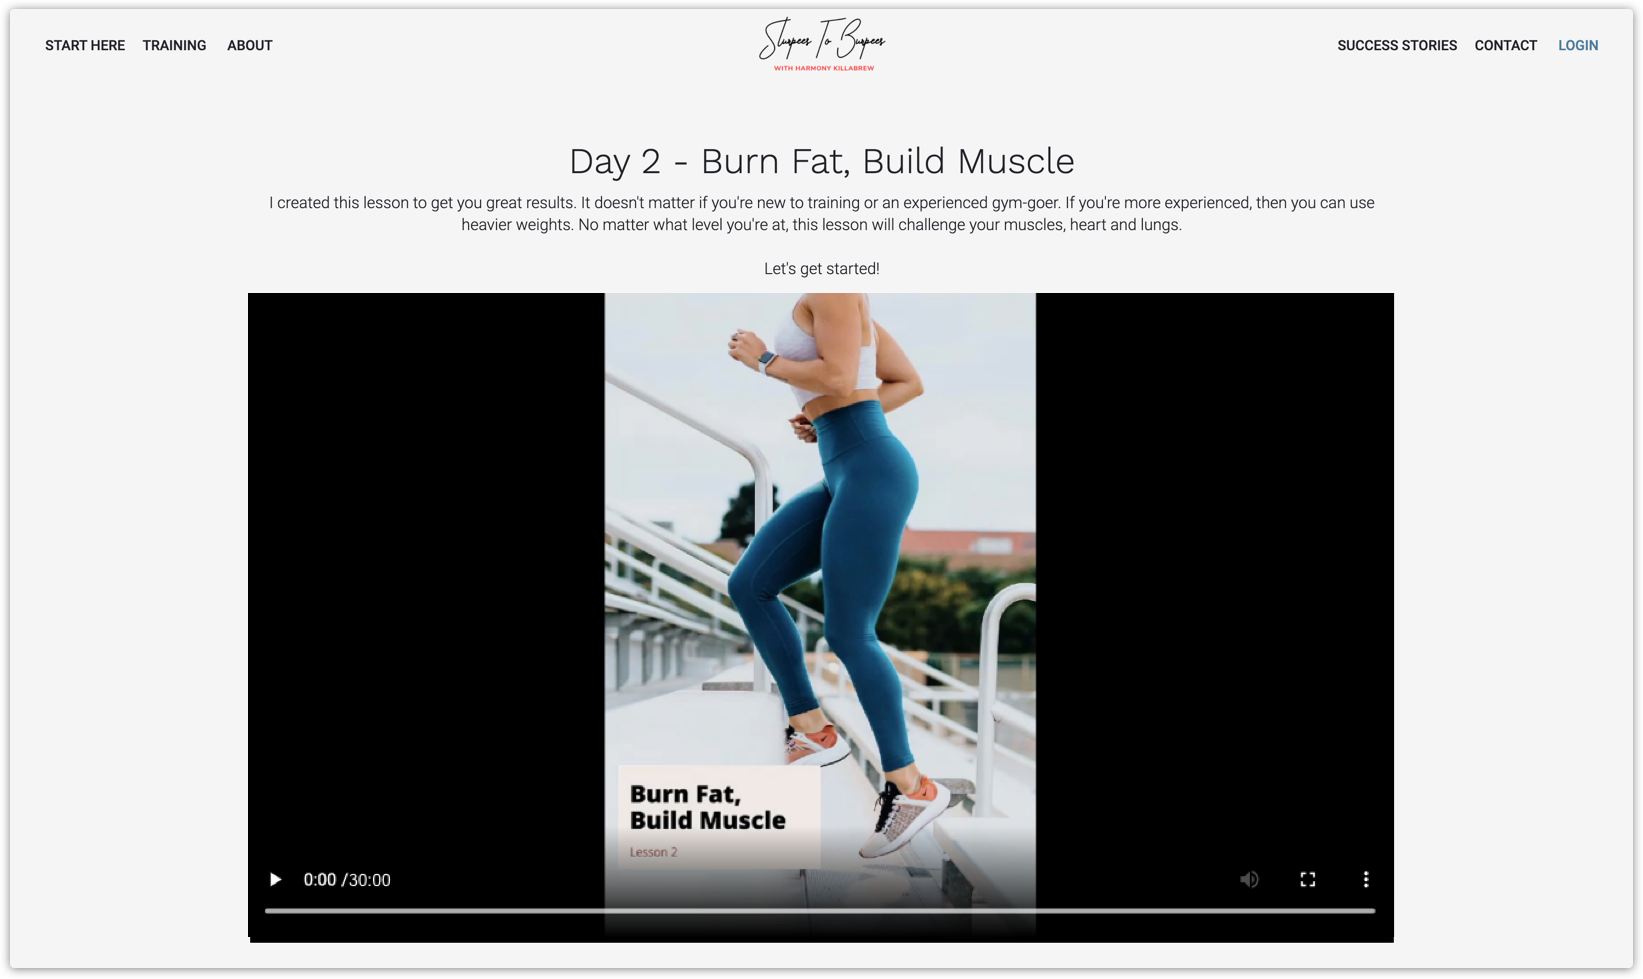
Use case #1 – Add dynamic video to lesson templates
If you offer online video classes, you can save yourself some time by using dynamic video. You can create a template to reuse every time you publish another video lesson. This is the ideal way to build your video courses because you won’t have to create separate pages for each lesson.
Here’s how:
- Create a “Video Lesson URL” URL field.
- Go to Sites → Dynamic Templates → New Dynamic Tempalte.
- Select your Lesson object as your data source and click Continue.
- Design your template as you’d like, and make sure you add a video element for your lesson.
- Click your video element to edit it, and select YouTube, Vimeo or Wistia from the “Provider” dropdown.
- Click on the right of your video link field, and select “Lesson Fields (Dynamic page)” then select your “Video Lesson URL” field.
- Click Done.
If you are selling access to your lessons, you’ll also want to protect your pages. Follow the instructions in “Step 3: Protect and Publish your Pages” in this article.
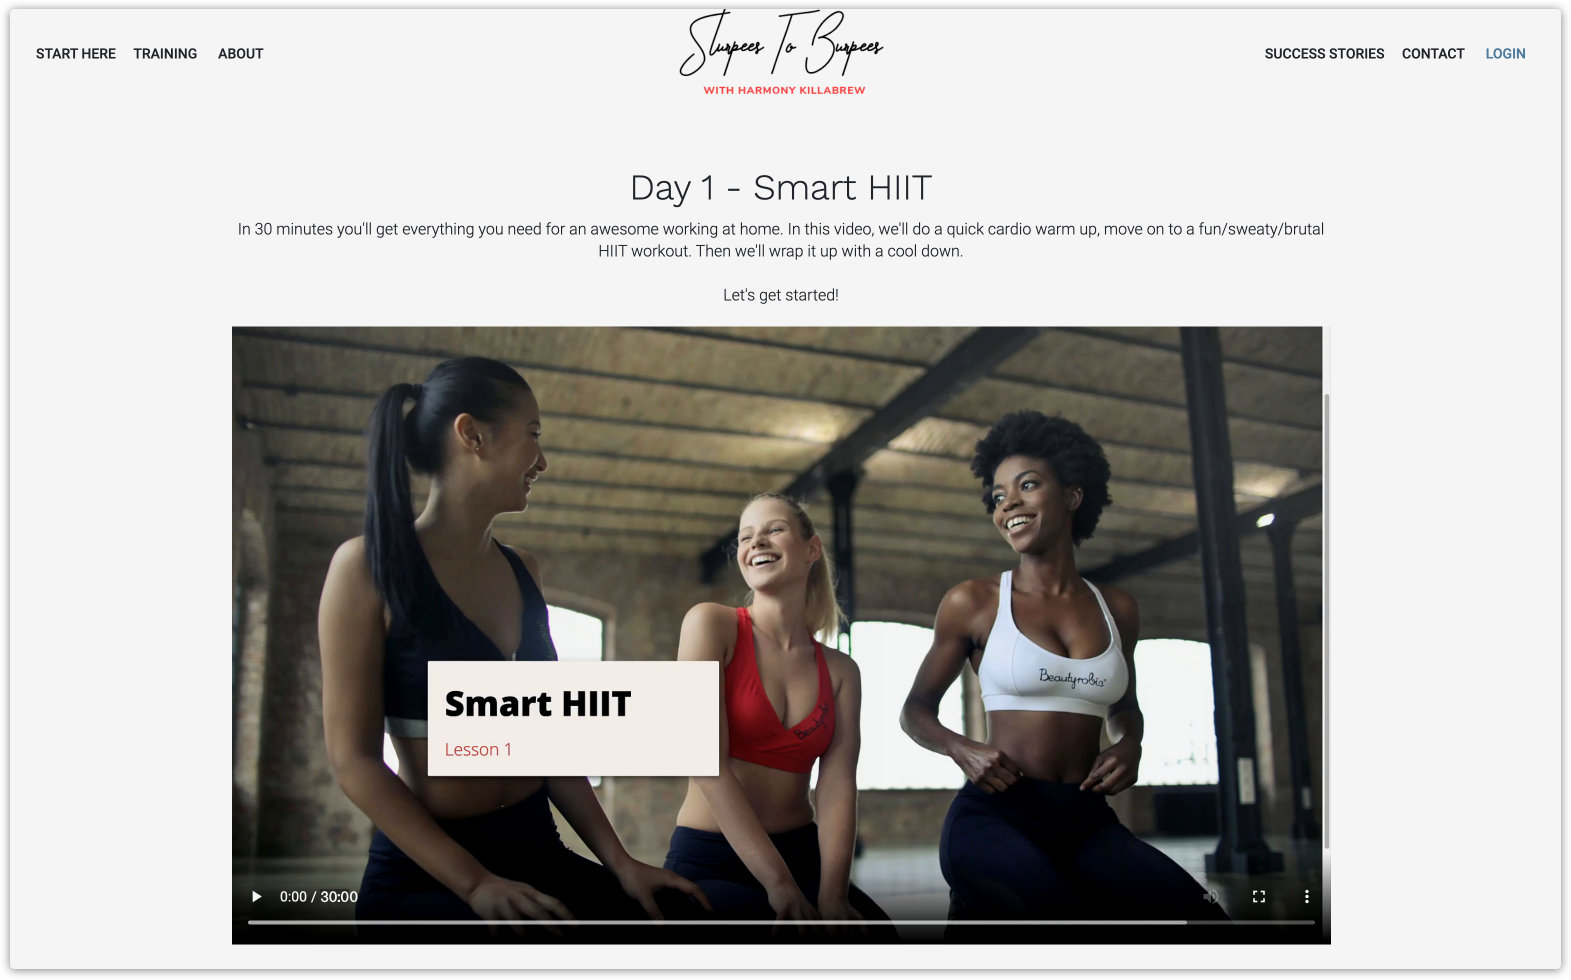
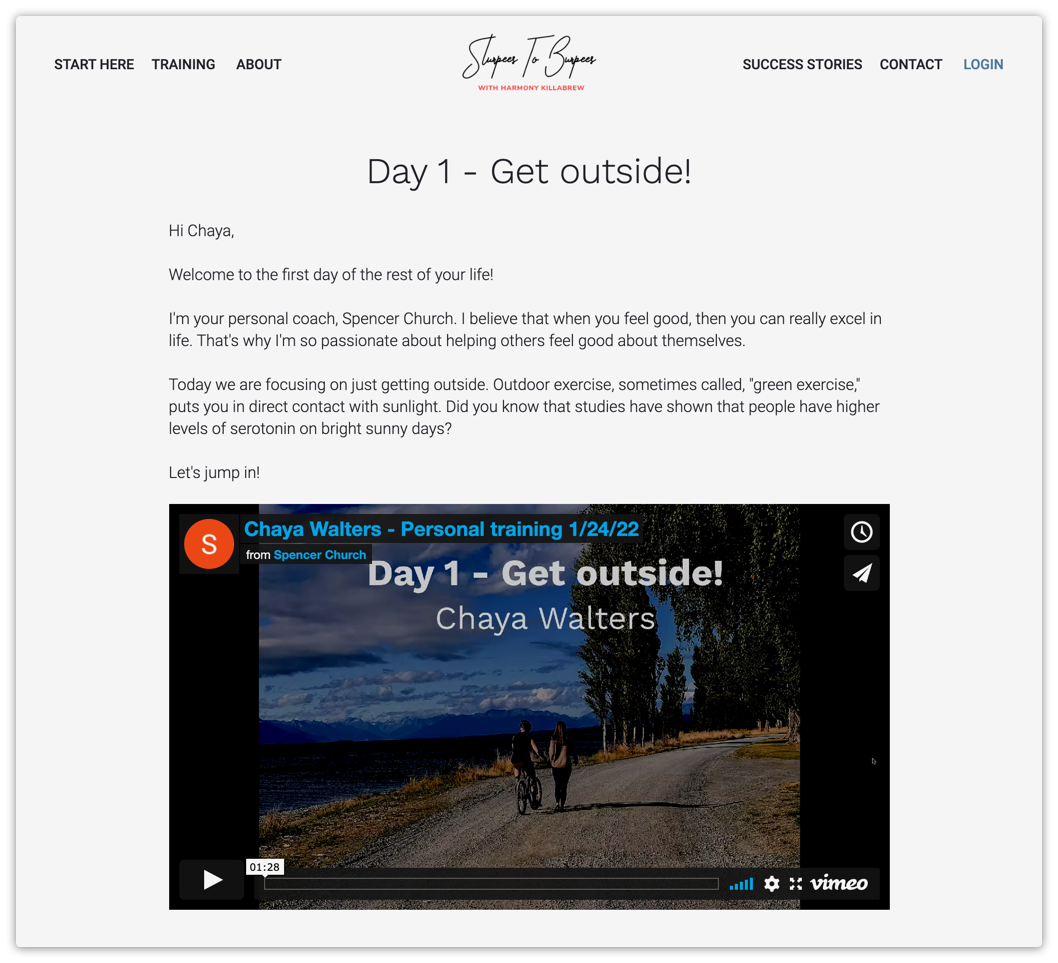
Use case #2 – Share personal videos on membership pages
If you offer your customers 1:1 coaching, you may want to create videos for specific customers. Personal videos are an amazing way to interact with your customers without meeting them in person.
Note, when you add personal information to a page, it is crucial to make that page private. That means you should add your page to a membership site, and add page protection to it. This will ensure that you are keeping your customers’ information safe behind a login form.
Make your video dynamic
- Create a “Personal Video URL” URL field.
- On a dynamic template or dynamic block, add a video element.
- Click your video element to edit it, and select YouTube, Vimeo or Wistia from the “Provider” dropdown.
- Click on the right of your video link field, and select “Visiting Contact Fields” then select your “Personal Video URL” field.
- Click Done.
Protect your page
After you’ve added a personal video to a dynamic template or a dynamic block, it’s very important to protect your page and add it to a membership site. This will ensure that only the intended recipient will be able to view the private video. Here’s how:
- Click the Settings tab then click Display Settings.
- Select “All Logged in Members.”
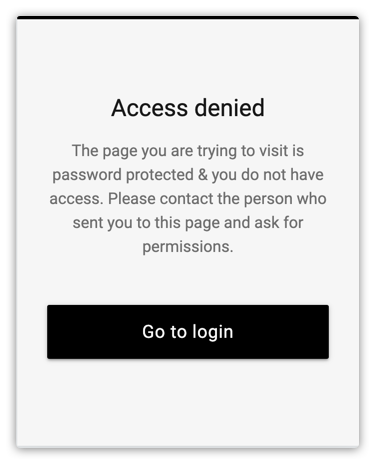
- (Optional) Add a sales page in your “Redirect users with no access here” field. This gives you the opportunity to pitch your product to visitors who land on your protected pages.
- If you don’t add a page in your redirect settings, visitors who don’t have access will see this message:
- Click Done.
Publish your page to your membership’s domain
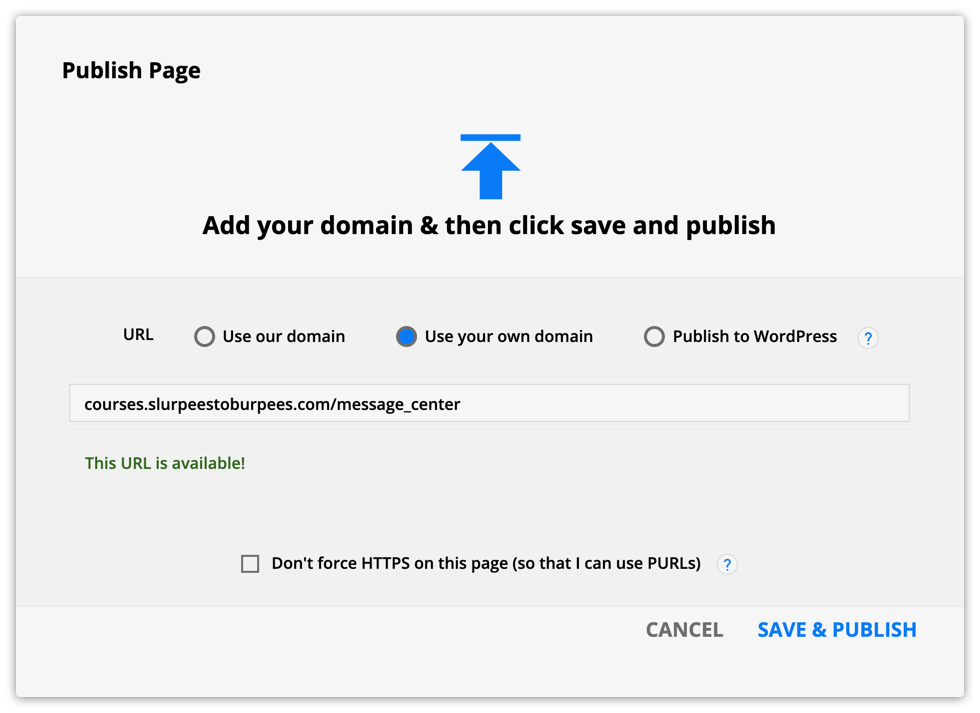
The last step is to add your page to your membership site. This step adds your page to your membership site’s “Pages” section and ensures your page protection works properly. You’ll do this by publishing your page to your membership site’s domain.
If your video is on an Ontraport page, click Publish and add your membership domain.
- For example, if your membership site’s domain is “courses.slurpeestoburpees.com,” you can publish your page to “courses.slurpeestoburpees.com/message_center.”
If you are using a dynamic template, make sure you use a page type that uses your membership domain in its URL structure settings.