A lead router automatically updates the “owner” field in contact records with a member of your team. The owner of a contact is responsible for managing that specific lead or customer. This helps sales teams follow up with every lead consistently and ensures you won’t miss any opportunities for a sale.
By default, the owner of new contacts is the account owner, but you can use lead routing to automatically distribute new leads to your sales reps.
There are two types of lead routing systems:
- Round Robin evenly distributes leads to your users, so each will end up with the same number of leads.
- Weighted Random allows you to set percentages of leads per user.
- Use this lead router if you want to assign a greater percentage of leads to certain sales reps and a lower percentage to others. This router is designed to give a heavier workload to more experienced reps and a more manageable workload to newer reps.
.png)
Lead scoring is available for users with Ontraport Plus accounts and above.
Learn more about lead routing in this Ontraport University lesson:
Table of contents
Create a round robin lead router
Create a weighted random lead router
Add contacts to a lead router through automation
Add contacts to a lead router through form settings
Notify users when a contact is routed to them
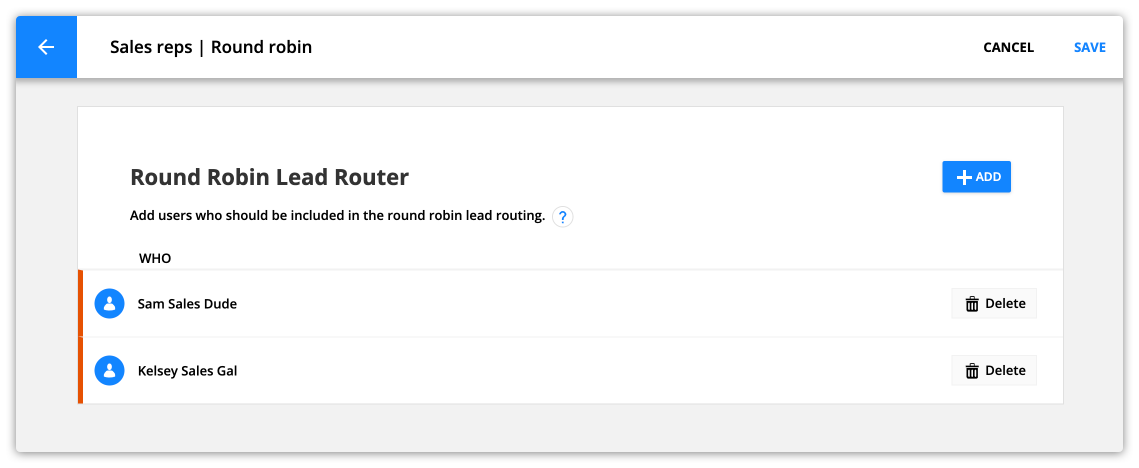
Create a round robin lead router
- Go to Contacts → Settings → Lead Routing.
- Click New Lead Router → Round Robin.
- Name your lead router.
- Add the users you want to assign new contacts to.
- Click Save.
Create a weighted random lead router
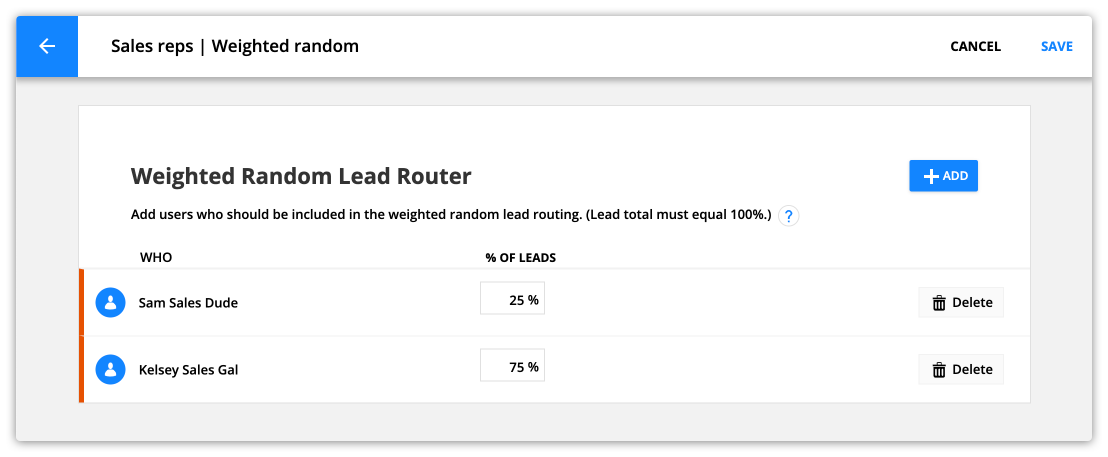
- Go to Contacts → Settings → Lead Routing.
- Click New Lead Router → Weighted Random.
- Name your lead router.
- Add the users you want to assign new contacts to and add the percentage of leads you want routed to each.
- Click Save.
Add contacts to a lead router through automation

The “Add to Lead Router” element lets you add your contacts to a lead router from your automation maps. You may want to add all new contacts to your lead router, or wait until your leads have reached a certain lead score before adding them to your lead router. Here’s how:
- Add the “Add to Lead Router” element to your map and click on the element to access its settings.
- Choose the lead router you want to use from the “Add to Lead Router” drop down.
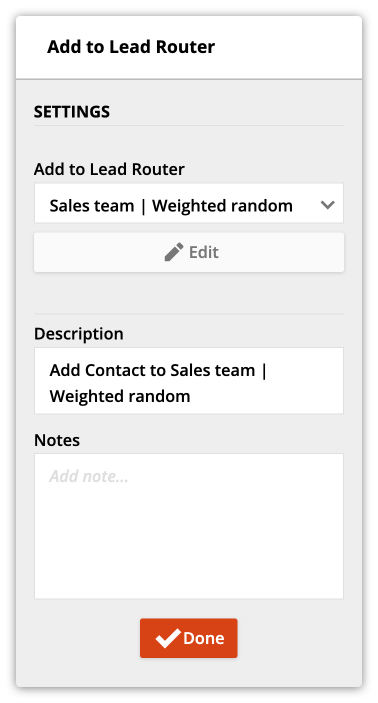
- Click Done.
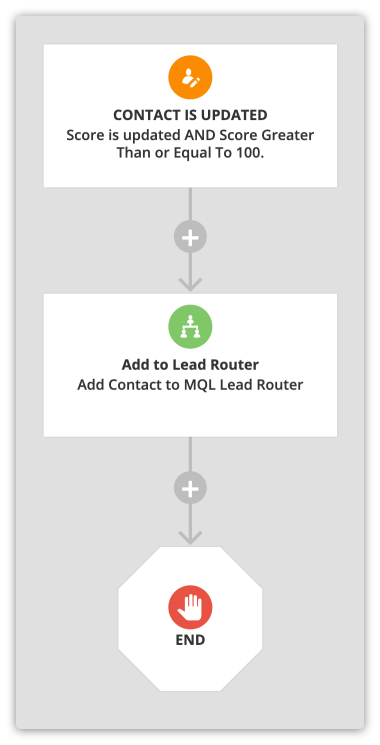
Here’s an example of automation that adds contacts with a high lead score to a lead routing system:
Add contacts to a lead router through form settings
The “Notification and Routing” section of your form settings allow you to select a lead router from the “If this is a new contact make the contact owner” drop down. When selected, all new contacts who fill out your form will be automatically added to your that lead router.
/forms-notificaiton_and_routing_section-lead_router_settings_example.png)
Notify users when a contact is routed to them
It’s a great idea to notify your team members when a contact is routed to them so they can stay on top of their new lead tasks.
Here’s how:
- Create a new automation map or edit an existing one.
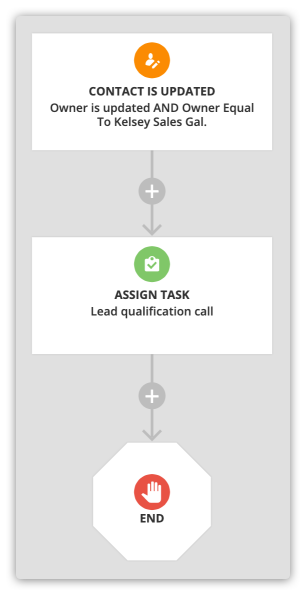
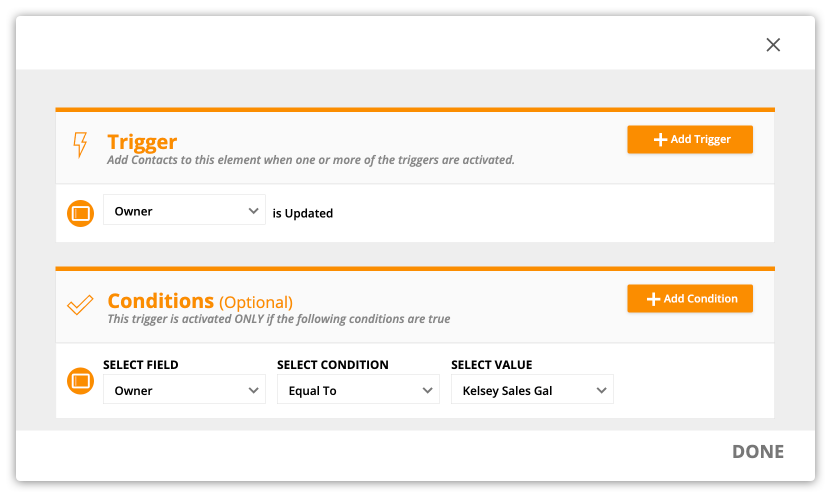
- Add a “contact is updated” trigger or goal to your map and configure it to move contacts when their owner field is updated to one of your users.
- Add your automation below your trigger or goal.
- Notification elements are a great option if you want to send an SMS or email message to your user. Or add an Assign a task element to ensure your user performs a specific task.
- Complete your automation map and save and publish it.
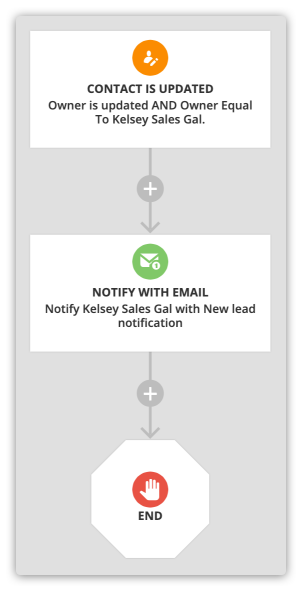
Here’s an example of sending a notification when a lead is routed to one of your users:
And here’s an example of automation that assigns a task to you user:
