Simple Mail messages are your go-to when writing a simple message you could have sent from a personal email. This is a What You See Is What You Get (WYSIWYG) editor that uses text-based messages that appear more personal than marketing messages. And when you send a Quick message to your contacts, you’ll also use the Simple Mail editor.
Ontraport also offers two other email editors, each designed to empower you with the tools to create stunning, customized email designs tailored to your unique goals.
- Advanced Mail
- This block-based builder allows you to create polished newsletters and on-brand marketing messages.
- Raw HTML Email editor
- This HTML editor allows you to customize your design using HTML and CSS.
Ontraport’s Inbox feature lets you create and send email messages using a chat interface.
This article is focused on Contact messages. However you can follow the same steps for any of the objects in your account. |
.png) → Administration → User Management → User Messages.
→ Administration → User Management → User Messages.Table of contents
Create a Simple Mail email
• Email settings
• Create and use canned messages
Create a Quick Email
Create a Simple Mail email
Back to top
Simple Mail uses a flexible WYSIWYG editor for clean, text-focused communication. While it doesn't feature prebuilt visual templates or layout blocks, it gives you full control over text formatting. To save time, you can create and use canned messages to instantly drop your frequently used text into any message.
- Go to Contacts → Messages → New message → Simple Mail.
- Name your email in the top left corner.
- Add your content to the copy of your message, and use the toolbar to customize your style, add images and format.
- Click Save.
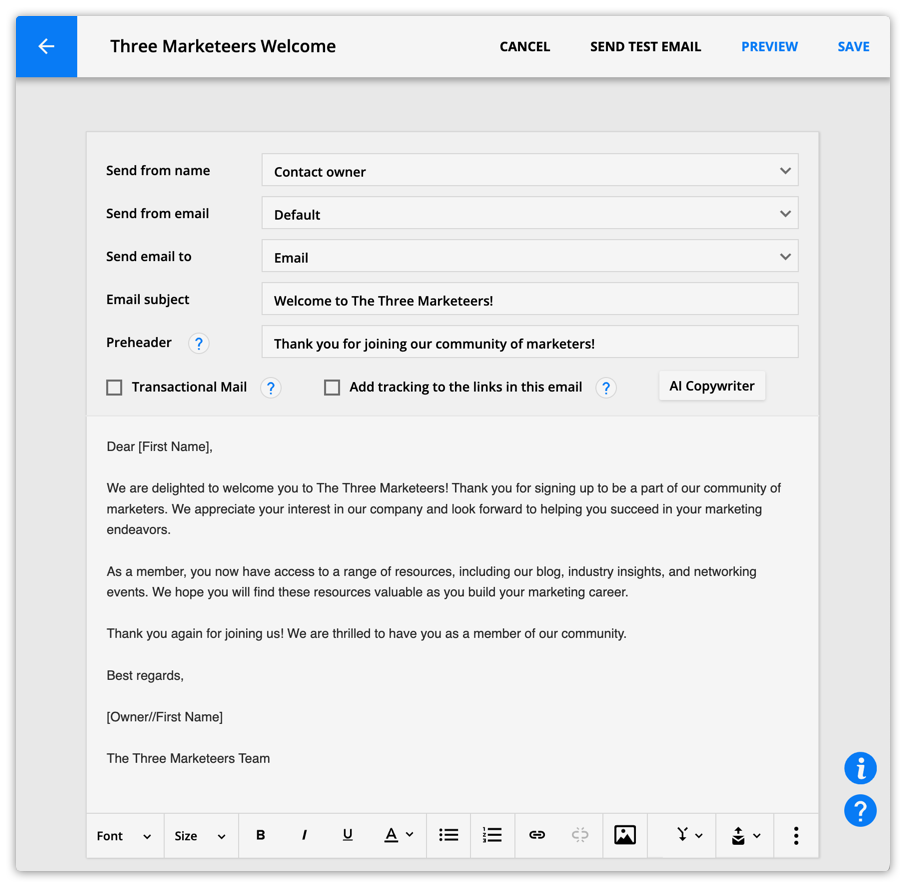
Email settings
Back to top
In Simple Mail settings at the top of the editor, you can customize sender information and the subject preheader, flag the message as transactional, and insert automatically generated UTM links..png)
The Send from field determines the send from name, email address, and reply address used for outgoing messages.
Choose from user relationships to dynamically populate sender information.. For example, if you select “Sales Rep,” the message will appear from each contact’s specific sales rep.
Or select a specific user to keep the same sender information for all sends.
When you choose the option “Custom,” you can add a custom “from” name and add any of your send from addresses as the “reply to” email address. You can also select your account's default no reply address that uses the format noreply+[account ID]@ontramail.com.
Select which related email address you want to send your message to. For example, suppose you’re sending an email from a company record. In that case, you can select the email address of a specific contact at the company or all contacts that work for the company.
Add the subject line of your message; this is what contacts will see before they open the email.
This is the text that appears after the subject line in your contacts’ inboxes, and it gives your readers more information about your email.
Transactional email is used for non-marketing emails such as confirmations and purchase receipts, messages about changes to your privacy policy, or sending login credentials to a purchased membership product. These emails are sent to contacts even if they have unsubscribed from your marketing emails. Enable this setting if your email falls into the transactional category.
Enabling this option adds UTM tracking parameters to each link in the email (available to Ontraport Pro accounts and above). All links in the email will add the same utm_campaign, utm_source, utm_medium, utm_content and utm_term to each link.
If you want to edit these links manually, keep the box unchecked.
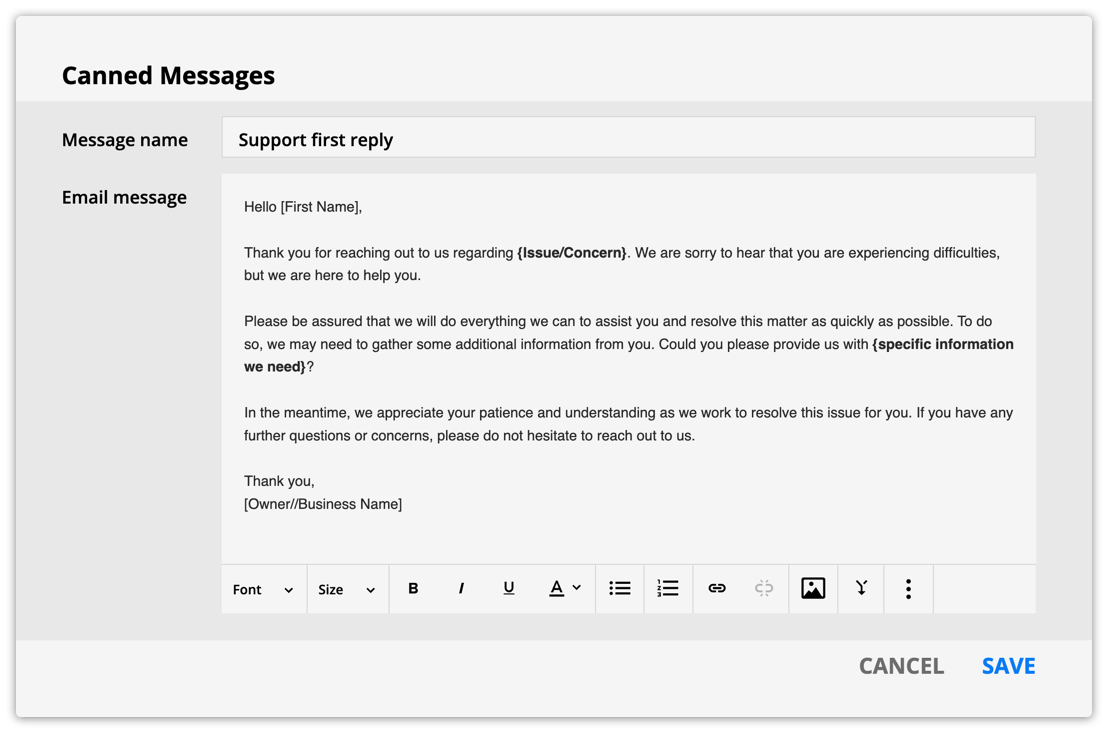
Create and use canned messages
Back to top
Canned messages are pre-formatted messages that you can quickly and easily insert into your Simple Mail messages. Here’s how to create and insert them into your messages.
Create a canned message
- Click
.png) → New canned message.
→ New canned message. - Add your message name and email message.
- Click Save.
Insert canned messages
Once you’ve saved a canned message, you can insert it into your message.
- Click and select your message from the dropdown.
Edit saved canned messages
You can edit any of your saved canned messages if you need to change their content.
- Click and hover over the message you want to edit.
- Click the pencil icon on the right of your message’s name.
- Edit your message and click Save.

Create a Quick Email
Back to top
Quick Emails use the same editor as the Simple Mail editor. The difference is that you’ll create Quick Emails when you send one-off emails. Check out this article to learn more.