This article is for those building a membership site using WordPress and PilotPress. If you're using Ontraport Membership Sites, click here. If you're getting started and don't know which to choose, this article will help.
If you have a membership site, inevitably you’ll have members who forget or lose their passwords. This article shows you how to send your members a password reminder email.
This custom password reminder is best for sites that don’t need a high level of security. Do not use this automation if your membership site contains any private information.
In those cases, we recommend using the default WordPress “Lost Password?” process. WordPress allows your members to reset their password, which is more secure than sending a password reminder. However, this option doesn’t allow you to send a branded email from Ontraport.
To use this functionality, add a login form and use the default style. Or if you customize your form, keep the “Forgotten Password” setting on.
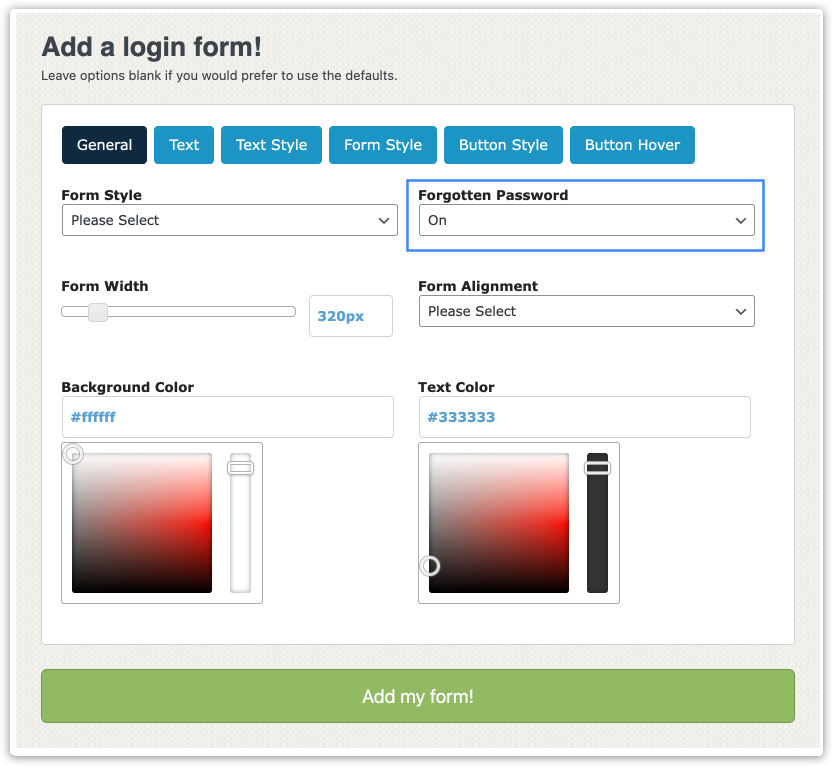
Table of contents
Part 1: Create a new login page on your WordPress site
Part 2: Create a password reminder form
Part 3: Add the password reminder form to WordPress
Part 4: Create a password reminder/forgotten password autoamtion map
Part 5: Test your password reminder automation
Before you can create your automation map and password reminder email to your members, you’ll create a new login page on your WordPress site. Within the login page, you’ll add a link that says “Forgot password?” that leads to a pop-up form. Once submitted, your pop-up form will prompt your automated password reminder email to the member.
Part 1: Create a new login page on your WordPress site
- Log in to your WordPress site as the admin.
- Select an existing WordPress page or create a new page.
- Add a classic block and add a custom login form by clicking
 → Customize it!
 - In the General settings, select “Off” in the “Forgotten Password” dropdown.
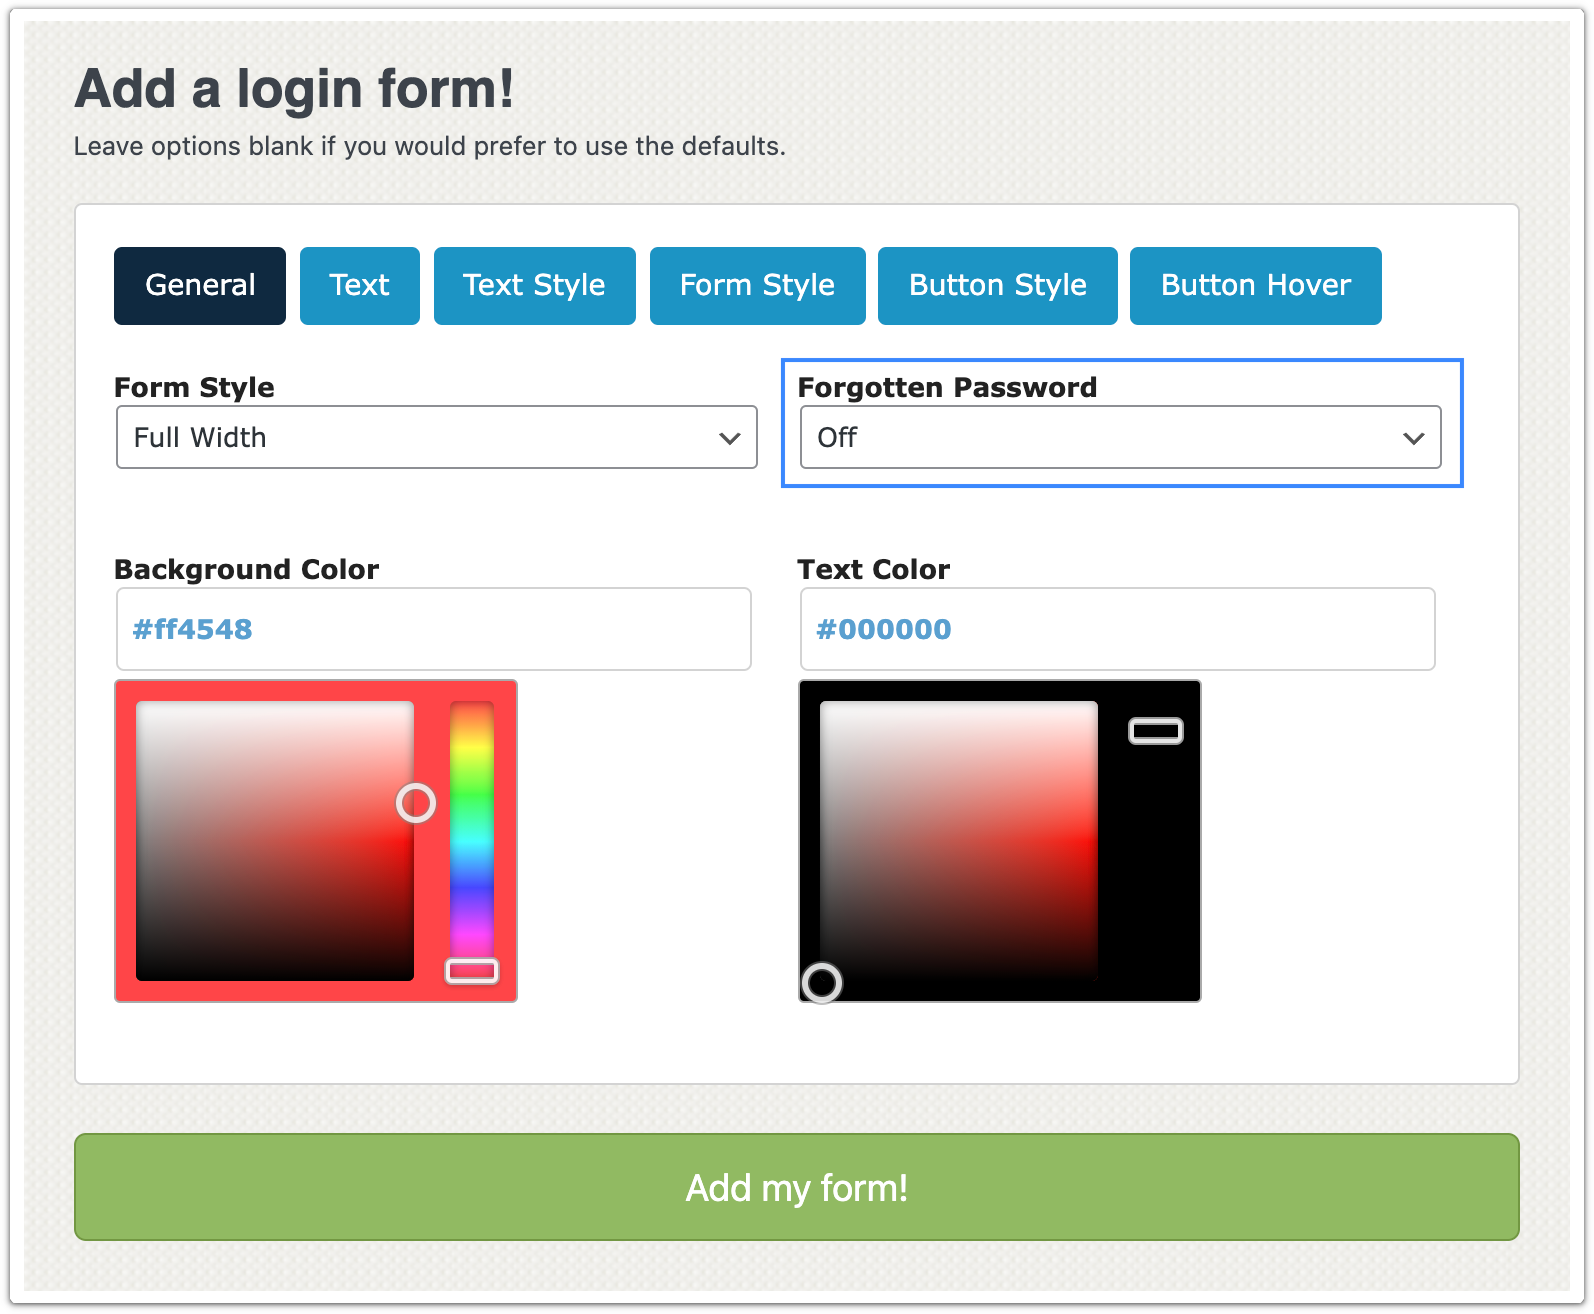
- Click Add my form! and save the changes to your page.
Part 2: Create a password reminder form
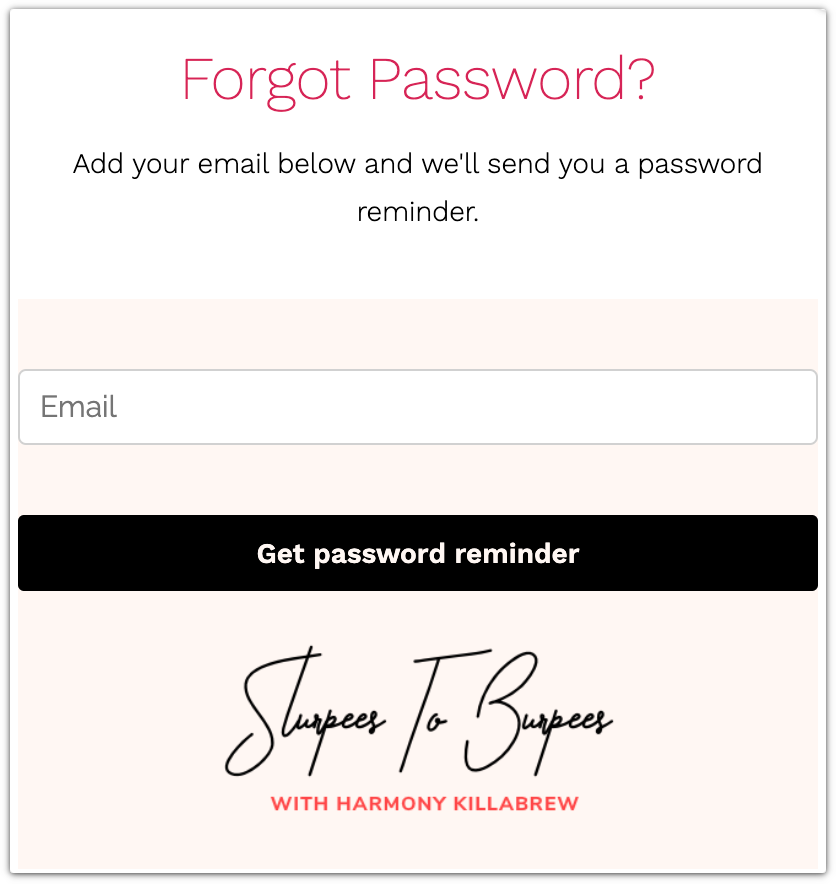
When your members click “Forgot password?” on your login page, this form will pop up and your members will fill it out in order to receive their password reminder email. You’ll create the form in Ontraport, then add it to your login page in WordPress.
- Create a new Ontraport Form.
- We recommend naming it “Password Reminder [Site Name].”
- Include only an email field and make it required.
- Edit the “Submit” button to say “Get password reminder.”
- Edit your form settings.
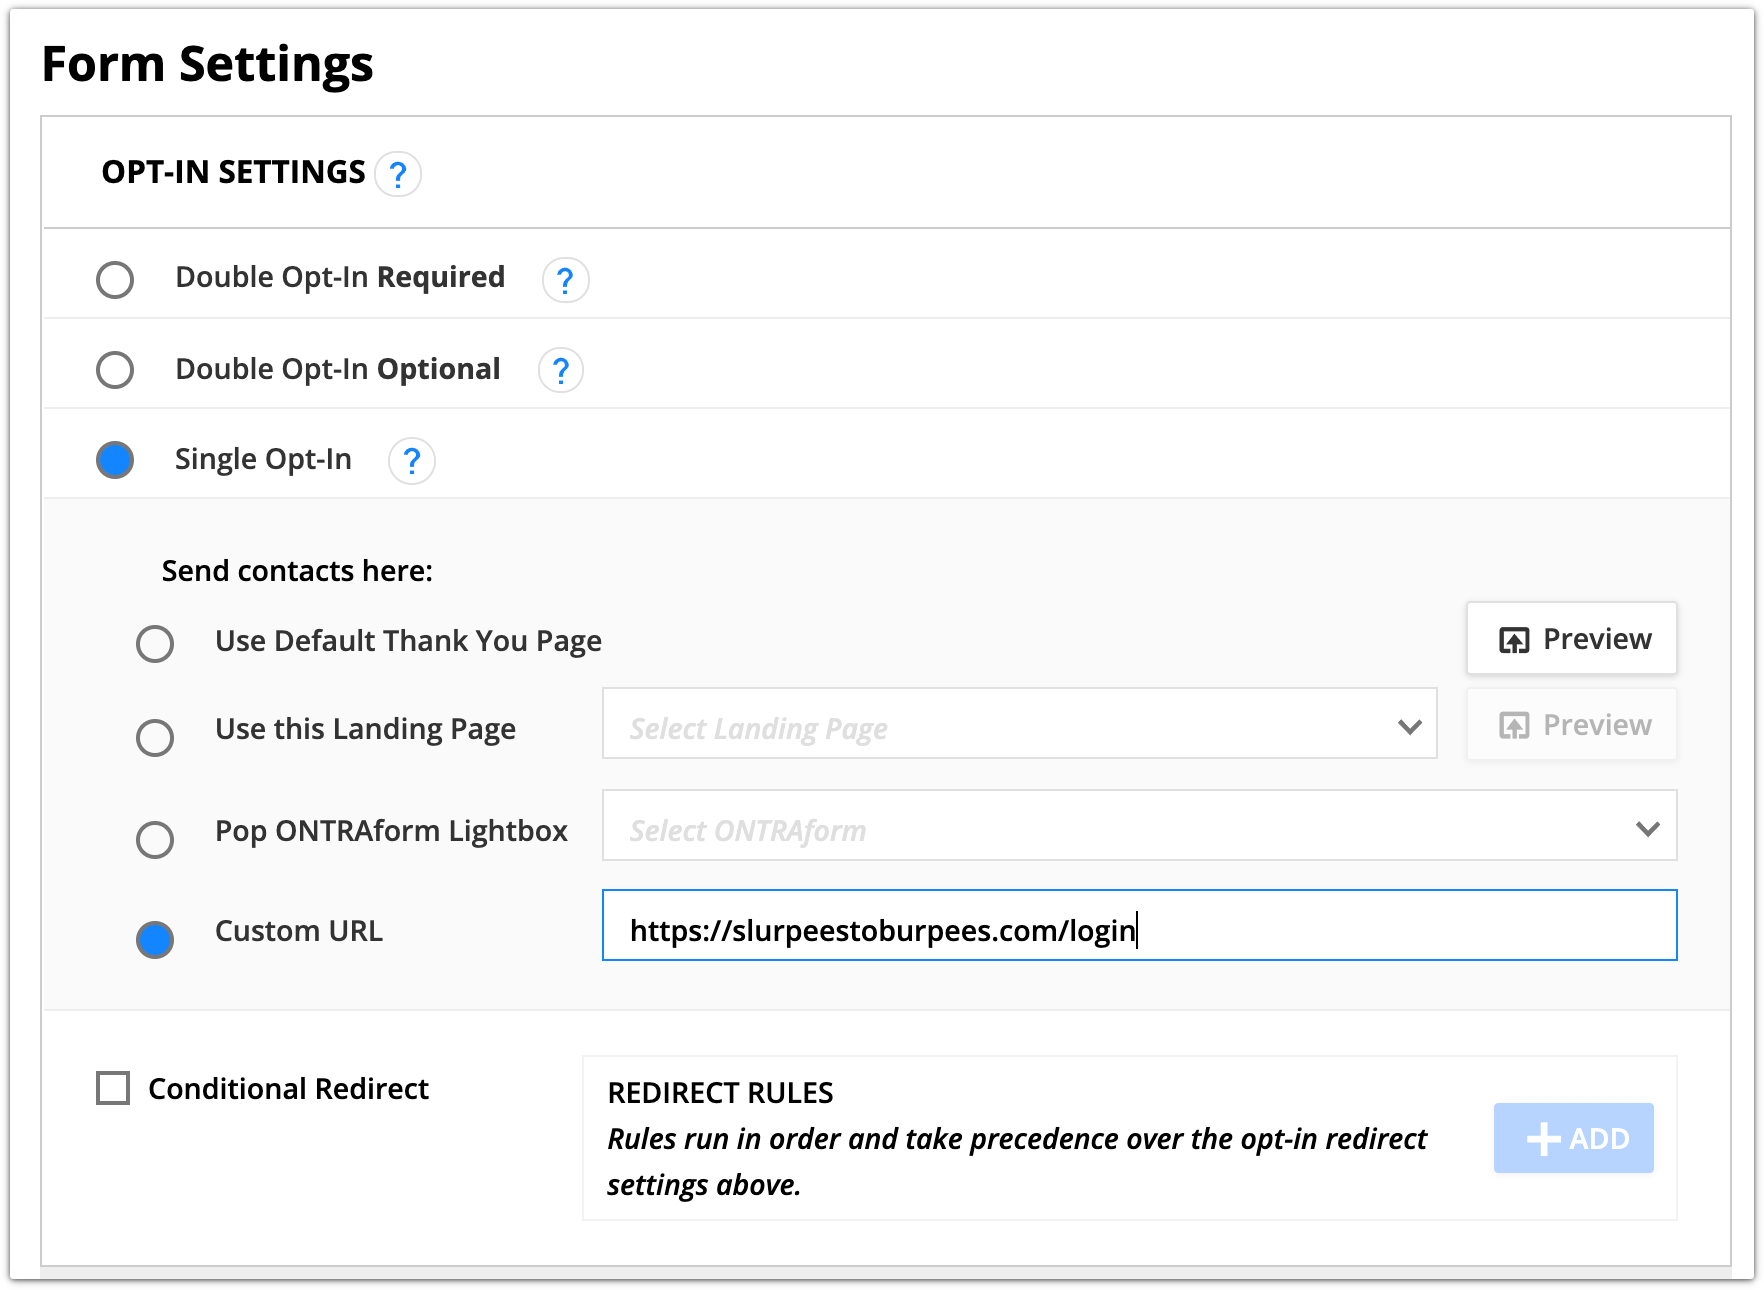
- Set the opt-in settings to “Single Opt-in.”
- Set the “Send Contacts Here” to “Custom URL,” and enter the URL to your custom login page.
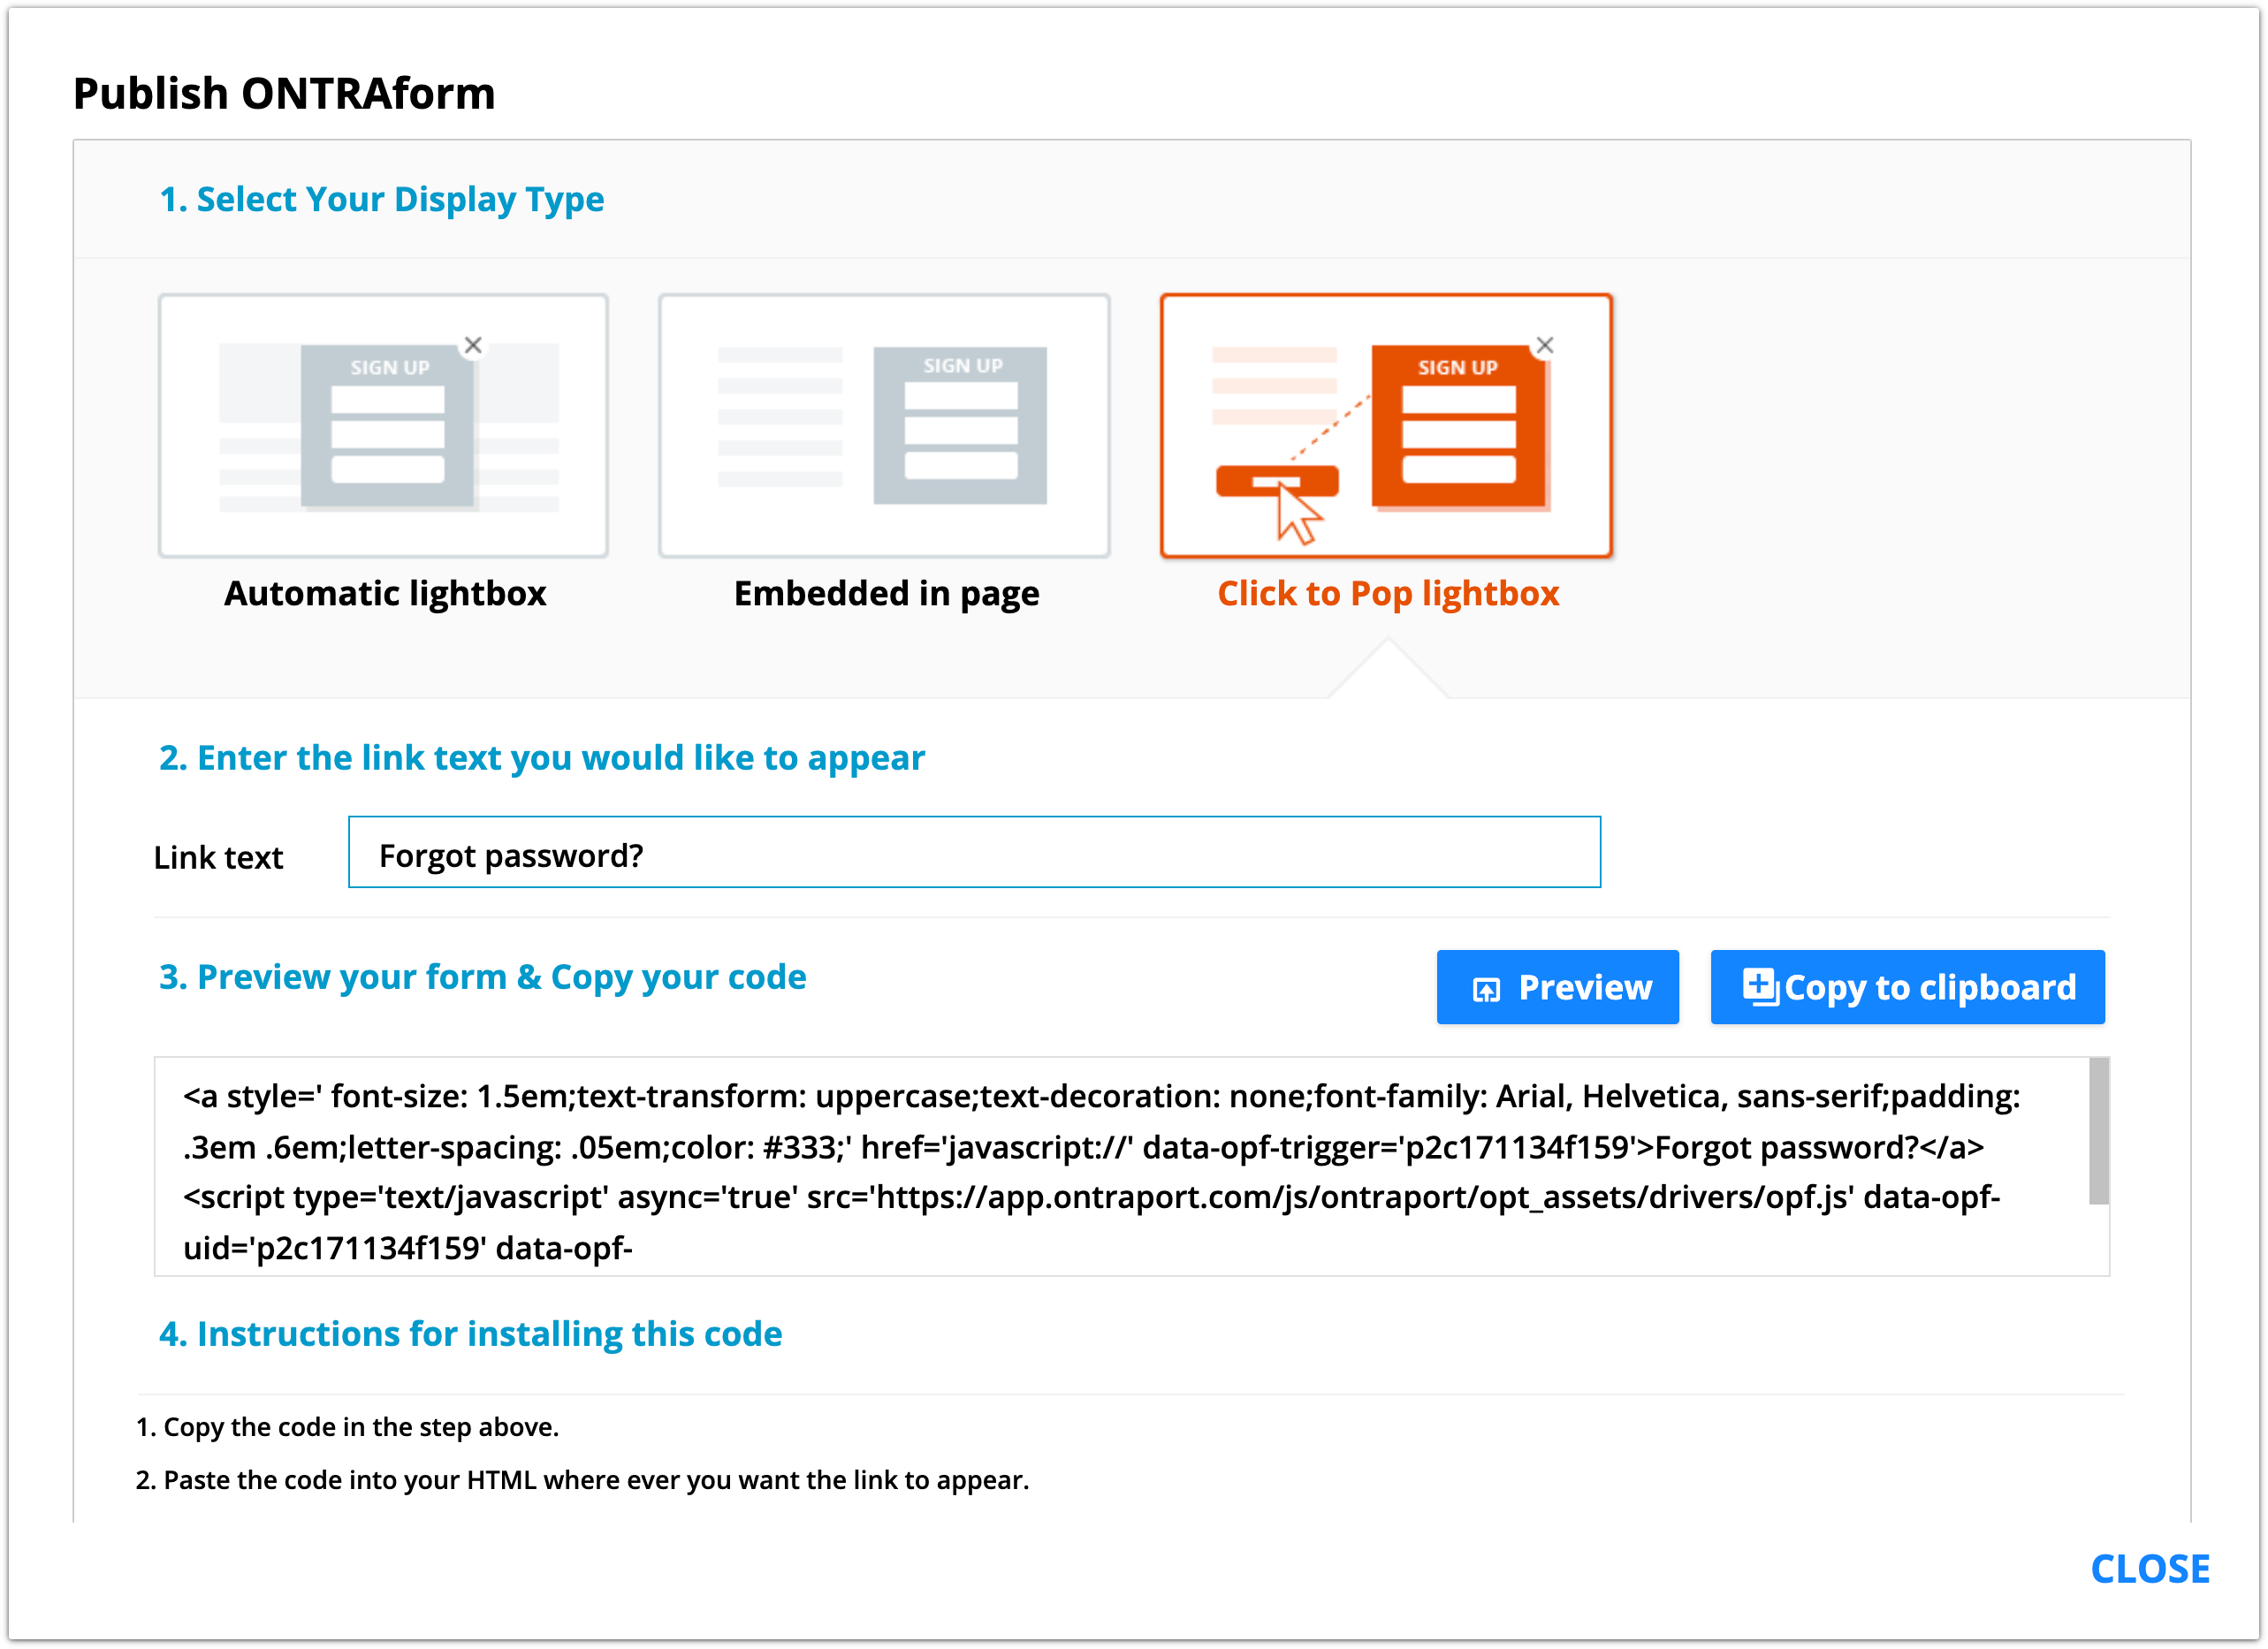
- Publish your form as a “Click to-pop lightbox.”
- Edit the link text to say “Forgot password?”
Part 3: Add the password reminder form to WordPress
- In WordPress, open your custom login page for editing.
- Add a “Custom HTML” block below your login form.
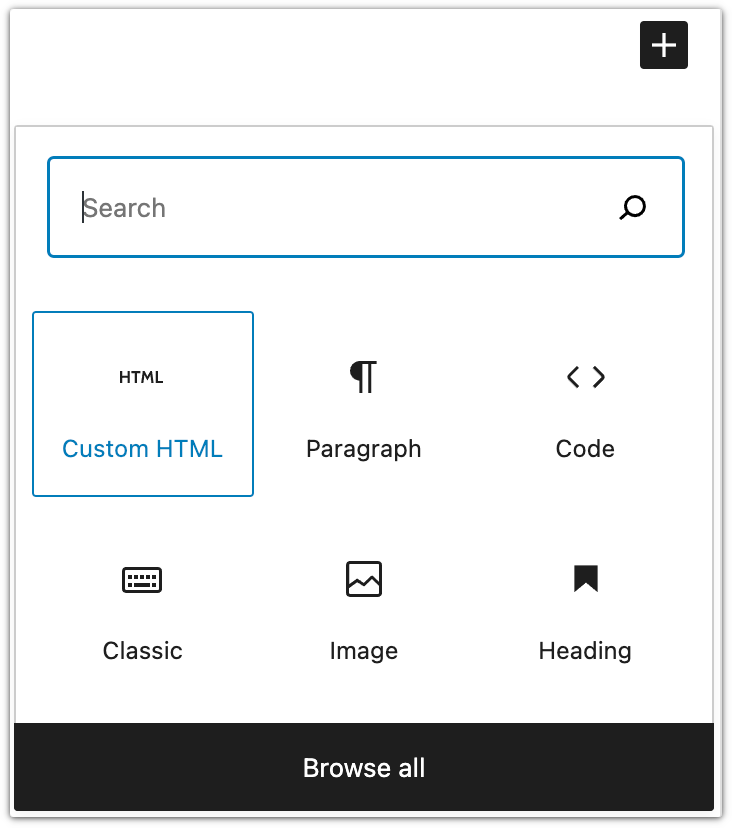
- Paste the form code (from Part 2, step 3) in your custom HTML block.
- You can click the preview button on that element to check that you copied your code correctly.

- Click Publish to update your page.
Part 4: Create a password reminder/forgotten password automation map
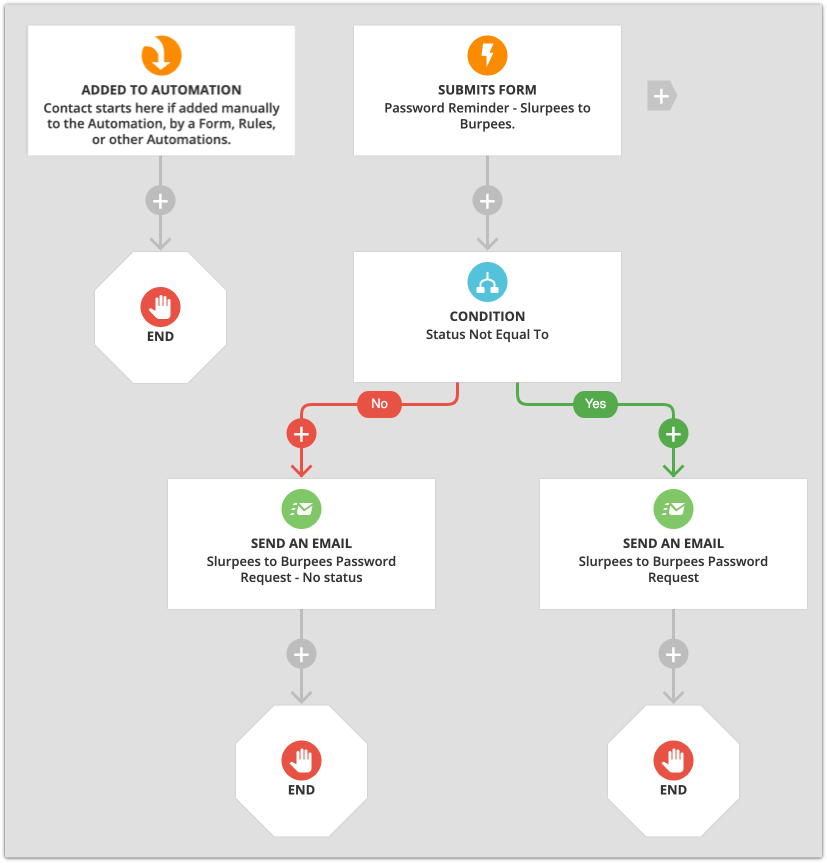
Now that you’ve created your password reminder form and have added it to your login page in WordPress, it’s time to create an automation map that will send members an email with their password when they fill out your form.
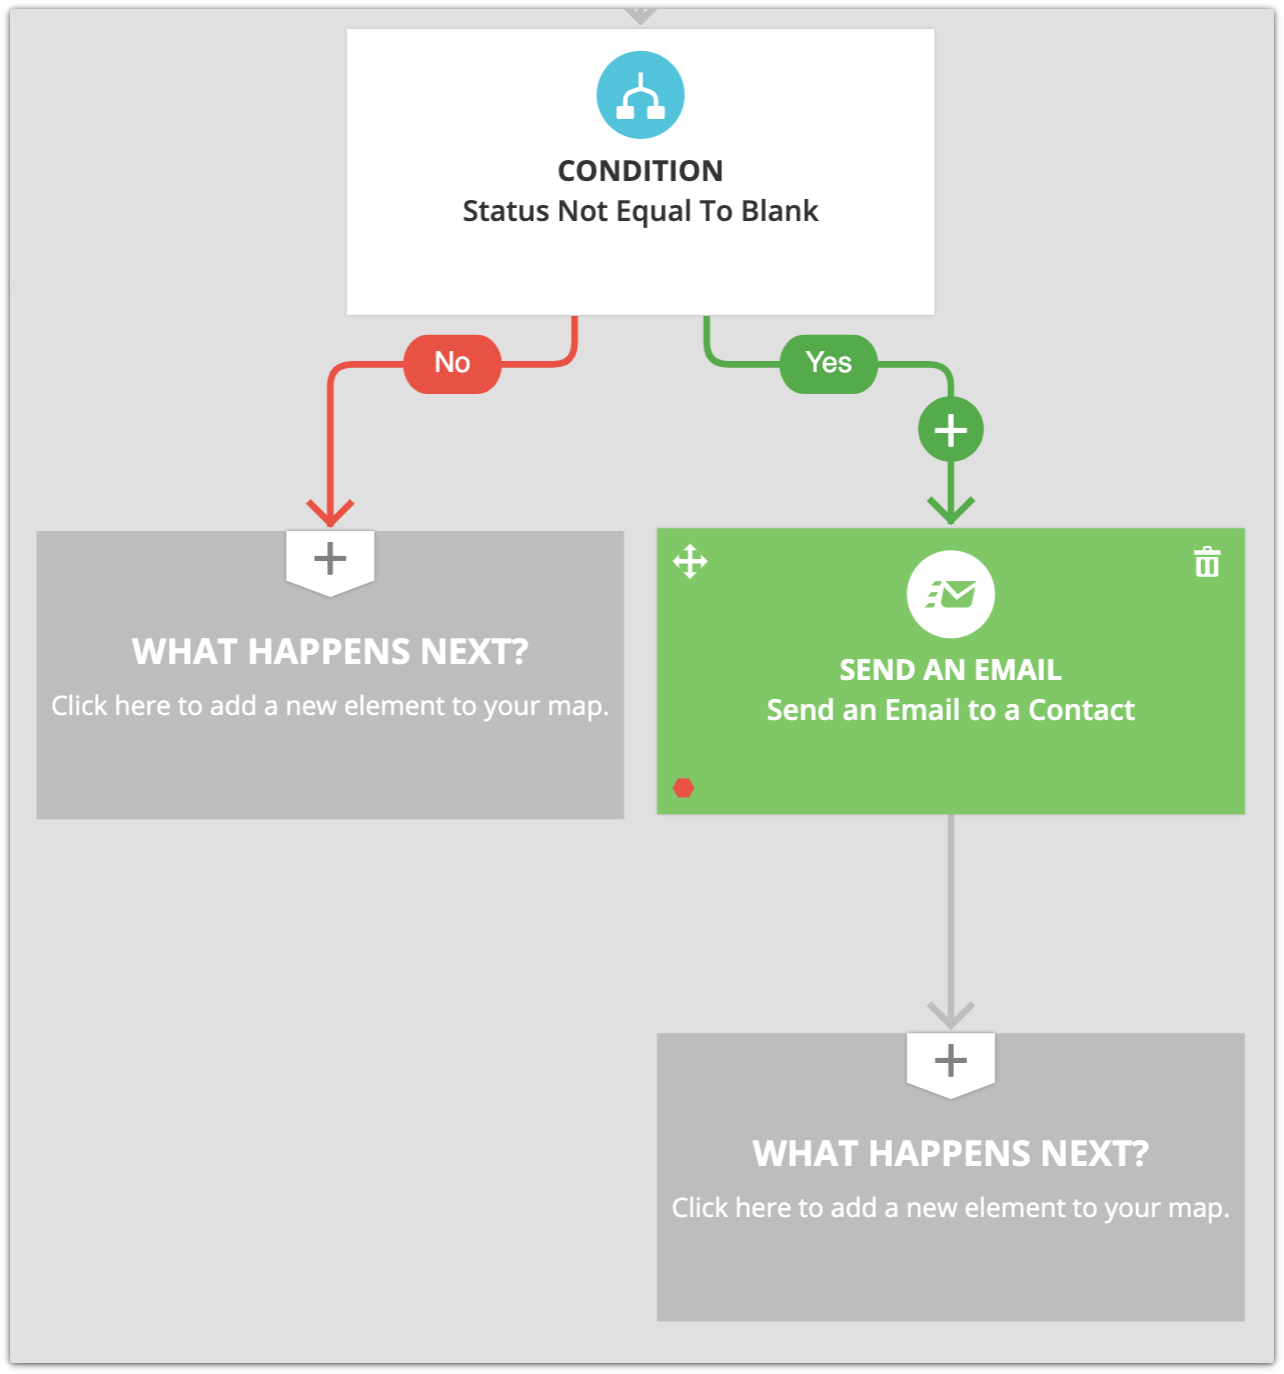
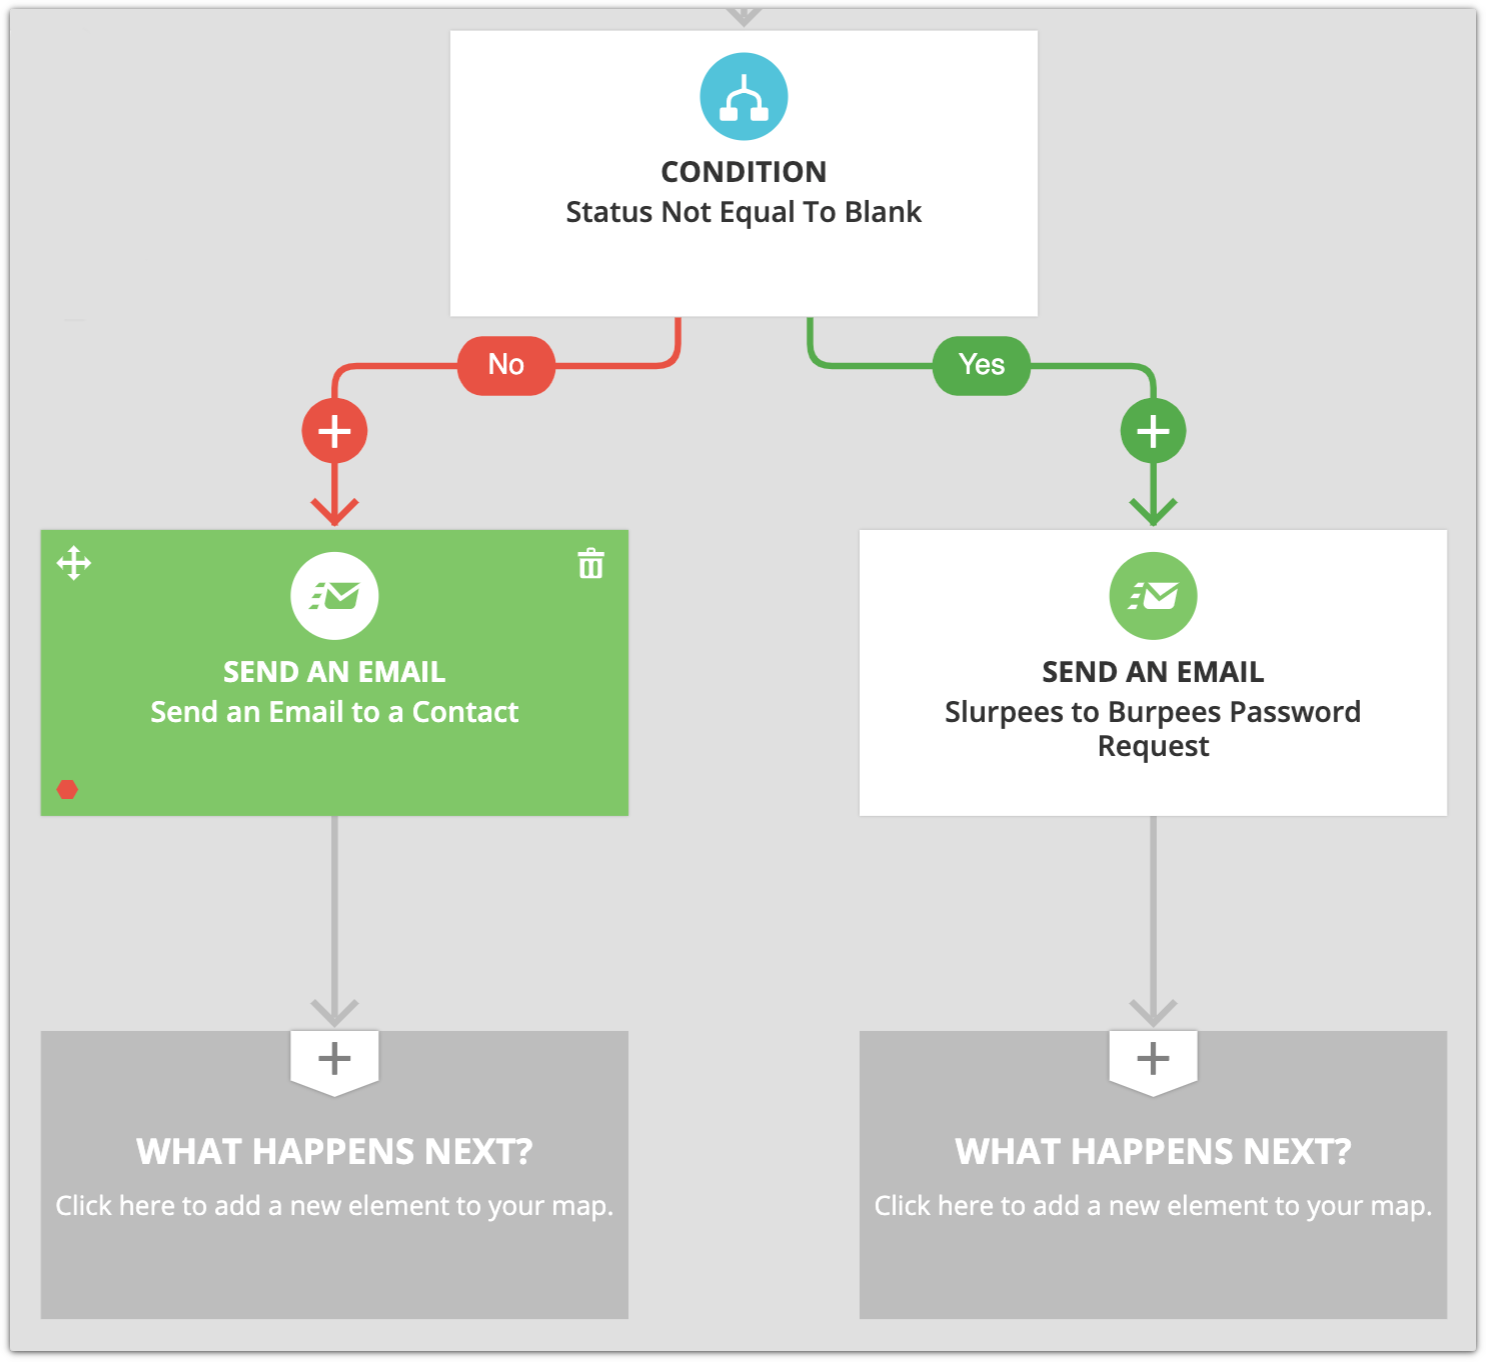
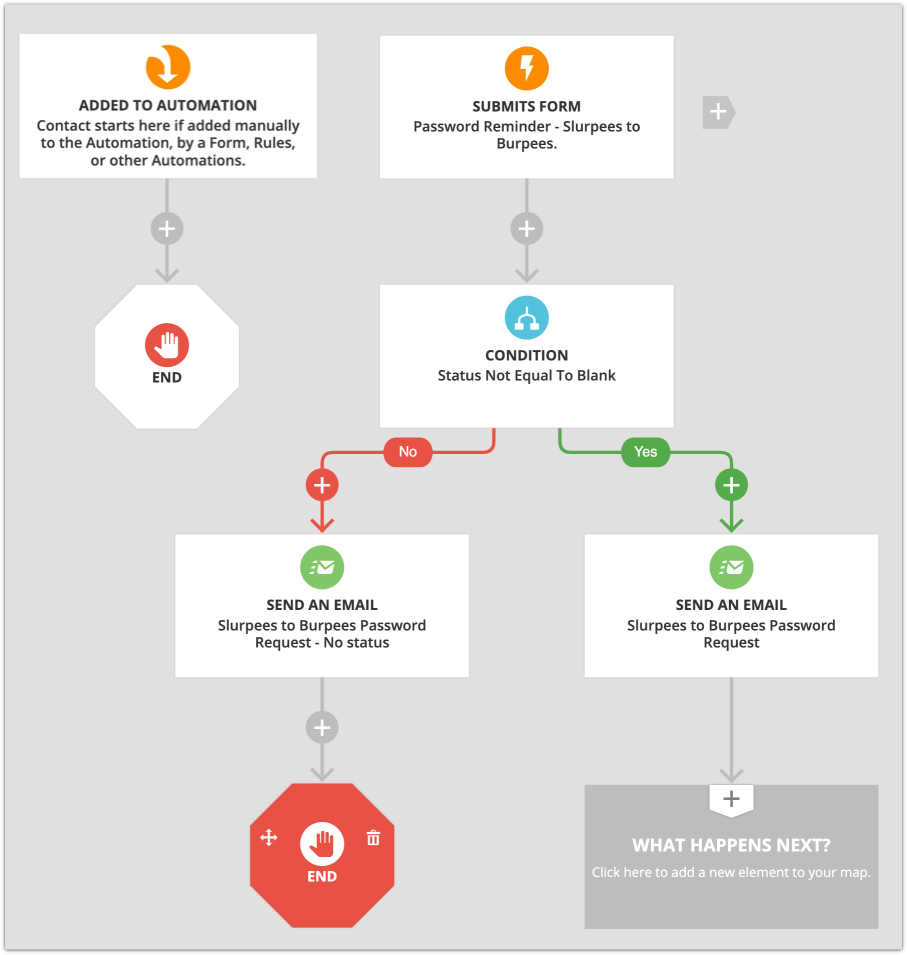
This is what your map will look like:
- Go to Automations → New Automation or open an existing one.
- If you have Deals, Companies or Custom Objects enabled, go to Contacts → Automations.
- Add the form you created in part 2 as a trigger on this map. Click
.png) → Add Trigger → “Contact Submits a Form” and select your form from the “Contact submits” dropdown.
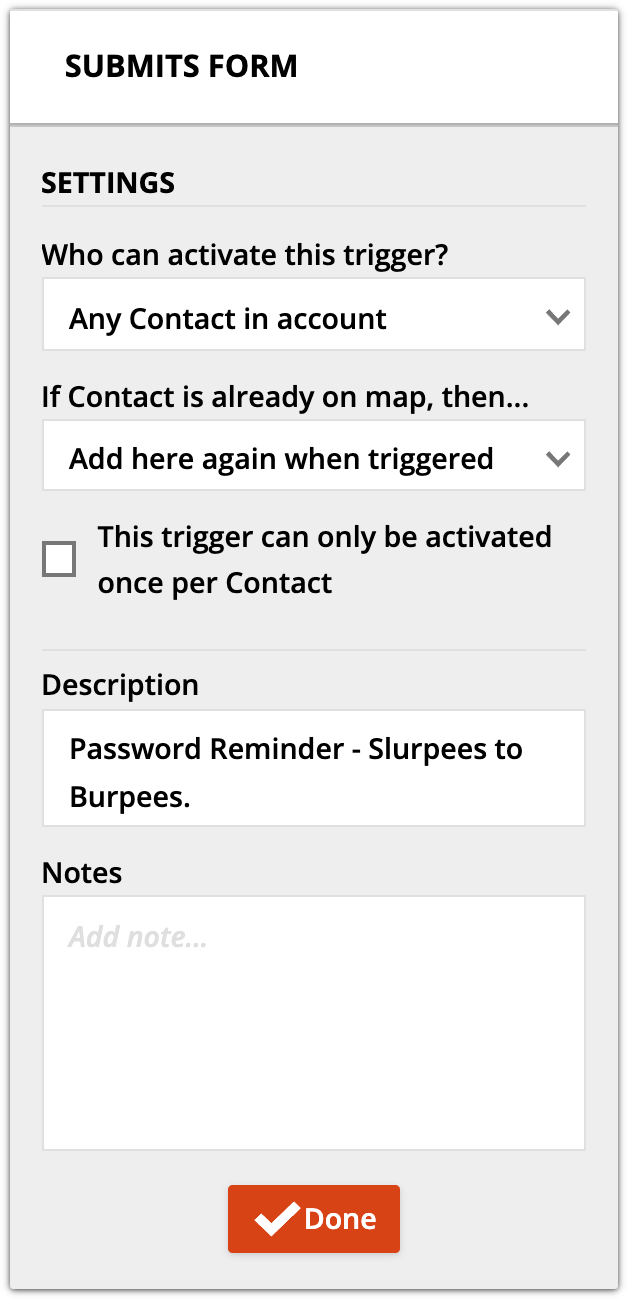
→ Add Trigger → “Contact Submits a Form” and select your form from the “Contact submits” dropdown.- Adjust the trigger settings:
- Who can activate this trigger?: Any contact in account.
- If contact is already on map: Add here again when triggered.
- This trigger can only be activated once per contact: Leave unchecked.
- Click Done.
- Adjust the trigger settings:
- Click What Happens Next? under the trigger, and add a Condition element.
- Click the condition to open its settings, then click Add Condition and select “Field is this value.”
- In the “Select field” dropdown, find Website Subscribers > [Site Name] > Status.
- In the “Select condition” dropdown, select “Not equal to.”
- Leave the “Select value” dropdown blank.
- Under the Yes path of the condition, click What Happens Next? and add a Send an Email element.
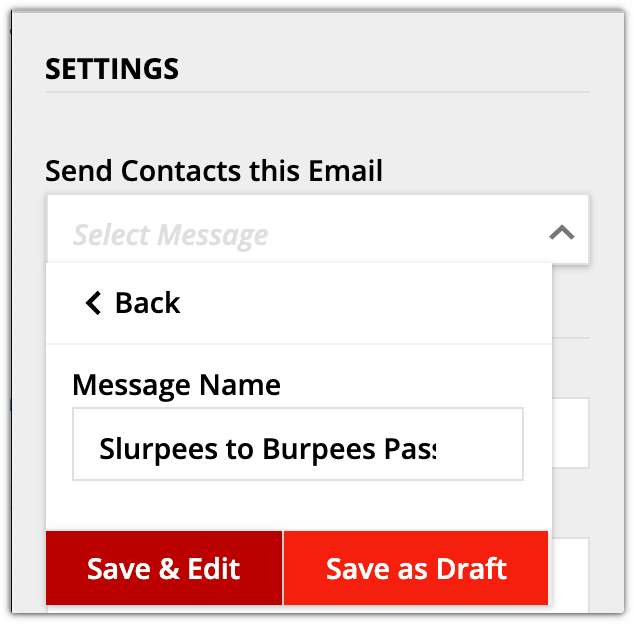
- Click the Send an Email element to open the settings and select + New Message from the “Send contacts this email” dropdown.
- Name your message and click Save & Edit.
- Edit your message and be sure to add the merge field for your site’s password.
- (Optional) You can also add the “Username” merge field to remind your members what name to sign in with.
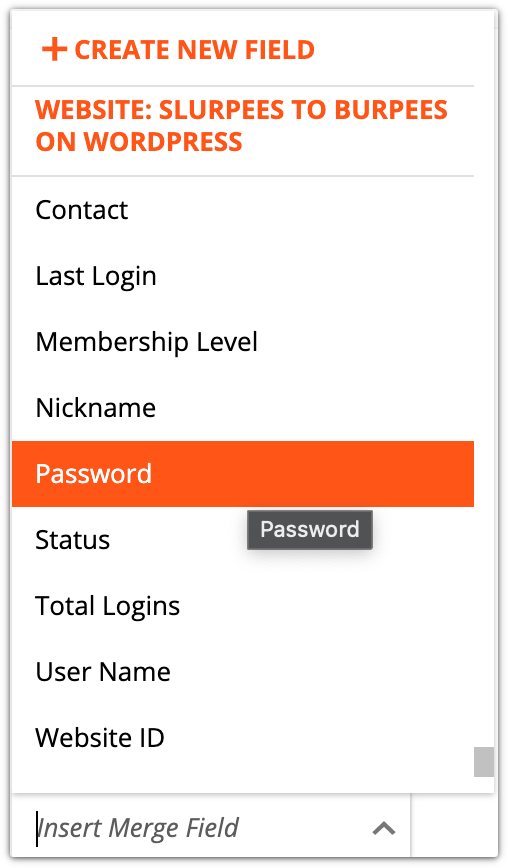
Your password merge field will look like this:
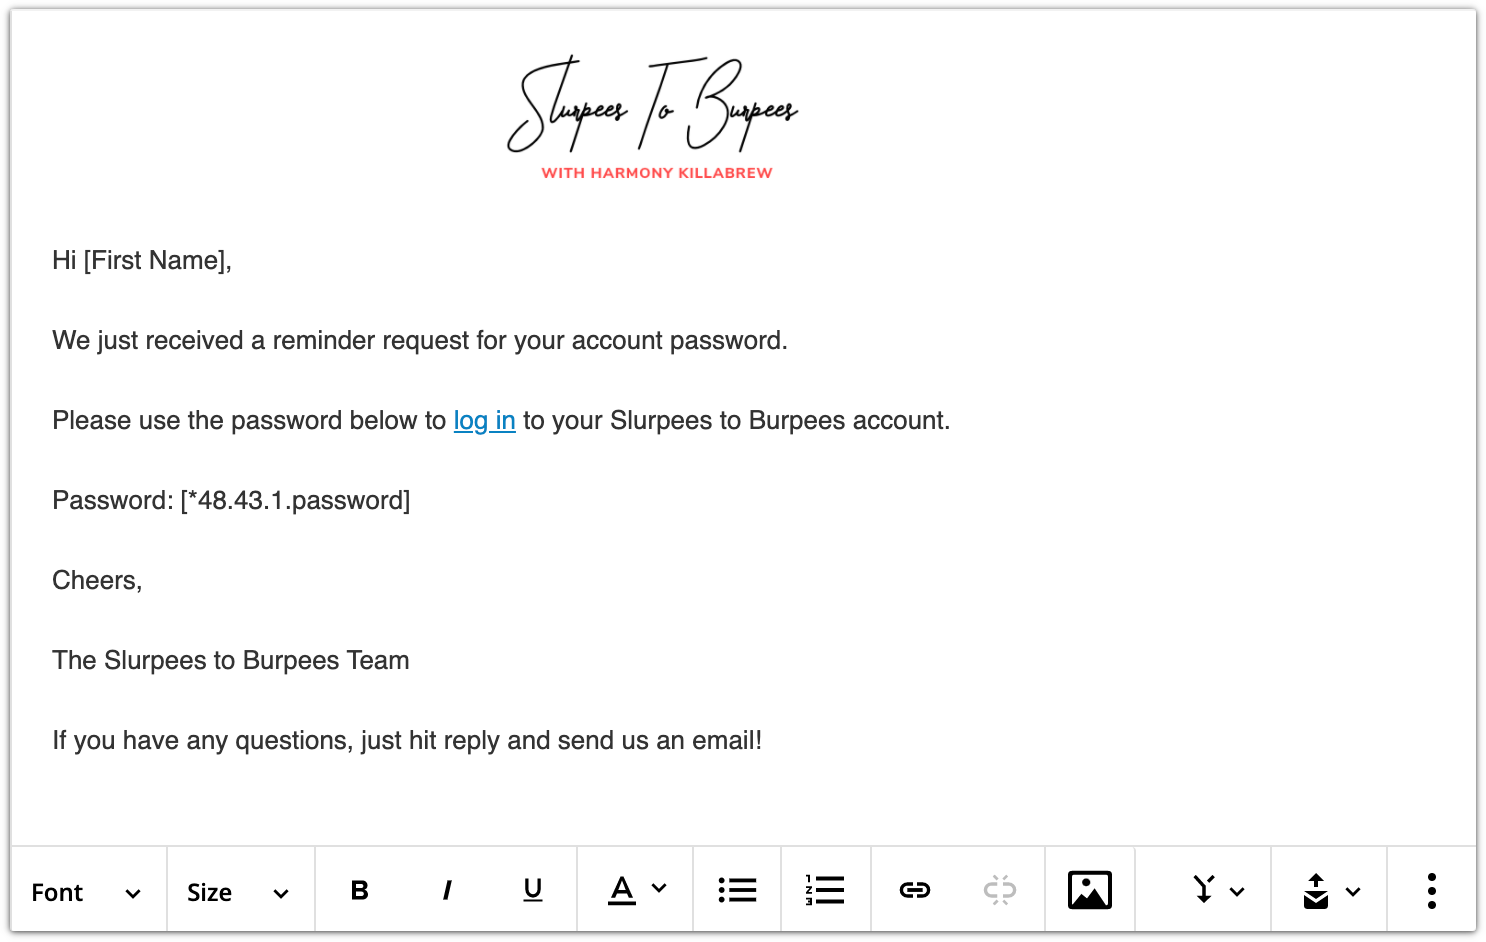
- Click Save to return to your map.
- Under the No path of the condition, click What Happens Next? and add a Send an Email element.
- Click the Send an Email element to open the settings and select + New Message from the send contacts this email dropdown.
- Name your message and click Save & Edit.
- Edit your message to inform users they are not currently a member and, therefore, cannot receive a password.
- Click Save to return to your map.
- Add End elements to all remaining What Happens Next? elements.
Part 5: Test your password reminder automation
To ensure that your password reminder automation is working correctly, it’s a good idea to test. Here’s how:
- Create a test contact with your own email address.
- Give that contact access to your membership site.
- Then go to your WordPress login page and click the “Forgot password?” button you added under your form.
- Add your email address to your form and request a password reminder.
- Make sure this is the same address that you used for your test contact.
- You can immediately check your map’s performance mode to see if your contact was added to your automation, and your email lands in your inbox in a few minutes.
If your test doesn’t produce the password reminder, here are some basic troubleshooting ideas:
Your contact wasn’t added to your map
The most common reason your contact wouldn’t be added is that your trigger and its settings are set up incorrectly.
- Check your trigger and ensure that you have the correct form selected, and there aren’t any conditions set up that would exclude your test contact.
- We don’t recommend that you include any conditions on your trigger. The point of the condition under your trigger is to ensure that everyone who fills out your form gets a reply — even if they aren’t actually a member.
- Click
 next to the condition and publish your automation map.
 - Check your trigger settings and make sure they look like this:

You didn’t receive an email
There are a few things that could be happening if you saw that your contact was added to the automation, but you didn’t receive an email.
- Check your test contact’s email address.
- Make sure that your email address is correct and there are no typos.
- Check your test contact’s bulk email status.
- Look in your contact’s Lead Information section to see if your bulk email status is set to “single opt-in” or “double opt-in.”
- If you see “transactional only” or “hard bounced,” the issue is your email address.

- Check your spam folder.
- You may have received the email but it did not get delivered to your inbox.
- For email delivery content tips, check out this article.
- You may have received the email but it did not get delivered to your inbox.
You received the “no access” email
If you got the email meant for people who don’t have access to your site, your test contact isn’t part of your membership site.
- Go to your contact’s membership tab and enable access to the correct site.
- Then repeat your testing from step 3 above.
