Universal Analytics properties will stop collecting data on July 1, 2023. If you currently use Universal Analytics, create a Google Analytics 4 (GA4) property to continue tracking. You may be able to reuse your existing Universal Analytics tagging for your GA4 property. Check out this article to learn more.
Google Analytics provides valuable insights into website traffic, user behavior, and key performance metrics. This information helps optimize your online presence and drive growth.
Once set up, you can see which Google Ads are converting, and you’ll gain valuable sales insights such as your average order value and the sales cycle length.
Add the Google Analytics tracking code to your landing pages so you can collect information about your web traffic. From your Google Analytics account, you can see the number of visitors to your page, where your traffic is coming from and more. All account levels can set up a basic integration with Google Analytics.
Higher Ontraport account levels allow you to set up deep funnel conversion tracking with Google. This integration sends contact data to Google Analytics based on mid and deep-funnel conversion data.
Check out our pricing page for more information.
This article walks you through setting up Google Analytics tracking on your site. And it shows you how to customize the prebuilt automation map to send your deep funnel conversion data to Google.
Table of contents
Set up your Google Analytics Account
• Install your Google tag
Add deep funnel conversion tracking
• Enable advanced Google tracking fields
• Set up your conversion events in Google Analytics
• Collect information to fill in your automation map
• Customize your prebuilt automation map
• Send specific product information
Enable Google Ecommerce Tracking
• Create a property
• Set up your Ontraport order forms
• Set up your thank you page
Set up your Google Analytics Account
- Sign in to your Gmail account.
- If you don’t already have one, sign up for one here.
- Click here to go to Google Analytics.
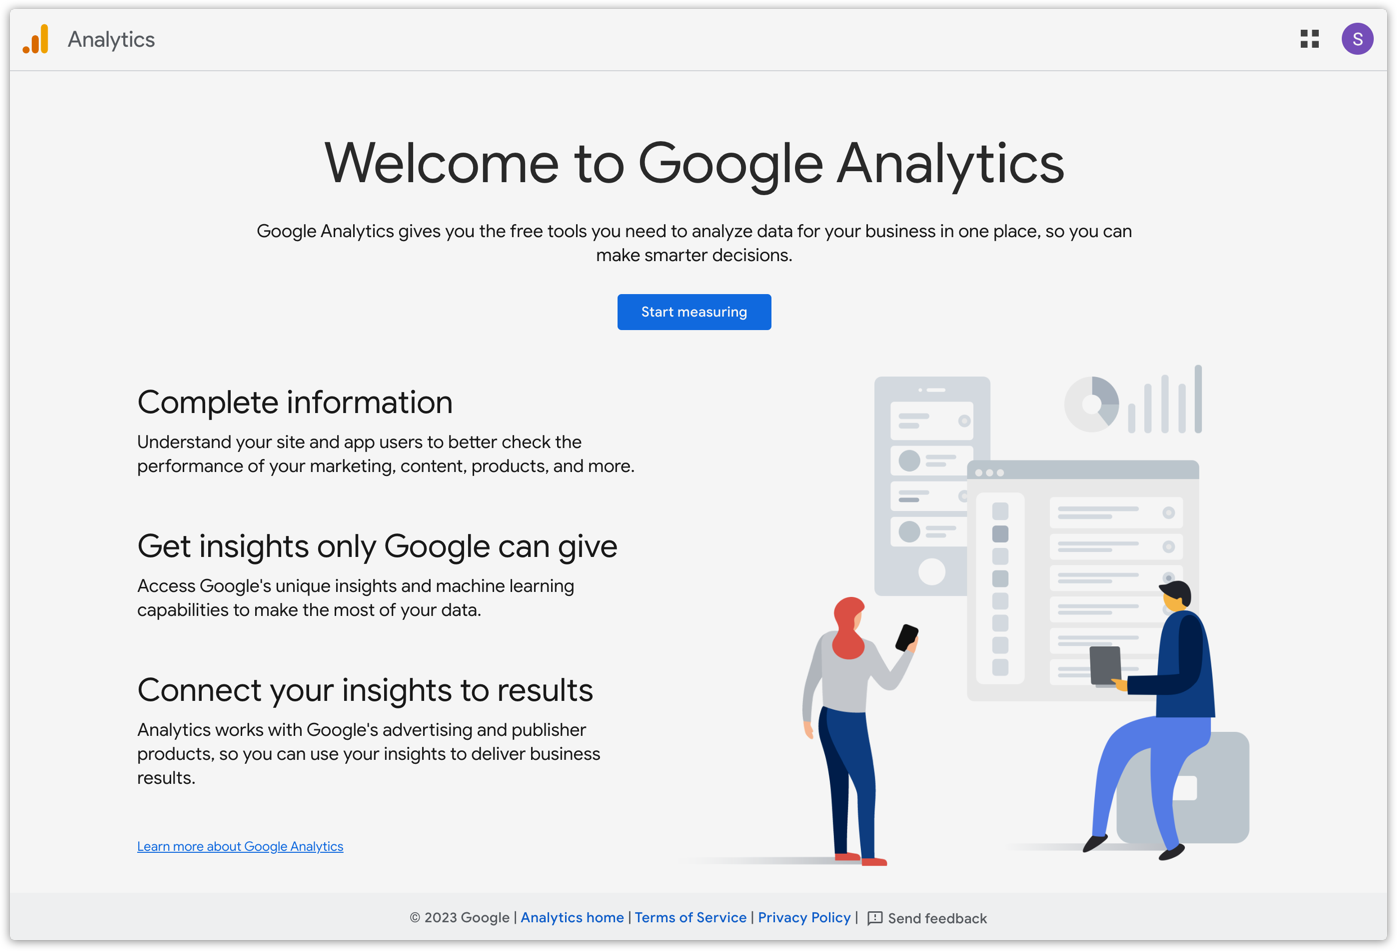
- Click Start measuring.
- Add your account name and customize your account data sharing settings.
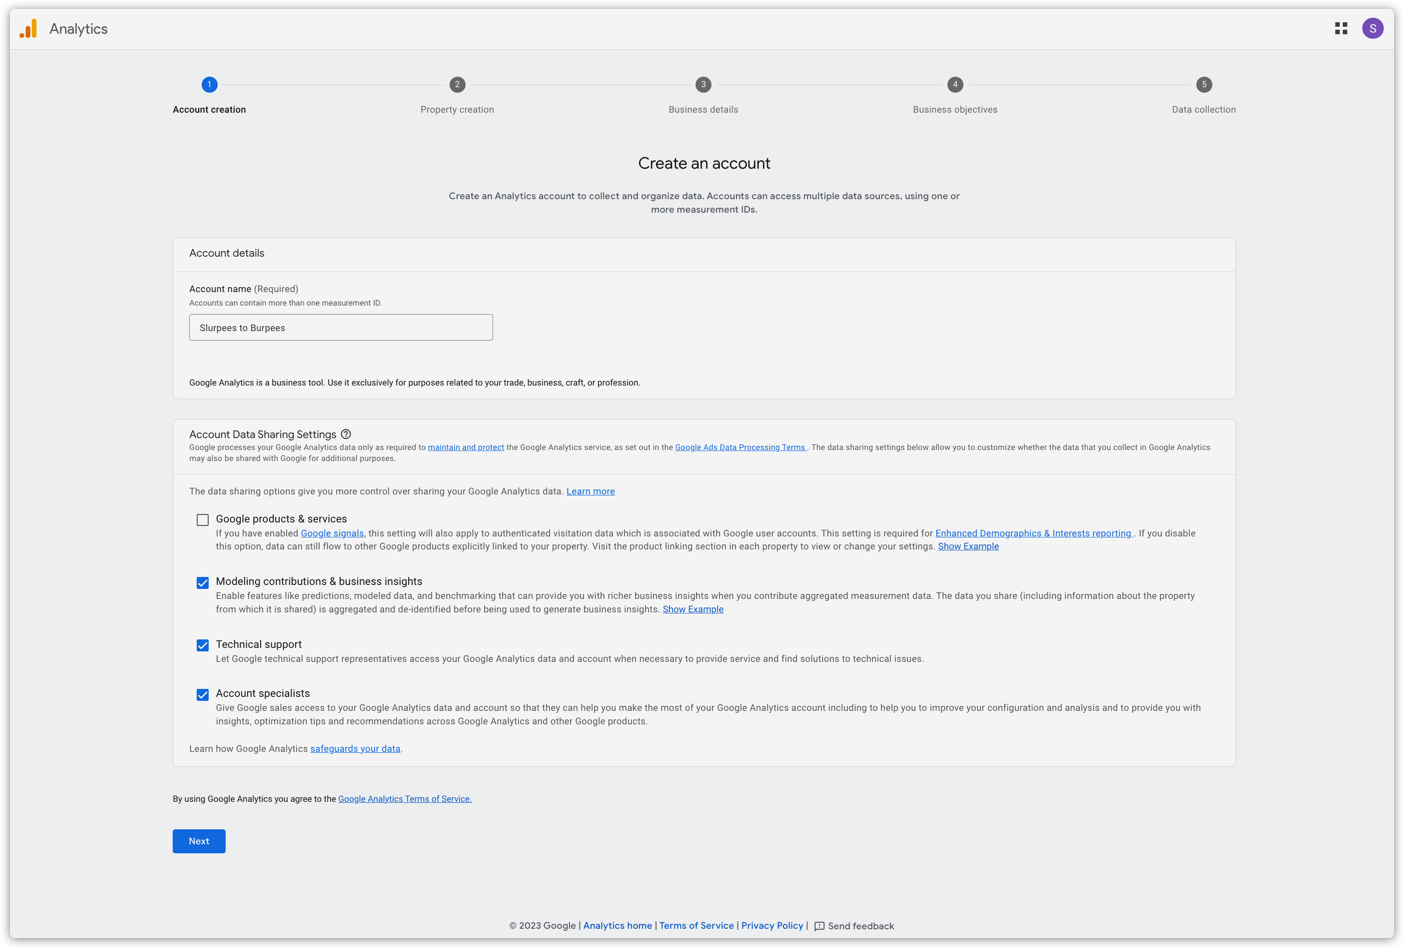
- Click Next.
- Create a property. Think of the property as a website or app. You can set up more than one property if you want to integrate multiple sites.

- Add your property name.
- Choose your reporting time zone.
- Select your currency.
- Click Next.
- Describe your business. Select your industry and business size.
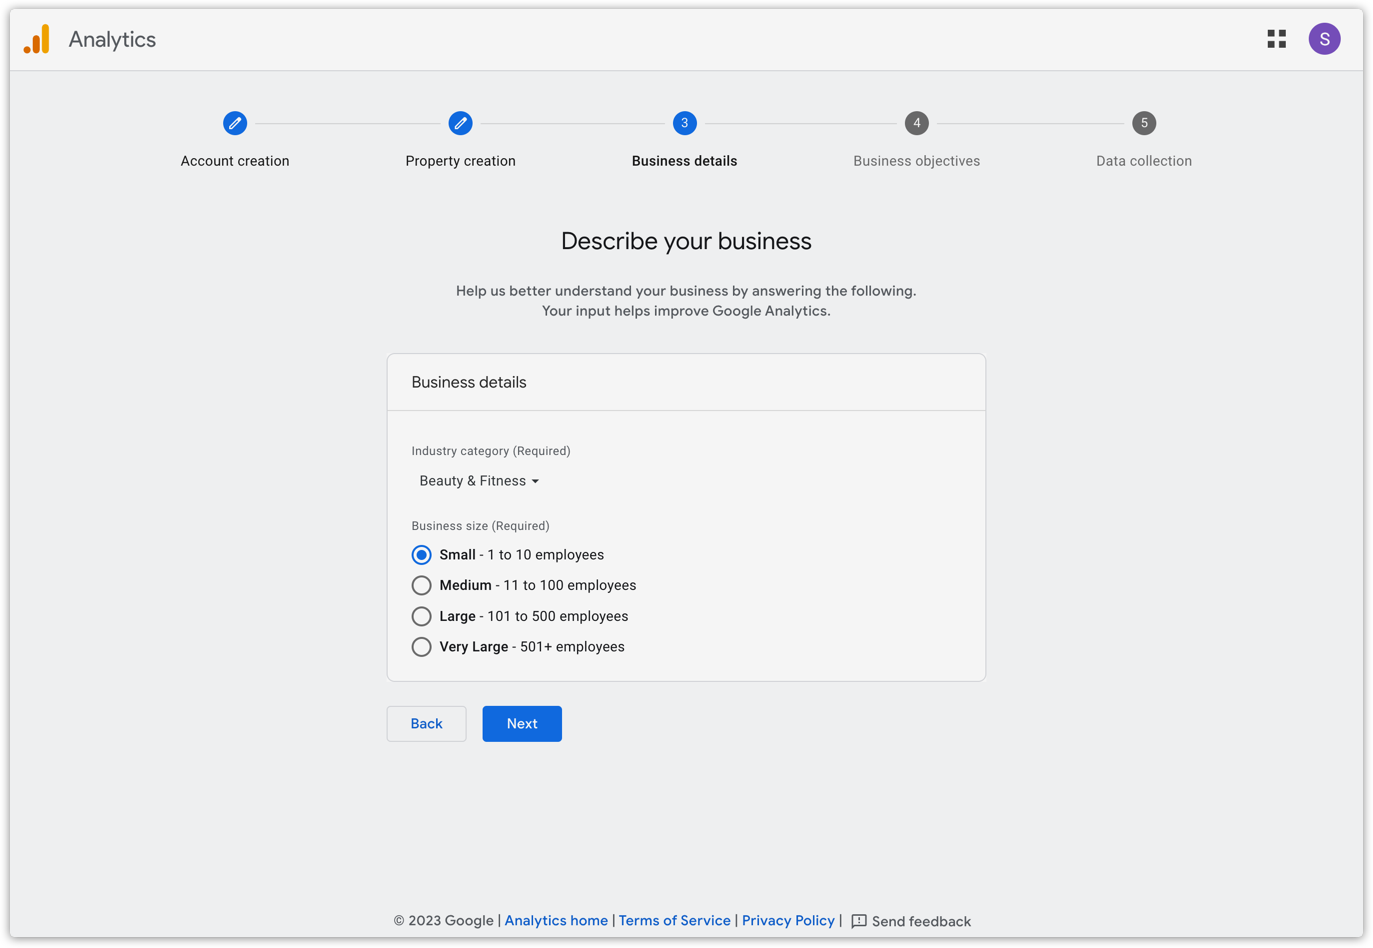
- Click Next.
- Select your business objectives.
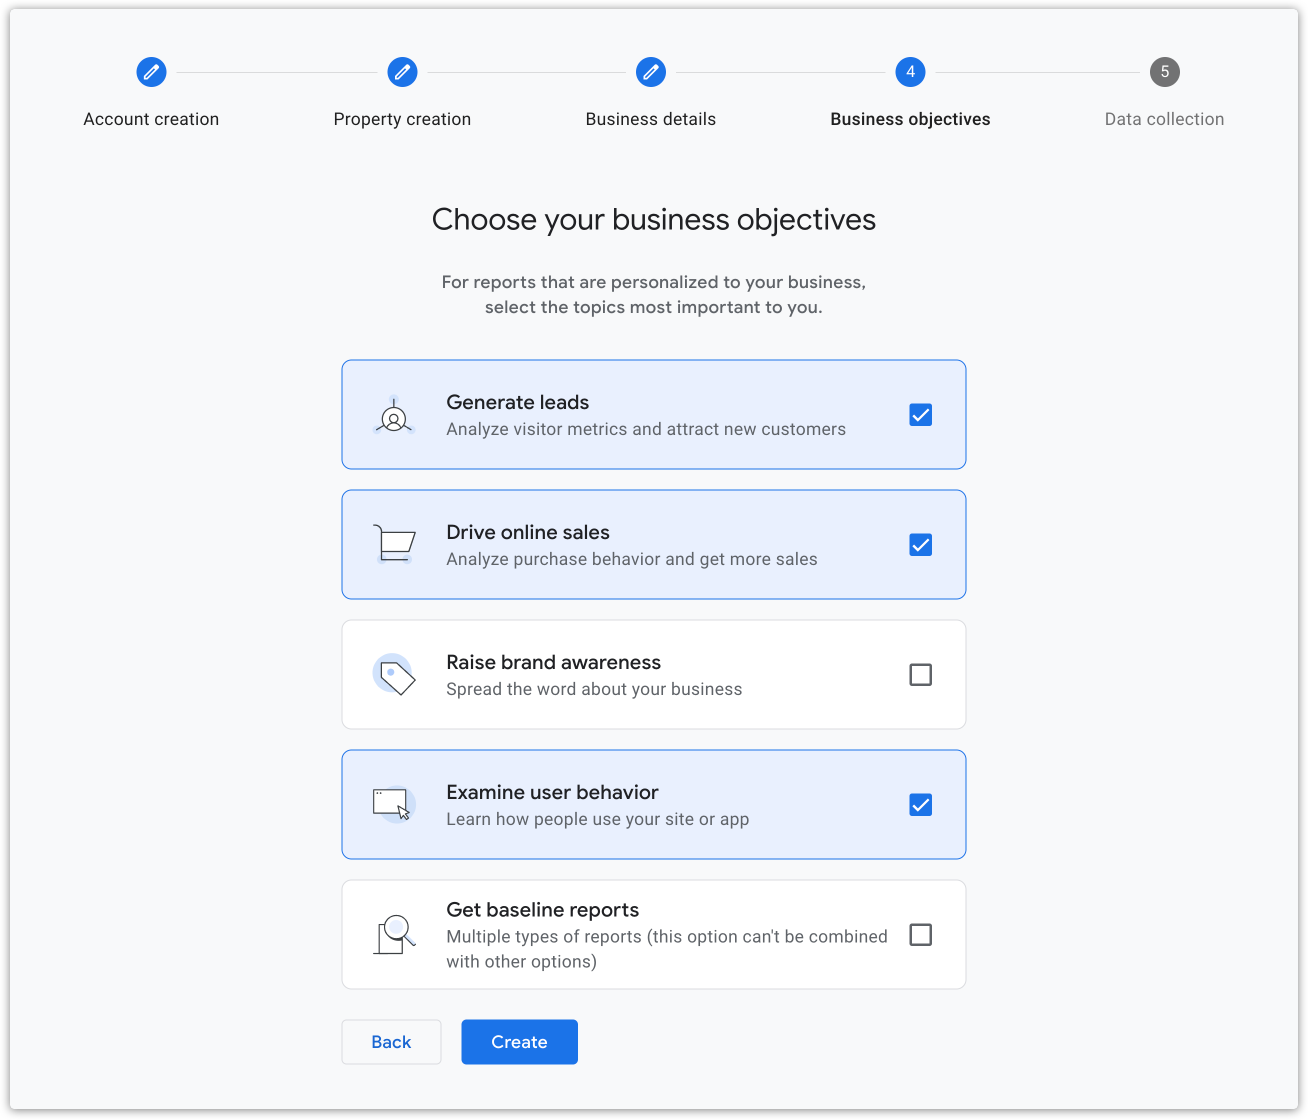
- Click Create.
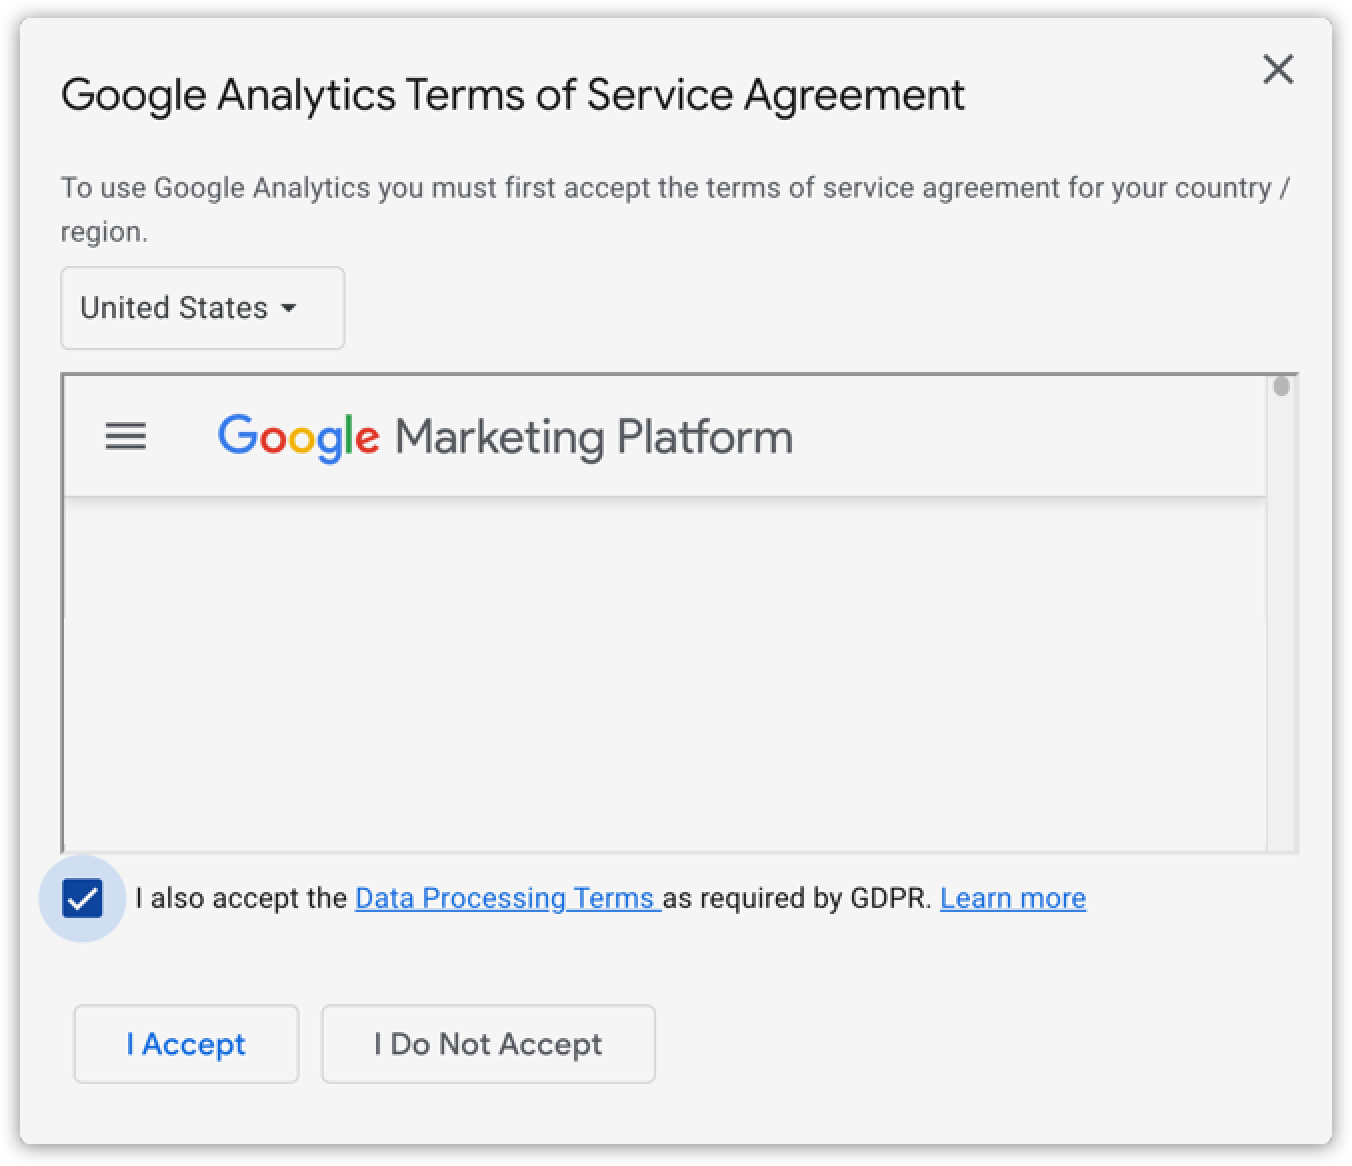
- Check the “I also accept the Data Processing Terms as required by GDPR.” checkbox and click I Accept.
- On the next page, click Web from the Choose a platform section.

- Add your website URL and name your stream.
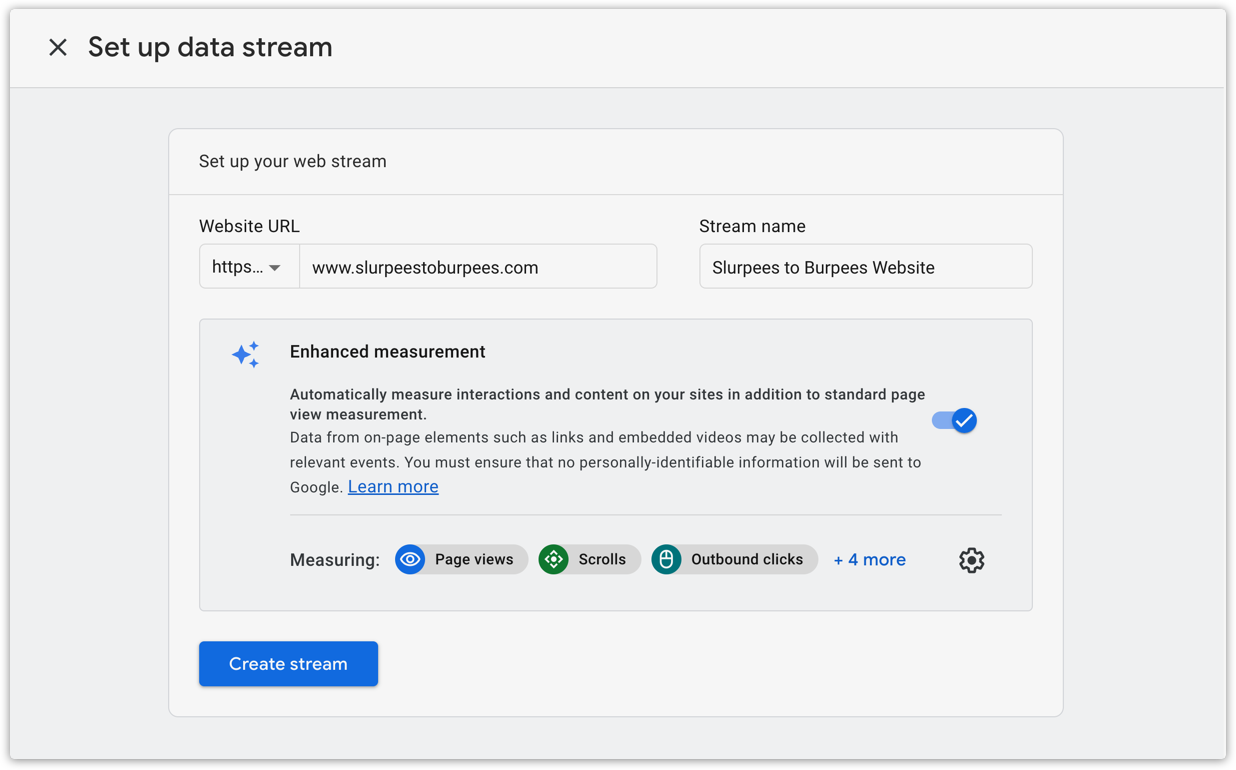
- (Optional) Click
 to change your measurement settings.
 - Click Create stream.
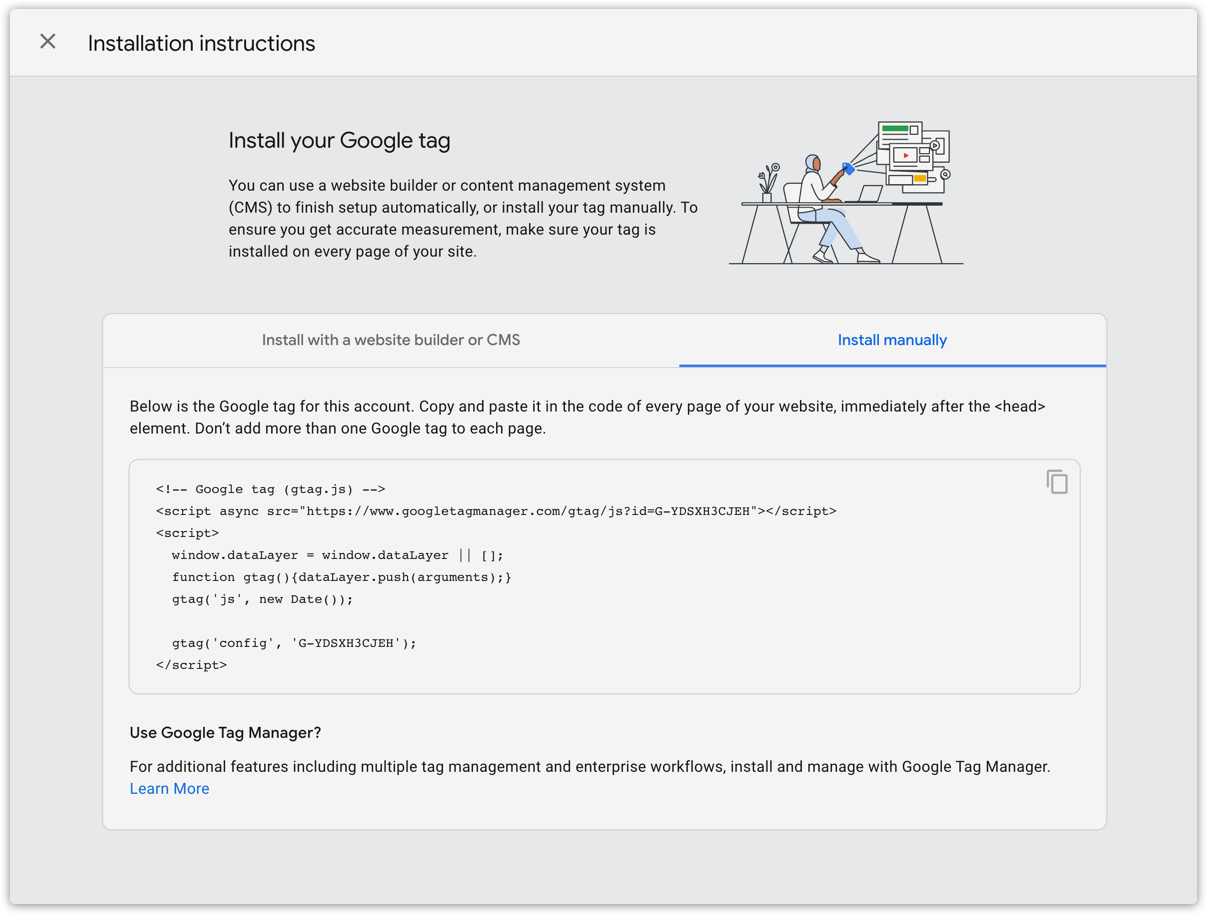
Install your Google tag
After you create a stream, go to the Install your Google tag page. Copy your Google tag and add it to your Ontraport page. Here’s how:
- Click Install manually.
- Copy your Google tag.
- In Ontraport, open the page or pages you want to add tracking to.
- Click Settings → Custom code → Header.
- Paste your Google tag into the header section.
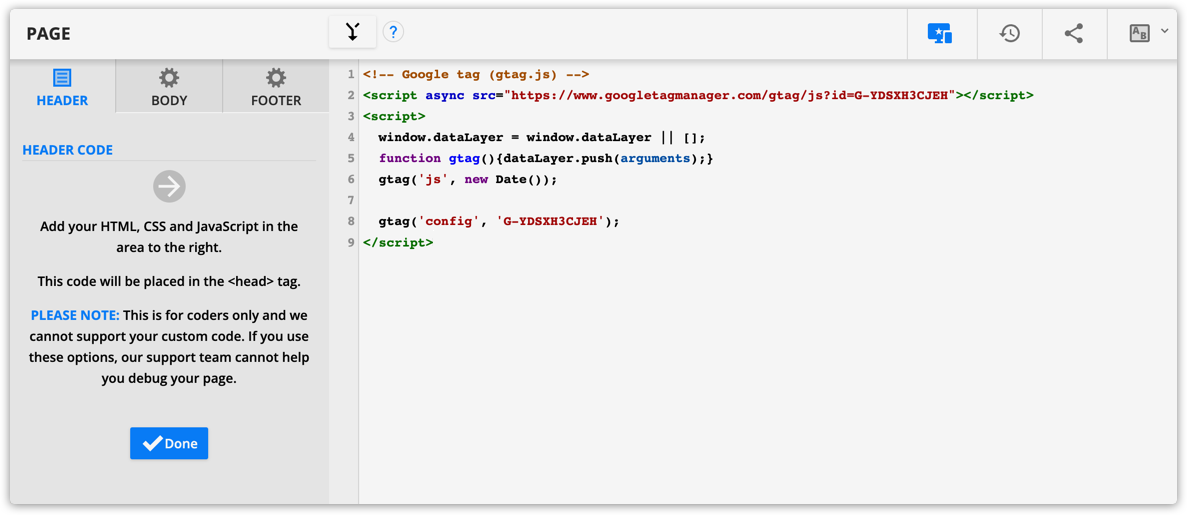
- Save and publish your page.
- Repeat these steps on all pages you want to add Google tracking to.
Add deep funnel conversion tracking
With this feature, marketers can set up an advanced Google tracking integration to obtain more comprehensive data about their conversions. Check out our webinar with Three Ventures to see how it all works.
This advanced integration allows you to bridge the gap between Google and Ontraport. You can connect the data about your anonymous leads tracked by Google and your identified leads tracked by Ontraport. This integration makes it possible to see if your ads drive traffic that purchases from you. Viewing your conversions from Ontraport in Google lets you focus your marketing budget on ads that drive sales — not just clicks or opt-ins.
Turn on UTM tracking in your account if you haven’t already. Enable advanced Google tracking fields in your account to get started. Then download and publish a prebuilt automation map to send your data to Google, and set up your Google Analytics account to use that data.
Enable advanced Google tracking fields
This feature lets you capture the Google Analytics Client ID and GCLID parameters when visitors submit your forms. When you enable deep funnel conversion tracking, it adds two new fields to your contact records, “GA Client ID” and “GCLID.”
As soon as you enable this feature, Ontraport will add your new fields. And when your visitors submit Ontraforms or forms on Ontraport Pages, Ontraport will save their IDs automatically.
- Log in to your Ontraport account.
- Go to
.png) → Administration → Advanced Settings.
→ Administration → Advanced Settings. - Toggle Deep Funnel Conversion Tracking
.png) .
.
Set up your conversion events in Google Analytics
Conversion events track and measure the actions taken by users on your website or app that are valuable to your business. These actions include purchasing, submitting a lead form, or viewing a key page on your website. By defining these actions as conversion events in GA4, you can track how often they occur and gain insight into the behavior of users who take them.
Ontraport’s prebuilt automation map includes triggers related to these conversion events, so it is best to set them up before editing your automation. Here’s how:
- Log in to your Google Analytics account.
- Hover over
 on the bottom left side of the screen and click Admin.
 - Click Conversions → New conversion event.
- Name your event.

- Click Save.
- Repeat steps 3-6 to create a conversion event for each action you want to track.
Collect information to fill in your automation map
To customize the prebuilt automation map, you’ll need to have your:
Here’s where you can locate this information:
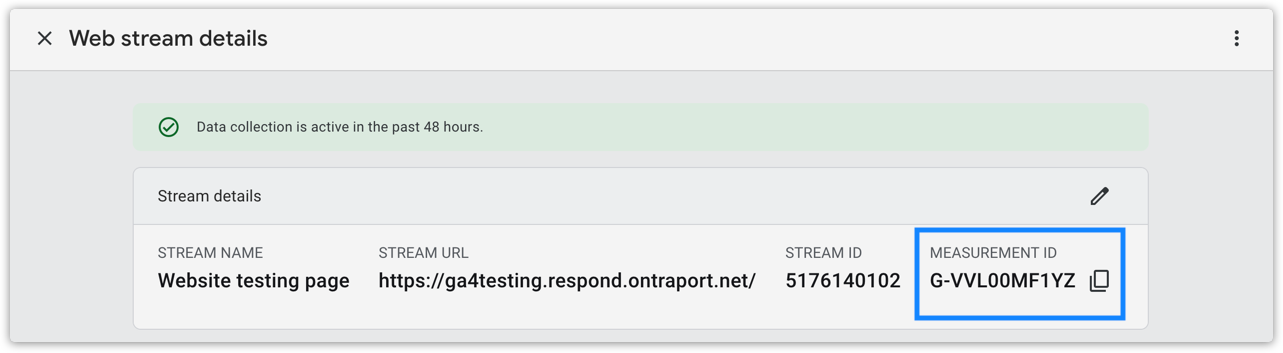
Measurement ID
Measurement IDs identify web data streams you’ve added to your Google Analytics 4 property.
- Log in to your Google Analytics account.
- Hover over in the bottom left side of the screen and click Admin.
- Then click Data Steams.
- Click on your data steam, and you’ll see your measurement ID in the Stream details section.
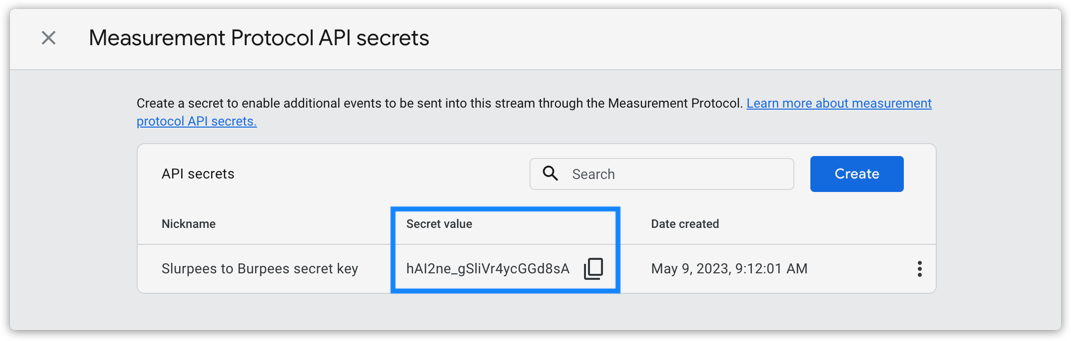
Secret value
The GA4 Measurement Protocol API Secret value authenticates requests sent to the Google Analytics 4 Measurement Protocol API. Google generates a unique secret key when you create a new Measurement Protocol API Secret in the Google Analytics 4 property settings.
The Measurement Protocol API lets you send data directly to Google Analytics servers from your Ontraport account.
Here’s where you can find your secret value:
- Log in to your Google Analytics account.
- Hover over in the bottom left side of the screen and click Admin.
- Then click Data Streams.
- From your Web Stream details page, click Measurement Protocol API secrets from the Events section.
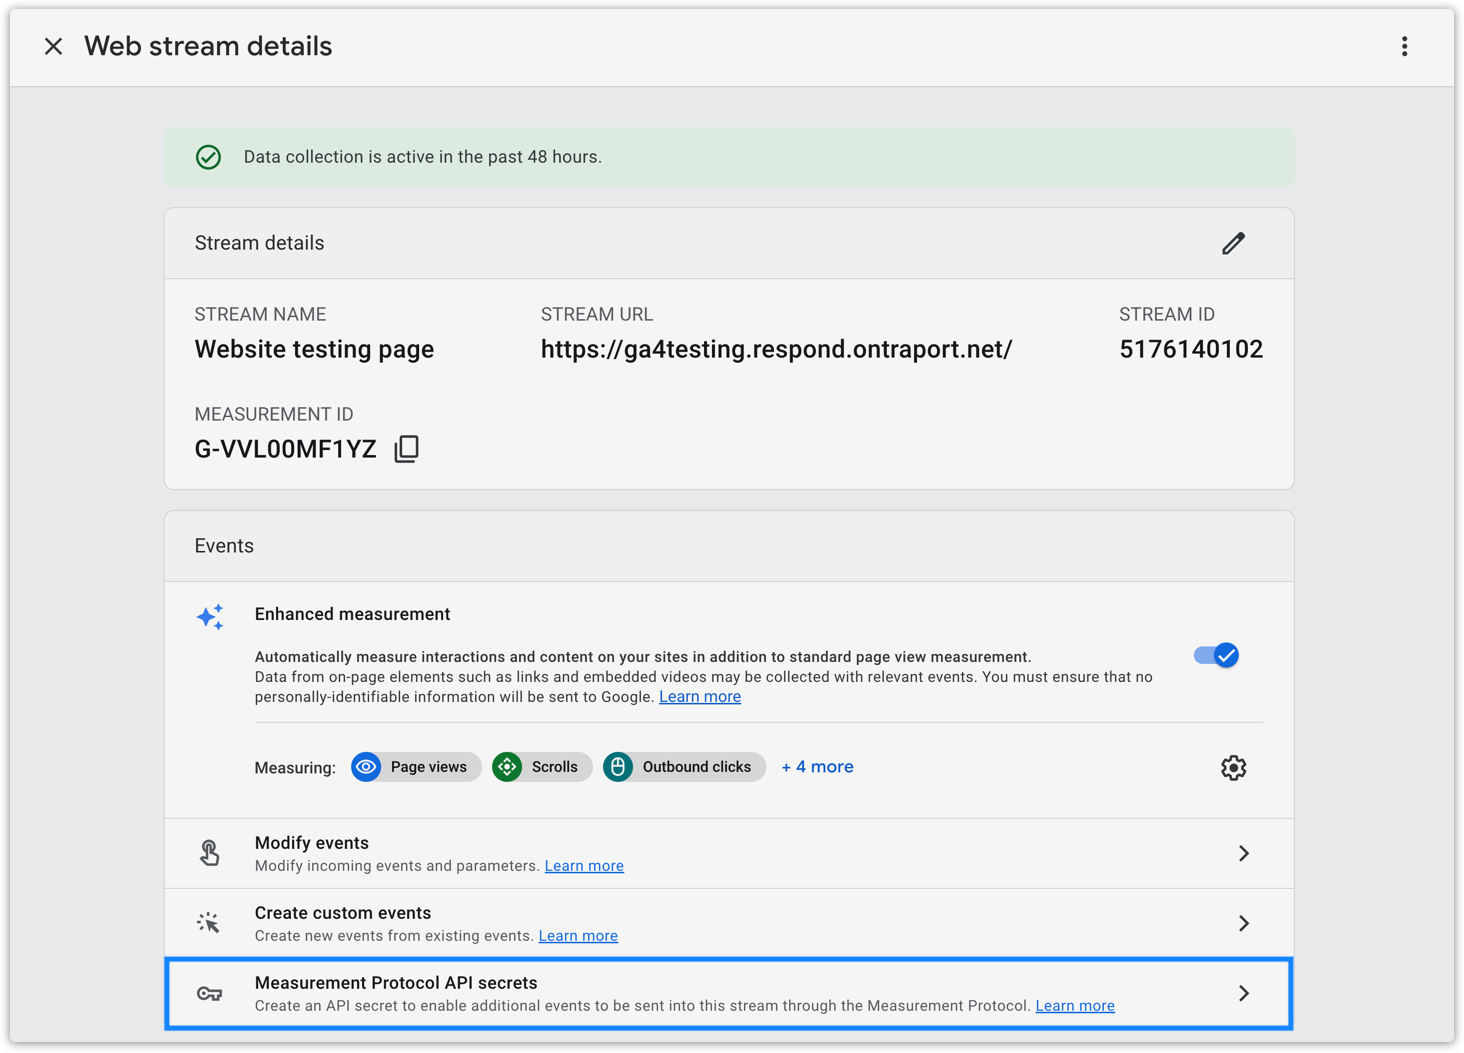
- Locate your secret value from the API secrets section.
- If you don’t have a secret value, click
 , add a nickname then click again.
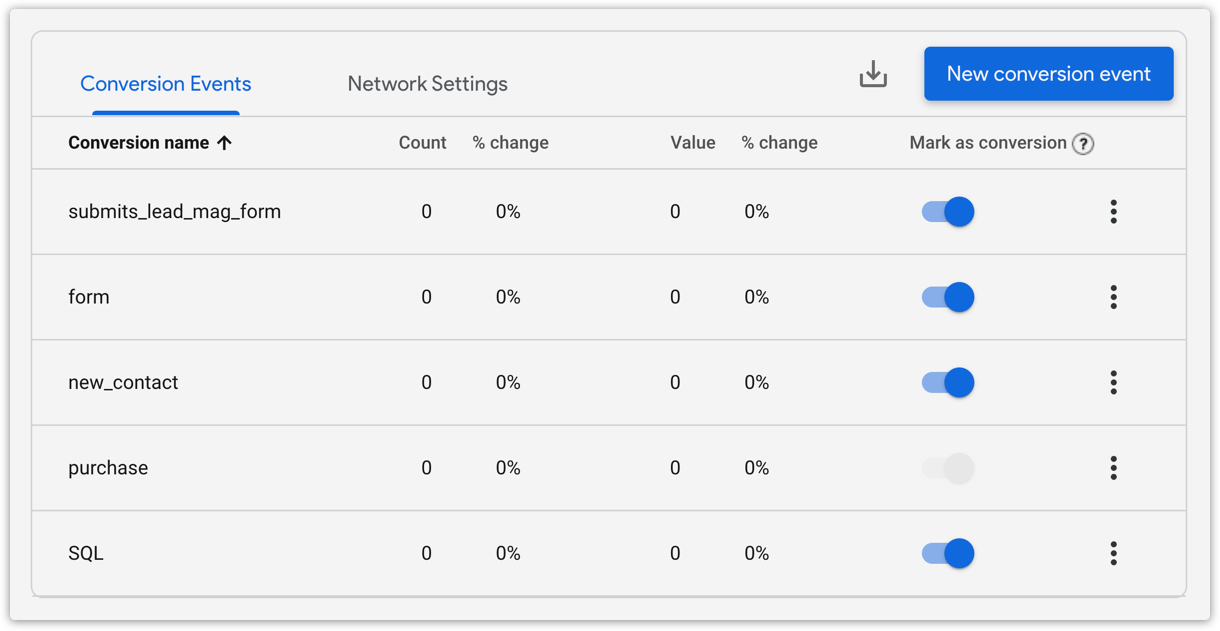
Conversion event names
When you customize the prebuilt automation map in Ontraport, you’ll use your conversion event names. Here’s where you can find that information:
- Hover over in the bottom left side of the screen and click Admin.
- Click Convestions.
- Copy your event names from the Conversion name column.
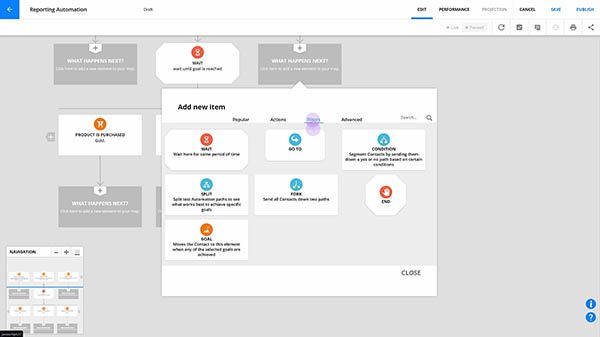
Customize your prebuilt automation map
This prebuilt automation map uses webhooks to send your mid and deep funnel conversion data back to Google.
- Click here to download the “Sending Deep Funnel Conversions to Google Analytics with GA4” map.
- Follow the automation checklist to customize it.
- The checklist will ask you to add the information you collected above.
- Publish your automation.
Send specific product information
The prebuilt automation map includes a trigger for your customers to purchase products. This trigger will count any purchase as a conversion event. If you sell more than one product at a time on a single order form, or people buy more than one of your products at a time, we recommend that you use Google Ecommerce Tracking.
You can also customize your map to send product specific information to Google.
- Open your “Sending Deep Funnel Conversions to Google Analytics with GA4” map.
- Click Edit to make updates to your automation.
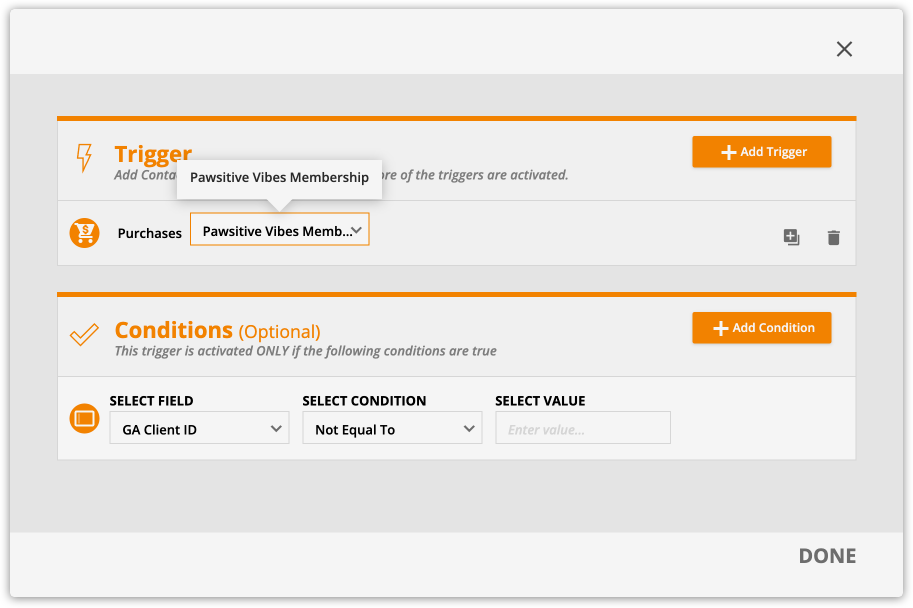
- Click on your “Product is purchased” trigger to open its settings.
- Select a specific product in the “Purchases” dropdown.
"items": [
{
"item_id": "PRODUCT_ID",
"item_name": "PRODUCT_NAME",
"coupon": "COUPON_NAME",
"discount: "DISCOUNT_VALUE",
"price": "ITEM_PRICE",
"quantity": QUANTITY
}
],
- Click Done.
- Click on the Webhook element below your trigger to edit it.
- Add this array to your request:
- Learn more about item parameters here.
- Replace the purple text with your product’s information.
- Remove “coupon” and “discount” if you don’t offer them for your product.
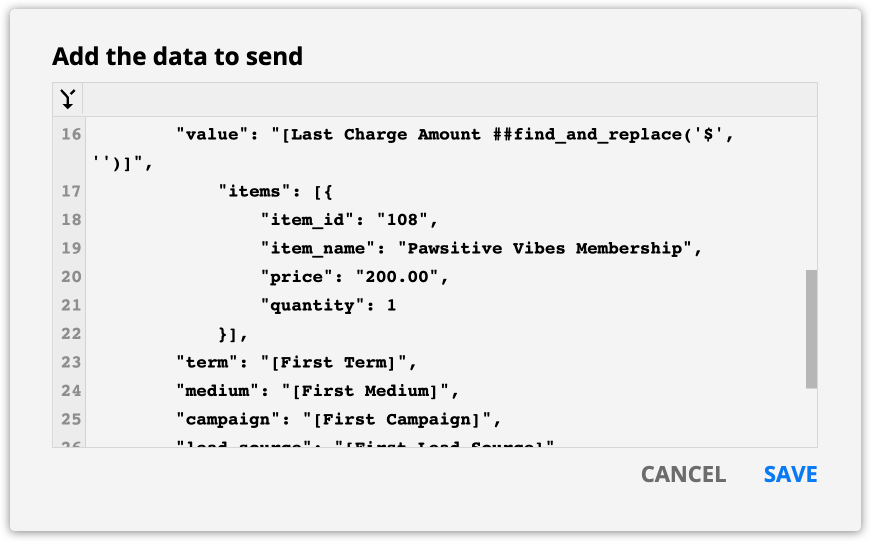
- Click Save.
- If you want to add multiple products, copy your “Product is purchased” trigger and repeat steps 3-9.
- Publish your automation map.
Enable Google Ecommerce Tracking
This feature sends your sales information to Google Analytics. To do this, create a property in Google Analytics, edit your order form’s settings and add a script to your thank you page.
If you make manual transactions or use the API to create purchases, Google Ecommerce Tracking will not work. This is because these methods do not have a thank you page to send the necessary data to Google.
This feature is available to some account levels. Check out our pricing page to learn more.
Create a property
A property is a website or mobile app that is associated with a unique tracking ID. If you have not set up a Google Analytics 4 property, follow the steps above to set up your Google Analytics Account.
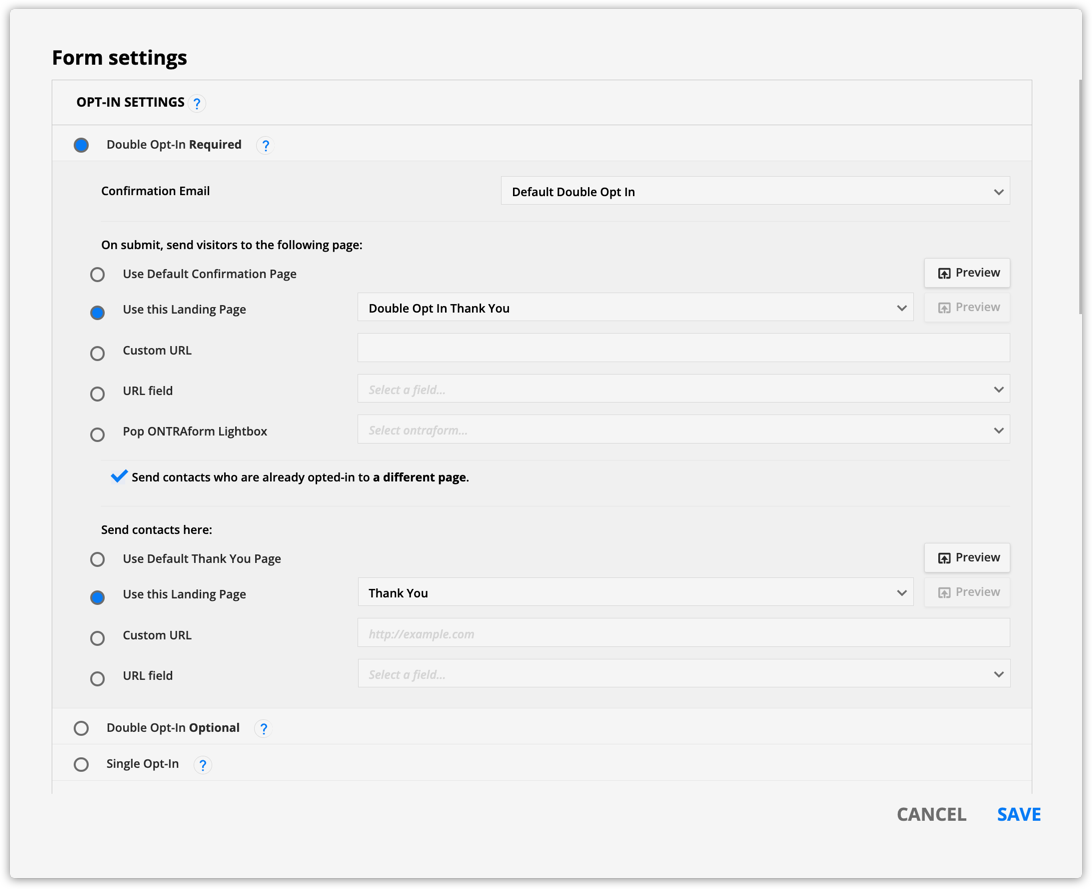
Set up your Ontraport order forms
- In your Ontraport account, select an order form.
- You can choose an Ontraport page or a standalone Ontraform.
- Go to your form settings, and scroll down to the “Advanced” section.
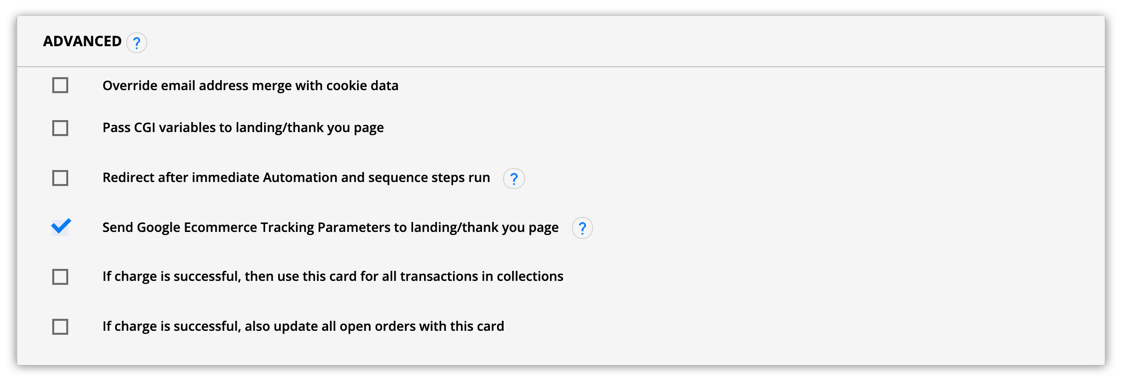
- Click the checkbox “Send Google Ecommerce Tracking parameters to landing/thank you page.”
- Click Save.
- Click Publish → Save & Publish.
- When your customers make a purchase, the form will send Google’s ecommerce tracking parameters to your thank you page.
- If you’re using an Ontraform, you don’t have to re-embed the form on your website.
Set up your thank you page
- Install your Google Tag on your page if it’s not present already.
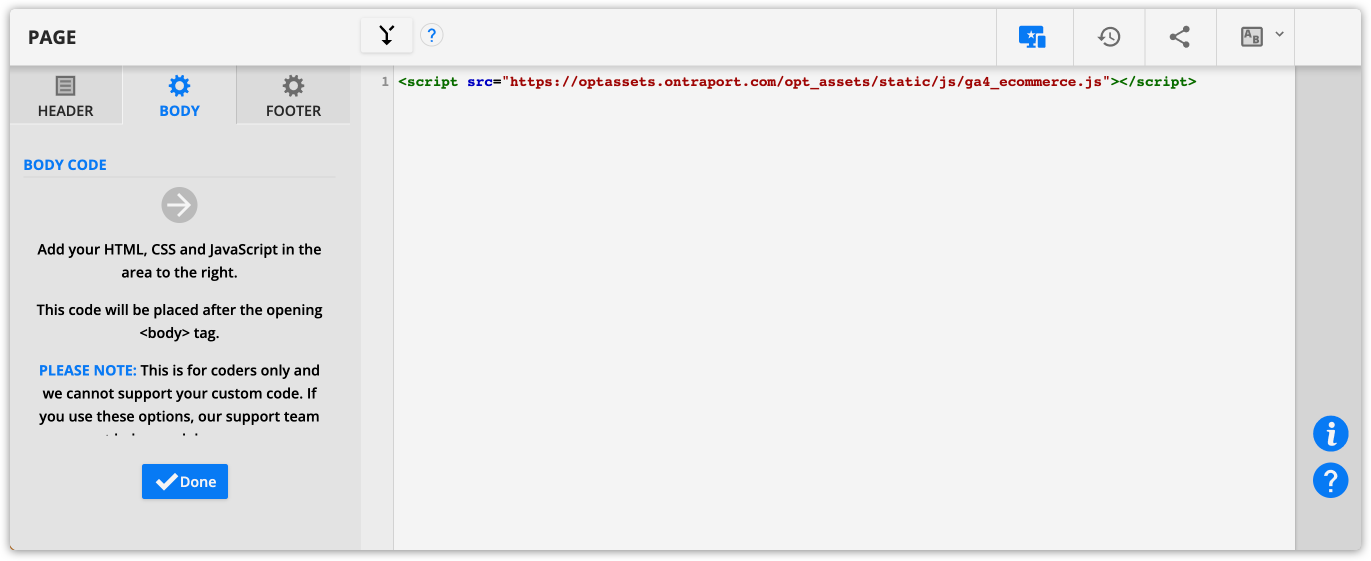
- Copy this script:
<script src="https://optassets.ontraport.com/opt_assets/static/js/ga4_ecommerce.js"> </script>
If you want to send your purchase details in a currency other than USD or send more information to Google Analytics, copy and modify this script instead.
- In Ontraport, go to Pages and select the thank you page you’ve selected in your order form’s settings.
- Click Settings → Custom Code.
- Select the “Body” tab, copy and paste your script into the text area, then click Done.
- Save and publish your thank you page.
- Wait 24 hours for the data to populate into Google Analytics, and test your order form. Then check your Google Analytics account for your purchase information.