Are you tired of creating your new automation from scratch? Ontraport’s Marketplace has got you covered! With prebuilt maps, you can get a jump start and save time creating your automation. The Marketplace makes it easy to set up new accounts or add new functionality to existing accounts. Find the automation that suits your needs, personalize it, and publish it. With Ontraport’s Marketplace, you can achieve your goals faster than ever!
You’ll find templates for different use cases, such as “Attract Leads” or “Sell + Deliver.” Ontraport offers free templates, and other users often sell or give theirs away.
Plus, we have a wide variety of complex automations that use Ontraport AI Assistant to perform tasks for you, such as editing your blog posts, IQS scoring for your sales calls, and even generating course content for you!
Templates come with easy-to-follow checklists so you can complete and customize your automation. Many templates include extra assets like related pages and emails for that automation.
If you want to make and sell your own marketplace campaigns, check out this article.
Table of contents
Install a marketplace automation map
Complete and publish your map
Install a marketplace automation map
You can add maps for Contacts and any of Ontraport’s prebuilt objects. The marketplace is continuously updated with new and helpful automations for your business. Here’s how to use prebuilt maps to your account:
- Go to Automations → New Automation.
- Or go to any of your custom objects and click Automations → New Automation.
- If you have Deals, Companies or other custom objects enabled, go to Contacts → Automations → New Automation.
- Or go to any of your prebuilt objects and click Automations → New Automation.
- To find the automation you want, browse the available templates. Click on the one you want to add it to your account.
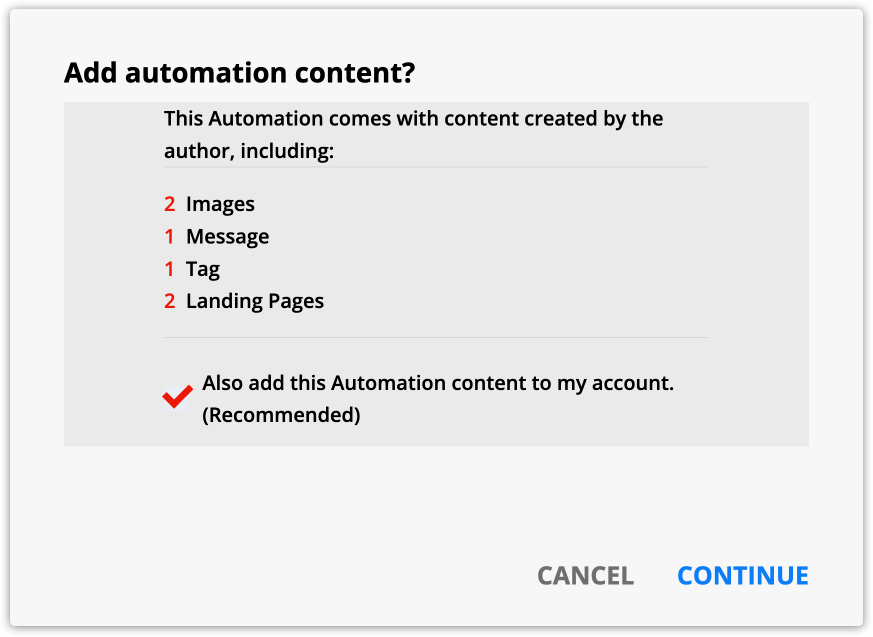
- If the map you select comes with additional assets, you’ll see a pop-up that tells you what will be installed.
- If you don’t want to install the assets, don’t choose the “Also add this campaign content to my account (Recommended)” option.
- Click Continue.
- If the map you select comes with additional assets, you’ll see a pop-up that tells you what will be installed.

- You’ll see a pop-up that lets you know that we’re installing your automation.
- Click Continue to close the pop-up.

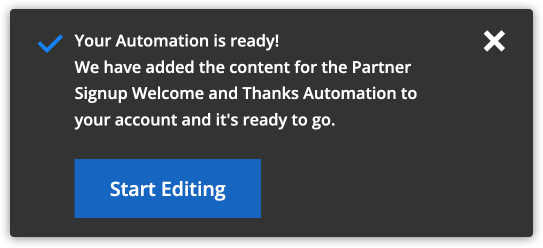
- You’ll be notified when your campaign is installed in the bottom left corner of your screen.
- Click Start Editing to open your new map.
Complete and publish your map
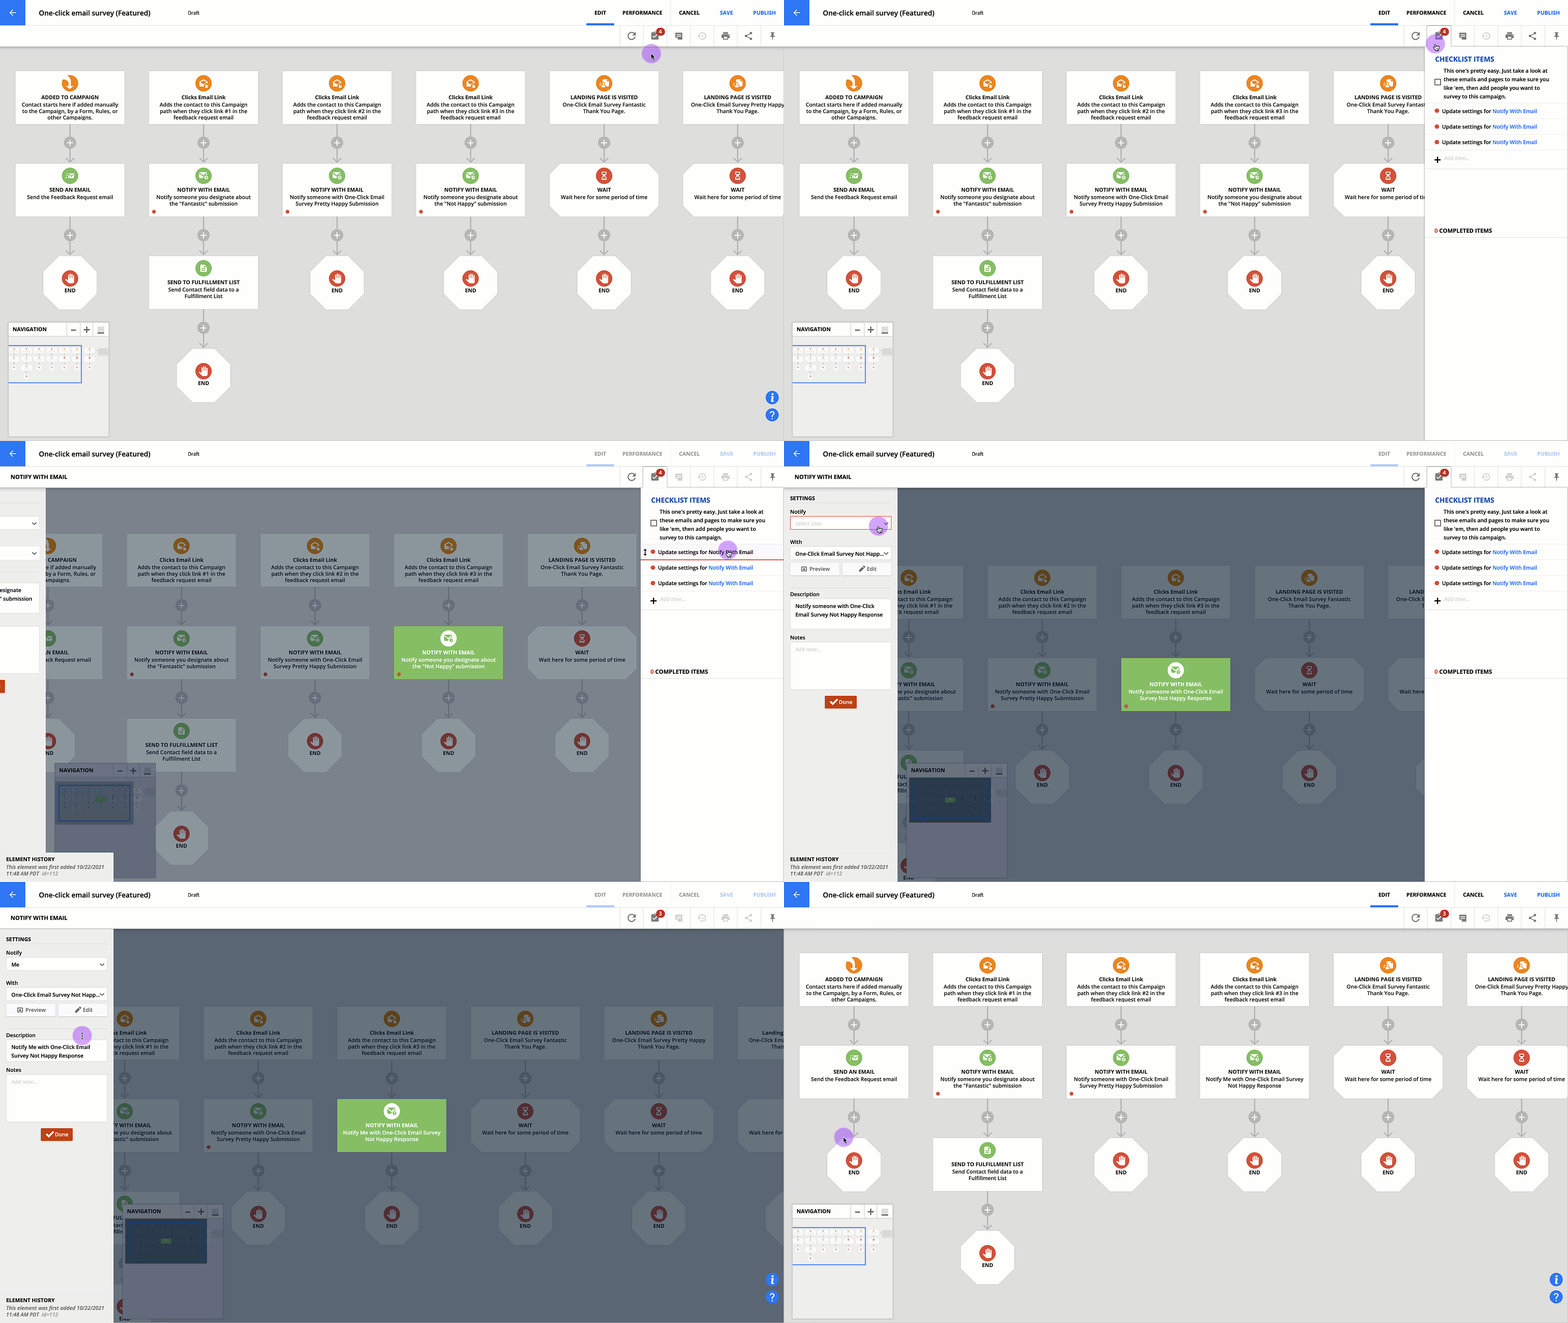
Don’t forget to add your personal touch to your newly installed automation map. For example, if there are emails in the campaign, edit the email copy so it includes your message and matches your brand. Before publishing, check the map’s checklist for tasks and notes from the author.
Each map has a unique list of items to complete. Your checklist will guide you through completing your map.

