The AI Assistant automation element enables you to leverage the benefits of AI in your automation maps. Additionally, you can access previous conversations, allowing you to respond automatically to your leads and clients based on the data saved in their records and prior conversations.
The AI Assistant allows you to develop your prompts. If you’re not interested in diving into AI prompt engineering, you can download one of the prebuilt maps with this element already customized to accomplish common use cases.
Learn more from this walkthrough video:
And get use case ideas from this webinar:
The AI Assistant is available to all account levels and requires you to purchase credits for your requests.
- Check out our account add-ons and services for more information.
Table of contents
AI prompting overview
Customizing your AI Assistant settings
• System role
• AI prompt
• Include memory in prompt
• Store response in
• Model
• Maximum credits to use
• Advanced settings
AI prompting overview
The AI Assistant includes the settings available in ChatGPT, and you’ll prompt the AI to generate content similar to the way you type a ChatGPT message or use the AI Assistant in the email and page editors.
However, not all prompts are equal, and you will get the best results if you include some specific details in your request. Some information belongs in the System role field and other information in the AI prompt field. Below, you’ll find recommendations for the type of information to include in your elements and how to customize them.
The significant difference between using ChatGPT and the AI Assistant is that the AI Assistant is connected to automation, which means that you can include merge fields for the data stored in the records running through your automation. ChatGPT is not.
Watch our in-depth training video here to learn how to optimize automations for your business’s needs!
Customizing your AI Assistant settings
The AI Assistant element can perform various tasks, based on the settings you customize when adding this element to your maps.
AI Assistant element settings have seven sections.
- System role
- AI prompt
- Include memory in prompt
- Store response in
- Model
- Maximum credits to use
- Advanced settings
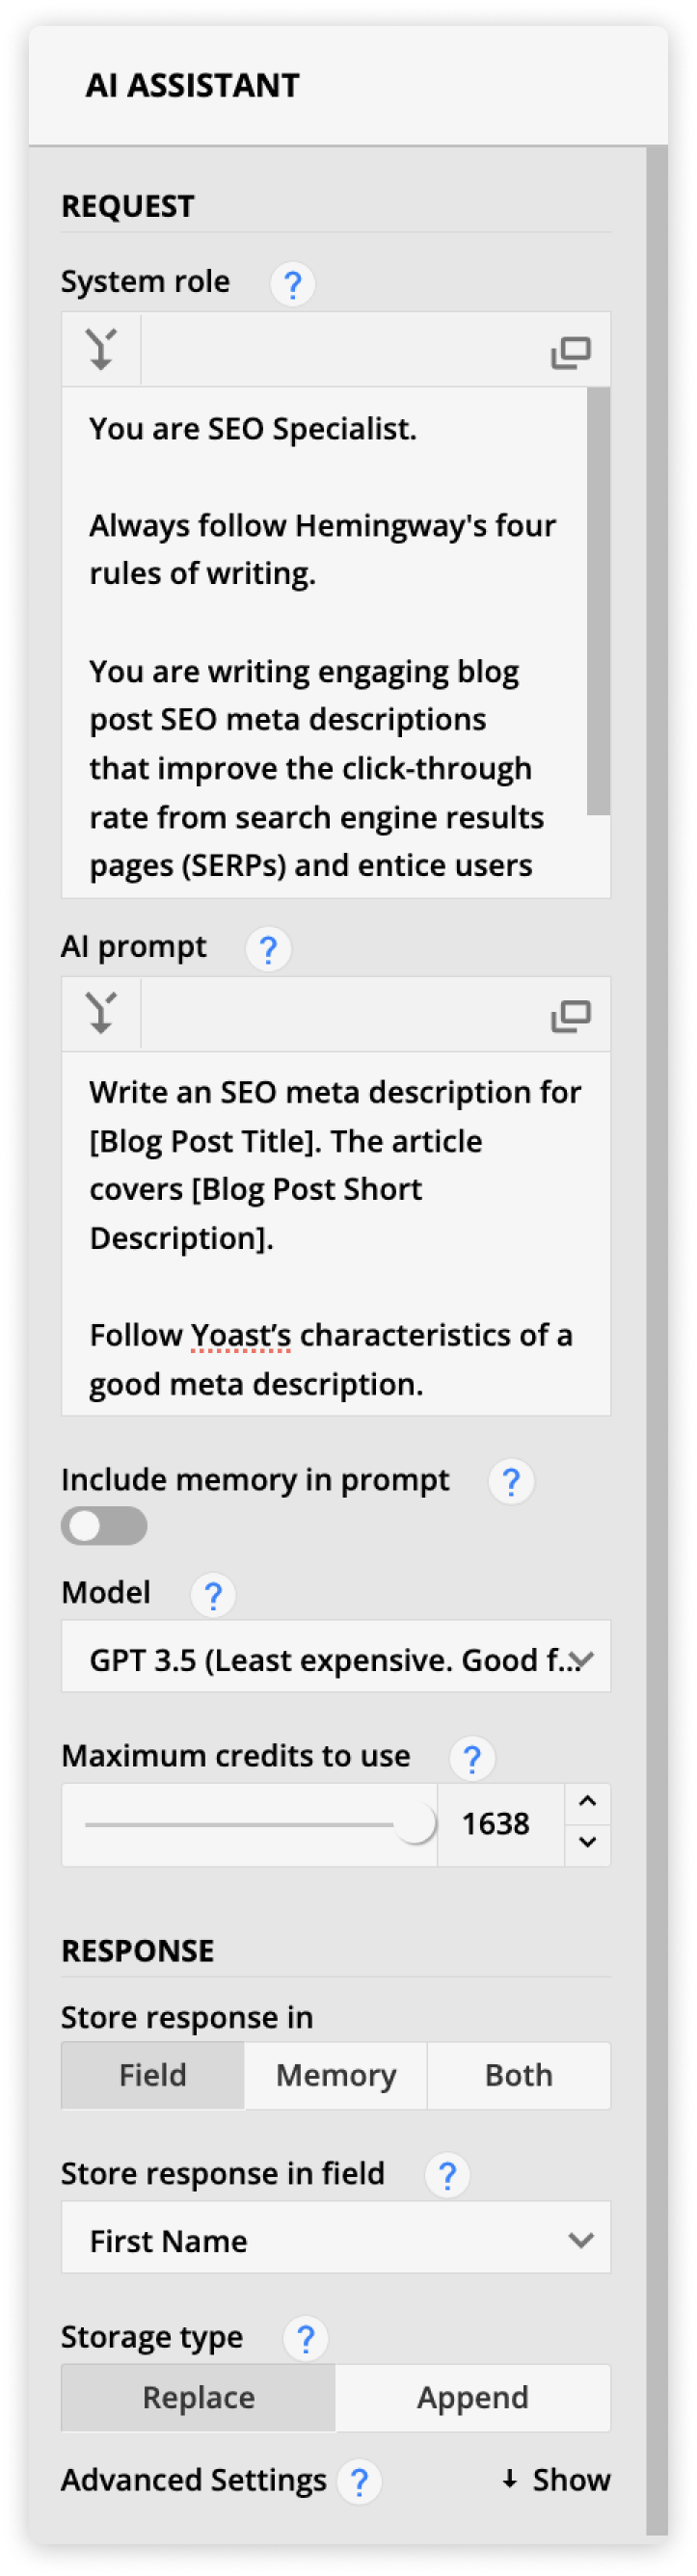
System role
The system role field is where you’ll put the initial instructions for your model.
Think of this section as the meta instructions for your AI Assistant. This is where you tell it what role it will play and how you want it to manage the task you’ll describe in the prompt below.
Not all of the elements are mandatory for every request. We suggest starting with simple system roles. Test the results and add more context or details if you’re not generating the responses you want.
Element | Description | Example |
| Persona | Describe the persona of your AI Assistant. Think of the person who would be the most competent at accomplishing your task, and include that description in your system role. | “You are an SEO Specialist.” |
| Instructions or rules | Instructions or rules you would like the assistant to follow. | “Always follow Hemingway’s four rules of writing.” |
| Context or data | The background information or situation surrounding a task provides additional context to help the assistant understand the task’s goals. Consider the context as guidelines rather than strict rules. | “You are writing engaging blog post SEO meta descriptions that improve the click-through rate from search engine results pages (SERPs) and entice users to visit my website.” |
AI prompt
This field is where you’ll add the information about the task you want your AI Assistant to perform. Here are some elements that will improve the response you receive. Not all these elements are required in every case, but a straightforward task is always a must.
In addition to the info below, check out OpenAI’s advice on prompt engineering.
Element | Description | Example |
| Task | The task is what you want the AI Assistant to do. You can include multiple tasks in one request. We recommend starting with an action verb and making your request clear and straightforward. | “Write an SEO meta description for [Blog Post Title]. The article covers [Blog Post Short Description].” |
| Format | Tell the assistant how you want outputs displayed. If you want to include headings, bullets or a table, include this information in your prompt. | “Follow Yoast’s characteristics of a good meta description.” |
| Example | Optionally, include instances, illustrations or references relevant to the task. This element can improve your results by helping the assistant comprehend the desired output. | “Here’s an example of the format I want: ‘Unlock digital success with our Online Marketing Mastery Course! Gain expert insights, practical skills and hands-on experience. Enroll now for comprehensive training in SEO, social media and more. Elevate your marketing game today!’” |
| Tone | Tell the AI Assistant the feeling you want to convey in your output. | “Write in a conversational and engaging tone.” |
Include memory in prompt
The AI Assistant allows you to save previous prompts and responses and add them to other requests. This allows you to continue conversations and build on existing content.
You can view your saved memories and their associated keys for the last three months in your AI Logs.
Go .png) to → Administration → Integrations→ AI Logs.
to → Administration → Integrations→ AI Logs.
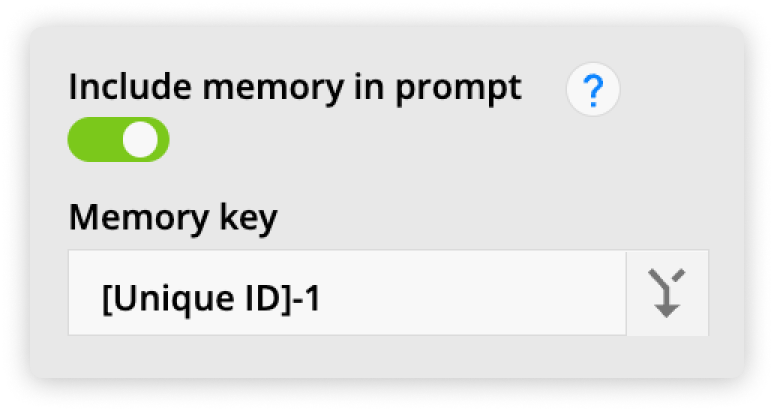
Toggle on this setting to include information from your AI Logs. The system will send any previous AI Logs matching a memory key in your request. The prompt and response of your previous request will get merged into your current request. Check out the “Store response in” section to learn more about naming memory keys.
Memory key
Add the key of the memory log that you want to include in your response. The memory key tells the AI Assistant which previous request’s data to include in the prompt.
You can only include memory in your prompt if you have stored a response in memory from a previous AI Assistant element.
Store response in
This section allows you to choose how you want to store your response. You can save it to a field, memory or both.
Field
This option is best when you want to generate content, save it in a record, and merge it into your emails or pages. Generally, you’ll choose this option over the “both” option if you generate content, such as blog articles or lesson content, rather than conversational content, such as personalized lead nurture emails.
For this option, select the field you want to save the response in from the “Store response in field.” dropdown.
- Before you set this up, consider which custom fields you need to create to store this information.
- Remember the length and formatting of your output when you select your field. For example, text fields are good for short text, long text fields are suitable for longer unformatted text, and rich text fields are suitable for adding formatting to your text.
Memory
If you select “memory,” your prompt and response generated by the element will be stored in a memory log. Using the same memory log in your future requests will allow you to continue previous conversations.
If you only store the response in memory, you won’t be able to use a merge field to display the response on pages or emails. This option is best when you want to use the response in another request to develop content before saving it to a field.
For example, if you want to create a custom page for your contact that addresses their biggest fear, you can stack your AI Assistant elements to write the page’s content step by step.
- First, ask the AI Assistant to write five headlines about the contact’s biggest fear, and save that information in the memory.
- Then, the next element asks AI to write a paragraph for the first headline and include the memory in the prompt so the element knows the headlines it wrote previously.
You can use any unique value in this field, but if you run multiple records through the element, we recommend adding the Unique ID merge field. This is because if you use a static key, such as “Blog Content,” your memory will be overwritten every time you run a new blog article through your automation. The Unique ID ensures that each record has its own memory log.
If you use the memory for multiple AI elements, you can add a mixture of merge fields and static text, such as “[Unique ID-1]” or “[Unique ID-outline].” This makes it possible to have a unique memory key for each step of your content development workflow instead of overwriting the memory log at each step.
Once your content is generated, you can use another element that stores it in a field to merge the content onto pages or emails.
Both
This option saves the response in both memory and a field. This is great when you want to continue a conversation AND be able to display the most recent response on pages or in emails.
- Choose which field in which you want to store the response from the “Store response in field” dropdown.
- Select your storage type.
- Replace – this option will overwrite your field’s value.
- Append – this option will add your response to the end of the field’s value.
- Add a unique value to the “Store response in memory log” field.
Model
The model you choose in your settings will change which ChatGPT model your assistant uses, which will also affect the cost of using the element.
- GPT 4.0 – This is best for creative writing and is the most expensive option.
- GPT 4 Turbo – This is best for large prompts and is less expensive than GPT 4.0.
- GPT 4o mini – This is the least expensive model and is good for basic tasks.
- GPT-4o – This offers similar high intelligence as GPT 4 Turbo at around half the cost, and has the best performance in non-English languages.
- This model is selected by default when using the AI Assistant in automations.
- GPT-5 Chat – This is best for general conversations. This is the same model as the ChatGPT web interface, which is a non-thinking version of GPT-5.
Maximum credits to use
ChatGPT breaks down requests into tokens. You can think of tokens as pieces of words. Before it processes the request, it’s broken down into tokens.
Ontraport converts those tokens to credits purchased in your account.
When you choose the number of credits to use, you control two things:
- The cost of your request
- The length of your response – The AI Assistant will return a shorter response when you choose fewer credits.
Advanced settings
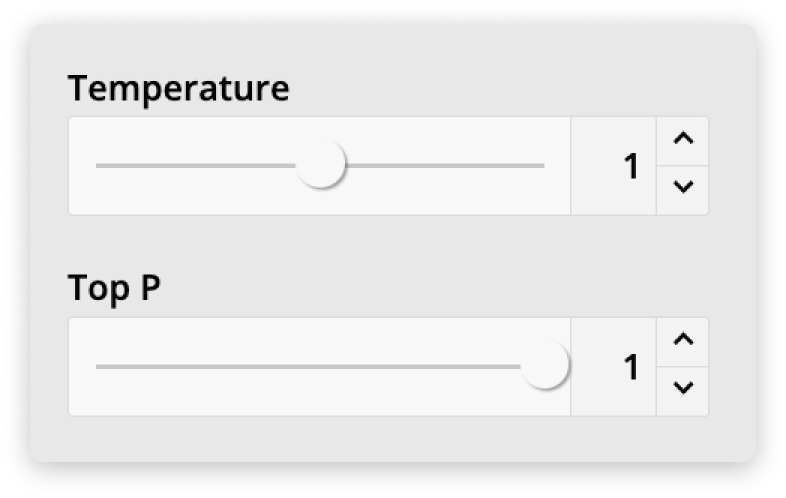
From the advanced settings, you can customize the creativity of your AI Assistant with two settings:
Temperature
This setting controls the “creativity” or randomness of the response. A high temperature will produce more varied and diverse results, and a lower temperature will generate a more predictable response.
The temperature scale ranges from 0-2; you can update it in increments of 0.1.
Top P
Similar to Temperature, Top P determines how many possible words to consider. If you choose a low value, your content will use a narrower set of highly-predictable words. If you choose higher values, the assistant will use a more comprehensive selection of words, making your response more diverse.