When a lead or customer takes an action, such as submitting a form, opening an email, visiting a landing page or purchasing a product, you’ll often want to follow up with additional interactions, such as sending another email or delivering the product that was purchased. All those interactions make up your automation, and the initial event, or trigger, is what begins the path.
In Ontraport, when you add a trigger to your automation map, you’re adding a new door for your contacts to use to get to that map. You can add as many of these doors as you want, but they can only appear at the top of an automation path.
Table of contents
Using triggers in your automation maps
Available triggers
• Customer Relationship Management (CRM)
• External Events
• Sales
Trigger conditions
• Customer Relationship Management (CRM)
• Messages
• Sales
• Sites / Pages
Trigger Settings
• Use triggers to move contacts from End elements
Using triggers in your automation maps
Triggers are the starting point for your automation and should be the first thing you add when you build an automation map. To build your automation from scratch, go to Contacts → Automations → New Automation → Start from scratch. To add a trigger, click .png) .
.
You’ll see many options for triggers, broken into four categories: CRM, external events, sales and sites/pages. Here we’ve further broken them down into categories to help you find the best trigger for your specific use case.
You’ll notice that the list of triggers is very similar to the list of goals. You’ll use triggers when you want to start a completely new automation map and add contacts to it based on qualifying actions. Goals allow you to create new automation paths based on the same qualifying actions, but can be within a large map, allowing you to easily track your efforts all in one map when in Performance Mode.
Available triggers
Back to top
The following triggers can be found in Contact automation maps. Triggers are broken up into three sections:
And you can type into the trigger dropdown to locate the specific trigger you want.
Customer Relationship Management (CRM)
Back to top
The triggers available from the CRM section are all based on changes to contact records, data updates, and interactions within your database. These triggers allow you to automate workflows by monitoring contact lifecycles, team activities, and specific date-based milestones to ensure timely and relevant communication with your audience.
Contact is created
Adds any new contact record to the automation as soon as it enters the database.
A field is updated
Activates when a specific contact field changes. Add a condition to target exact values. For example, only sending an invitation when the "City" field changes to "New York." Use this to trigger automation based on any of a contact’s fields being updated.
Contact is paused on automation
Holds a contact at a specific point in a map until they resolve an issue, such as updating a credit card.
- Contacts can be paused using the Pause/Unpause automation action.
Contact is unpaused on automation
Resumes a contact's progress in the automation once a pause is lifted.
- Contacts can be paused using the Pause/Unpause automation action.
When contact is added to tag
Starts the automation when you apply a specific tag to a contact.
When contact is removed from tag
Starts the automation when you remove a tag from a contact record.
When contact is added to fulfillment list
Triggers when a contact joins a fulfillment list via a shipping-enabled order form or the "Send to fulfillment list" action.
When contact is removed from fulfillment list
Triggers when a contact leaves a fulfillment list via auto-unsubscribe settings or the "Remove from fulfillment list" action.
Today matches contact's date field
Adds contacts to the map when the current date matches a field in their record, such as a birthday or card expiration.
- Select date or date and time fields in the trigger settings.
Today is relative to contact's date field
Adds contacts to a path a set number of days before or after a date in their record; useful for following up after a subscription expires.
- Select date or date and time fields in the trigger settings.
Today is specific date
Triggers for all contacts on the map on a chosen calendar day, such as the final day of a promotion.
- Select a date in the trigger settings.
Contact is added/removed from automation
Triggers an action when a contact starts or ends a different automated journey.
Task is completed
Starts a follow-up sequence the moment a team member logs a completed manual task, such as an automated email following a sales call.
- When tasks include outcomes, you can select specific outcomes from the trigger.
Contact submits a form
Adds contacts who fill out a specific form. For order forms, you can trigger specific paths based on whether the transaction succeeds or fails.
Call is logged
Activates when a user records a call in the contact's record. Use this to automate next steps like sending proposals or updating pipeline stages.
A relationship is added or removed
Triggers when you add or remove a many-to-many relationship from the contact.
External Events
Back to top
The triggers available from the External Events section are all based on interactions that occur outside of your internal database through direct communication channels. These triggers allow you to bridge the gap between prospect engagement and automated follow-up by reacting the moment a contact clicks a link in an email, sends an inquiry to your inbox, or reaches out via text message.
Clicks an email link
Trigger follow-up based on email engagement.
- Select link “0” to trigger automation when contacts click any link in the email, or add a specific link number. Email links are numbered from left to right top to bottom.
Sends you an email
Automatically route incoming inquiries to your team.
- This trigger requires Email Sync setup.
SMS Received from contact
Trigger automation when a contact texts you.
- Use the condition “SMS contains text” to trigger specific automated replies based on keywords.
Sales
Back to top
The triggers available from the Sales section are all based on financial transactions, website engagement, and membership access changes. These triggers allow you to bridge the gap between prospect engagement and automated follow-up by reacting the moment a contact purchases a product, interacts with your sales pages or tracked links, or experiences a change in their membership status.
Purchases product
Activates when a contact purchases the specified product, regardless of the purchase method (e.g., order form, manual entry, rule, or API). It also triggers for customers on payment plans with the "add here" or "move here when triggered" setting.
- Won't trigger multiple times if a contact buys more than one of the same product in a single transaction.
Gets a refund on a product
Activates when a contact receives a refund for a product they have previously purchased.
Abandons external checkout
Activates when a contact initiates a purchase that requires external payment confirmation, such as Stripe 3DS or PayPal, but does not complete the external approval step and the incomplete purchase is automatically removed by the system.
- This trigger works with the PayPal Standard element, and not the legacy element.
Visits a landing page
Trigger automation when a contact visits a page. You do not need to set up any tracking to use this trigger because visits to Ontraport pages are automatically tracked.
- If you want to create an abandoned cart automation, it will be kicked off with a contact visiting one of your sales pages.
Visits a PURL
A PURL will show your contact’s name in the URL to personalize the experience. You can add a PURL to any of your Ontraport pages by using the correct merge field from the PURLs section. This trigger will add contacts when they visit a personalized URL.
Open order is created
Trigger automation when a contact purchases a subscription or a product with a payment plan.
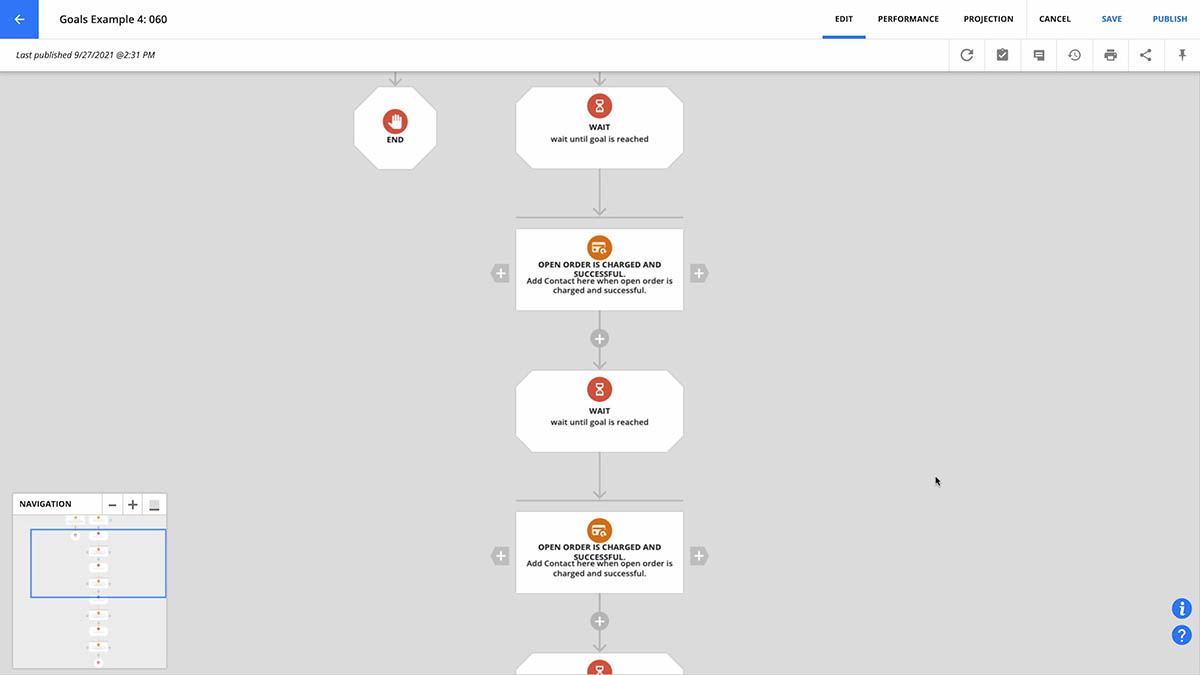
Open order is charged or updated
Trigger automation when a subscription or payment plan is updated such as being completed or canceled. You can also trigger based on successful or failed payments. When you select this trigger you’ll see a second dropdown that allows you to customize it:
- Charged and successful
- Only activates for subsequent payments after the initial transaction.
- Charged but declined
- Activates when an attempt to charge an open order is made, but the payment is declined. Typically this is due to inaccurate credit card information or insufficient funds..
- Canceled
- Activates when an open order is canceled by a contact, such as canceling a membership or subscription or manually by a user in the app.
- Completed
- Activates when an open order transaction is successfully processed and marked as completed, such as a finalized payment plan.
Credit card is charged or declined
Activates when there is an attempt to charge a credit card.
- From the trigger settings you can choose if you want to trigger automation when the charge is successful (Charged) or fails (Declined).
Contact visits URL
Trigger automation when a third-party page is visited.
- To enable tracking on a third-party site use the Ontraport tracking code.
Clicks tracked link
Trigger automation when a contact clicks a tracked link.
Ontraport membership access is updated
Trigger automation when a contact’s Ontraport membership status field’s value changes.
Membership is created by open registration
Trigger automation when a contact is given access to an Ontraport membership site via open registration.
- For security purposes we recommend that you enable open registration with the status, suspended and use this trigger to kick off automation that updates the membership status to enabled.
Is given access to WordPress Membership Level
Trigger automation when a WordPress member is given a specific PilotPress membership level.
Loses access to WordPress Membership Level
Trigger automation when a WordPress member has a specific PilotPress membership level removed from their record.
Trigger conditions
Back to top
You can add the following conditions to any of your triggers to limit the number of contacts who will be moved by your trigger elements.
Customer Relationship Management (CRM)
Back to top
The trigger conditions available from the CRM section are all based on specific criteria within a contact's record and their history within your account. These conditions allow you to refine your automation by filtering for specific field values, tag statuses, or timing within an automation map, ensuring that only the contacts who meet your exact requirements proceed through the workflow.
Was subscribed to Automation before or after a certain date
Allows you to limit the trigger only for contacts who were subscribed to a specific automation map before or after a specific date. This is a great way to grandfather in early adopters or target only contacts who joined a campaign after a launch date.
Has been on an Automation for a certain amount of time
Allows you to limit automation only for contacts who have been on a specific automation map for a certain amount of time. Ensure contacts have had enough time to experience an automation before moving them to the next stage, such as waiting for a full nurture sequence to play out before triggering a sales handoff.
Contact is paused or active on Automation
Limit automation only for contacts who are either paused or active on a specific automation map. This is a great way to skip contacts who are already mid-flow or re-engage ones that were temporarily paused.
Field is this value
Limit automation only for contacts who have a specific value stored in a field.
- This condition is commonly used with the “Field is updated” trigger to be able to target specific value updates.
Now is before, during, or after a day, date, or time
Limit automation based on the current time. This condition is helpful for time-sensitive offers, countdowns or business-hours-only actions.
Contact has Tag
Limit the trigger only for contacts who have a specific tag.
Contact doesn't have Tag
Limit the trigger only for contact who do not have a specific tag.
If Contact is subscribed to Fulfillment List
Limit the trigger only for contacts who are subscribed to a specific fulfillment list. This condition is a great way to confirm active customers before sending order-related content.
If Contact is not subscribed to Fulfillment List
Limit the trigger only for contacts who are not subscribed to a specific fulfillment list. For example this condition can help catch contacts who haven’t yet received a deliverable or onboarding item.
Relationship does or does not exist
Limit the trigger only for contacts who do or do not have a specific record though a many-to-many relationship.
Messages
Back to top
The trigger conditions available from the Messages section are all based on engagement metrics and the specific content of your outgoing or incoming communications. These conditions allow you to segment your automation by analyzing how often a contact interacts with your emails or by parsing the specific text and data found within their SMS replies.
Has opened an Email a certain number of times
Limit the trigger only for contacts who have opened a specific email a certain number of times.
Has clicked an Email link a certain number of times
Limit the trigger only for contacts who have clicked on a specific email’s link a certain number of times.
SMS contains an Email address
Limit the trigger to only contacts whose last inbound SMS message contains an email address. This condition allows you to capture and route contacts who reply with their email via text.
- This condition is most commonly used with the “SMS Received from contact” trigger.
SMS does not contain an Email address
Limit the trigger to only contacts whose last inbound SMS message does not contain an email address. This condition allows you to flag incomplete replies to prompt a follow-up request for contact info.
- This condition is most commonly used with the “SMS Received from contact” trigger.
SMS Contains Text
Limit the trigger to only contacts whose last inbound SMS message contains specific text. This condition allows you to branch flows based on keyword replies, such as “Yes,” “Stop,” “Info,” etc.
- This condition is most commonly used with the “SMS Received from contact” trigger.
SMS Does Not Contain Text
Limit the trigger to only contacts whose last inbound SMS message does not contain specific text. This condition allows you to catch replies that don’t match expected keywords for fallback handling.
- This condition is most commonly used with the “SMS Received from contact” trigger.
Sales
Back to top
The trigger conditions available from the Sales section are all based on purchase history, spending thresholds, and subscription longevity. These conditions allow you to gate your automation by evaluating a contact’s financial commitment, ensuring you can differentiate between one-time buyers and long-term subscribers to deliver targeted loyalty rewards or upsell opportunities.
Has spent a certain amount on a product
Limit triggers based on the monetary value that a contact has spent on a specific product. This condition allows you to reward high-value customers or trigger loyalty/upsell sequences.
Has ordered a certain amount of a product
Limit triggers based on how many times a contact has purchased a specific product. This condition allows you to identify repeat buyers for VIP treatment or bulk discount offers.
- Will include multiple one-off purchases as well as subscriptions.
Is subscribed to product
Limit triggers based on if the contact has a subscription with a specific product. This condition can be used to confirm active subscription status before delivering member-only content.
Has been subscribed to a product for a certain amount of time
Limit triggers based on how long a contact has been subscribed to a product. This condition helps you trigger renewal reminders, loyalty rewards or anniversary offers.
Sites / Pages
Back to top
The trigger conditions available from the Sites / Pages section are all based on website engagement frequency and specific membership access levels. These conditions allow you to refine your automation by tracking how often a contact visits your pages or by verifying their current membership status, ensuring you can target your most active users or gate content based on their specific tier.
Has visited a Wordpress site a certain number of times
Limit triggers based on if the contact has visited a specific WordPress site a certain number of times. Identify highly engaged members who are frequently accessing your membership site, and trigger rewards, upsell offers to higher tiers, or check-ins to maximize their experience.
Has visited a Page a certain number of times
Limit triggers based on how many times a contact has viewed a specific Ontraport page. This helps you identify high-interest prospects repeatedly viewing a pricing or product page.
Ontraport membership access is set to this status
Limit trigger based on the status of a contact on your Ontraport Membership site. This condition can be used to route contacts based on active, expired or pending membership states.
Has access to WordPress Membership Level
Limit the trigger based on the contact having a specific WordPress Membership level. Use this condition to deliver content or offers exclusive to a specific membership tier.
Does not have access to WordPress Membership Level
Limit the trigger to only contacts who do not have a specific WordPress membership level. This condition can help prompt upgrades or gate content from contacts below a required tier.
Trigger Settings
Back to top
Trigger settings allow you to narrow the list of qualifying contacts who can activate a trigger. Settings help you determine what happens when a contact activates the trigger but is already on the automation map or has activated that trigger already. Contacts can exist in more than one place on a map, so the trigger settings help ensure your contacts don’t get repeated outreach from you.
Who can activate this trigger?
- Any contact in account: This setting is the most common and will allow you to add new contacts to your automation map.
- Any contact on this map: This setting limits the trigger to only contacts already on the map. This means that contacts can’t enter the map through the trigger, and it’s best used when you want to move a contact from one automation path to another on the same map. A common use case for this is when you have one path that sends emails and, when one of those emails is opened, they are moved to a new path via a new trigger.
If contact is already on map, then…
- Ignore this trigger: This option keeps contacts in their current position on the automation map. A common use case is a general lead nurture map connected to multiple lead capture forms. If a contact submits a second form, this setting prevents the contact journey from restarting.
- Move here when triggered: This is the most common setting. It moves contacts to the new element when they perform the selected action. For example, if you use a custom lead scoring system, each action that changes a contact’s lead score can move them to a new step in the automation.
- Add here again when triggered: This option creates another instance of the same contact on the automation map. For example, if you have a lead magnet delivery map for multiple ebooks, this setting allows contacts to request and receive several ebooks at the same time.
This trigger can only be activated once per contact (checkbox)
This setting gives you the option to only allow contacts to trigger the automation once. This might be used if you want to use the trigger Contact visits URL to give those visitors a discount after their first time visiting your page. You could decide that contacts only get that option once, and check this box. Then, next time they visit the page, they won’t be put here again.
Use triggers to move contacts from End elements
Back to top
When contacts reach an End element, only Triggers or Goals will move them from it. If you add new elements above your Ends, contacts on your End elements won't automatically move to them. Follow the steps below to move contacts from End elements to new upstream automation.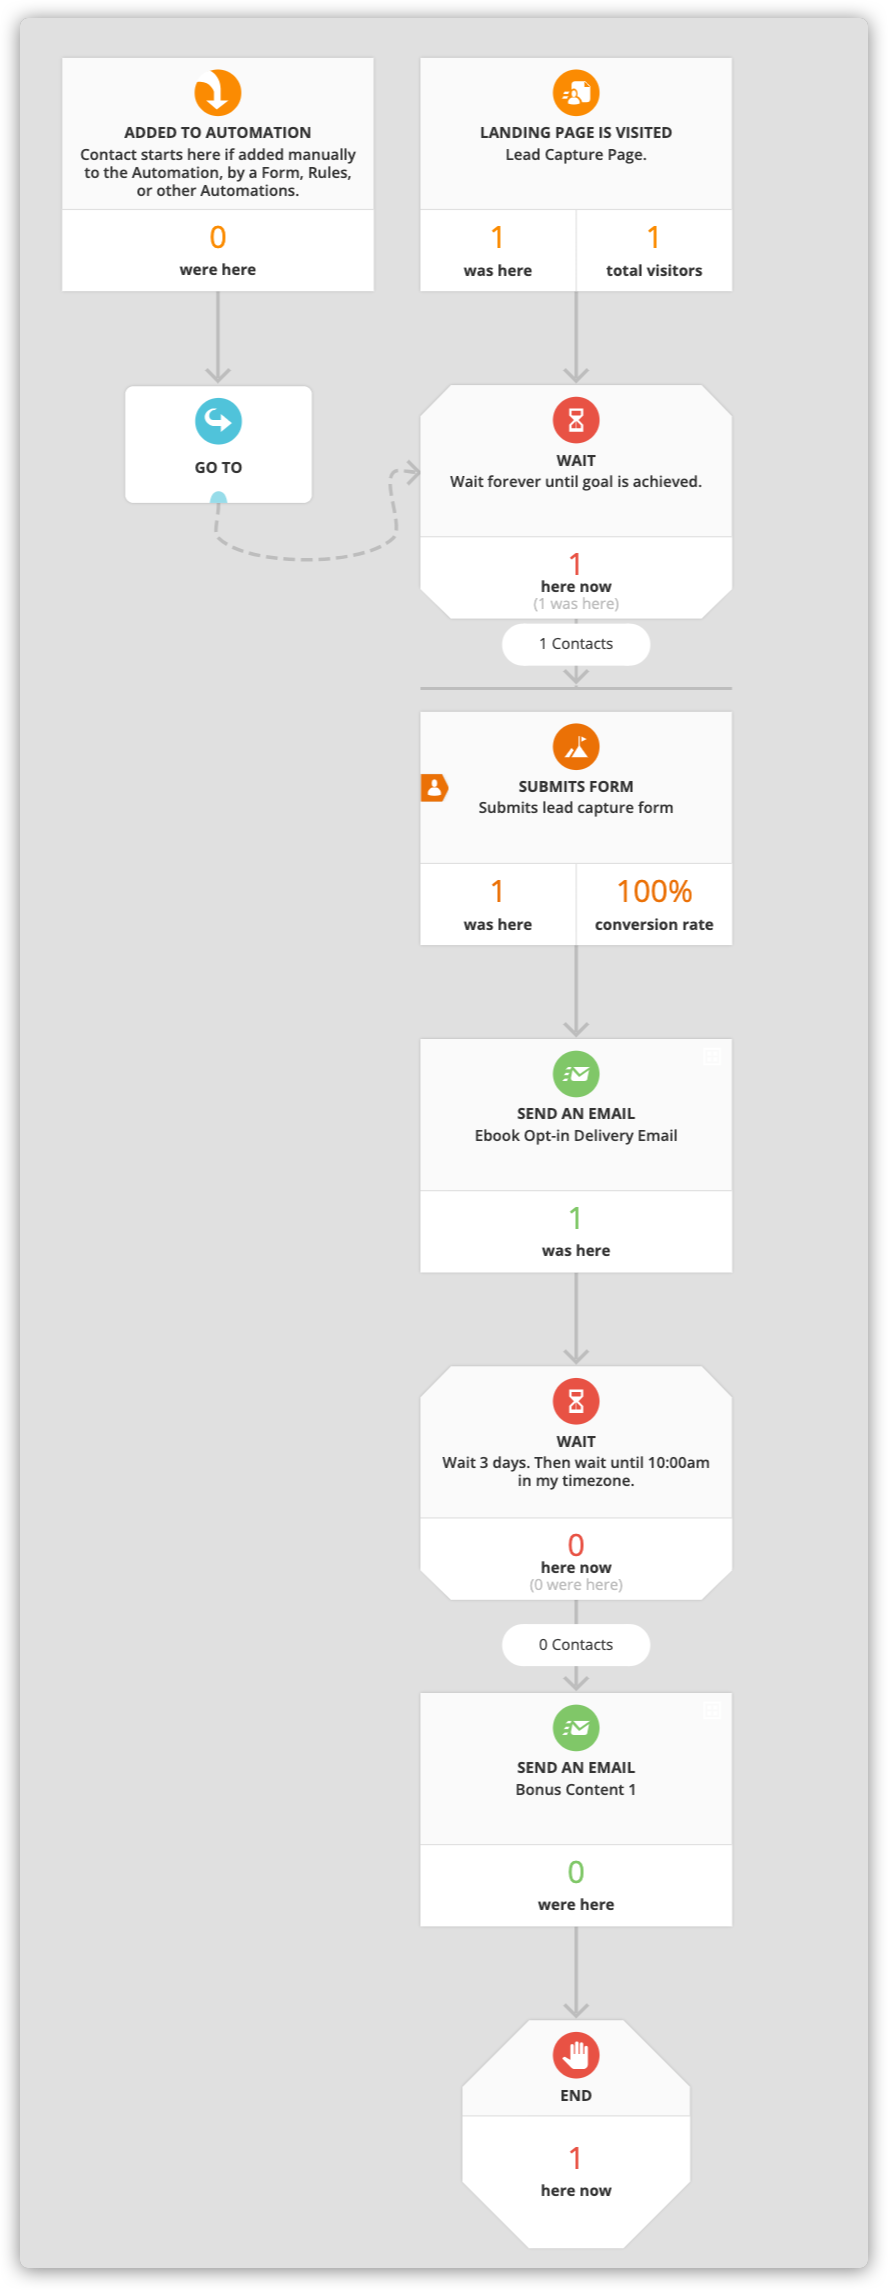
- Create a new tag specific to this process.
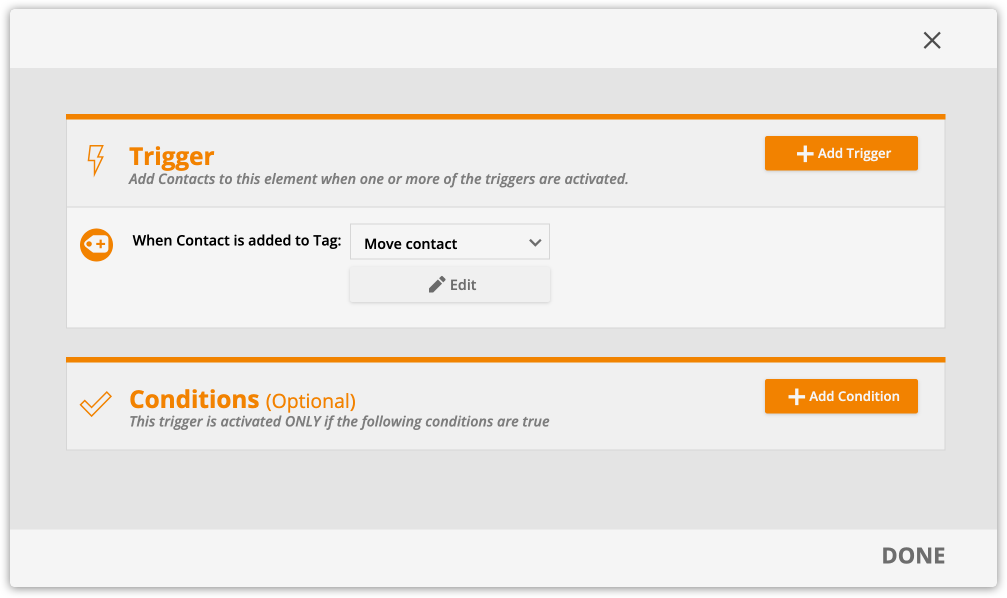
- Add a “Contact is added to Tag” trigger.
- In your trigger settings, select your tag.
- Then customize your left sidebar settings:
- Who can activate this trigger: Any contact on this map
- If contact is already on map, then…: Move here when triggered
- Then customize your left sidebar settings:
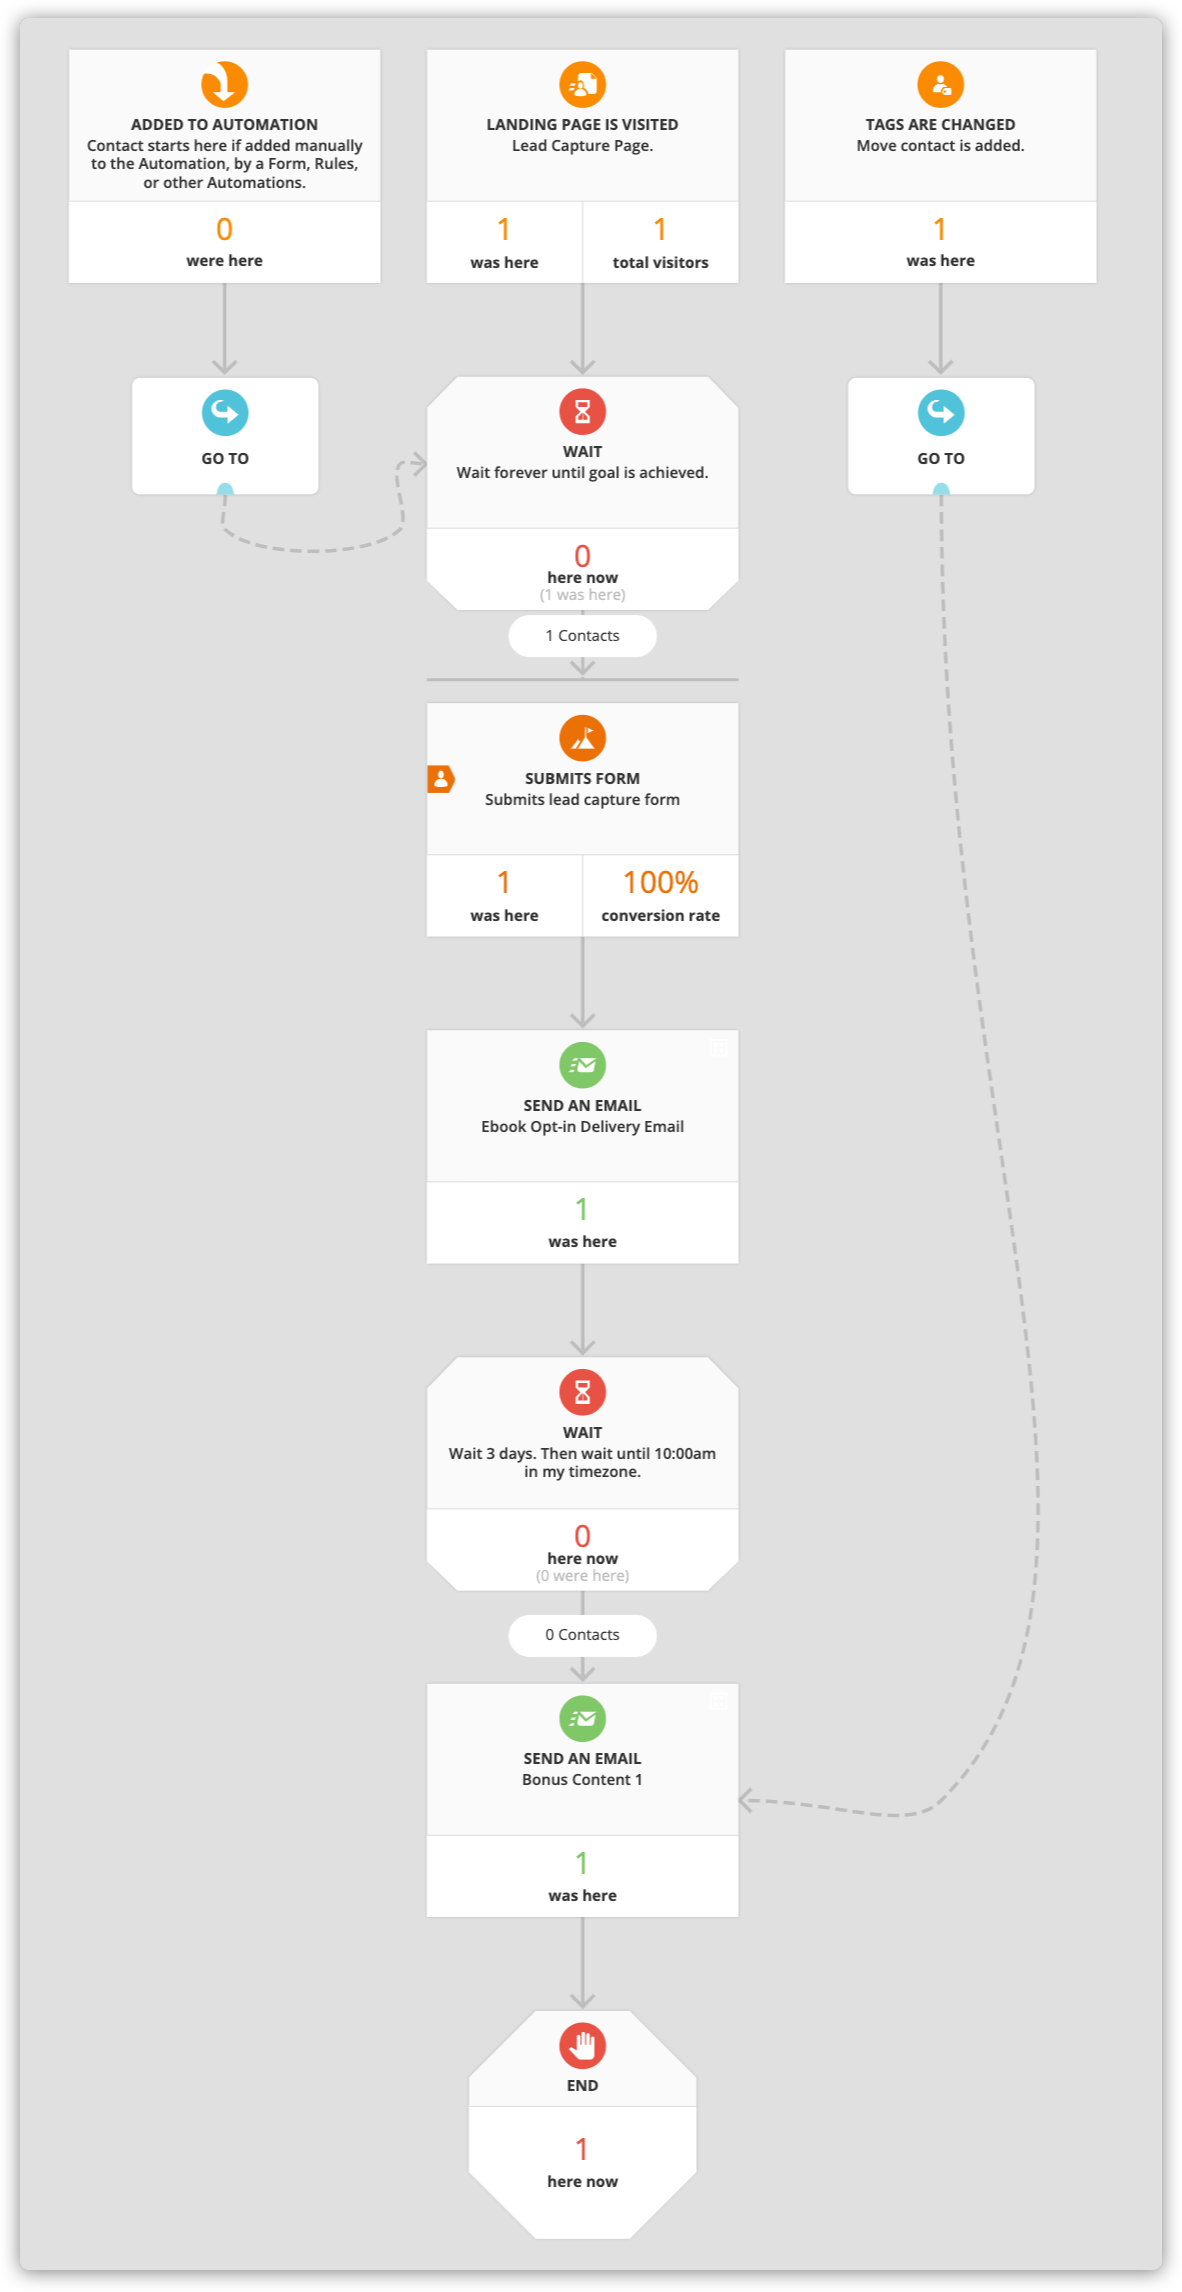
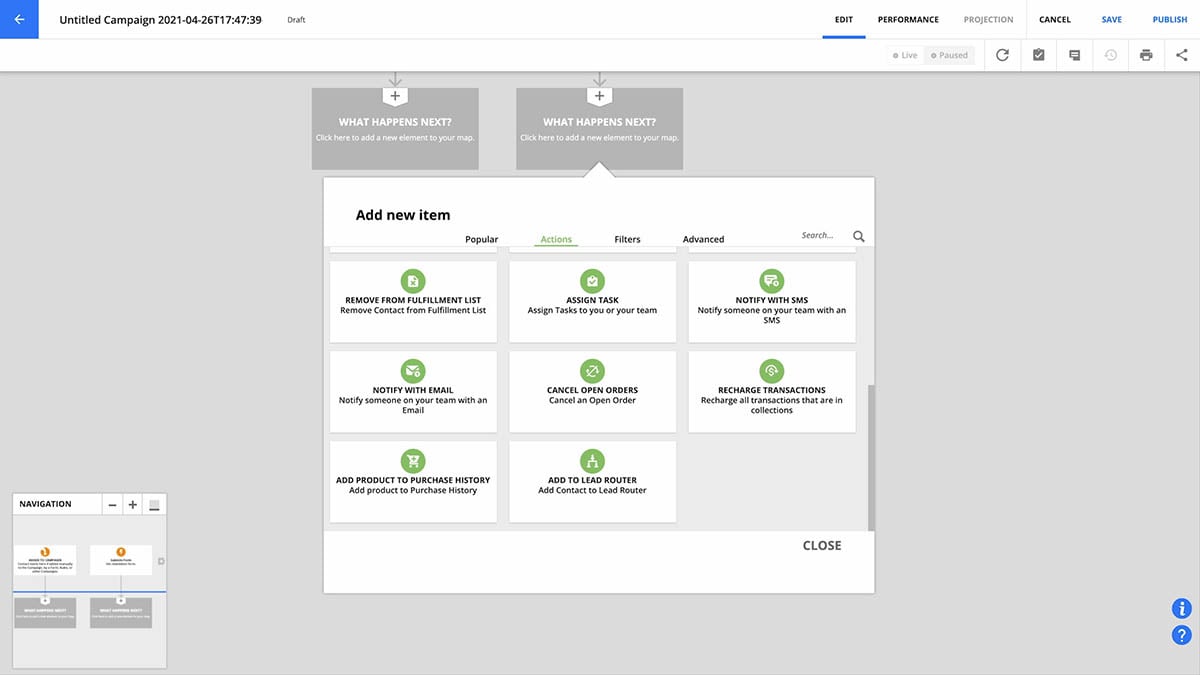
- Add a Go To filter element in the “What happens next?” below the trigger.
- Grab the Go To element's drag handle, and connect it to the element where you want to send contacts.
- Save and re-publish your automation map.
- In performance mode, click on the number on your End element to open a group of contacts on that element. Then select all and add your tag.

 .
.