Pass appointment data from your scheduling tool to Ontraport with an appointment and calendar integration. This allows you to add and update contact records with tags and fields, then create automated follow-up in Ontraport around that data.
You can create an Ontraport booking page to offer self-scheduling to your leads and customers without integrating a third-party service. Check out this article or watch this video to learn more. |
Note: Ontraport only offers support for built-in integrations. For assistance with an outside integration, please reach out to their support team using the contact information provided below.
Integrations
Acuity Scheduling
- Connect your Ontraport account to the integrator tool Zapier.
- Create two custom fields to use in your integration: “Acuity Appt Date” — a date field and “Acuity Appt Time” — a text field. These are the fields that you use to update an Ontraport Contact in Zapier with the contact’s appointment information from Acuity.
- Connect Acuity Scheduling with Zapier.
- Use a prebuilt template for New Appointments and Canceled Events. Or create your own Zap. In Zapier, choose which zaps you want to use to connect Ontraport to Acuity Scheduling. To create your zap integration, go to Zapier’s Ontraport + Acuity Scheduling integration page, and click “Connect” next to the zap.
- If you choose to set up your own Zap, you will need date formatter actions to pass your dates and times properly. When creating your Zap, the “Create or Update Contact” step needs to update “Acuity Appt Date” and “Acuity Appt Time” from the date formatter steps, and not from the Step 1 trigger.
For assistance integrating Acuity Scheduling with your Ontraport account, visit the Acuity Scheduling help center.
Using the Acuity Date Field:
When your Acuity Date field is updated via your Zap, you can trigger automation in Ontraport. A common use case is sending notifications for appointments:
- Create an Ontraport Email or Raw HTML Email and add the merge field for “Acuity Appt Date” and “Acuity Appt Time.” This will allow you to send appointment reminders to your contacts or booking notifications to your team.
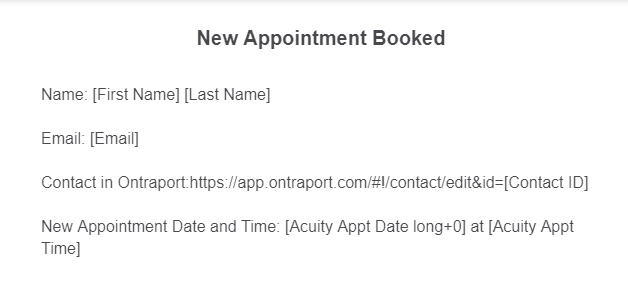
For example, a useful notification could contain the contact’s name, email, a link to their record in your account, and the booked appointment date and time.
Create a notification automation map:
Add a trigger for “field is updated” and select “Acuity Appt Date.” When the Zap fires, information will be added to your contact’s record and simultaneously trigger a notification email and/or SMS message to be sent to a user in your account.
.png)
Set up a reminder automation map:
Add a trigger for “field is updated” and select “Acuity Appt Date.” Add a wait under your trigger — you can set your waits on your map to be relative to your Acuity date field. For this example, the reminder is sent out the day before the appointment; however, you can customize your map by simply editing your wait.
.png)
Embed Acuity Scheduling calendar on your Ontraport pages:
Collect your calendar’s embed code and add the code to a custom HTML element to an Ontraport page.
Calendly
- Connect your Ontraport account to the integrator tool Zapier.
- Create a custom field to use in your integration: “Calendly appointment date and time” — a date and time field.
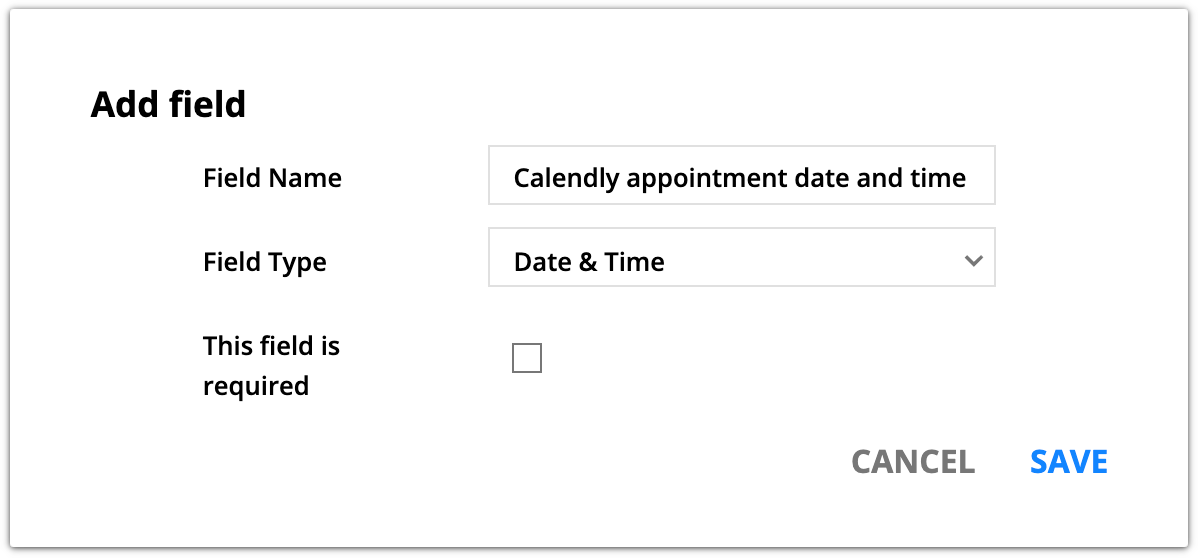
- When someone books an appointment through Calendly, Zapier saves that date and time in this field in Ontraport.
- Connect your Calendly account to Zapier.
- Set up your Zaps.
- Use this prebuilt template to create or update contacts in Ontraport as soon as an invitee is created in Calendly.
- Use this template to create or update contacts in Ontraport when they cancel an appointment in Calendly.
- Or you can create your own Zap. In Zapier, choose which Zaps you want to use to connect Ontraport to Calendly. To create your Zap integration, go to Zapier’s Ontraport + Calendly integration page and click Connect Calendly + Ontraport below the Zap.
For assistance integrating Calendly with your Ontraport account, contact Ontraport Support, Zapier Support or Calendly Support.
Using the Calendly date and time field:
When your Calendly Date field is updated via your Zap, you can trigger automation in Ontraport. A common use case is sending notifications for appointments:
- Create an Ontraport Email or Raw HTML Email and add the merge field for “Calendly appointment date and time.” This will allow you to send appointment reminders to your contacts or booking notifications to your team.
For example, a useful notification includes merge fields for name, email, a link to their record in your account, and the booked appointment date and time.
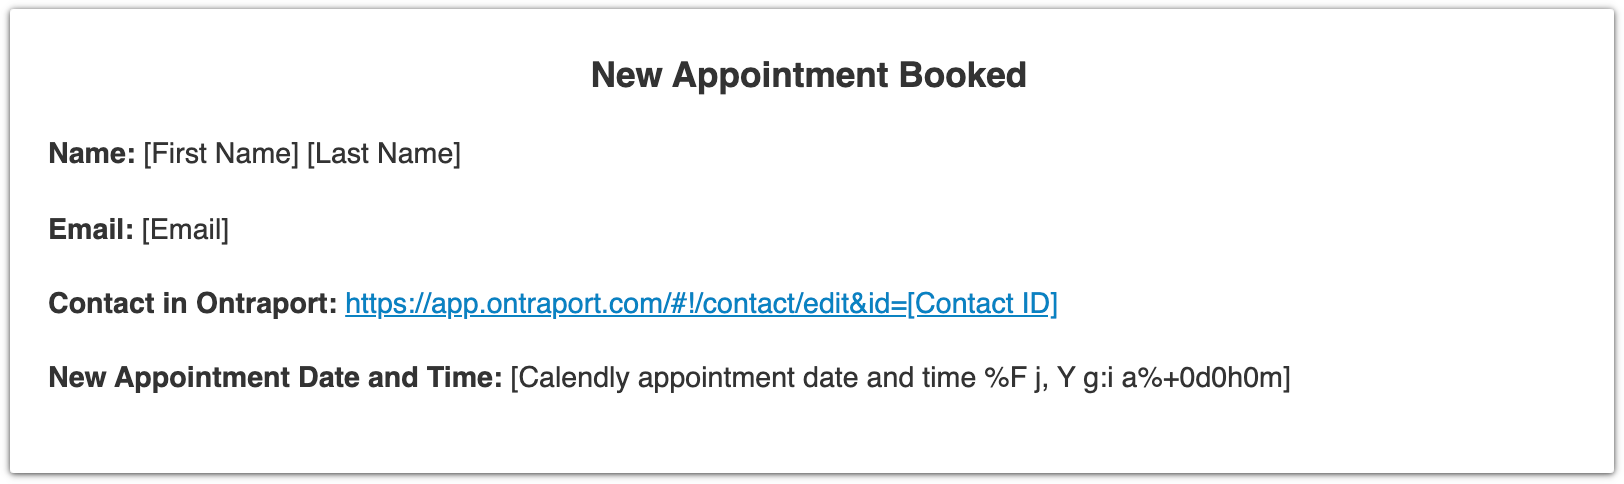
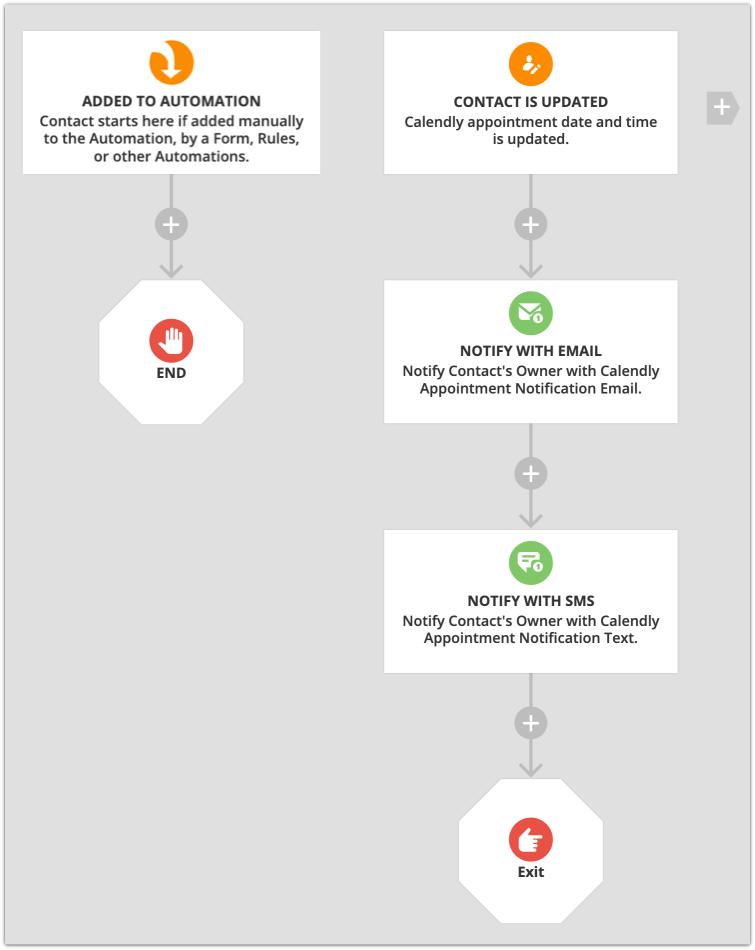
Create a notification automation map:
Add a trigger for “field is updated” and select “Calendly appointment date and time.” When the Zap fires, information will be added to your contact’s record and simultaneously trigger a notification email and/or SMS message to be sent.
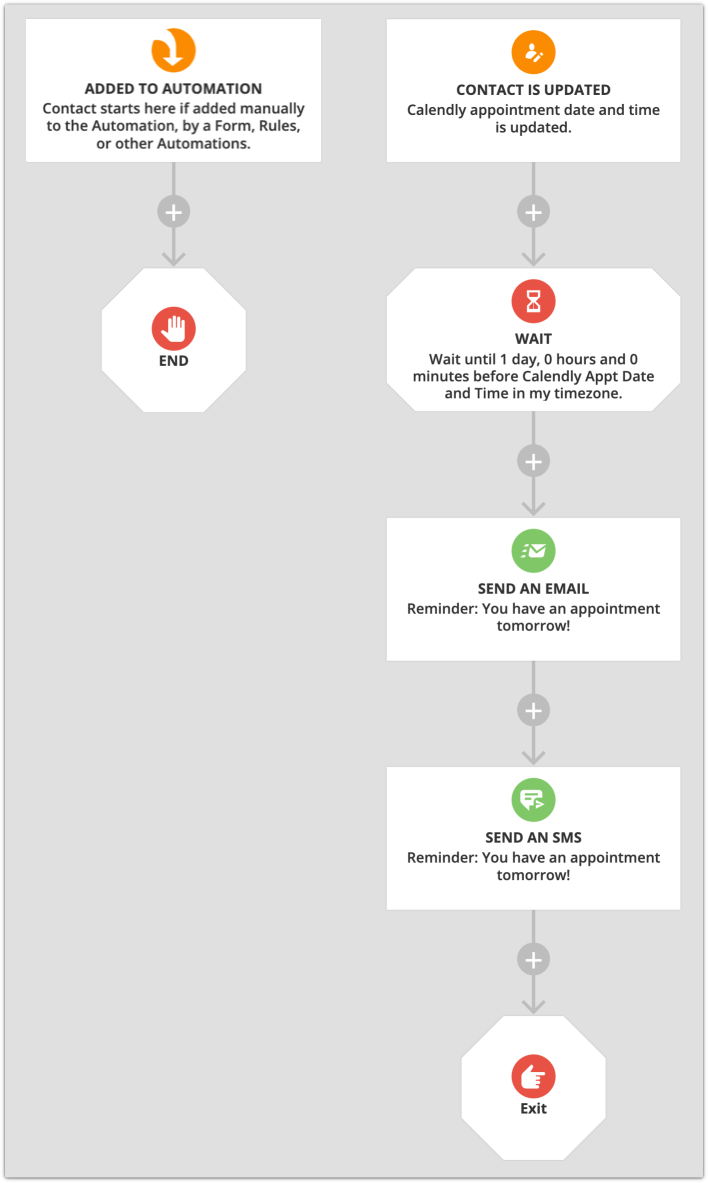
Set up a reminder automation map:
Add a trigger for “field is updated” and select “Calendly appointment date and time,” and add a wait under your trigger — you can set your waits on your map to be relative to your Calendly date and time field. For this example, the reminder is sent out the day before the appointment, but you can customize your map by simply editing your wait.
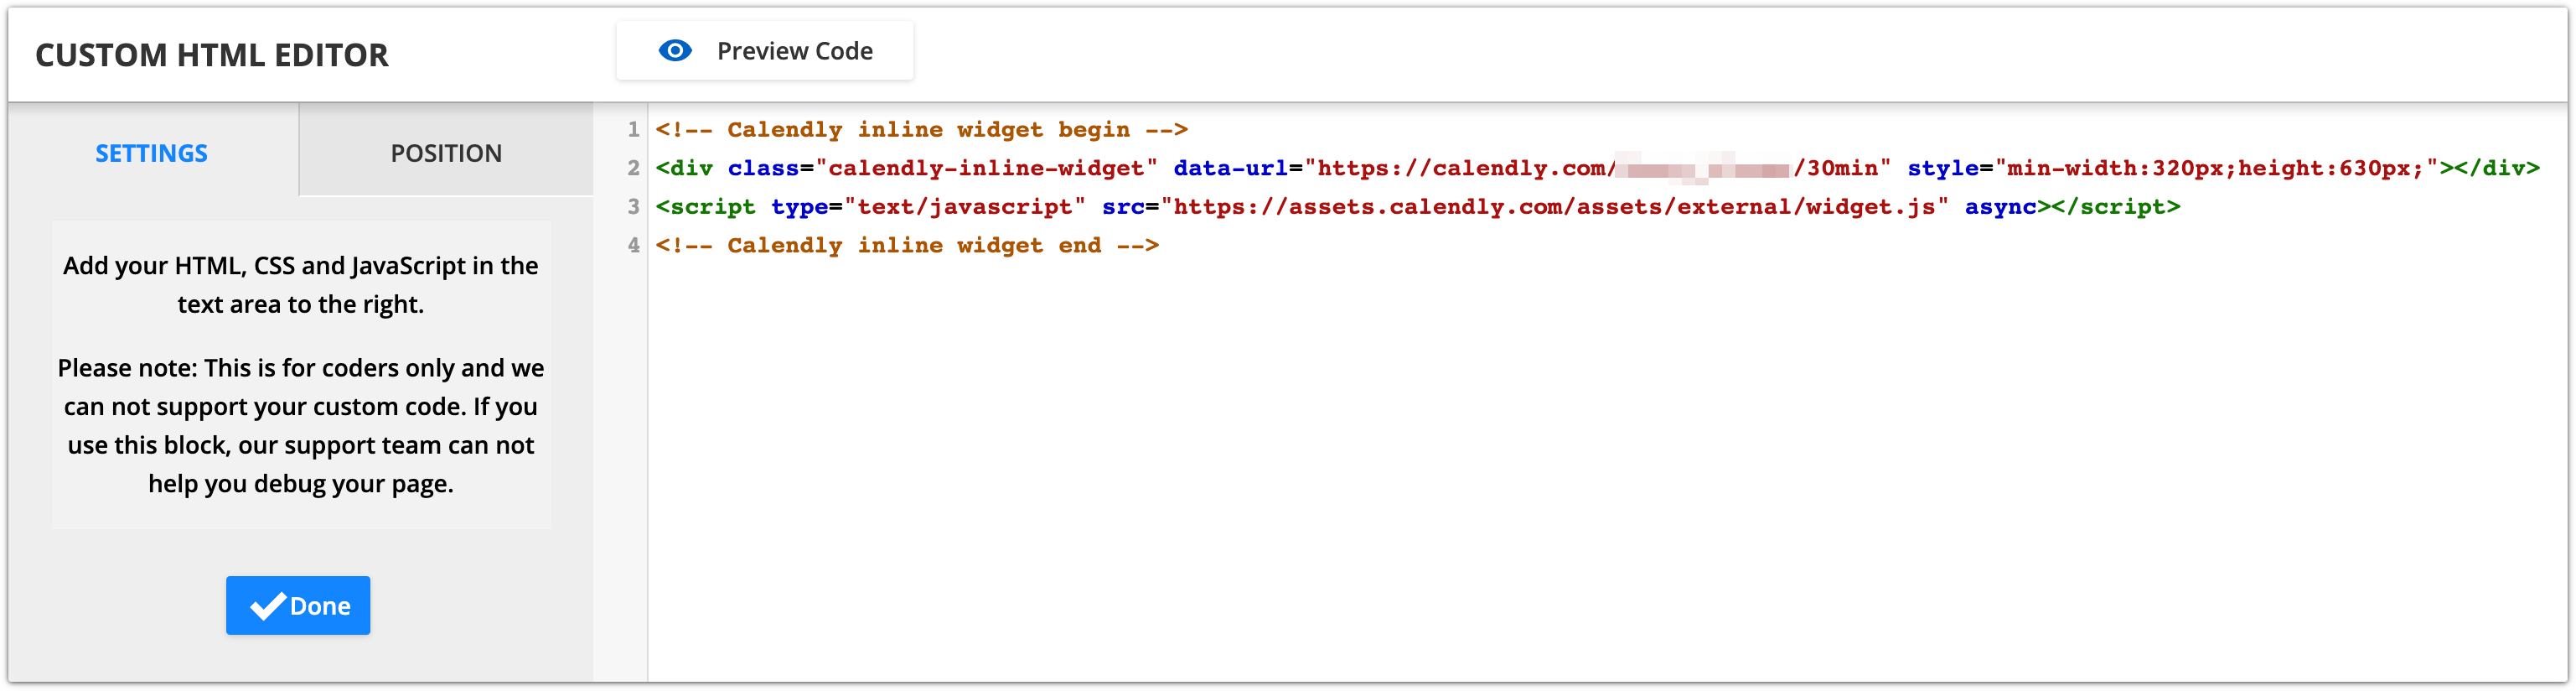
Embed your Calendly calendar on an Ontraport Page:
To allow contacts to book appointments directly from your pages, collect your Calendly embed code, and add it to a custom HTML element on an Ontraport page.
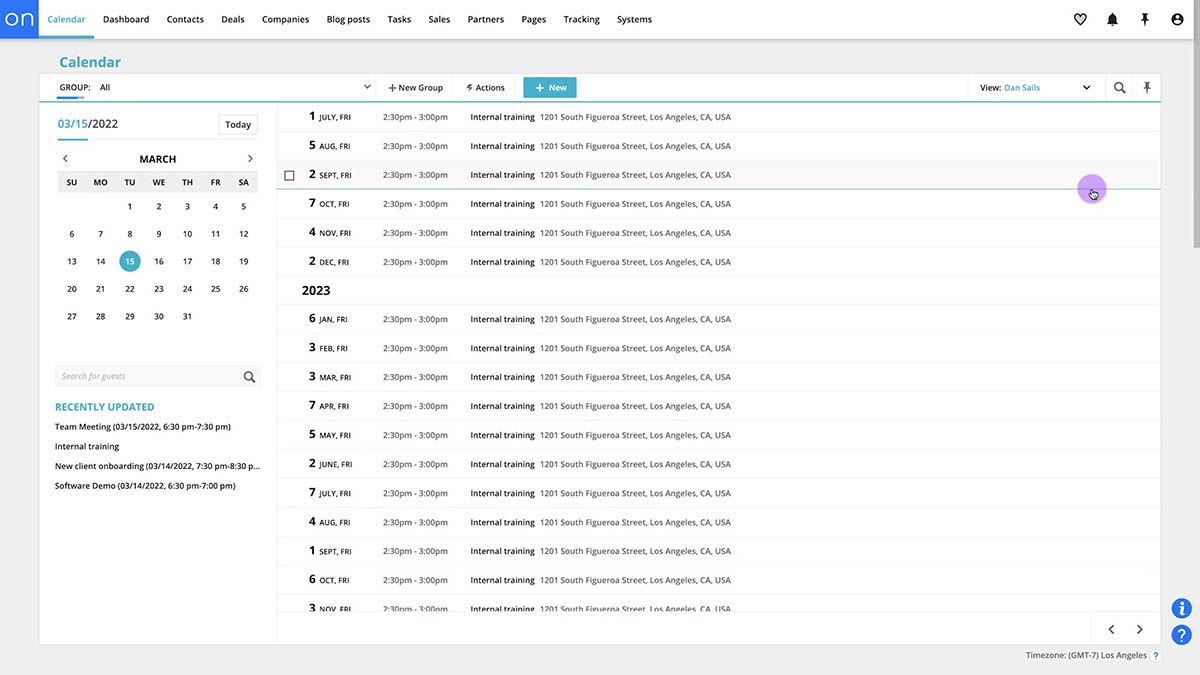
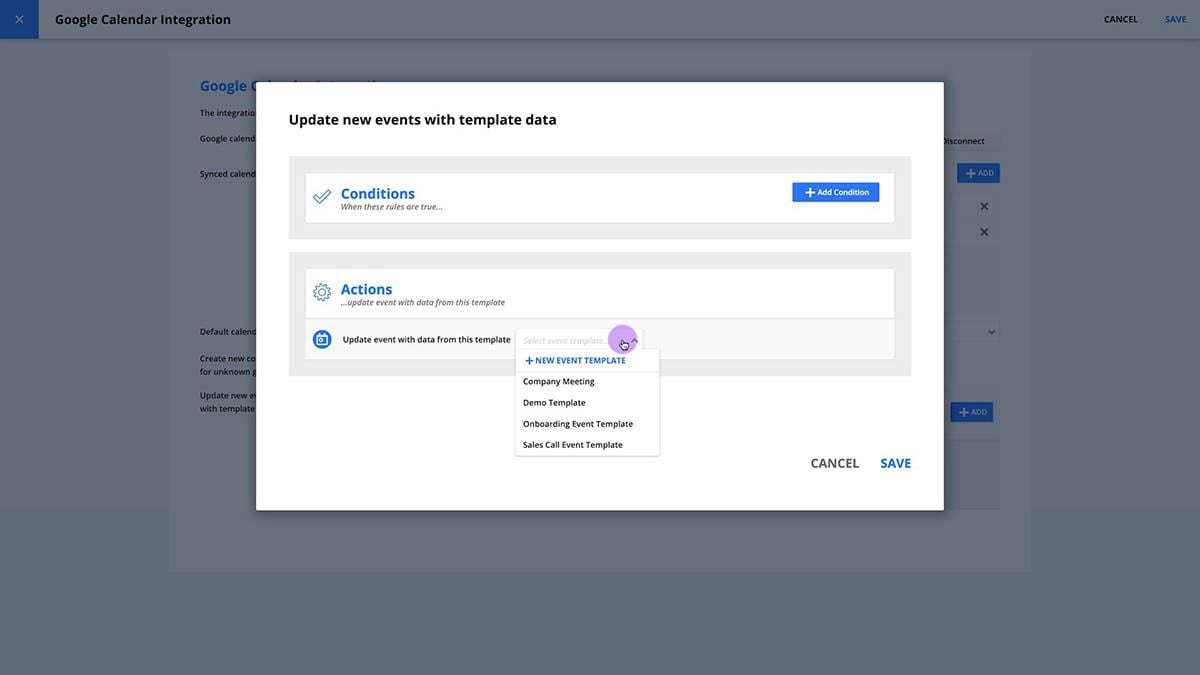
Google Calendar
Ontraport offers a built-in integration with Google Calendar so you can get connected with just a few clicks.
With this integration, you can set up a two-way sync between your Google Calendar and your Ontraport Calendar. That means it doesn’t matter if you scheduled your event with Google or Ontraport; all of your calendars will be kept up-to-date.
Follow these steps in the article “Manage appointments with Ontraport Calendar” to integrate with Google Calendar.
ScheduleOnce
- Connect your Ontraport account to the integrator tool Zapier.
- Create two custom fields to use in your integration: “ScheduleOnce Appt Date” — a date field and “ScheduleOnce Appt Time” — a text field. These are the fields where Zapier will place your contact’s appointment information from OnceHub.
- Connect OnceHub to Zapier.
- Use a prebuilt template to:
- Or create your own Zap. In Zapier, choose what Zaps you want to use to connect Ontraport with OnceHub. For example, you can use a Zap to add new OnceHub bookings to Ontraport. To create your Zap integration, go to Zapier’s Ontraport + OnceHub integration page and click “Connect” next to the Zap.
- If you choose to set up your own Zap, you will need date formatter actions to pass your dates and times properly.
- Learn more about Zapier’s formatter tool here.
For assistance integrating OnceHub with your Ontraport account,contact Ontraport Support, Zapier Support or OnceHub Support.
Using the ScheduleOnce Date Field:
When your ScheduleOnce Date field is updated via your Zap, you can trigger automation in Ontraport. A common use case is sending notifications for appointments:
Create an Ontraport Email or Raw HTML Email and add the merge field for “ScheduleOnce Appt Date” and “ScheduleOnce Appt Time.” This will allow you to send appointment reminders to your contacts or booking notifications to your team.
For example, a useful notification could contain the contact’s name, email, a link to their record in your account, and the booked appointment date and time.

Create a notification automation map:
Add a trigger for “field is updated” and select “ScheduleOnce Appt Date.” When the Zap fires, information will be added to your contact’s record, and simultaneously trigger a notification email and/or SMS message to be sent to a user in your account.
.png)
To set up a reminder automation map:
Add a trigger for “field is updated” and select “ScheduleOnce Appt Date.” Add a wait under your trigger — you can set your waits on your map to be relative to your ScheduleOnce date field. For this example, the reminder is sent out the day before the appointment; however, you can customize your map by simply editing your wait.
.png)
To embed your ScheduleOnce calendar on an Ontraport Page:
Collect your embed code and add it to a custom HTML block on your page. This will allow your contacts to schedule appointments directly from your pages.
Time Trade
- Follow these steps to obtain an Ontraport API key and app ID.
- Connect Ontraport with the integrator tool Fuzed by following the steps in this video.
- Log in to your Fuzed account and click New Fuze. Set Google Calendar as the trigger service, and choose the Google Calendar you want to link.
- Select the trigger action Add Description Guest.
- Set your parameter. We recommend selecting “Contains” then, under “Set event title criteria,” type in a keyword that corresponds with your TimeTrade calendar. For example, if your TimeTrade calendar is called “VIP Calls,” your event title criteria might be “VIP.” This criteria tells Fuzed where to pull the data from.
- Select your action service as “Ontraport,” and select the action to perform — either add tag to contact or add info to fields.
- Click Create Fuze. Now, your new contacts’ information will be added to your Ontraport database every time a contact comes through TimeTrade calendar.
For assistance integrating TimeTrade with your Ontraport account, visit the Fuzed support page or email Fuzed support.
Discover Other Ontraport Integrations
Know of any appointment or calendar tools that integrate with Ontraport that aren’t listed here? Please email pr@ontraport.com to let us know.